Chickpea Flatbread.

I’ve become obsessed with these chickpea flatbreads. Lately I’ve been making them every week, because they go with everything and are so good. They’re the basis of a breakfast tostada-like thing I make on weekends, a great addition to a curry chicken and cauliflower rice work lunch, and I’ve even tried to make them into a quesadilla for dinner (with mixed results). They’re also very forgiving–it’s tough to overcook them–and have so few ingredients, I can barely call this a recipe. But a recipe it is, and such a versatile one. Chickpea flatbreads are quickly becoming one of my go-tos and I’m not mad about it.

IMG_8200

INGREDIENTS

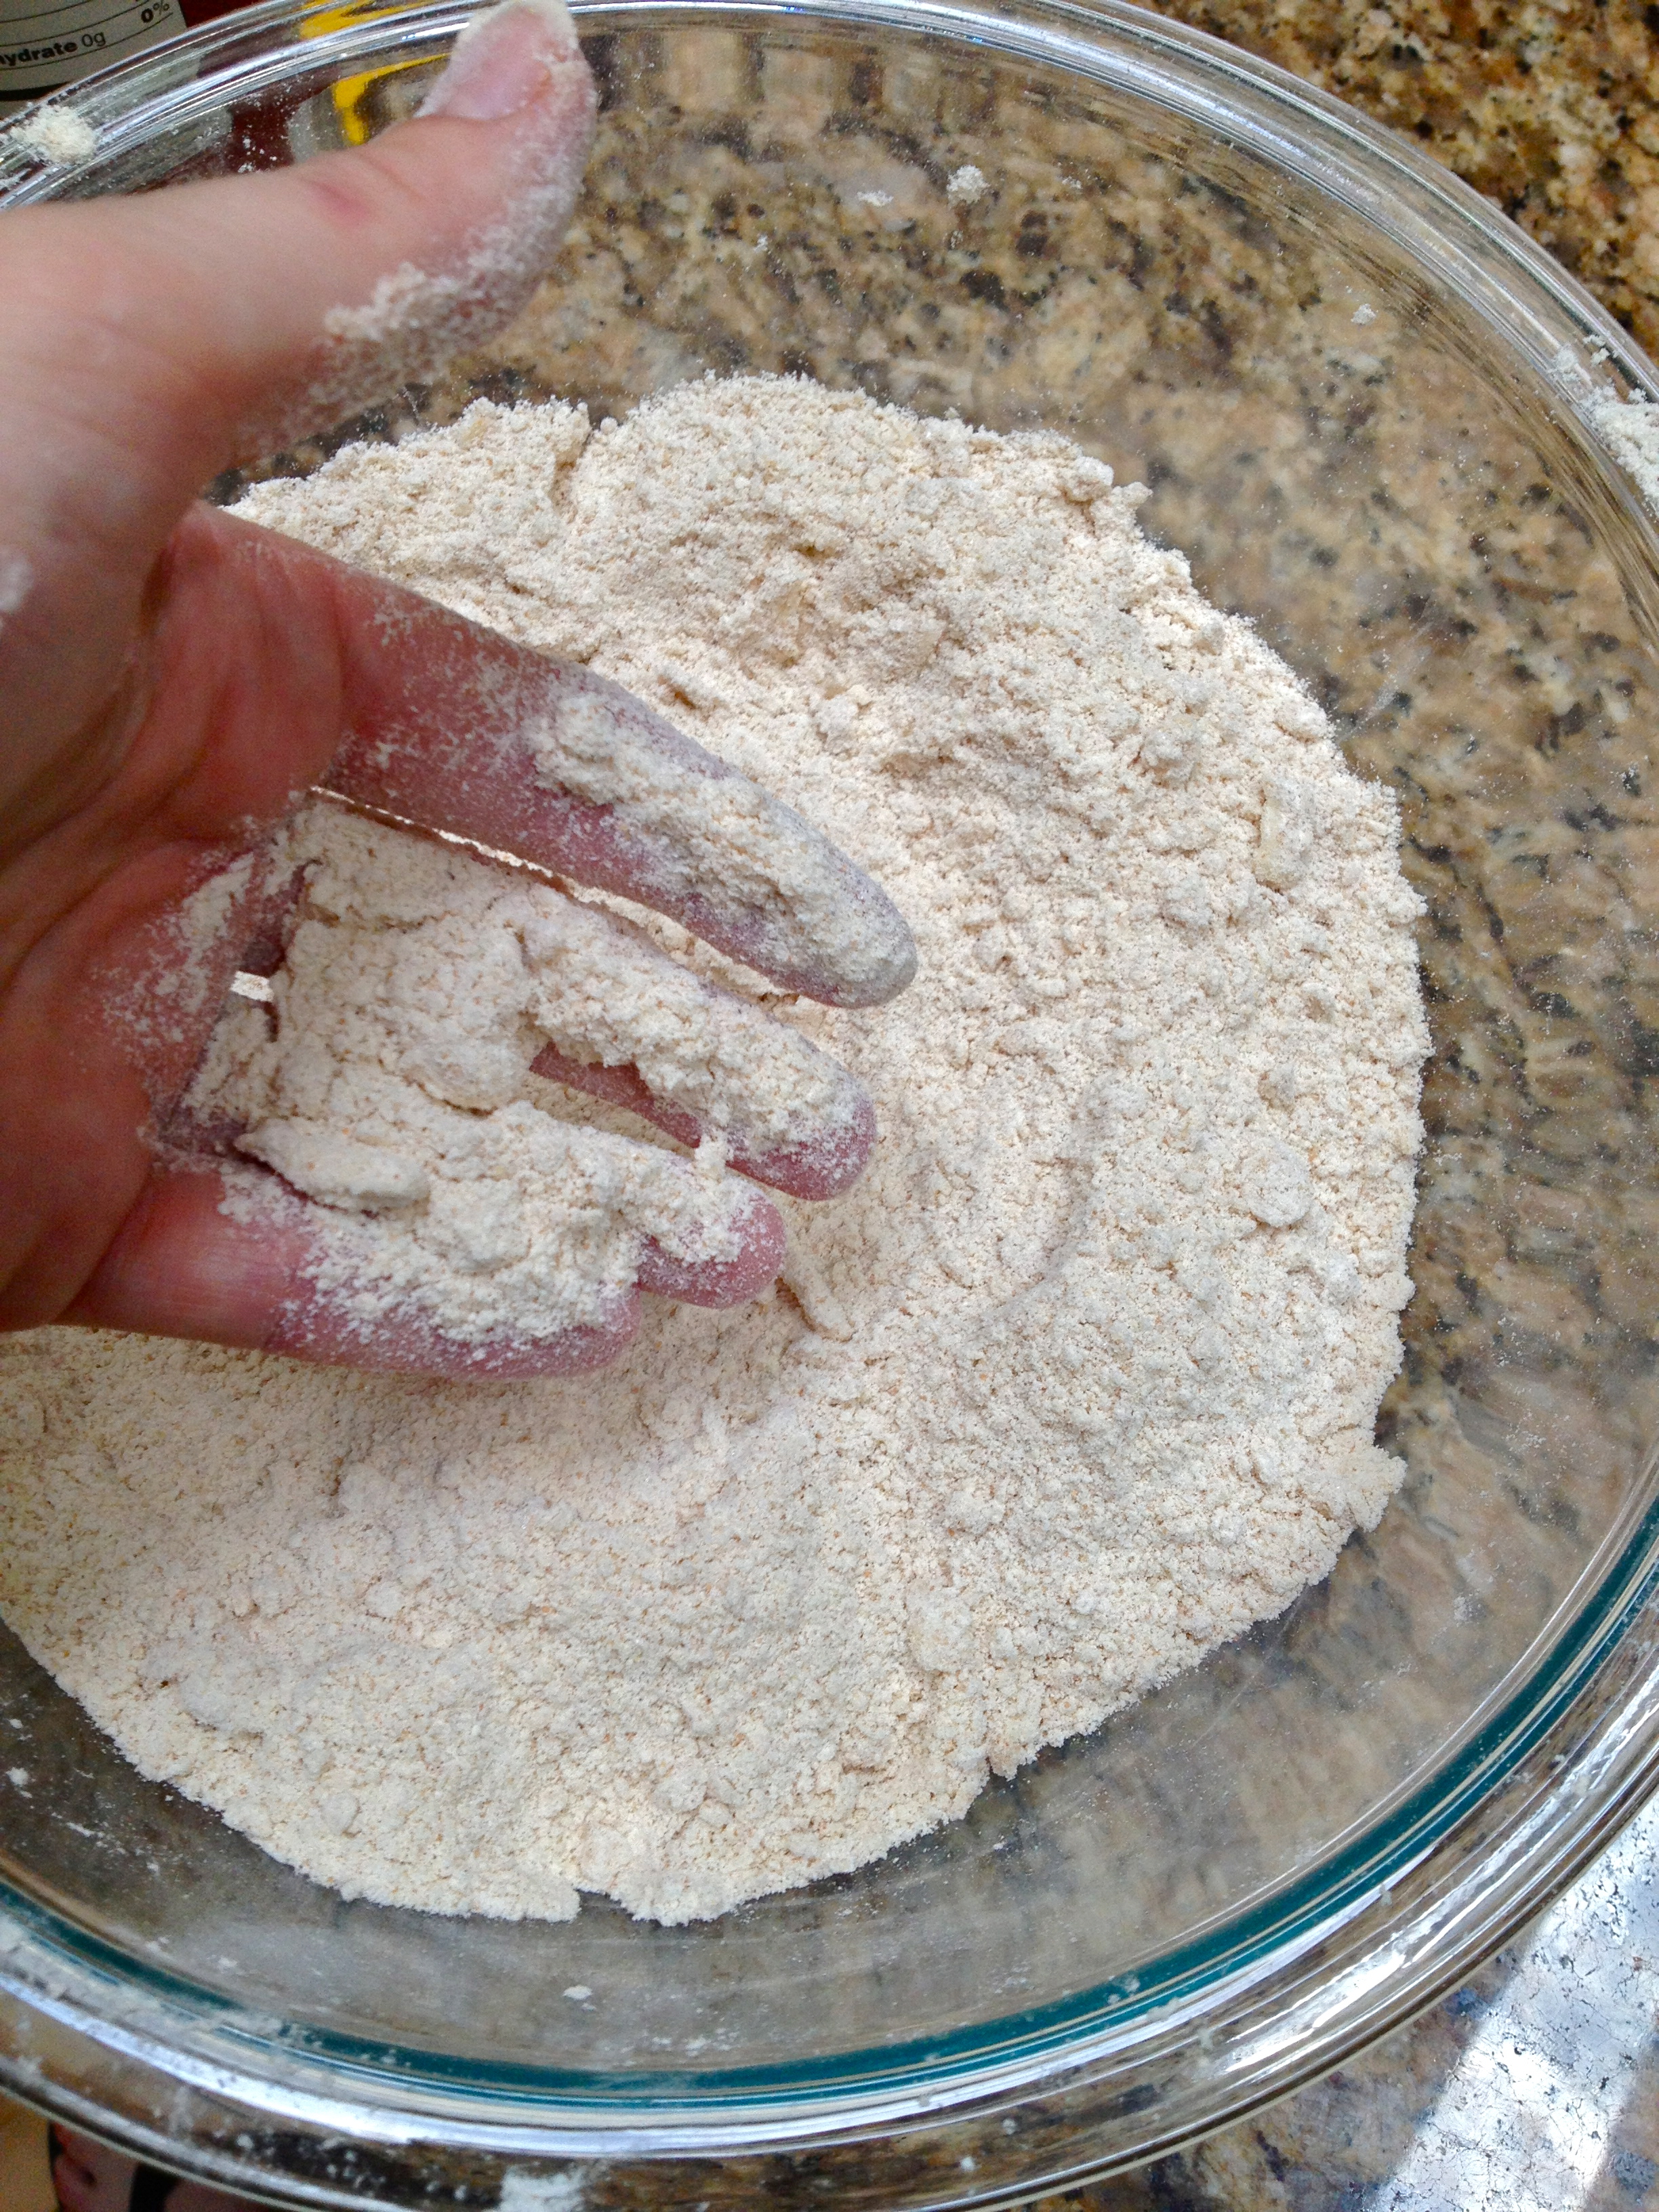
2 cups chickpea flour
3 cups cold water
olive oil
salt and pepper

DIRECTIONS

Pour the chickpea flour into a mixing bowl, and slowly whisk in the cold water, stirring to break up any lumps. Once you’ve added all the water and the batter is completely combined, use a slotted spoon to skim off any foam that has risen to the top. Get rid of that foam! Your digestive system will thank you later. Set the de-foamed batter aside on the counter to soak overnight (or for at least 6 hours).
A note on soaking: I’ve made the flatbreads after waiting only 3 hours, and while they still turn out delicious, they are also a lot harder on your digestive system (remember that rhyme about beans?). So I soak the batter overnight at a minimum.

IMG_8161

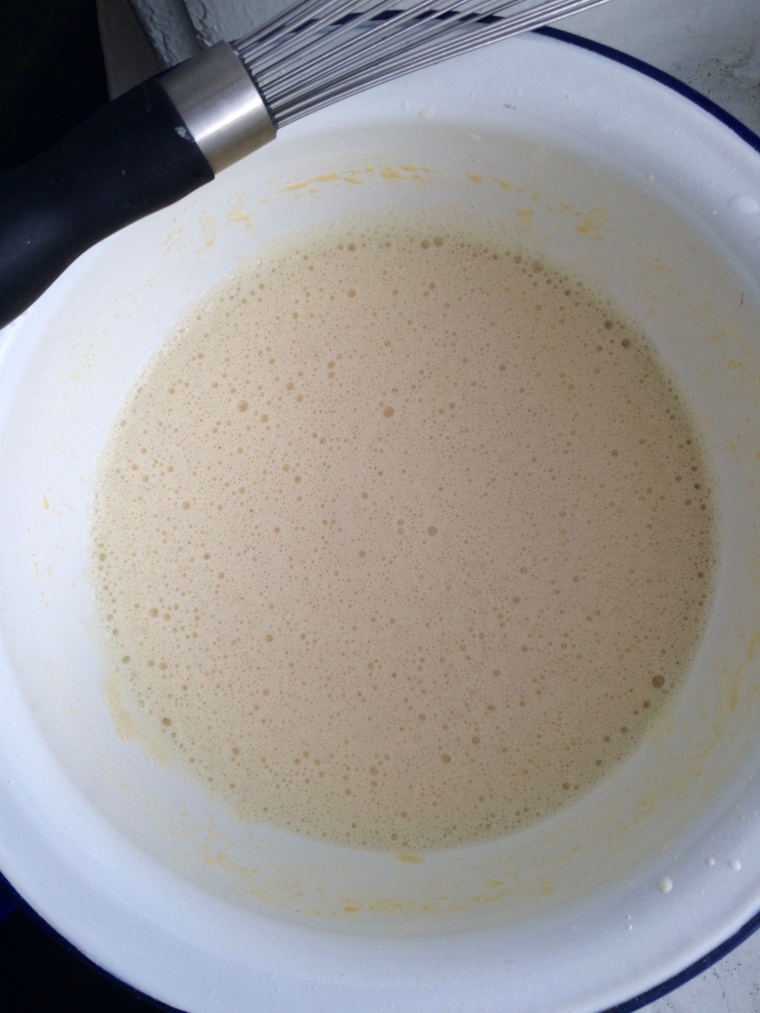
Once the batter has soaked, use a slotted spoon again to skim off any foam/impurities that rise to the top. Then give the batter a good stir to make sure it’s well-combined, and you’re ready to make some flatbreads!

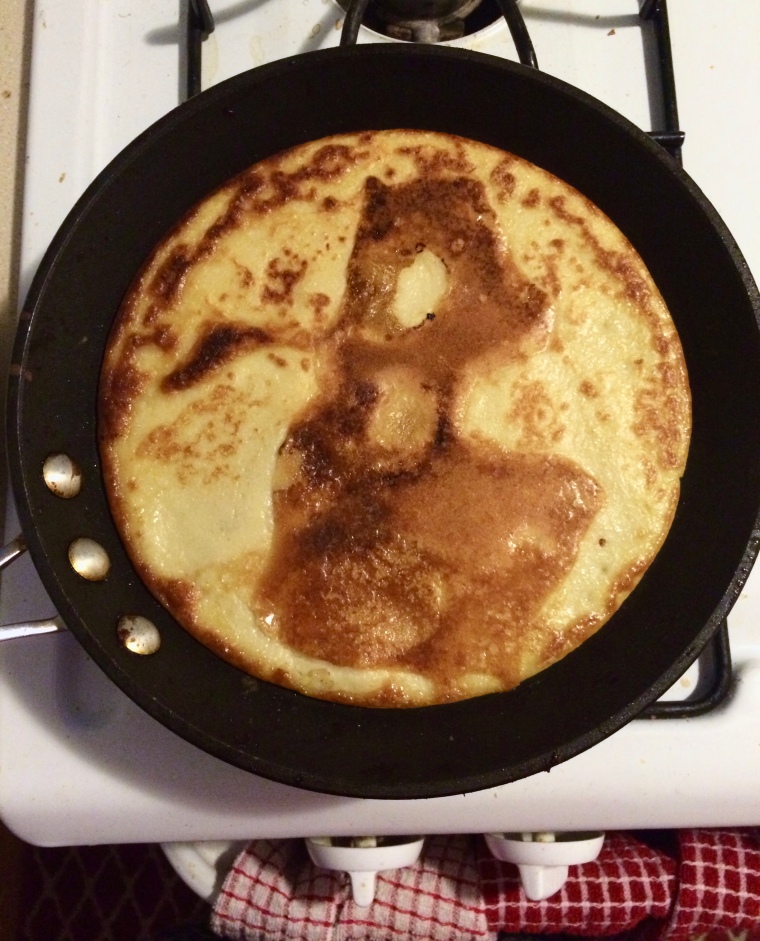
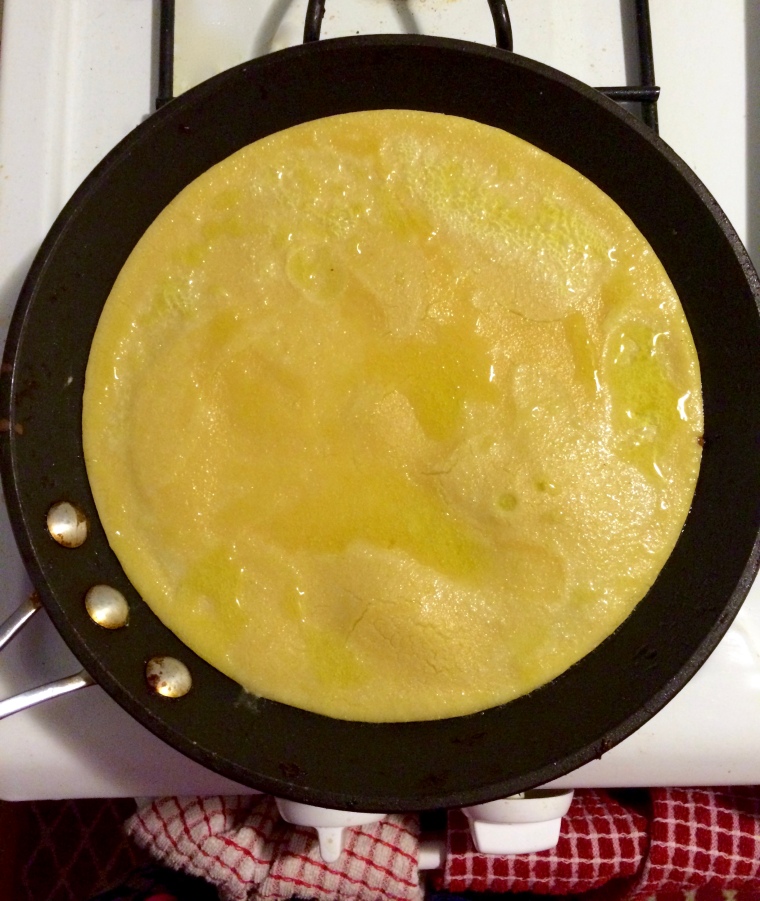
Heat a crepe pan or other non-stick surface over a low flame (2 out of 10 on my stove) and add a good amount of olive oil to the pan – not so much that you completely cover the bottom of the pan, but more than you’d use to just grease it. The olive oil is a fantastic flavor in this recipe, so you really do want to taste it.

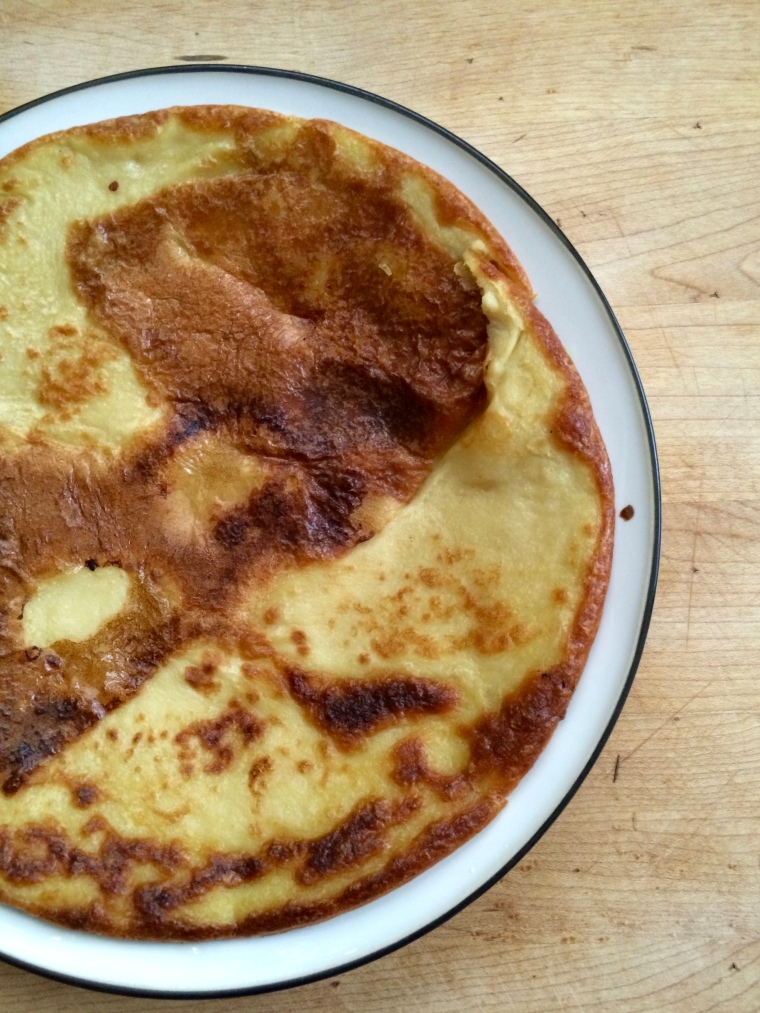
Once the pan is hot, you’re ready to add your batter. The amount you add will depend on the size of your pan: I use about 1 cup of batter, which covers the entire pan so that you can’t see the bottom–thicker than a crepe. Pour it in, add salt and pepper to taste, and let cook undisturbed for about 10 minutes. Once the batter is set on top, turn up the heat to medium/medium low (4-5 out of 10 on my stove) for 2 minutes to brown the bottom.

IMG_8193

Flip the flatbread over and cook the other side for another 8 minutes or so, until both sides are browned and the flatbread is cooked through.

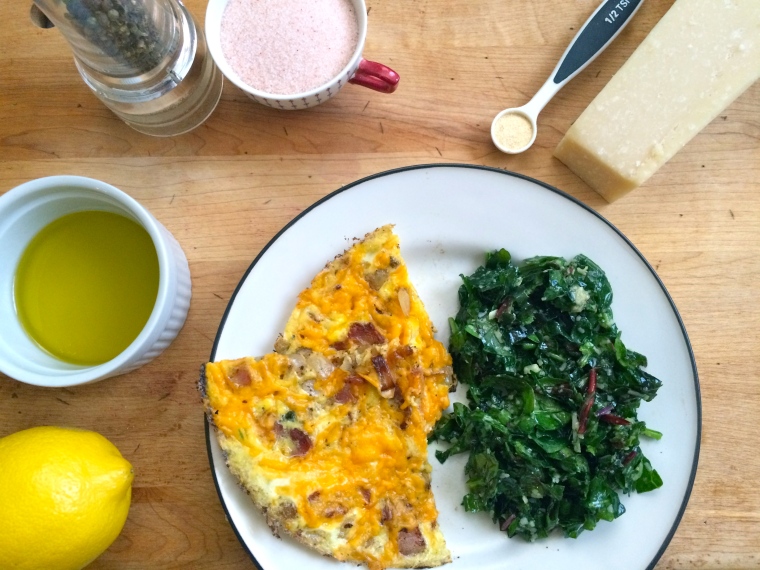
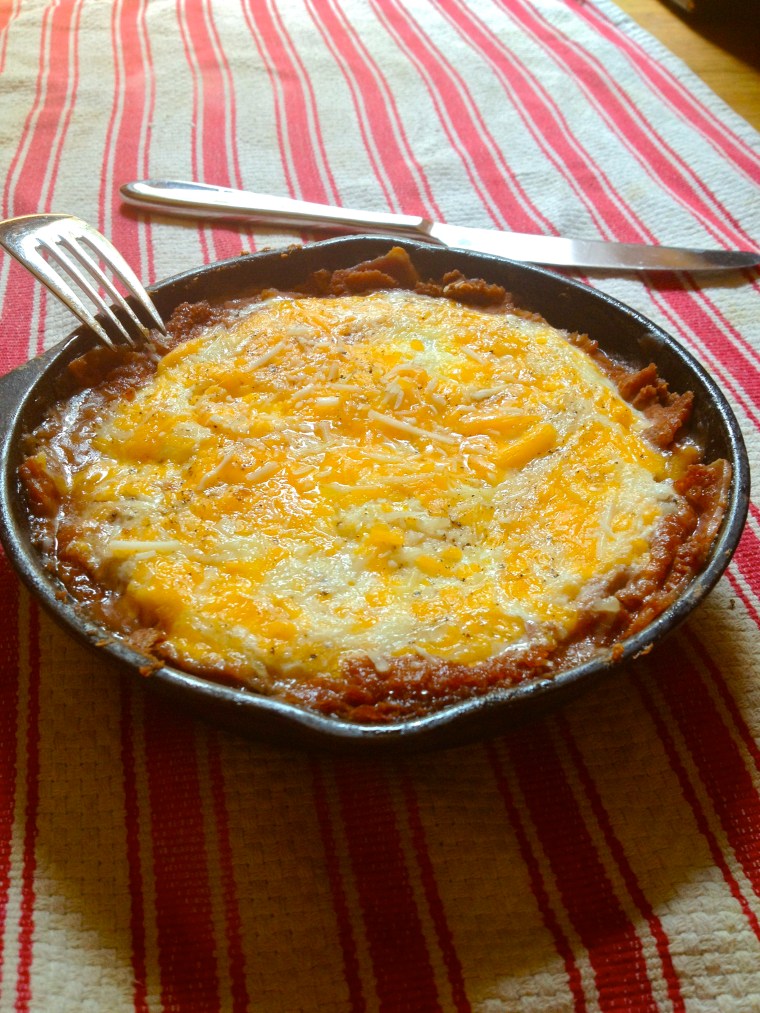
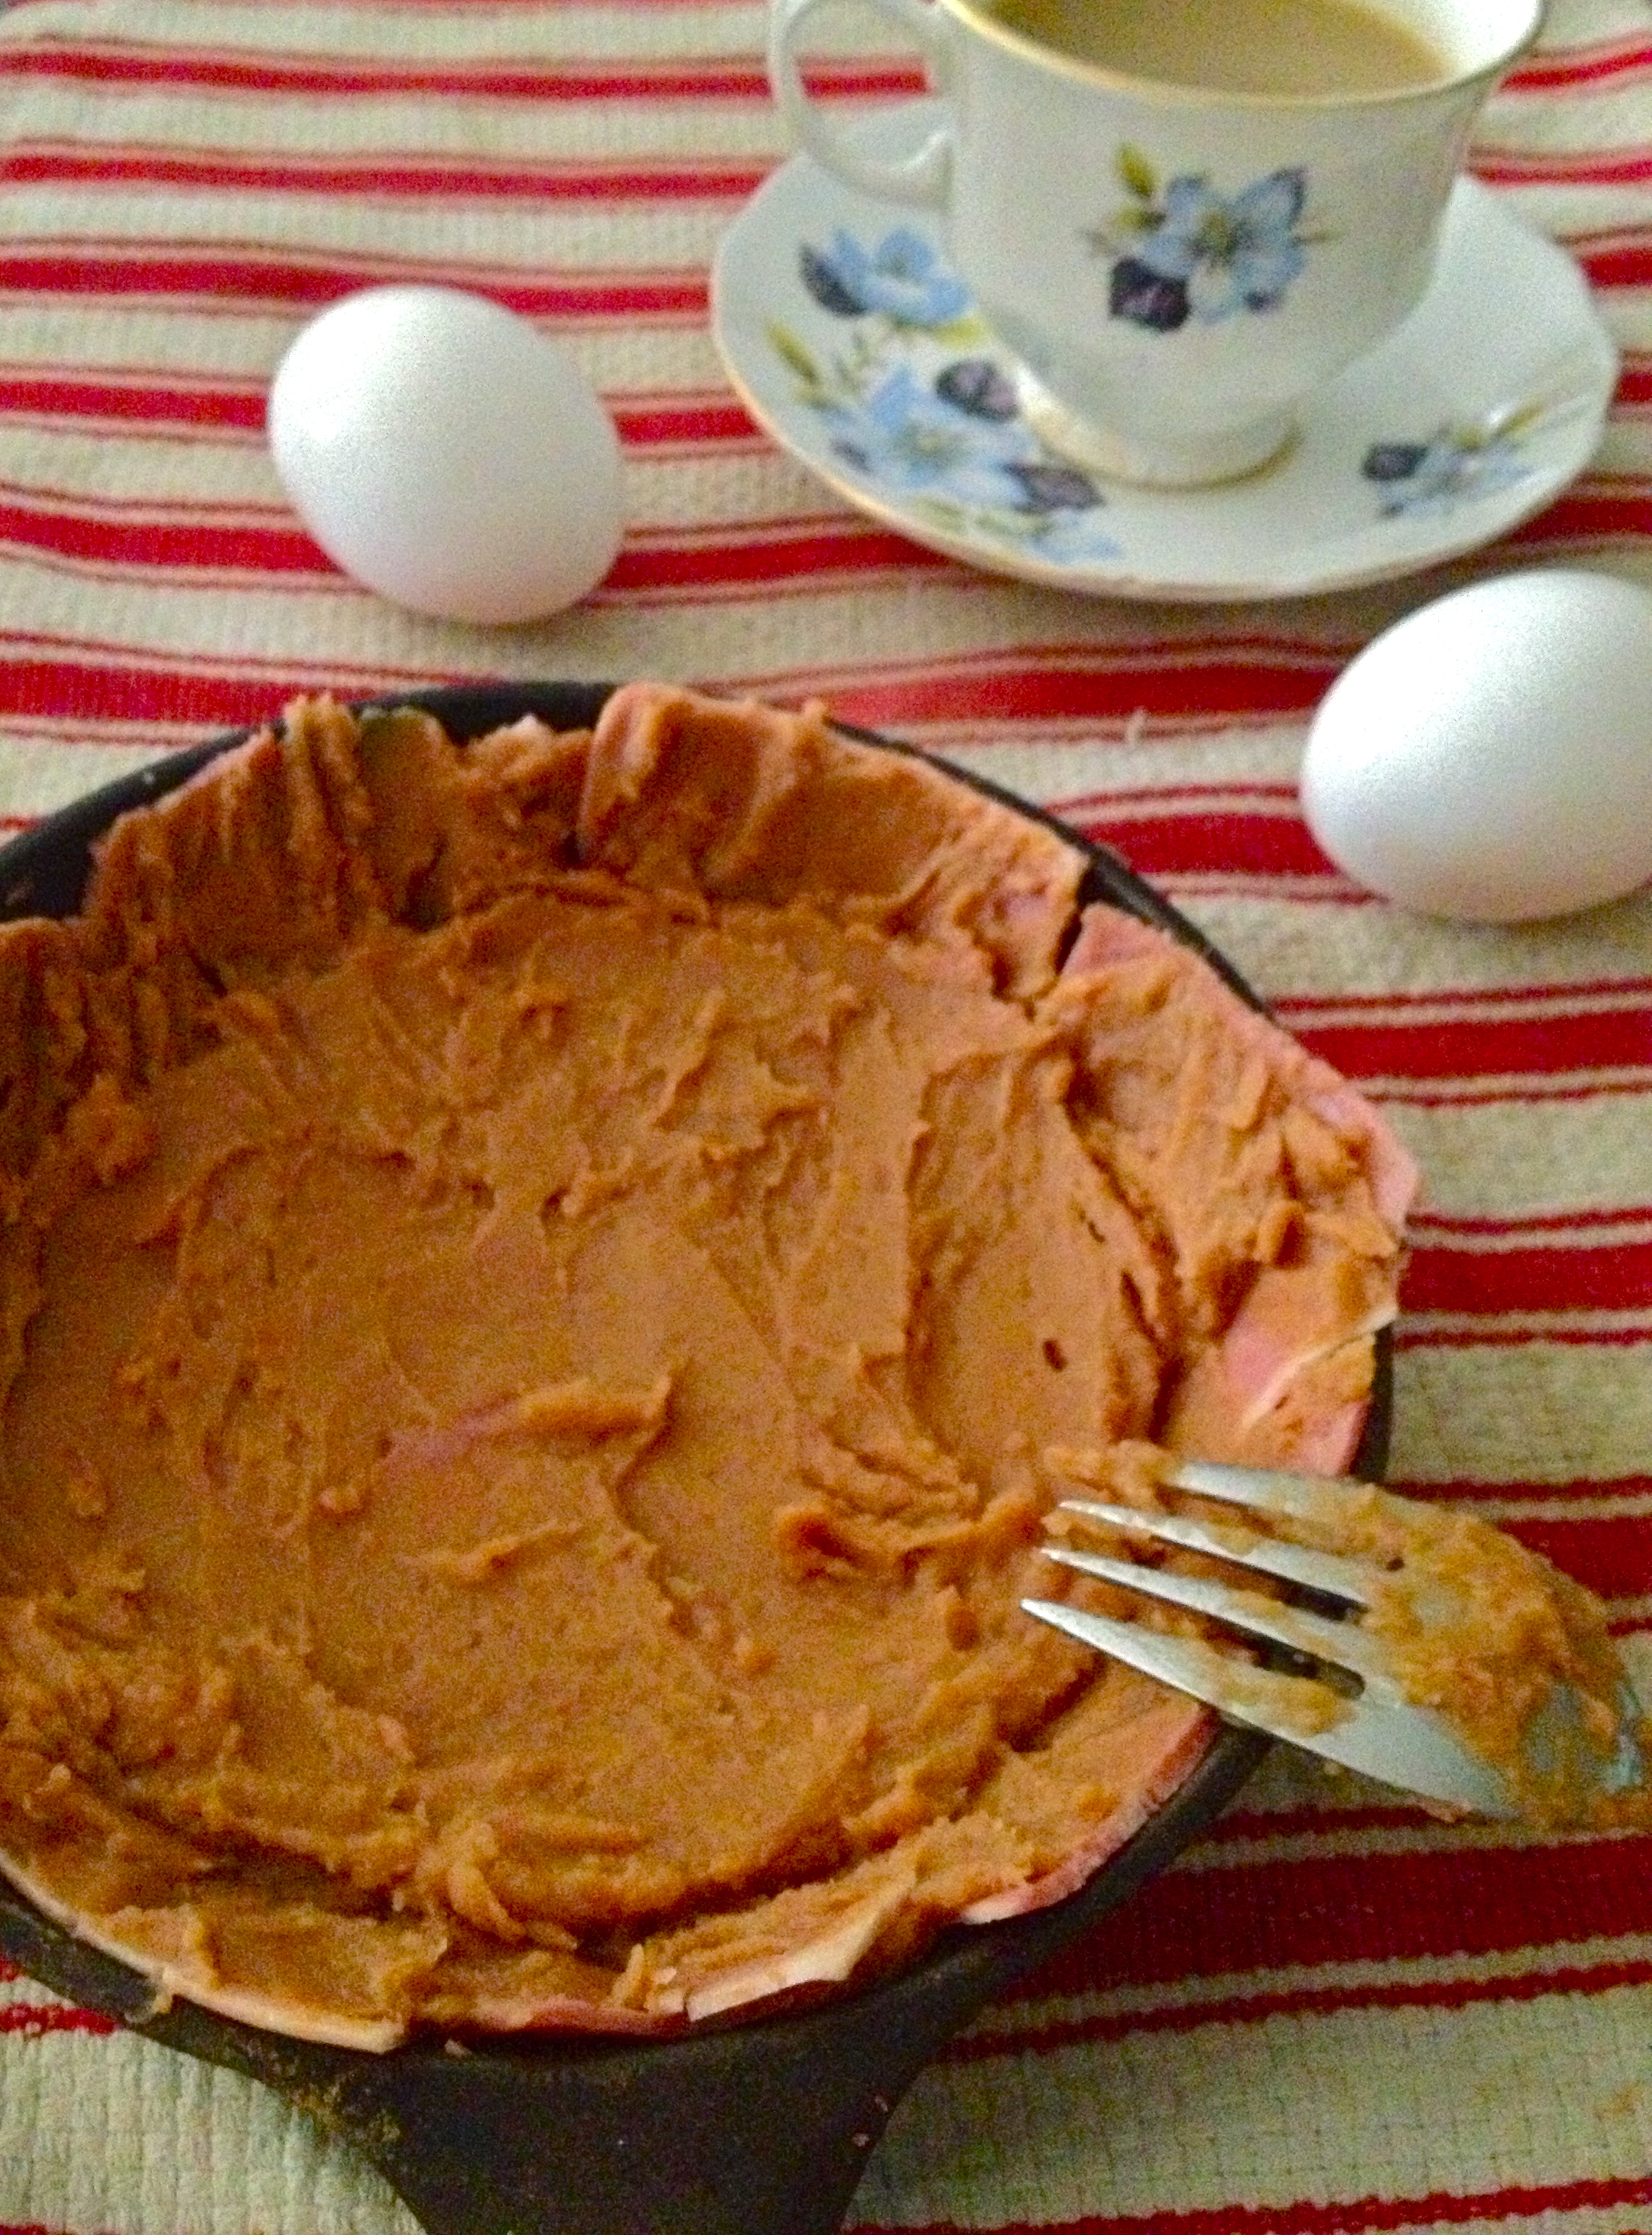
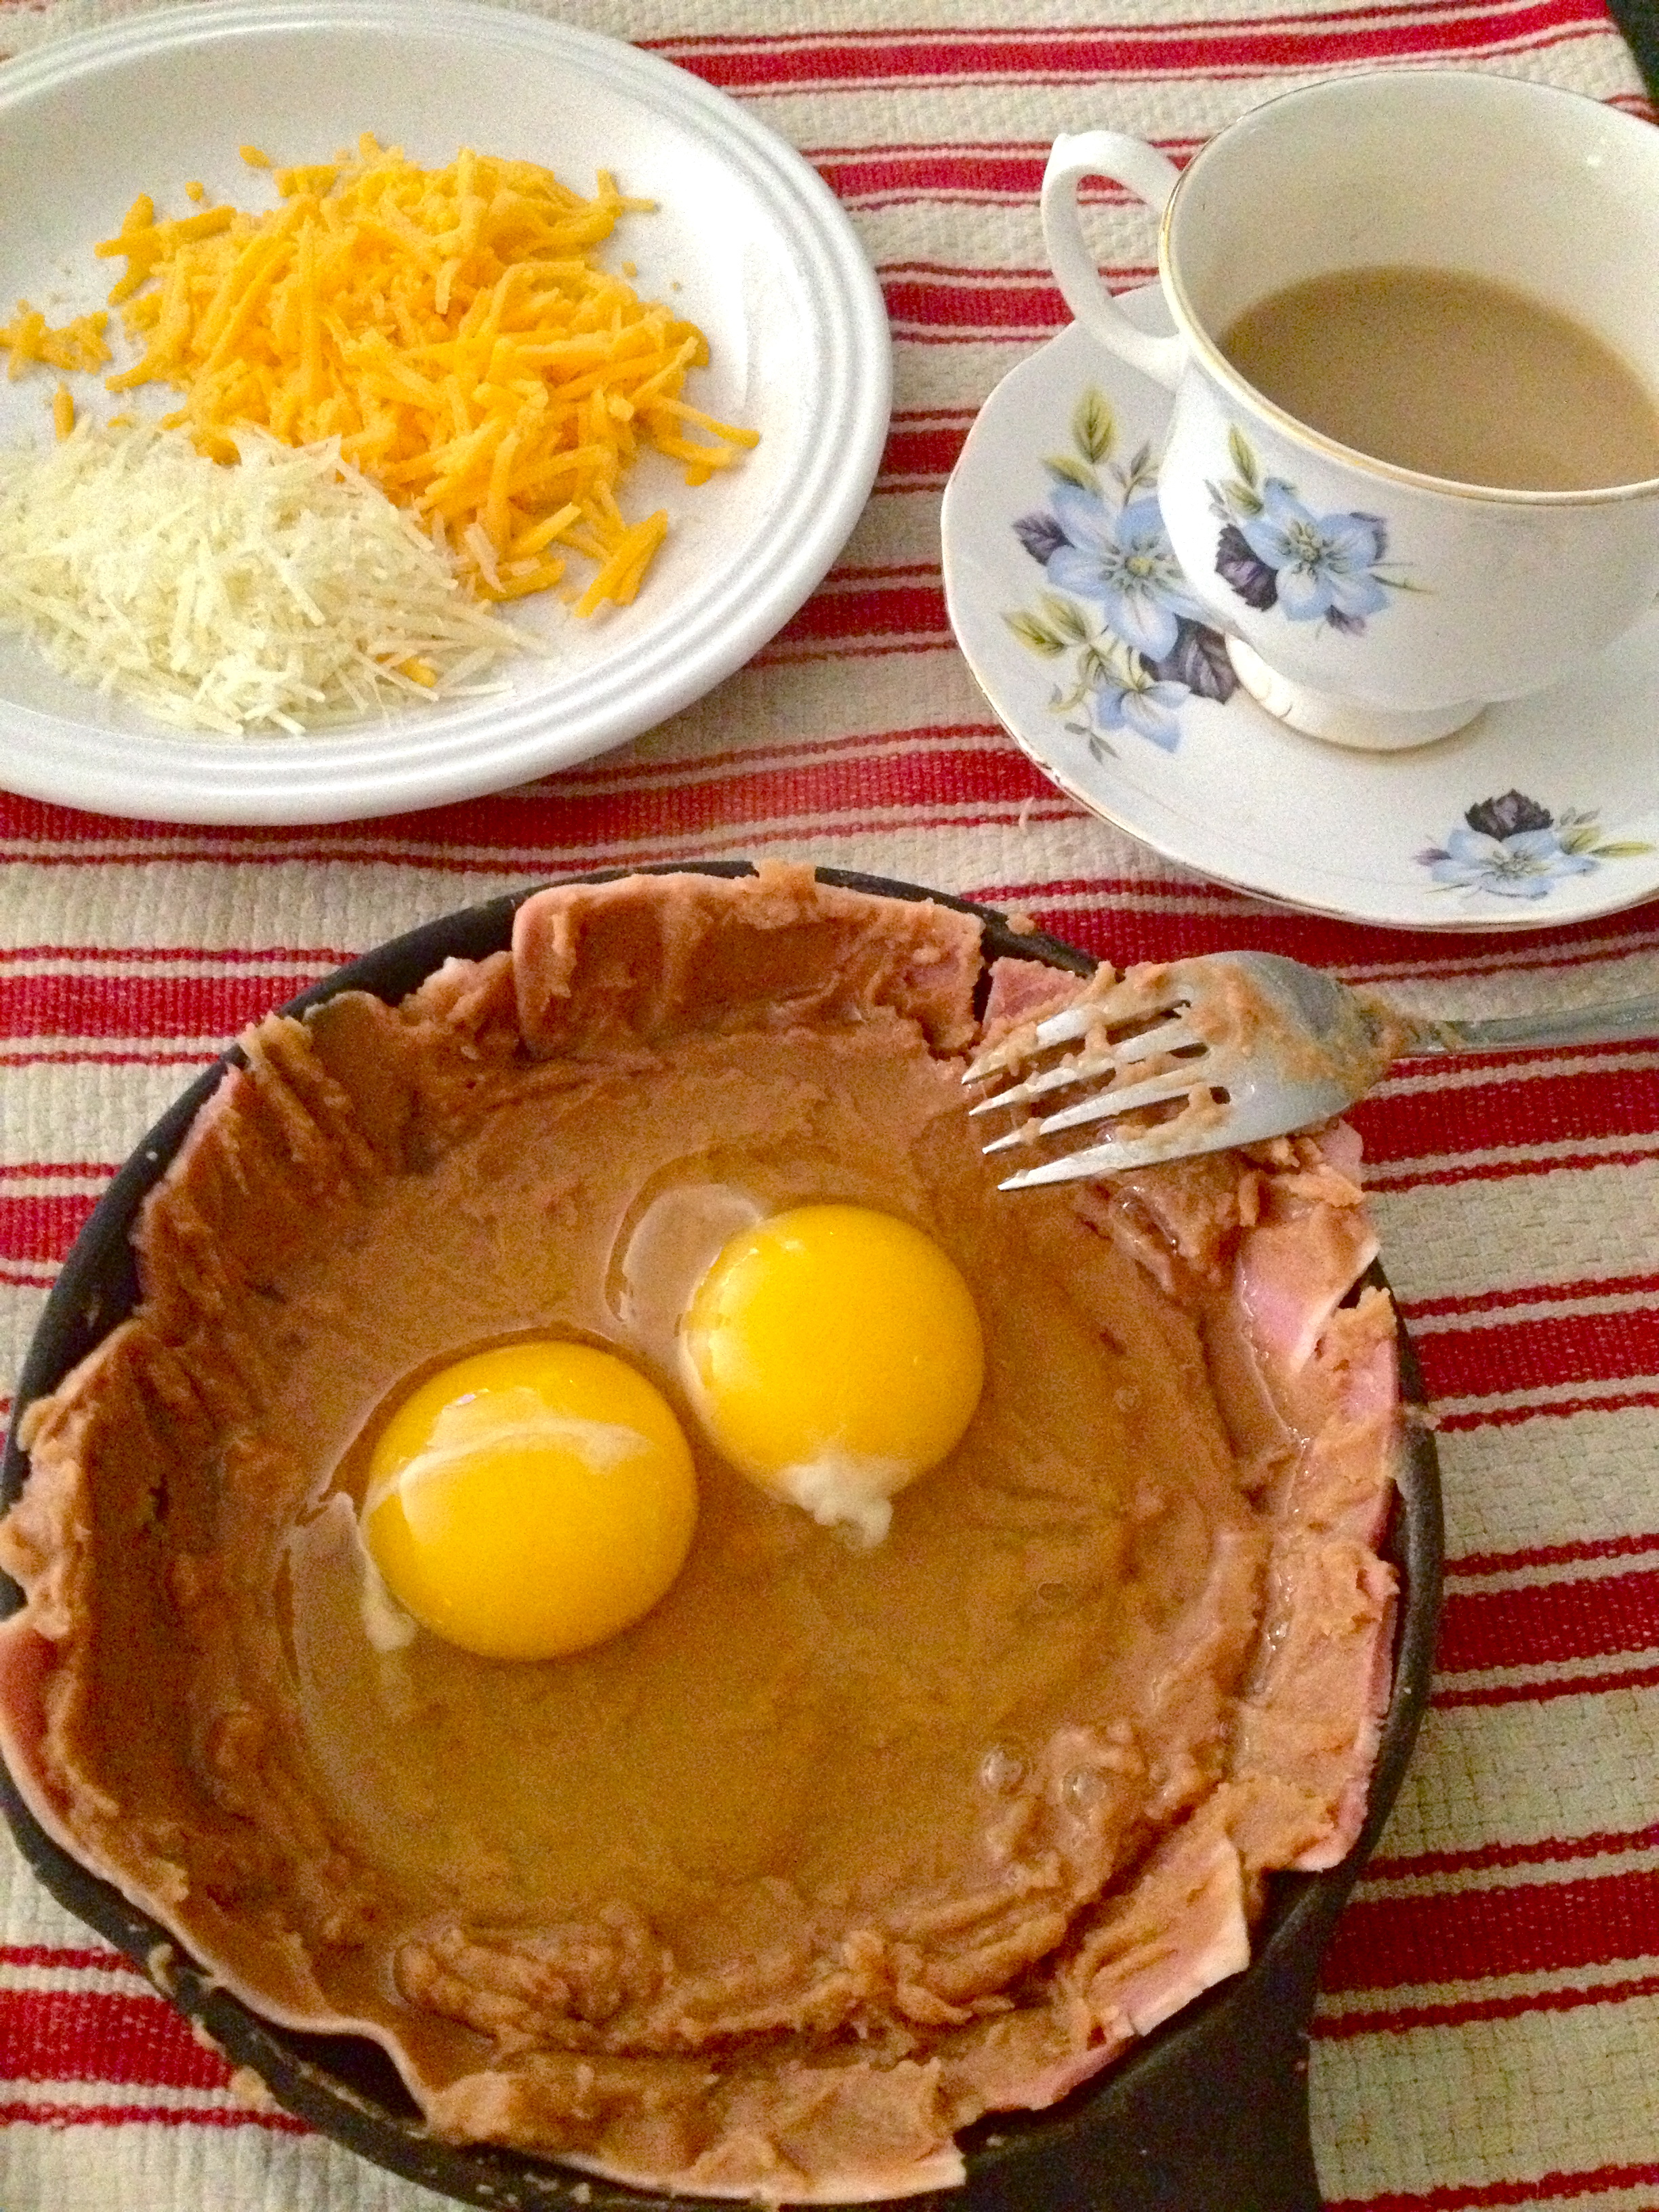
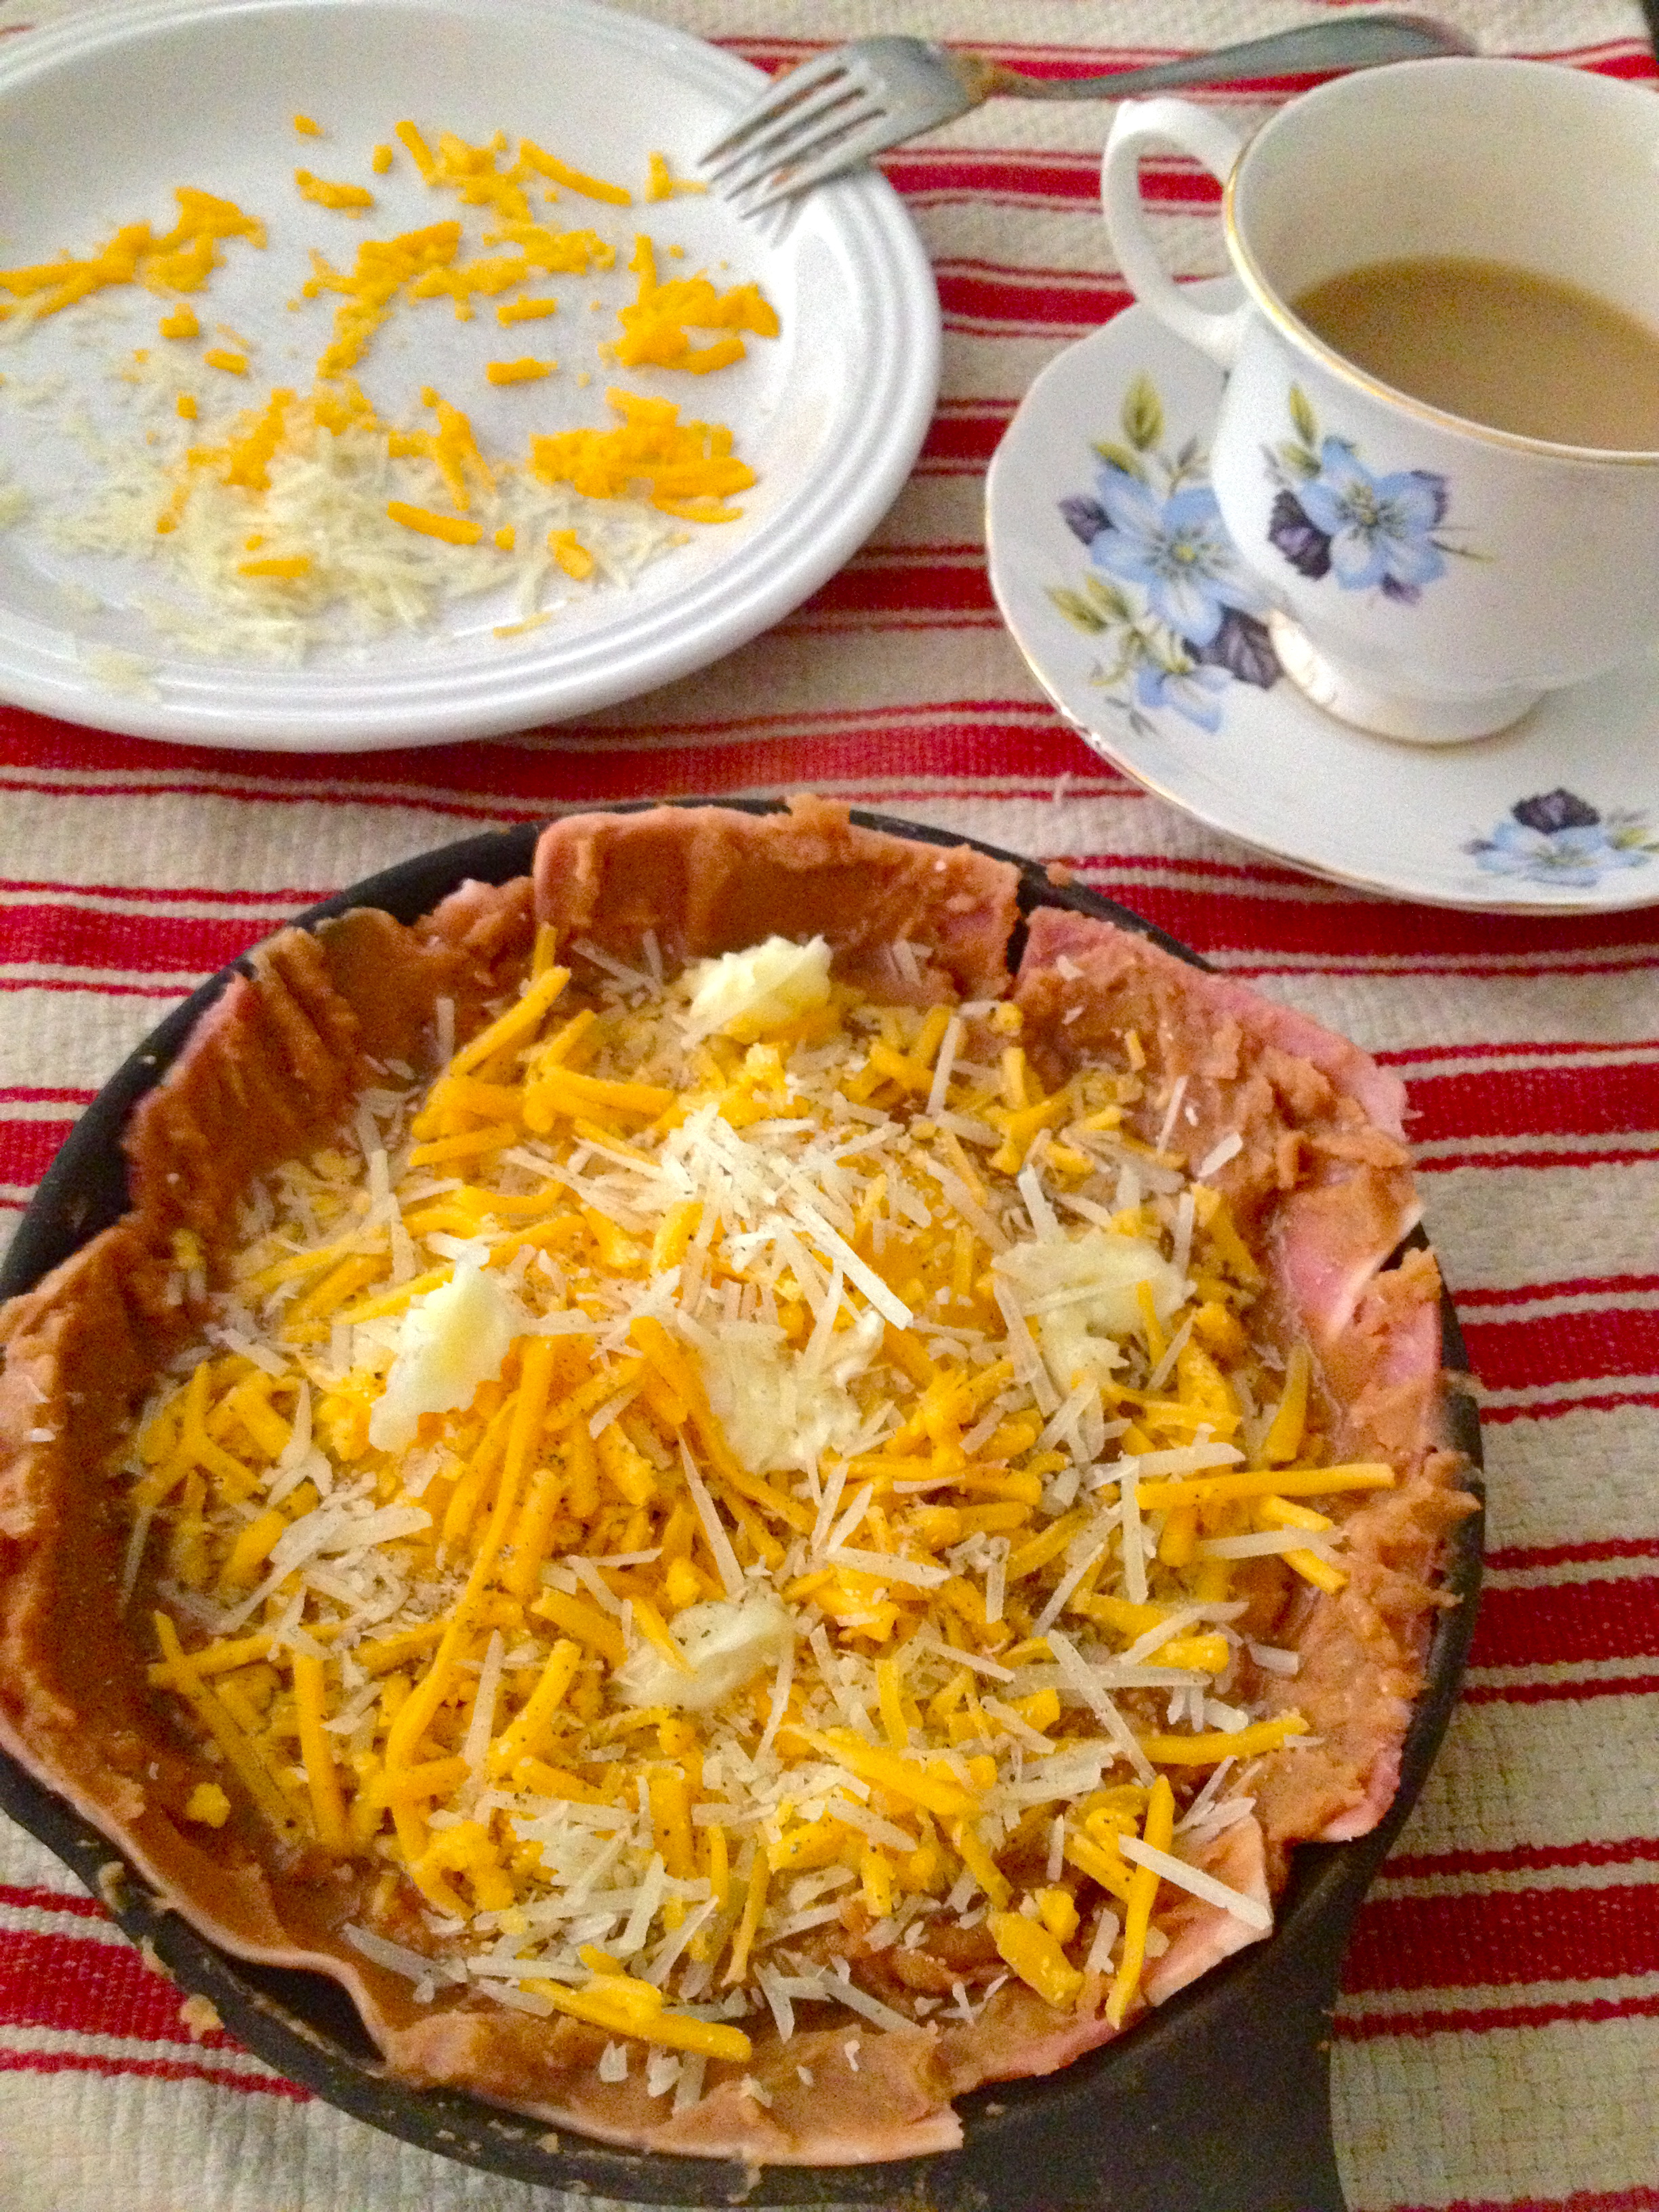
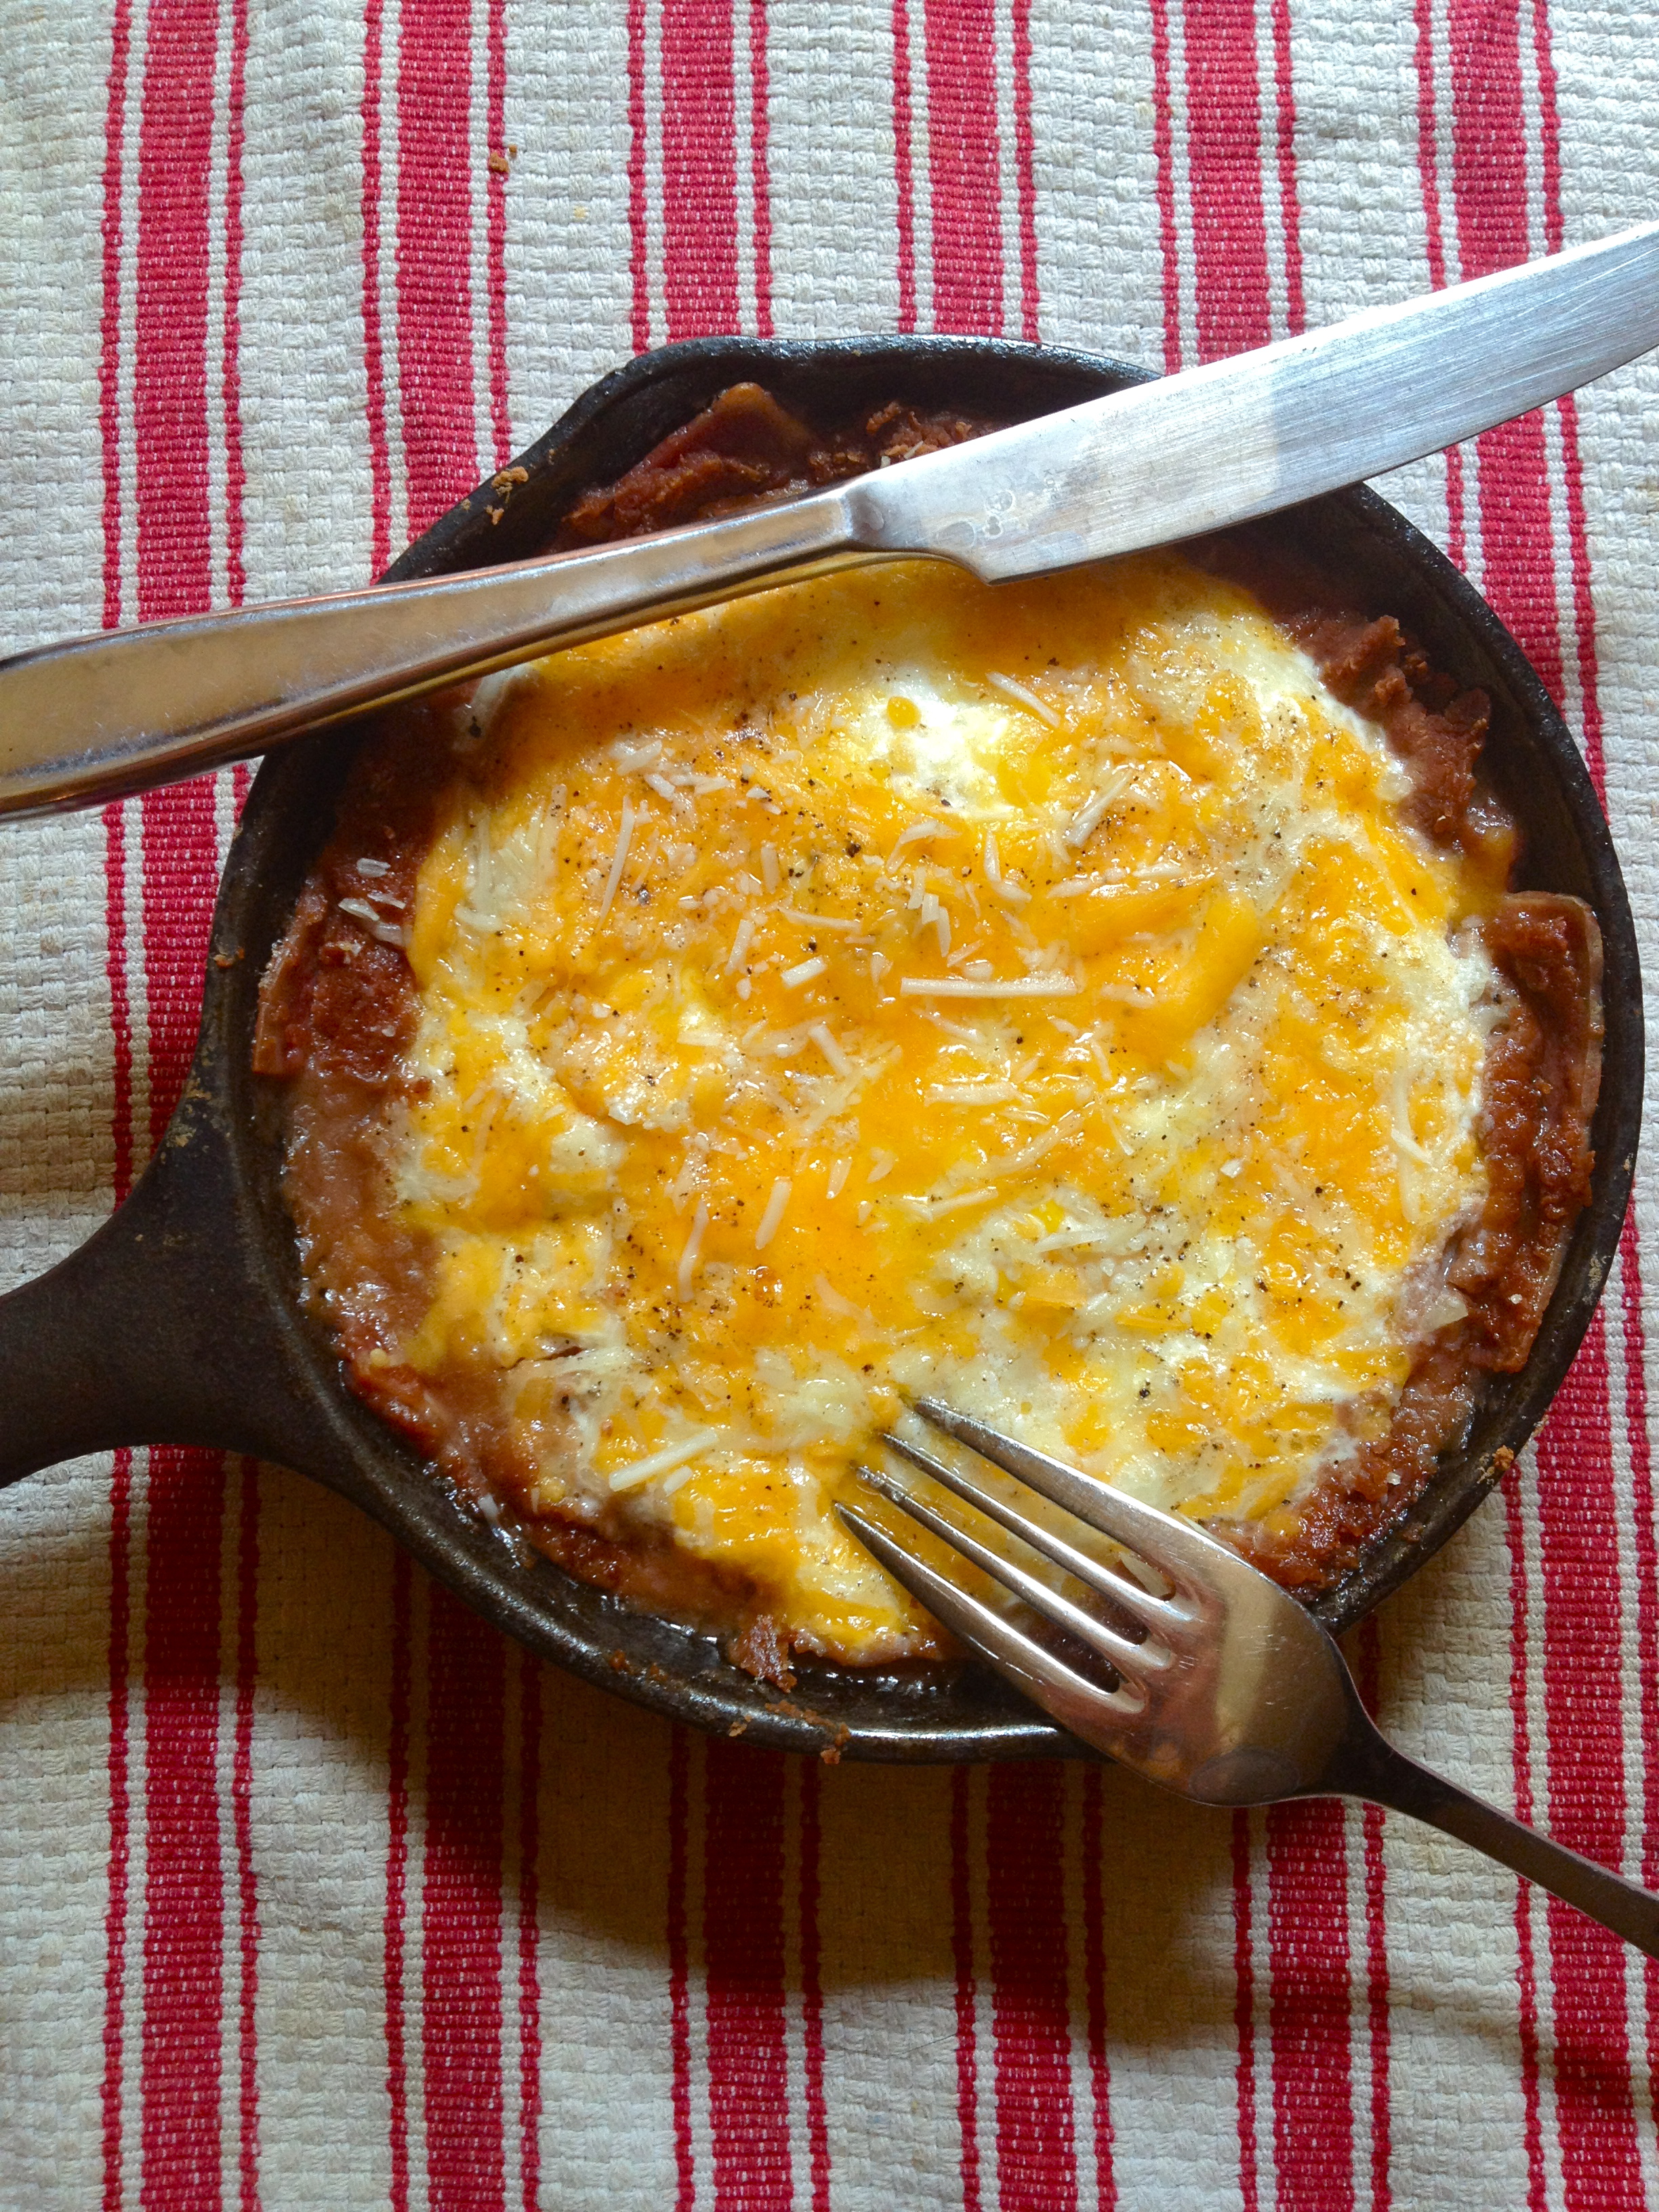
That’s it! I prefer to serve these right away, with some melted cheese, salsa, and eggs. Or you can let them cool, cut them up into quarters, and serve later. These heat up fine in the microwave, but they’re best reheated on a skillet. Usually I make one at a time, and I keep the rest of the batter in the fridge to make later (up to a week after first mixing it).

IMG_8197

Advertisement

Kale Salad with Pistachios and Roasted Cauliflower.

Fancy breakfast side. Favorite work lunch. Quick and easy dinner. This salad has everything going for it even before I tell you how healthy and and wholesome it is (and it is healthy and wholesome). The dressing has all the things a good dressing should. Lemon and oil, sweet honey and tangy mustard, and a bit of seasoning are beautifully simple tossed with kale. The cauliflower makes it interesting and a little “meatier,” and with a good sprinkle of pistachios, things are starting to look downright fancy! I love this as an accompaniment to frittata on my weekend mornings (check the bottom photo!), and it’s an office lunch I actually look forward to. And since it’s normal to be out of an ingredient or two, I love riffing on the dressing using whatever I have around (no lemon? Try white wine vinegar. No pistachios? Almonds are great, too.). What I’m saying is, it tastes amazing, is good for you, and you can eat it for every meal. Make it. Make it today.

Lemon Parmesan Kale Salad with Pistachios and Roasted Cauliflower | KellyintheKitchen.net | extra virgin olive oil, lemon juice, dijon mustard, honey, granulated garlic, salt, pepper, parmigiano-reggiano cheese, pistachios, kale, cauliflower, cayenne pepper, olive oil

INGREDIENTS

for salad:
1/3 cup extra virgin olive oil
1 tbsp lemon juice
1/2 tsp dijon mustard
1/2 tsp honey
1/4 tsp granulated garlic
salt and pepper
1/4 cup grated parmigiano-reggiano cheese (or as much as you want!)
1/3 cup chopped pistachios (or about 1/2 cup if you measure before shelling)
1 large bunch kale, washed, dried, and julienned

for cauliflower:
1 cup cauliflower florets, washed, dried, and sliced
olive oil for drizzling (no need to use EVOO here, regular is fine)
salt and pepper
scant 1/4 tsp granulated garlic
pinch of cayenne pepper

DIRECTIONS

Preheat the oven to 350 F.

Lemon Parmesan Kale Salad with Pistachios and Roasted Cauliflower | KellyintheKitchen.net | extra virgin olive oil, lemon juice, dijon mustard, honey, granulated garlic, salt, pepper, parmigiano-reggiano cheese, pistachios, kale, cauliflower, cayenne pepper, olive oil

I like to start with the dressing; the longer those flavors have to come together, the better it will taste. Combine olive oil, lemon juice, mustard, honey, garlic, salt, and pepper, and stir together. Add the cheese and gently stir it in. Set aside.

Toss the cauliflower in the olive oil, salt, pepper, garlic, and cayenne until evenly coated. Spread on a baking sheet in a single layer and roast about 25 minutes, stirring halfway through. It’s done when the florets are soft and just toasty-brown. Let it cool to room temperature before using.

Lemon Parmesan Kale Salad with Pistachios and Roasted Cauliflower | KellyintheKitchen.net | extra virgin olive oil, lemon juice, dijon mustard, honey, granulated garlic, salt, pepper, parmigiano-reggiano cheese, pistachios, kale, cauliflower, cayenne pepper, olive oil

While the cauliflower is roasting, I use this time to de-shell and chop the pistachios.

The final step is assembly. Toss the kale in the dressing, taste, and adjust seasonings if needed. Add the pistachios, and top with cauliflower. Serve as a side or as the main event. Enjoy!

Lemon Parmesan Kale Salad with Pistachios and Roasted Cauliflower | KellyintheKitchen.net | extra virgin olive oil, lemon juice, dijon mustard, honey, granulated garlic, salt, pepper, parmigiano-reggiano cheese, pistachios, kale, cauliflower, cayenne pepper, olive oil


Eternally-Fresh Berries and Greek Yogurt.

This is definitely not a “recipe” in my usual sense. It’s more of a favorite technique, and I’m sharing it with you because ever since I started doing it, I’ve saved money by not letting fruit go to waste and I’ve made my breakfasts a lot healthier and better-tasting. I used to eat those single-serve yogurts that come with a layer of sugary fruit to stir in, which is of course delicious and convenient, but not such a great way to start the morning. Then I started doing fruit and yogurt this way instead, and man is it ever good! Here’s the basics of why this method rocks:

  • the berries last longer because I wash and dry them before they go in the fridge/freezer, which helps fend off mold/mushiness
  • my berries are washed and ready to go whenever I need them, so I never have to eat wet and drippy berries
  • I freeze half, so I have gorgeous berries on hand all the time
  • The fresh berries are (obviously) delicious, and the frozen berries break up easily when stirred into yogurt (just like the sugary stuff, only healthier!)

Convinced? Because I love this stuff berry much. Now orange you laughing at my fruit jokes?

INGREDIENTS

2 packets of fresh berries – raspberries are my favorite, and blackberries are great too, but any berry you like should work
Greek yogurt (let me HEARTILY suggest Fage brand yogurt. I’ve reached the point where if it isn’t Fage, I don’t even want it. Seriously unbeatable stuff)

DIRECTIONS

As soon as you get home with your berries, rinse them under cold water. Then turn them out onto a towel and flip each one upside-down; if you’re using raspberries, for example, turn them so that they’re standing up on their hollow end. This helps them dry completely, which is what we’re going for. Leave the berries for an hour or two, until dry.

IMG_0181

When the berries are dry, put them back in their little plastic basket or other similar container (which should also be dry).

IMG_0191

Put one of the containers in the fridge and use within 2-3 days. Not only can you eat these on the go, without stopping to rinse them and then have them wet and drippy, but they also last a lot longer when they’ve gotten a chance to dry before they get piled on top of each other in the fridge.

Put the other container of berries in the freezer. Because they are dry, the berries will freeze individually, without sticking to one another, and they’ll keep their perfect picturesque berry shape.

IMG_0193

Here’s how I use the frozen berries: before I leave for work, I spoon a portion of Fage Greek yogurt into a tupperware and toss in 8 or so of these frozen gems. By the time I get to work and dig into the yogurt, the berries have defrosted and gone a little bit soft. They’re the perfect consistency to crush up with my spoon and stir into the creamy yogurt. I LOVE this because it’s just as delicious as one of those yogurt-and-fruit single serving cups, but it’s so pure and healthy!

IMG_0195

Here’s what it looks like once I get it to the office and stir everything up. Best easy workday breakfast ever!

IMG_0205

Nutty Cinnamon Cream of No-Wheat, a.k.a. “Faux-tmeal”

Cream of No-Wheat: a hot cereal made with nuts, dried fruit, seeds, and cinnamon – but with no wheat and no oats. Considering how I’ve altered the way I eat pretty dramatically over the past few months, moving away from processed grains and sugar and toward protein, fruits, veggies, and the like, this recipe is the answer to my breakfast dreams! That’s because, while I really haven’t looked back following these big changes, I have to admit that there are a few things I have truly, truly missed, and one of those things is my morning oatmeal.  When I saw a recipe from A Girl Worth Saving via salixisme that looked like a great hot cereal compromise, I had to give it a try. And it is absolutely delicious: creamy, nutty, with just enough sweetness from the dates, and a slightly chewier consistency from the nuts and seeds. It’s a very flexible recipe, and you can swap various ingredients in or out as you like: pumpkin seeds, wheat germ, pecans, dried apples, or brown sugar would all do a little something special if you wanted to try them out in here. And because this recipe makes about 8 servings, you can prep the “oatmeal” dry mix ahead of time, and just cook however many servings you need that morning. I calculated it out, just to see what this dish looks like from a protein perspective: each 3/4 cup serving has about 8g of protein, plus about 10g from the milk, making this a breakfast with about 18g of protein. Yay for hot breakfast!

UPDATE: I recently made another version of this – I was out of sunflower seeds, so instead of the 1/2 cup of sunflower seeds, I used about 3 tbsp of chia seeds and an additional 1/4 cup of chopped walnuts. The chia seeds were awesome here, thickening the consistency to that it more closely resembled cream of wheat. I’m definitely adding chia seeds to this every time I make it from now on!

IMG_9564

INGREDIENTS:

the dry mix*:
1/2 cup roasted sunflower seeds, chopped
1/2 cup flaxseed meal (or use whole flax seeds and grind them)
1/2 cup walnuts, chopped
1/2 cup almonds, slivered
1/2 lb pitted dates, chopped
1/2 tsp salt
1/2 tsp ground cinnamon
1/2 tsp vanilla extract
*NOTE: chop your ingredients finer if you want a smoother, more cream-of-wheat-esque finished product, or leave them bigger for a chunkier consistency. I tried to opt for a middle ground.

to cook the oatmeal:
3/4 cups of dry mix per person
1 1/4 cup milk per person (dairy milk, almond milk, whatever you like)

Just the Recipe link: Nutty Cinnamon Cream of No-Wheat, a.k.a. “Faux-tmeal”

DIRECTIONS

Combine all the dry mix ingredients in a bowl and stir together.

IMG_9553

Measure out the amount you’d like to make now (about 3/4 cups per person should do it), and store the rest in an air-tight container in the fridge, for future use.

IMG_9554

To cook the oatmeal, bring the milk to a gentle bubble on the stove and stir in the dry mix.

IMG_9558

Stirring occasionally, simmer gently until thickened to your liking (mine took about 10 minutes, give or take). Remove from heat.

IMG_9560

Spoon the good stuff into a bowl and stir in any extras you like – more milk, fruit, nuts, whatever! Then dig in.

IMG_9563

Pretzel Milk and Chocolate Chip Scones.

On a cute and crazy-creative blog called “A Cozy Kitchen, ” I saw blogger/pancake expert Adrianna do something magical: she made pretzel milk pancakes. This is one of the most food-genius things I’ve seen in a long time: she roasted pretzels in the oven, soaked them in milk, and then strained them out so that the milk was left in faintly golden pretzel-flavored perfection, making her pancakes deliciously pretzely. I was mesmerized by this idea, and initially wanted to make a cookie using the pretzel milk method. I’m still working on the cookie version of this recipe, but for now, these scones are pretty amazing. Pretzel milk – I am so glad we’ve found each other. The lightly golden milk gives the finished product the most unusual and profound savoriness—not in-your-face pretzely, but more of a welcome note of something warm and deep. It’s pretty special.

I have a question for my beloved readers: what to do with the milk-steeped pretzels you’re left with after making the pretzel milk? I ate a few (they’re actually good, in a weird, slightly soggy kind of way), but there’s got to be something interesting they could be used for. Crush them up and stir them into muffin batter, or even cookie dough? Or food-processer them with lots butter and maple syrup, shape the butter mixture into a log, toss it in the fridge, and a few hours later you’ve got maitre d’ maple pretzel butter for toast and waffles and all those goodies? If you come up with a good use for them, let me know! And PS – when they’re in the oven, watch these more carefully than I did….my scones got a little bit toastier than I would have liked. Still awesome though!

IMG_9058

INGREDIENTS

3 cups pretzels
1 1/2 cups cream or half-and-half
1 cup all-purpose flour
1 cup whole wheat flour (feel free to use all A-P flour if you prefer)
1 tbsp baking powder
4 tbsp sugar
1/2 tsp salt
5 tbsp unsalted butter, chilled and cut into little cubes
1/2 cup chocolate, chopped into small bits (I used semi-sweet)
optional: turbinado sugar, for sprinkling

Just the Recipe link: Pretzel Milk and Chocolate Chip Scones

DIRECTIONS

Preheat oven to 350 F. Spread pretzels onto a sheet pan in a single layer and roast until they turn a nice dark brown, about 10 minutes. Let them cool completely (don’t worry, they cool very quickly).

IMG_9042

Preheat the oven to 450 F.

Transfer the cooled pretzels to the cream or half-and-half and let them soak for about 15 minutes. Then strain, leaving just the beautiful pretzel-y cream. The pretzels will have soaked up some of the liquid; you’ll need just 1 cup total for this recipe. If you have any leftover milk, keep it on hand and maybe dip the scones into it once they’re baked. This stuff is amazing.

IMG_9045

Place flour, baking powder, sugar, and salt in a mixing bowl or food processor. Whisk or pulse together until combined. Add the butter; if using your fingers, quickly rub the flour mixture into the butter until the mixture resembles coarse sand, handling the butter as little as possible and careful not to melt it as you go. If you’re using a food processor, pulse together until the mixture resembles coarse sand.

IMG_9040

Add the chocolate bits and stir or pulse briefly to combine. Transfer mixture to a mixing bowl if it was in a food processor. Stir in the pretzel milk until the dough starts to come together. Then turn it out onto a floured workspace.

IMG_9046

Knead the dough a few times gently with your hands, just until it comes together in a ball – the less you work the dough, the better, since you don’t want the heat of your hands to melt the butter.

Flatten the dough into the shape of a rectangle (roughly….), about 3/4 inch -thick. Okay fine, so this dough is obviously not in a rectangle. I took this picture before I decided what shape I wanted the scones to be. Whatever.

IMG_9047

Cut the dough into squares. Then cut each square diagonally in half, to make little triangles…..Or, cut them however you want!

IMG_9050

If you like, sprinkle each scone with a bit of turbinado sugar. It’s sweet and gives the scones a little bit of crunch. And it’s pretty.

IMG_9051

Place sconces on a baking sheet and bake until light brown, about 12-15 minutes. Cool slightly before serving. These more than rock with sweet cream butter and a cup of black tea.

IMG_9053

And seriously – any ideas what to do with these already-steeped pretzels??

IMG_9043

Bacon, Bean, and Egg Skillet.

I’ve mentioned before that I’m eating a little bit differently now than I have in the past. One of the big changes I’ve made is cutting way down on grains and sugars, and completely eliminating them at breakfast time. It’s been kind of hard, given that a lot of the most delicious breakfasts in the world involve both of these things. So I’ve had to get a little bit creative, especially when I’m in the mood for something more dramatic than simple eggs or yogurt. That’s what this is. I don’t really have a story for this bacon, bean, and egg skillet, other than that it was delicious. I had been craving a recipe from Rachel Khoo that is similar but involves béchamel sauce and white bread, so I altered it a bit and created this dish. Yum. And if you’re making this, please see my note about bacon – it definitely makes an improvement on my original recipe.

IMG_8816

INGREDIENTS

3 slices of turkey bacon or regular bacon* (or however many it takes to line your skillet or baking dish)
1/4 cup refried beans (or, again, however much it takes to spread in the dish)
2 eggs
salt and pepper, to taste
shredded cheese, for sprinkling

*A note about bacon: Cook your bacon halfway before you use it in the recipe. I didn’t pre-cook mine, and when the whole thing was done, the bacon was just barely cooked. Still delicious, but it would have been even better if I had given it a few minutes on the stove or in the microwave. It just won’t get the cooking love it needs when it’s covered up by the beans and eggs. Do yourself a favor and pre-cook it.*

Just the Recipe link: Bacon, Bean, and Egg Skillet

DIRECTIONS

Preheat oven to 325 F.

Cook your bacon about 50% of the way. Then lay your pre-cooked bacon in the bottom of the pan, forming a base for the beans.

IMG_8800

Watch out for little bacon-lovers, who may be drawn to you at this point.

IMG_8815

Spread the beans in a smooth layer all over the bacon, a little higher toward the sides of the pan and a little shallower in the center, where the eggs will go.

IMG_8808

Crack the eggs into the center of the dish.

IMG_8811

Sprinkle with salt, pepper, and cheese.

IMG_8814

Bake until the eggs are set but the yolks are still runny. Watch them carefully so as not to overcook. Be sure to cut right into those yolks and let them run all over. Oh yeah.

IMG_8821

And watch out, in case the little bacon-lover returns to beg.

IMG_8823