Impeachmint Gelato.

Impeachmint Summer Gelato | KellyintheKitchen | 4 cups whole milk, 1 cup sugar, 1/3 cup water, 10-12 sprigs fresh mint, 5 smallish fresh peaches, juice of 1 lemon, 4 egg yolks

It’s been a year since I last posted. My, how things have changed!

The past few months have held a lot of surprises. Most of them have left a pit in my stomach and a bad taste in my mouth. And amidst all the protesting and the calling my representatives and the learning about my privilege, as a small-time recipe blogger, there is one other contribution I can make: I can combine two summery flavors, peach and mint, in a creamy, icy gelato recipe.

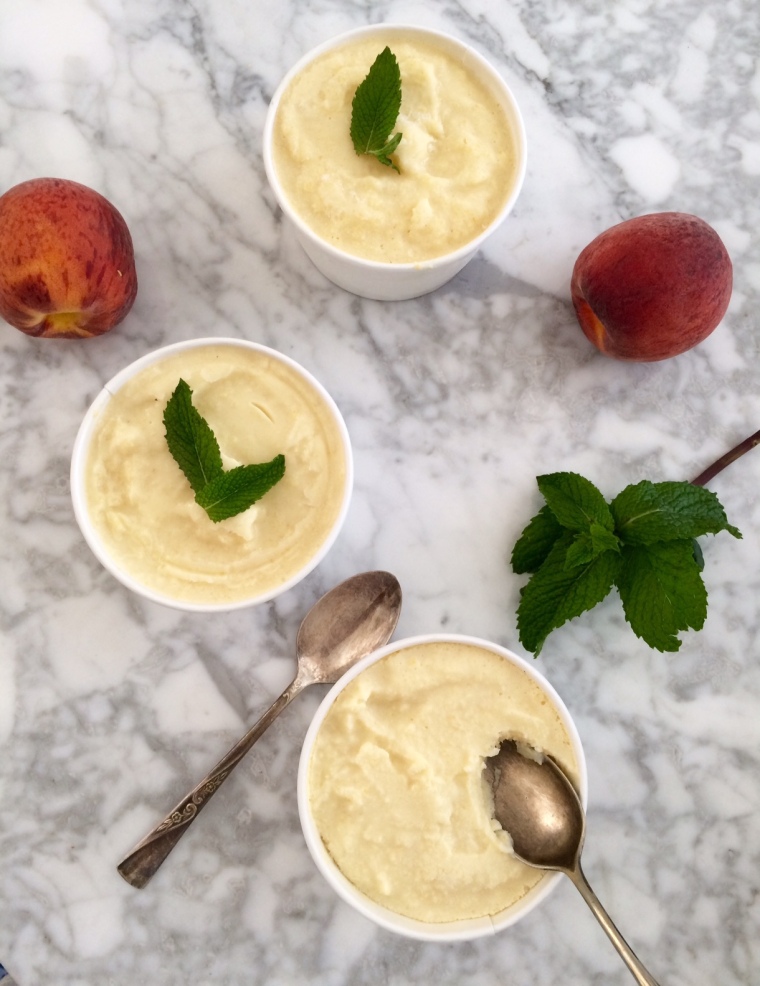
I’m calling it “Impeachmint.”

Fair warning: Impeachment is not easy to do, there are a lot of steps involved, and you’ll have a bit of a mess to clean up after it’s over. Don’t let that stop you. This needs to be done.

And what about this flavor combo, right?? Peach and mint? They really don’t seem to go together at all. Peaches are good on the grill or in a rustic pie, perhaps while kicking back with a toxic dose of Fox News?, whereas mint pairs well with fine chocolate or tea and reading The Atlantic. It’s like these flavors have nothing in common!

Sure, they’re not a natural pair. But in order to successfully execute this recipe for Impeachmint, peach and mint have to unite behind their shared dream of a better gelato. As Abraham Lincoln said, “We are not enemies, but friends. We must not be enemies.” He was talking about the Civil War, but his words hold true today, about this gelato.

I get it, the prospect of Impeachmint is kind of intimidating. And there are probably other gelato flavors you prefer over this one. Hell, I’ll take something chocolatey from Ben & Jerry’s over Impeachmint any day. But be realistic. What’s in your freezer right now? Some gross old orange creamsicle? Impeachmint is definitely better than keeping that thing around.

INGREDIENTS

4 cups whole milk
1 cup sugar, divided
1/3 cup water (plus more for prepping ingredients)
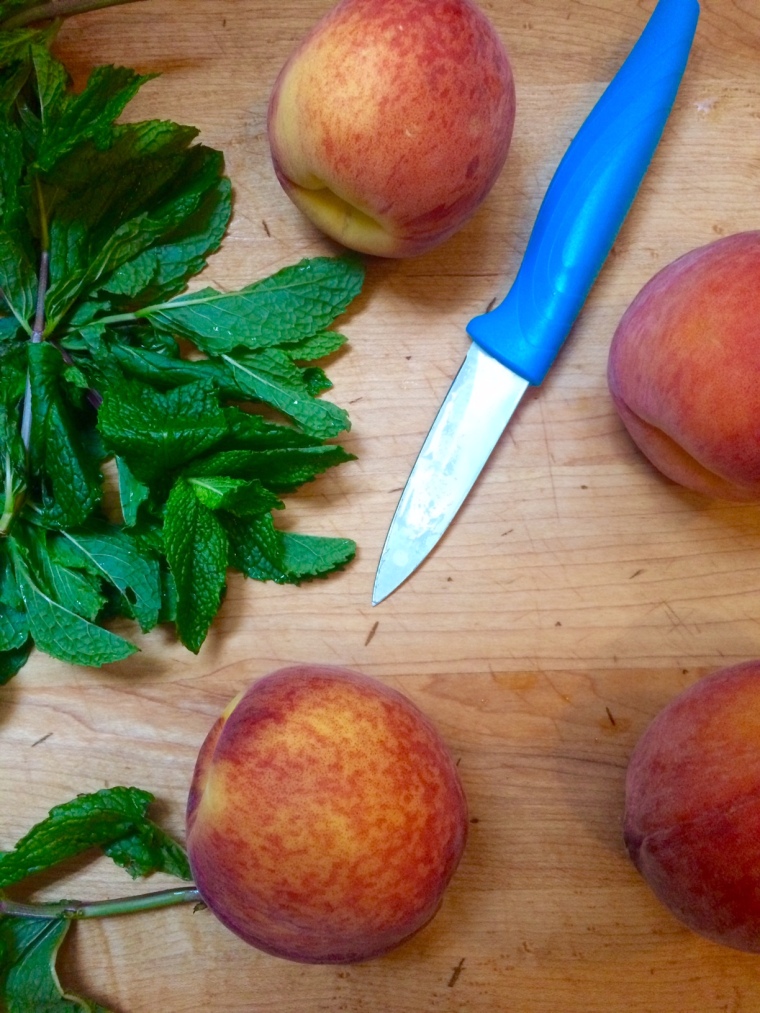
10-12 sprigs fresh mint (a good handful), washed
5 smallish fresh peaches, peeled, pitted, and chopped
juice of 1 lemon
4 egg yolks

And check out these fun links while your ice cream freezes!
Swing Left: https://swingleft.org/
Indivisible
: https://www.indivisible.us/
ACLU: https://www.aclu.org/
Pod Save America: https://getcrookedmedia.com/here-have-a-podcast-78ee56b5a323
Planned Parenthood: https://www.plannedparenthood.org/
Black Lives Matter: https://blacklivesmatter.com/

Impeachmint Summer Gelato | KellyintheKitchen | 4 cups whole milk, 1 cup sugar, 1/3 cup water, 10-12 sprigs fresh mint, 5 smallish fresh peaches, juice of 1 lemon, 4 egg yolks

DIRECTIONS

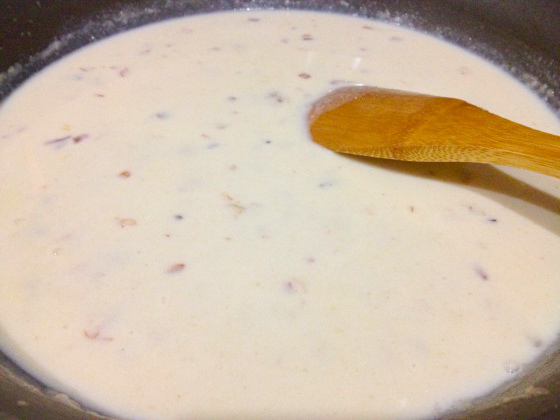
Heat milk over medium flame. Once it reaches a simmer, remove from heat, cover to retain some of the heat, and set aside.

Heat 1/4 cup water and 1/4 cup sugar until sugar dissolves. Remove from heat and set aside.

Prepare an ice bath. Heat a small pot of water on high until boiling. Add the mint and cook for 30 seconds until bright green. Transfer mint from boiling water to ice bath. When cooled, squeeze out extra water and set aside.

Add peaches, lemon, and remaining 1/4 cup sugar to food processor. Blend until smooth. If you like, pour peach mixture through a strainer to strain out solids. Set aside.

Add sugar syrup and mint leaves to food processor and blend until smooth. Pour through a strainer to remove solids. Set aside.

Add egg yolks and remaining 1/2 cup sugar to food processor and blend until smooth. Then, with the machine running, slowly pour in half the hot milk mixture, careful not to scramble the eggs.

Get another ice bath going—one big enough to fit the bottom of your pan—and set ice bath aside. Add the egg mixture to the remaining milk and heat pan over medium. Stir constantly until thickened. It’s ready to go when this “custard” mixture smells amazing and is thick enough to coat the back of a spoon. Remove pot with thickened custard mixture from heat and set in ice bath, stirring a occasionally to cool to lukewarm.

In a large bowl, combine strained peach mixture, lukewarm custard mixture, and mint syrup to taste (I used 2 tbsp of mint syrup because I like a more mellow mint flavor—start with that and then taste to see if you need more). Refrigerate at least a few hours, or overnight is even better.

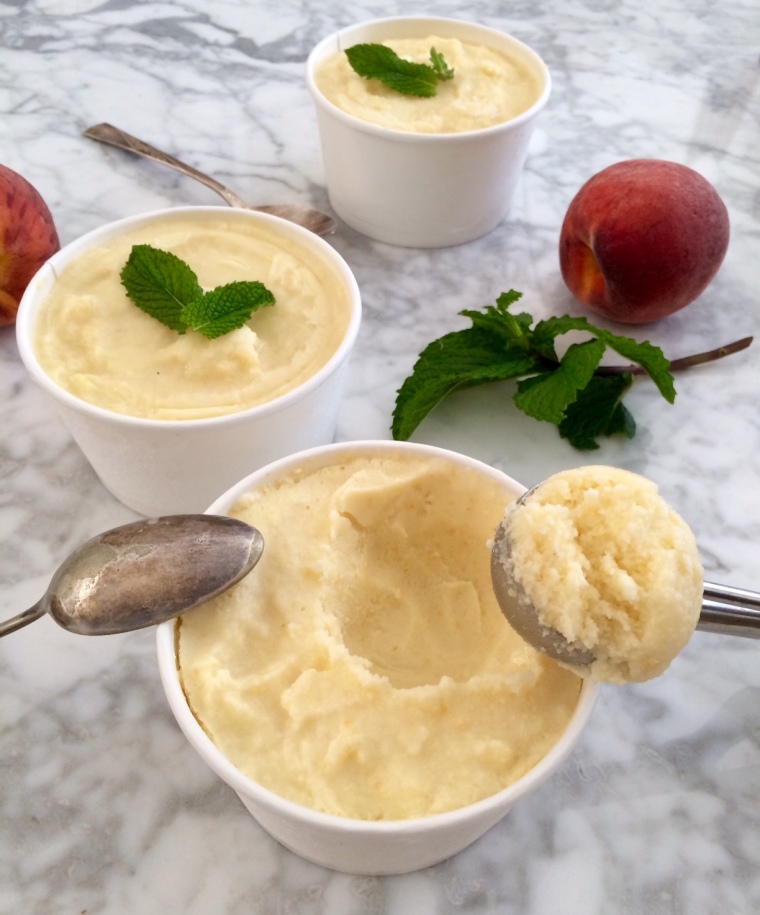
Once gelato mixture is thoroughly chilled, churn according to your ice cream maker’s instructions. Freeze in cute little cups or in a bigger ice cream container. When the mixture has set, your gelato is ready to go! In typical gelato fashion, give it a minute or two to thaw a little before digging in. Garnish with a mint leaf or two, bring some over to your neighbor, eat it together without fighting, if possible.

Impeachmint Summer Gelato | KellyintheKitchen | 4 cups whole milk, 1 cup sugar, 1/3 cup water, 10-12 sprigs fresh mint, 5 smallish fresh peaches, juice of 1 lemon, 4 egg yolks

Advertisement

Czech Goulash: Updated Recipe.

Four years ago when I went to Prague, I ordered a dish of goulash at a little restaurant near our hostel. It was my first taste of goulash–my first heavenly taste of that paprika-y, hearty stuff–and I’ve loved it ever since. In fact, my goulash might be the first recipe I ever made that I can claim as a Kelly original. That recipe has lived through a few delicious incarnations as I’ve re-worked it through the years; I think this posting is the third version. And it’s by far my favorite. I’ve kept it simple and focused on my favorite flavors, most importantly the deep deep warmth of paprika, which absolutely rocks on a chilly winter day. An homage to my Bohemian relatives and a sweet memory of my trip to Prague, here is my updated recipe for Czech goulash!

Czech Goulash | KellyintheKitchen | olive oil, 1 large onion, 3 carrots, bay leaf, 2 lb stew beef, cubed, 3 cloves garlic, 3-4 tsp paprika, 2 tsp caraway seed, 1 tsp dried thyme, 15 oz canned crushed tomato, 4-6 cups cold water or stock, salt and pepper to taste, 2 tbsp corn starch, and garnishes: sour cream, green onion, marjoram/parsley

INGREDIENTS

olive oil
1 large onion, chopped
3 carrots, peeled and chopped
bay leaf
2 lb stew beef, cubed
3 cloves garlic
3-4 tsp paprika
2 tsp caraway seed
1 tsp dried thyme
15 oz canned crushed tomato
4-6 cups cold water or stock
salt, pepper to taste
2 tbsp corn starch
sour cream, green onion, and marjoram or parsley for serving

DIRECTIONS

Heat oil over medium in Dutch oven or other large soup pot. Add onions, carrots, and bay leaf, and cook until transparent. Then add the beef and cook until browned.

Stir in the garlic, paprika, thyme, and caraway seed. Cook for 2 minutes, until fragrant.

IMG_0182

Pour in the tomatoes and 4 cups of stock and add salt and pepper to taste. Bring to a boil, then lower the heat to a simmer. Cover and cook for 2 hours, stirring occasionally and adding more stock if necessary.

IMG_0196

After 2 1/2 hours, stir in the corn starch. Cook for another hour at least; I like to cook the goulash for a total of 4-5 hours if I have the time. We’re going for fall-apart tender beef that could almost float away in the broth/gravy/stew juices (or whatever they’re called).

Remove from heat and fish out the bay leaf. Serve with a scoop of sour cream and a sprinkling of green onion and parsley or marjoram. This stuff is amazing right out of the pot and only gets better as it sits in the fridge!

Czech Goulash | KellyintheKitchen | olive oil, 1 large onion, 3 carrots, bay leaf, 2 lb stew beef, cubed, 3 cloves garlic, 3-4 tsp paprika, 2 tsp caraway seed, 1 tsp dried thyme, 15 oz canned crushed tomato, 4-6 cups cold water or stock, salt and pepper to taste, 2 tbsp corn starch, and garnishes: sour cream, green onion, marjoram/parsley

Spicy-Tangy-Sweet Pulled Pork.

IMG_9179

INGREDIENTS

1 large onion, peeled and cut into 8 wedges
3-4 lb pork shoulder (also called pork butt)
salt
1 tsp peppercorns (or 3/4 tsp pepper)
1/2 tsp mustard seeds (or scant 1/2 tsp ground mustard powder)
1 canned chipotle chile in adobo sauce, minced (throw in a few more if you like it extra spicy)
1 tbsp adobo sauce (the sauce from the canned chipotle chiles)
2 bottles root beer (about 24 oz – I used Berghoff Root Beer, because I’m a good Midwestern girl)
1 cup water (optional – use if you want more juices leftover after it’s cooked)

Just the Recipe link: Spicy-Tangy-Sweet Pulled Pork

DIRECTIONS

Preheat oven to 325 F.

Lay the onion wedges in the bottom of a Dutch oven or other large pot with a lid. Season the pork with salt.

If you’re using whole peppercorns and mustard seeds, grind them up using a mortar and pestle until they’re broken up, but not pulverized.

IMG_9152

Sprinkle your pepper and ground mustard over the pork, and place the pork in the pot, on top of the onions.

IMG_9156

Next, add the chipotle chile and adobo sauce to the pot, and pour in the root beer. Optional: add the water. Do this if you want more sauce at the end – I made mine without the water, and it had just enough sauce for the pork to soak it all up. If you like it a little saucier, add the water.

IMG_9160

Cover the pot and put it in the oven for at least 3 hours (I cooked mine for just over 4 hours). Flip the pork over once during cooking.

You know you’re there when you can easily shred the pork using two forks. At this point, remove the pork from the pot and shred it completely. Discard the bone.

IMG_9176

There should be just enough sauce left in the pot to coat the pork, so add the shredded meat back to the sauce and stir. That’s all!

IMG_9177

Obviously this makes a great pulled pork sandwich, but I served mine with these refried beans and this red cabbage slaw.

IMG_9192

Pork perfection, ready for its close-up.

IMG_9193

Sticky Glazed Vanilla-Chocolate Shortbread Cookies.

I haven’t been baking much recently. I miss it! Cutting way down on sugar and processed grains, as I have been, means a lot of my favorite baking activities are on hold. This weekend, however, I was up at my family’s lakehouse in Wisconsin, celebrating my sister’s seventeenth birthday with a handful of her girlfriends. And I saw my chance. My chance to make these cookies, inspired by 101 Cookbooks. Ever the pragmatist, I recognized in this group of high schools girls a captive audience; I knew, if I placed a platter of gleaming sweets in the midst of their Beyonce-listening sunbathe-fest of Saturday, they’d happily help me out by disposing of the evidence. And they did not let me down—when we left the lakehouse on Sunday, only one cookie remained. Nicely done, girls. And happy birthday, Kathleen!

IMG_8701

INGREDIENTS:

for cookies:
12 tbsp (or 1 1/2 sticks) unsalted butter, softened to room temperature
2/3 cup brown sugar
, plus more for sprinkling
2 large egg yolks
1 tablespoon vanilla extract
2 1/2 cups all-purpose flour
1 teaspoon baking powder
1 scant teaspoon salt
about 3 tbsp chocolate, finely chopped (I used semi-sweet)
2-3 tablespoons milk (I ended up using about 1 ½ tbsp)

for glaze:
2 tbsp milk
about 6 heaping tbsp. powdered sugar
splash of good quality vanilla extract (you want to use the good stuff here – don’t skimp on quality)

Just the Recipe link: Sticky Glazed Vanilla-Chocolate Shortbread Cookies

DIRECTIONS:

Using an electric mixer (or your best elbow grease), cream the butter until it’s fluffy. Then add half the brown sugar, stir it in, and scrape the sides of the bowl, and repeat with the other half. Beat in the egg yolks and the vanilla until combined.

IMG_8647

In a separate bowl, mix together the flour, baking powder, salt, and chopped chocolate. You want the chocolate very finely chopped – if the pieces are too big, your dough won’t hold together as well when you’re rolling it out.

IMG_8637

Stirring by hand, gently mix part of the flour into the butter and sugar, just until it combines. Add the rest of the flour, careful not to over-mix. If the dough looks too dry, add a tbsp of milk or two – we’re looking for the dough to just hold together when pressed into a ball. Which, conveniently, is the next step.

IMG_8655

Turn out the dough into a cutting board or countertop and form it into a ball using your hands.

IMG_8656

Then divide the ball into 4 equal sections.

IMG_8660Form the sections into balls and then flatten them into discs. Wrap each disc in plastic wrap and refrigerate for at least half an hour.

IMG_8664

When the dough has chilled, preheat oven to 350 F.

Take one of the discs out of the fridge. Lightly flour a flat workspace and use a rolling pin to roll out the dough very very thin, like wafer thin.

IMG_8667

With a cookie cutter (or a small glass, because I couldn’t find any cookie cutters) cut out the cookies and place them on a baking sheet. They don’t spread out much, so crowding the cookies is okay. Sprinkle each one with a bit of brown sugar. Repeat with the other 3 sections of dough.

IMG_8668

Now, to the oven. Depending on how big the cookie cutter you use is, these bake pretty quickly because of how flat they are, so watch them. Mine baked about 8 minutes, just until the edges started to turn golden brown.

IMG_8675

Put the cookies on a cooling rack and cool completely before glazing.

To make the glaze, pour the milk into a small bowl and add the vanilla. Then add 4 tbsp of powdered sugar and whisk or use a fork to combine. From there, add the rest of the powdered sugar as needed until you reach the right consistency – thin, but not watery.

IMG_8682

When the cookies have cooled, glaze them. The quick way is to spoon the glaze over the cookies, drizzling a bit on each one. If you want to put a bit more TLC into the glazing process, dip the top of each cookie into the glaze. Either way, set them back on the cooking rack to set before plating.

IMG_8688

That’s all! Enjoy.

IMG_8696

But be careful – my tasters found these pretty addicting.

IMG_8704

Salmon Cakes and Baby Spinach Salad with Orange Vinaigrette.

On Friday night, I made baked salmon fillets for dinner. Intending to post the recipe afterward, I shot each step of the prep process – but when I sat down to eat, it was…just fine. Not great. And I tend not to blog about recipes that I don’t think are awesome or that I wouldn’t make again, so I decided not to write it up or post it here. Oh well, this happens fairly often, folks. I finished eating one of the fillets,  and I shredded up the second and put it in the fridge. I unenthusiastically figured I would make some kind of salad out of it. Meh. But then I thought, there is a lot I could do with this average-tasting salmon that would make it totally delicious! So I combed the internet a bit and found a recipe from Rachel Ray that really got me going. I adapted it a bit and the result is what you see here: a tasty dinner that sees an ugly duckling salmon fillet turned into a real swan of a meal (birds and fish – stop me if the metaphor-mixing gets to be too much). Long story short: “blah.” became “ta-da!”

IMG_8001

INGREDIENTS

for the salmon and salad:
1 egg
1 – 1 1/2 cups salmon, cooked and flaked (1 can of salmon will work here as well)
1 green onion, sliced thin
1/3 cup bread crumbs (I used Panko – use gluten-free bread crumbs if you like)
1 tsp of your favorite fish seasoning (I used Lake Shore Drive Seasoning from the Spice House – love this stuff!)
a squeeze or two of hot sauce (I use Sriracha)
a small handful of fresh parsley, chopped
a pinch of cayenne pepper
salt and pepper
a few tablespoons of vegetable oil (not olive oil or butter – we need it to have a pretty high smoke point)
1 1/2 cups fresh baby spinach, washed and dried
shredded carrots or any other salad fixins’ you like

for the orange vinaigrette dressing:
1 tbsp orange juice
1 tsp red wine vinegar
3-4 tbsp extra virgin olive oil
salt and pepper to taste

Just the Recipe link: Salmon Cakes and Baby Spinach Salad with Orange Vinaigrette

DIRECTIONS

Get the pan going over medium heat (not medium high). We’ll add the oil in a little bit; for now, just heat the pan.

Crack the egg into a mixing bowl and add the salmon. Use a fork to mash up the salmon a little bit and combine it with the egg. Add green onion, bread crumbs, seasoning, hot sauce, parsley, cayenne pepper, and salt and pepper, and stir together to combine everything evenly.

IMG_7991

At this point, add the oil to the pan – just enough to cover the bottom. Let it get hot while you form the salmon into cakes. Divide the mixture into two even portions, and use your hands to shape each portion into a patty about 3/4 inch thick. Add them to the pan and cook until browned and a little bit crispy on each side. Mmm.

IMG_7994

While the cakes cook, prep the salad. I tossed the baby spinach onto a pretty plate and topped it with shredded carrots. Then make the dressing, which is incredibly easy. Just stir together all the ingredients with a fork.

IMG_7997

Then it’s just a matter of dressing the salad and plating the salmon cakes. Perch them right on top of the greens, and if you have any dressing leftover, drizzle a bit on the cakes. The orange is delicious here. I could hardly believe this was the boring salmon I had made the night before. Enjoy!

IMG_7998

Gail’s Baked Mac ‘n’ Cheese.

I went to college about 1000 miles away from home, and at times it was rough for a homebody like me! Home is comforting and safe and easy—and that’s part of the reason why I wanted to go far, far away. To stretch myself a bit, get uncomfortable, and try something a little bit scary.

But not every experience needs to be new and unknown; sometimes safe and comfortable is just what the doctor ordered. And without any of my own family nearby, college-me found it especially thrilling to get to spend a weekend at the homes of some of my friends. It was so much fun to hang out with their families, pet their dogs, and see what it was like in the towns where they grew up. Visiting my beloved roommate Maura’s family was always a lot of fun for many reasons, not the least of which was the amazing FOOD! Maura’s mom and dad are awesome cooks and never failed to whip up something absolutely delicious whenever I came to visit; I have droolingly fond memories of her mom Gail’s key lime pie, and her mac ‘n’ cheese was always out of this world. I was overcome with a craving for it this past weekend, and they were nice enough to share the recipe with me. And, no surprise, it was the best mac ‘n’ cheese I’ve ever home-made myself. Check it out – this is the amazing Gail’s Baked Mac ‘n’ Cheese!

IMG_7567

INGREDIENTS (this served 3 people 2 BIG helpings each, with leftovers)

1 lb (1 box) cavatappi or your favorite pasta
4 tbsp butter
olive oil
1 small onion, diced
3 tbsp flour
3 cups milk (approximately – you’re just going for the right sauce consistency, so eyeball it a bit)
1 cup Gruyere cheese, shredded
1 1/2 cups cheddar cheese, shredded
nutmeg, salt, and pepper to taste
1 tbsp or more Sriracha or other hot sauce
3/4 tsp Dijon mustard
panko bread crumbs

Just the Recipe link: Gail’s Baked Mac ‘n’ Cheese

DIRECTIONS

Preheat oven to 350 F.

Cook the pasta in boiling salted water until slightly underdone. Reserve 1 cup of the pasta cooking water (it’s nice and starchy and is great to have on hand to add to the sauce later), and then drain the pasta and set it aside. It will finish cooking in the oven later.

Heat butter and a drizzle of olive oil over medium high, and add the onions. Cook until softened and translucent.

img_7542

Add the flour and stir as it forms a paste. Let it cook for about 2 minutes, stirring the whole time.

img_7544

Then grab your whisk and slowly pour in 1 cup milk, whisking vigorously to avoid creating any lumps. Once this first addition of milk is incorporated, whisk in the rest of the milk. once all the milk is incorporated, you can trade in your whisk for a spoon if you like, and keep stirring as the sauce thickens.

img_7546

Once the sauce has thickened and coats the spoon thickly, stir in the cheese.

img_7549

Add the nutmeg, salt, pepper, Sriracha, and Dijon mustard at this point, tasting and adjusting to get the flavor you want. I ended up adding a lot more Sriracha than I initially planned. It’s just so good in here.

img_7553

By this time, the sauce had thickened a little more than I wanted it to. To get it back to that gooey creamy sauciness, I added a bit of the pasta water that I had set aside earlier. When the sauce consistency is to your liking, stir in the pasta and coat it completely in beautiful cheesy goodness.

img_7554

Pour the whole thing into a greased baking dish and spread it out evenly. Top with bread crumbs and drizzle with a bit of olive oil.

img_7556

Bake for 20-30 minutes, or until the sides are bubbling and the topping is browned and crunchy.

img_7563

Devour!

img_7564