Chocolate Crepes with Berry Yogurt Filling.

IMG_6996

INGREDIENTS

1 tbsp butter
1/3 cup semi-sweet chocolate chips
1 cup milk
2 eggs
1 tsp vanilla extract
scant 1/4 cup sugar
1 cup flour, sifted
1 cup frozen berries (of course, fresh would be great, too – your filling will just be chunkier)
1 cup Greek yogurt
squeeze of honey
water
cooking spray or butter
lemon juice

Just the Recipe link: Chocolate Crepes with Berry Yogurt Filling

DIRECTIONS

Put the butter, chocolate, and milk in a pot over medium low heat and bring to a simmer, stirring to start the chocolate melting. Remove from heat and continue to stir until everything is dissolved.

Crack the eggs into a bowl with the sugar and vanilla and whisk together. Then switch to a big spoon and stir in the flour. You’ll get an annoyingly-sticky paste that is hard to stir. Pour in the milk mixture and stir to combine. Let this batter sit for 30 minutes.

IMG_6974

To make the berry filling, put the frozen berries in a bowl with warm water to thaw out. I usually change the water once, just to move the thawing along a little faster.

IMG_6976

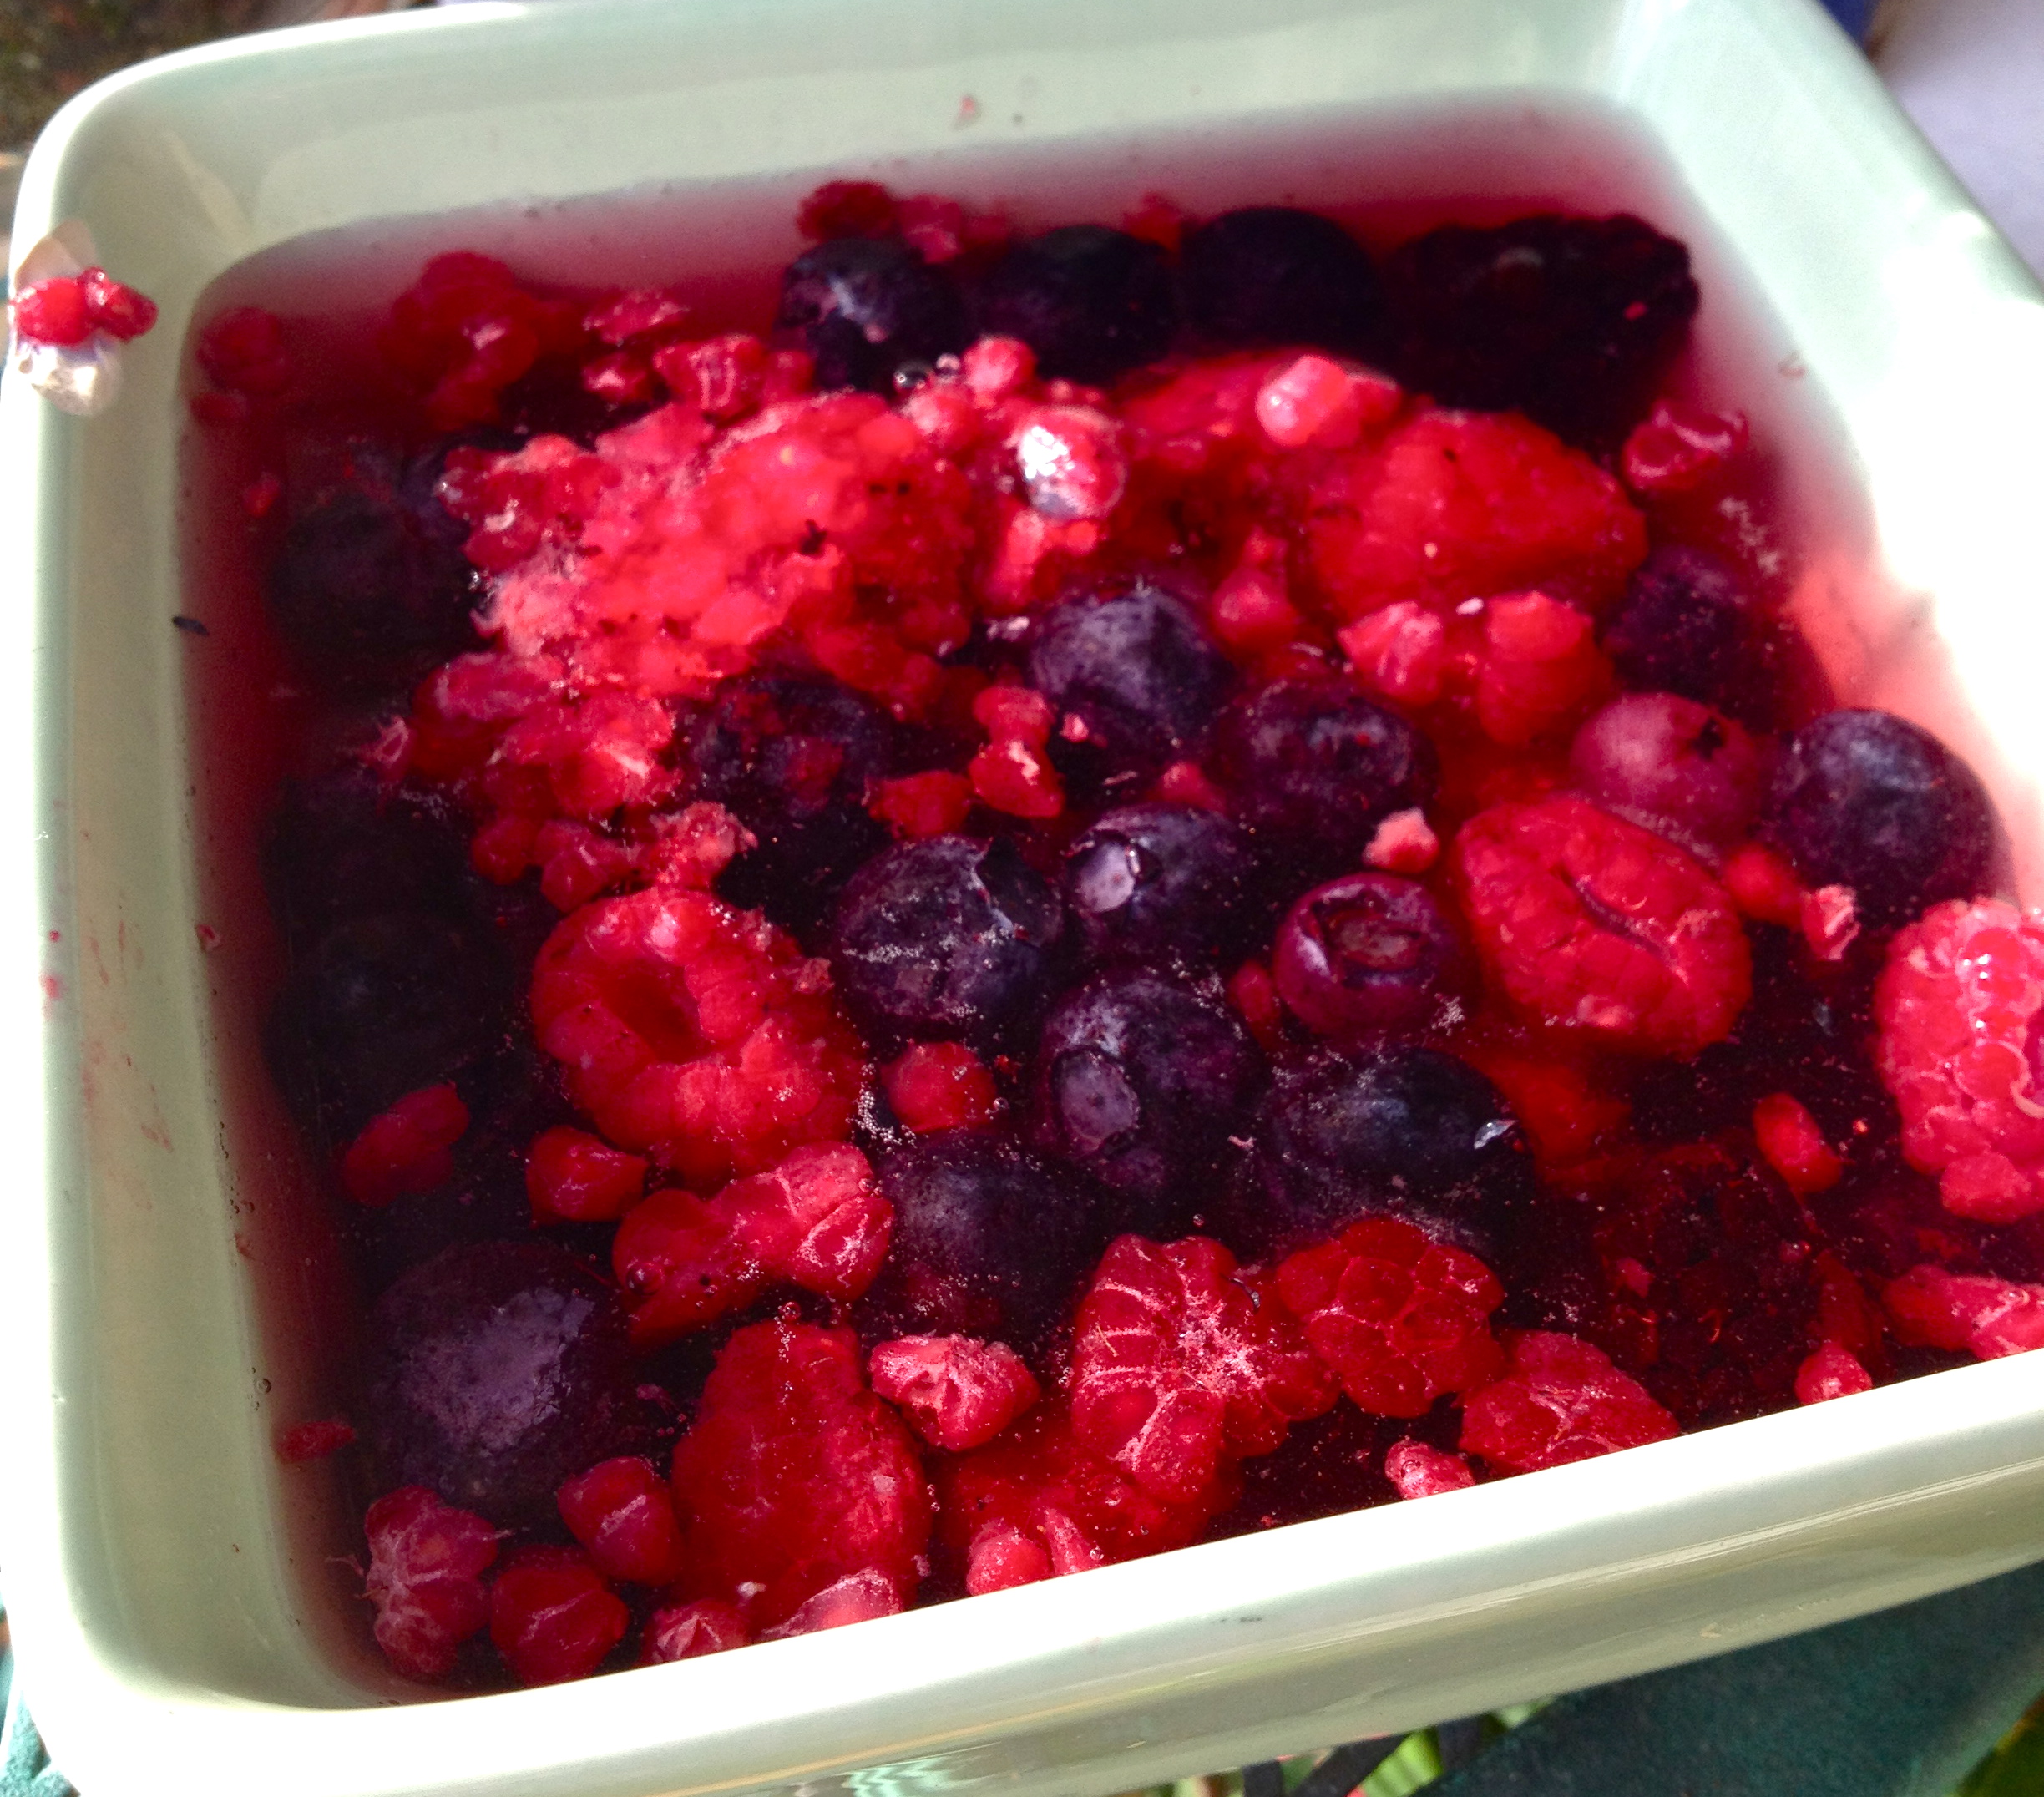
Then drain the berries and mix with the yogurt and honey. Set aside.

After 30 minutes have passed, pour the crepe batter through a mesh strainer to get some of the lumps out. This step isn’t absolutely necessary, but I find that no matter how careful I am about lumps, I always have some in my crepe batter, so I like to strain it.

IMG_6978

At this point, check your batter for consistency. We’re going for a pretty watery consistency, almost like whole milk. So add water, one tablespoon at a time, until your batter is the right consistency.

IMG_6984

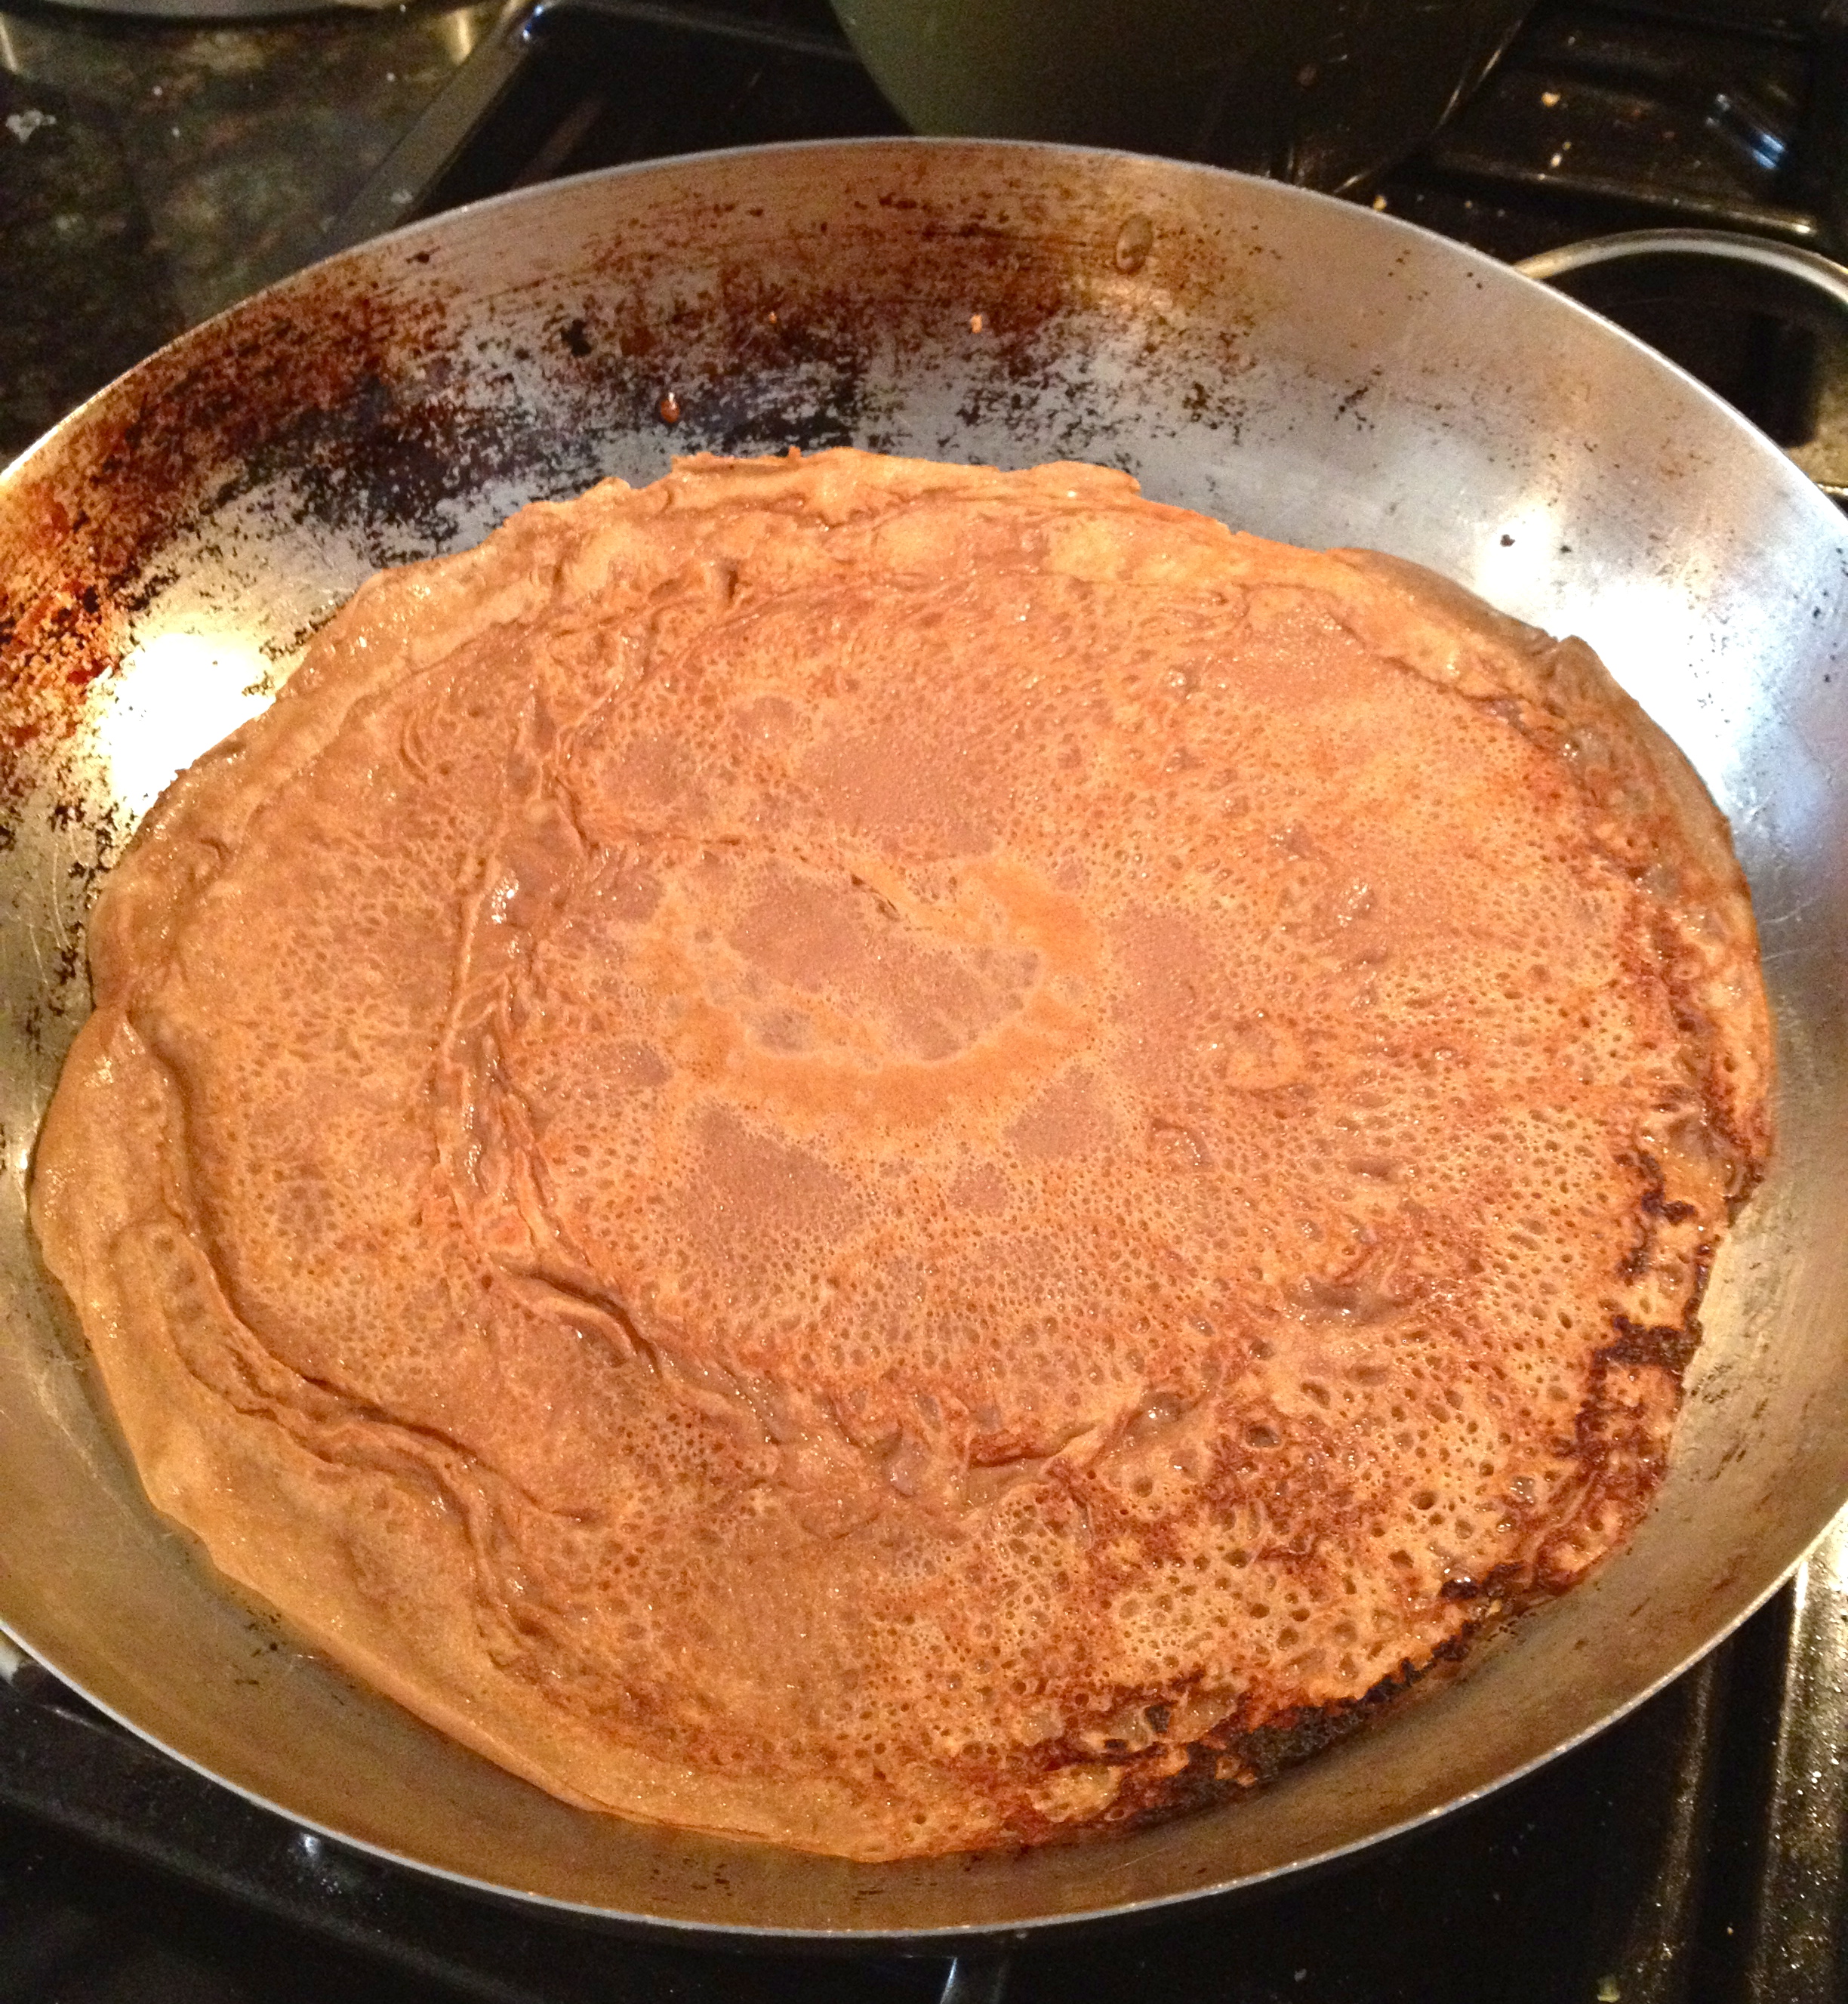
To cook, butter or spray a pan with cooking spray and heat over medium. Using a ladle or measuring cup, pour in a small amount of batter into the center of the pan and immediately swirl around to the edges of the pan. The first crepe is notoriously a failure, so don’t feel bad if your first one looks like this:

IMG_6988

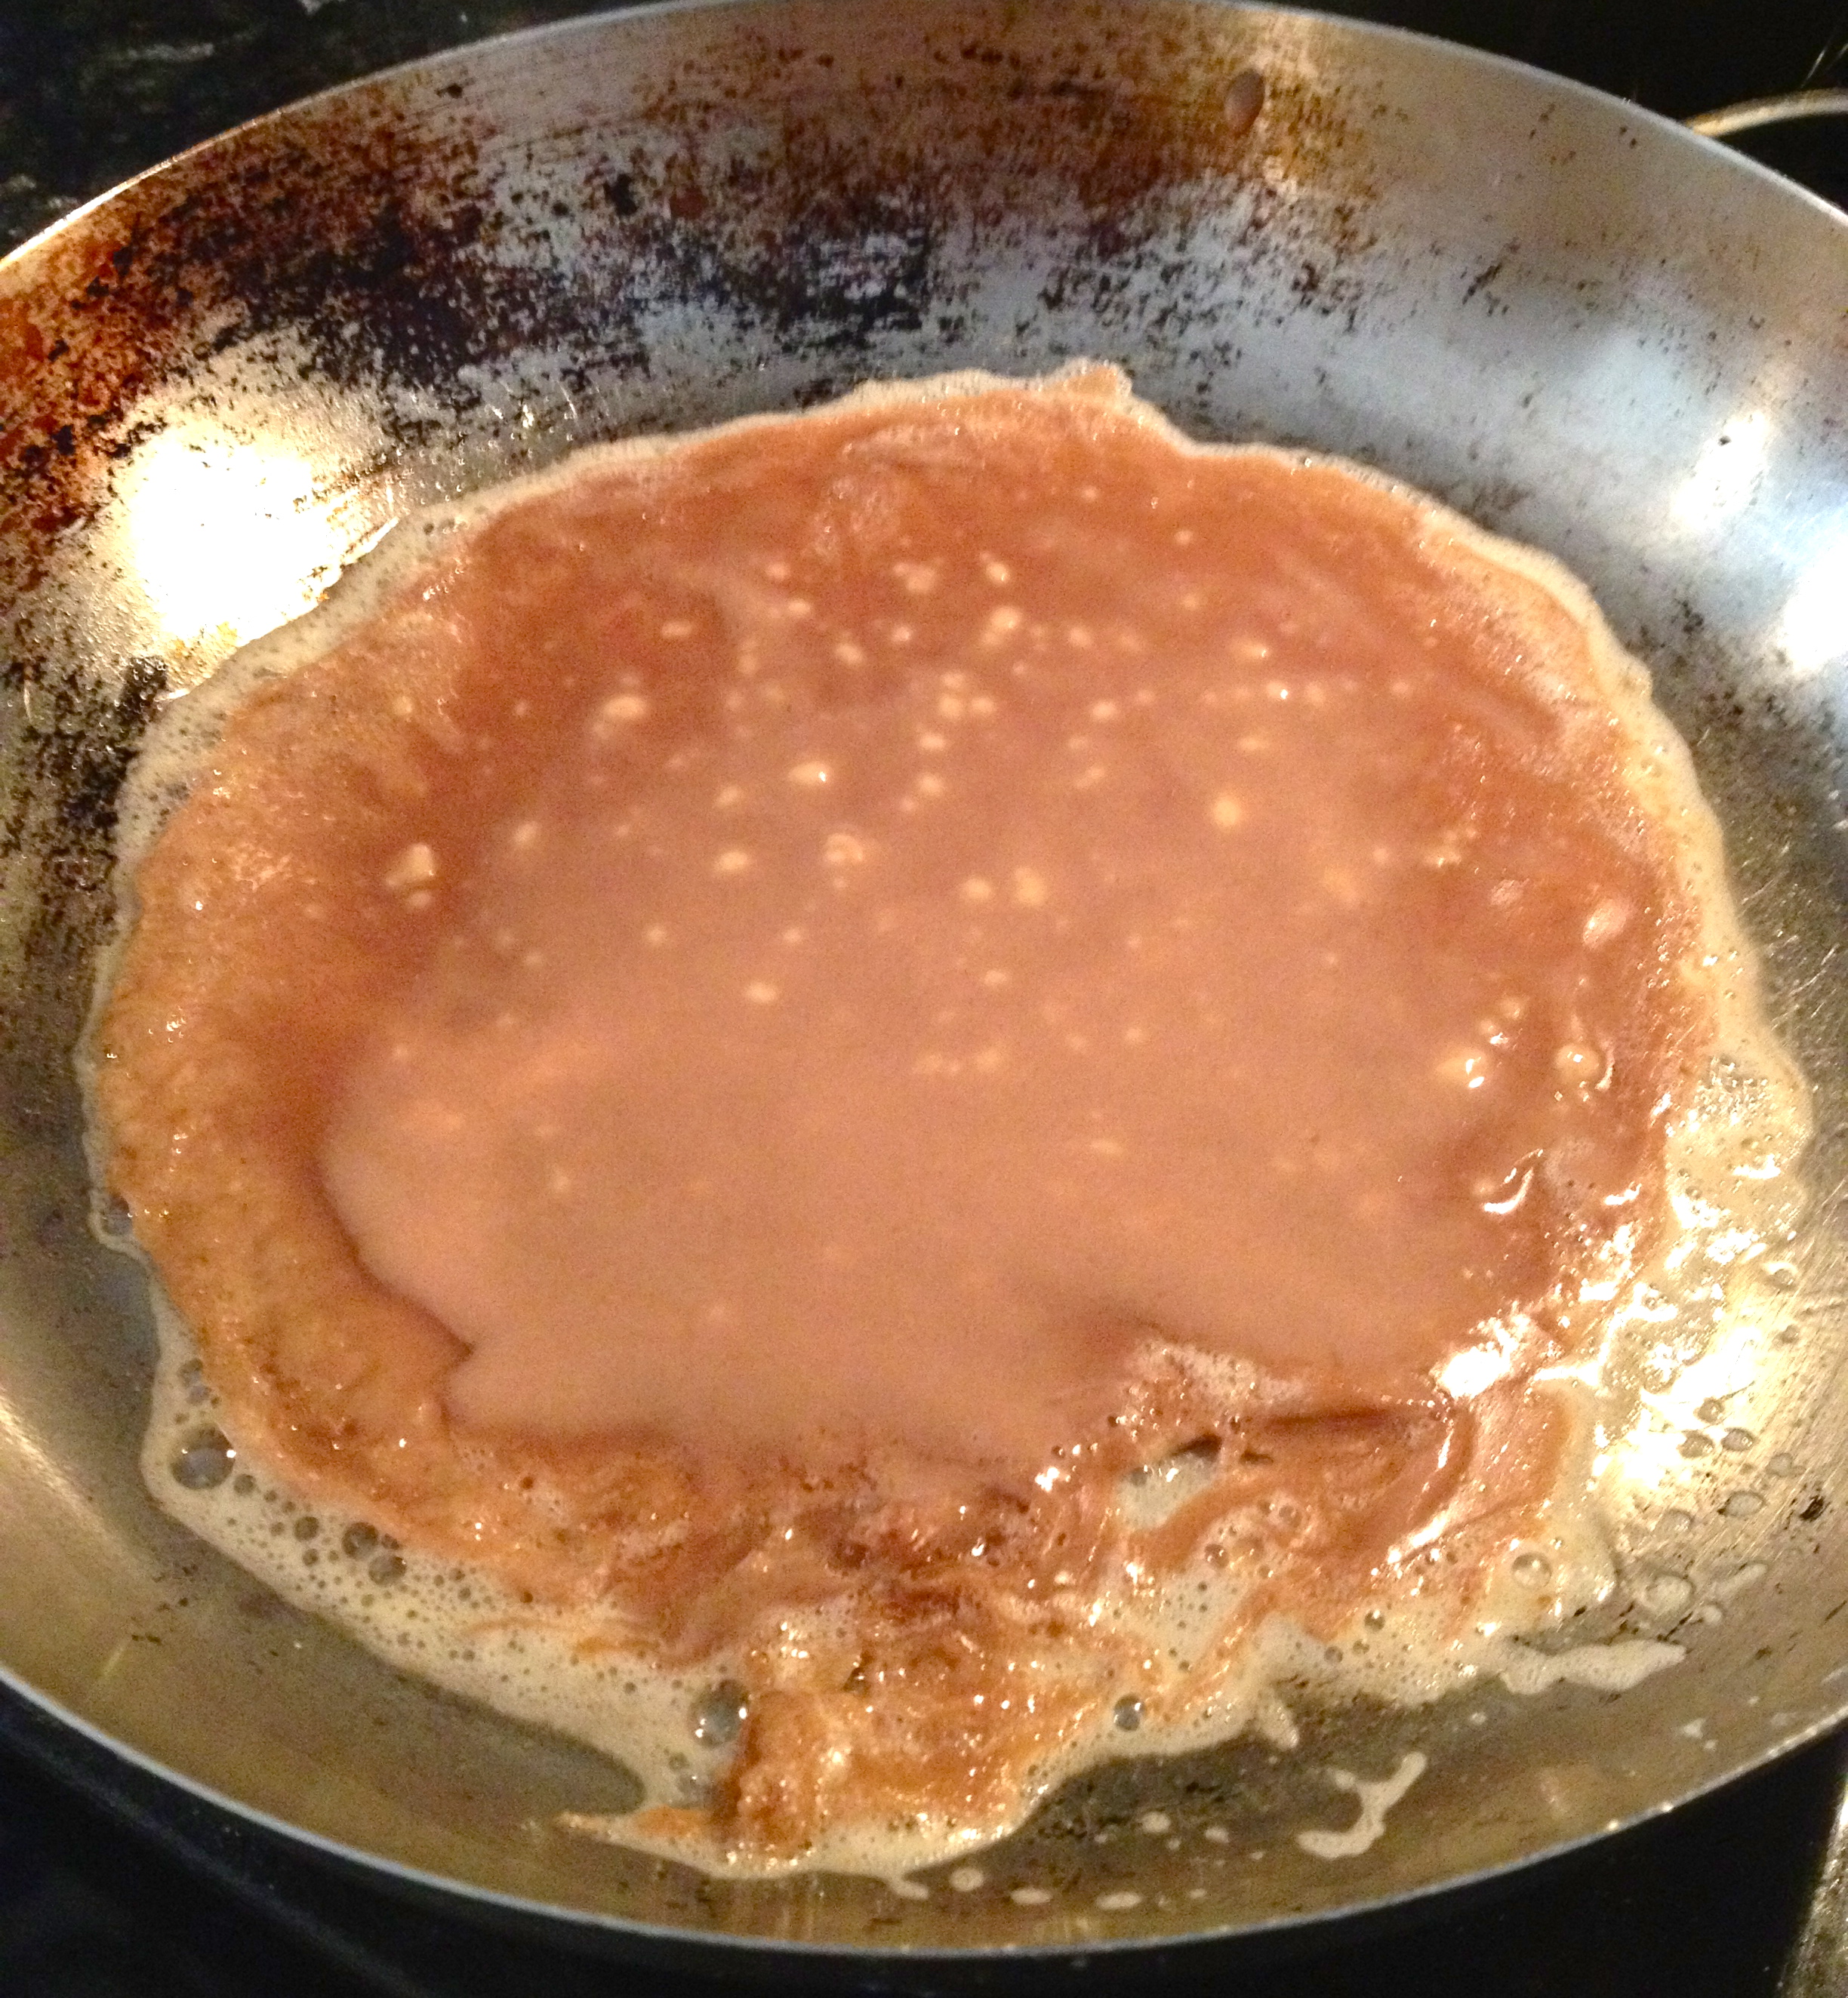
The French say to give the reject first crepe to the dog. Since these have chocolate in them, I figured Penny’s little tummy wouldn’t appreciate it, so I ate the ugly one, because my tummy does appreciate it. Regardless, the next few should work out better.

IMG_6990IMG_6991

Once all the crepes are cooked, fill them. The two usual ways are to dollop the filling down the center of the crepe (the diameter, if we want to get geometric), and fold each side over to the center, like this:

IMG_6993

Or to spread the filling over one quadrant of the crepe (can breakfast foods have quadrants?), fold it in half, and spread over the crepe layer that sits on top of the filled quadrant and fold again (that sounds confusing….just look at my picture):

IMG_7007

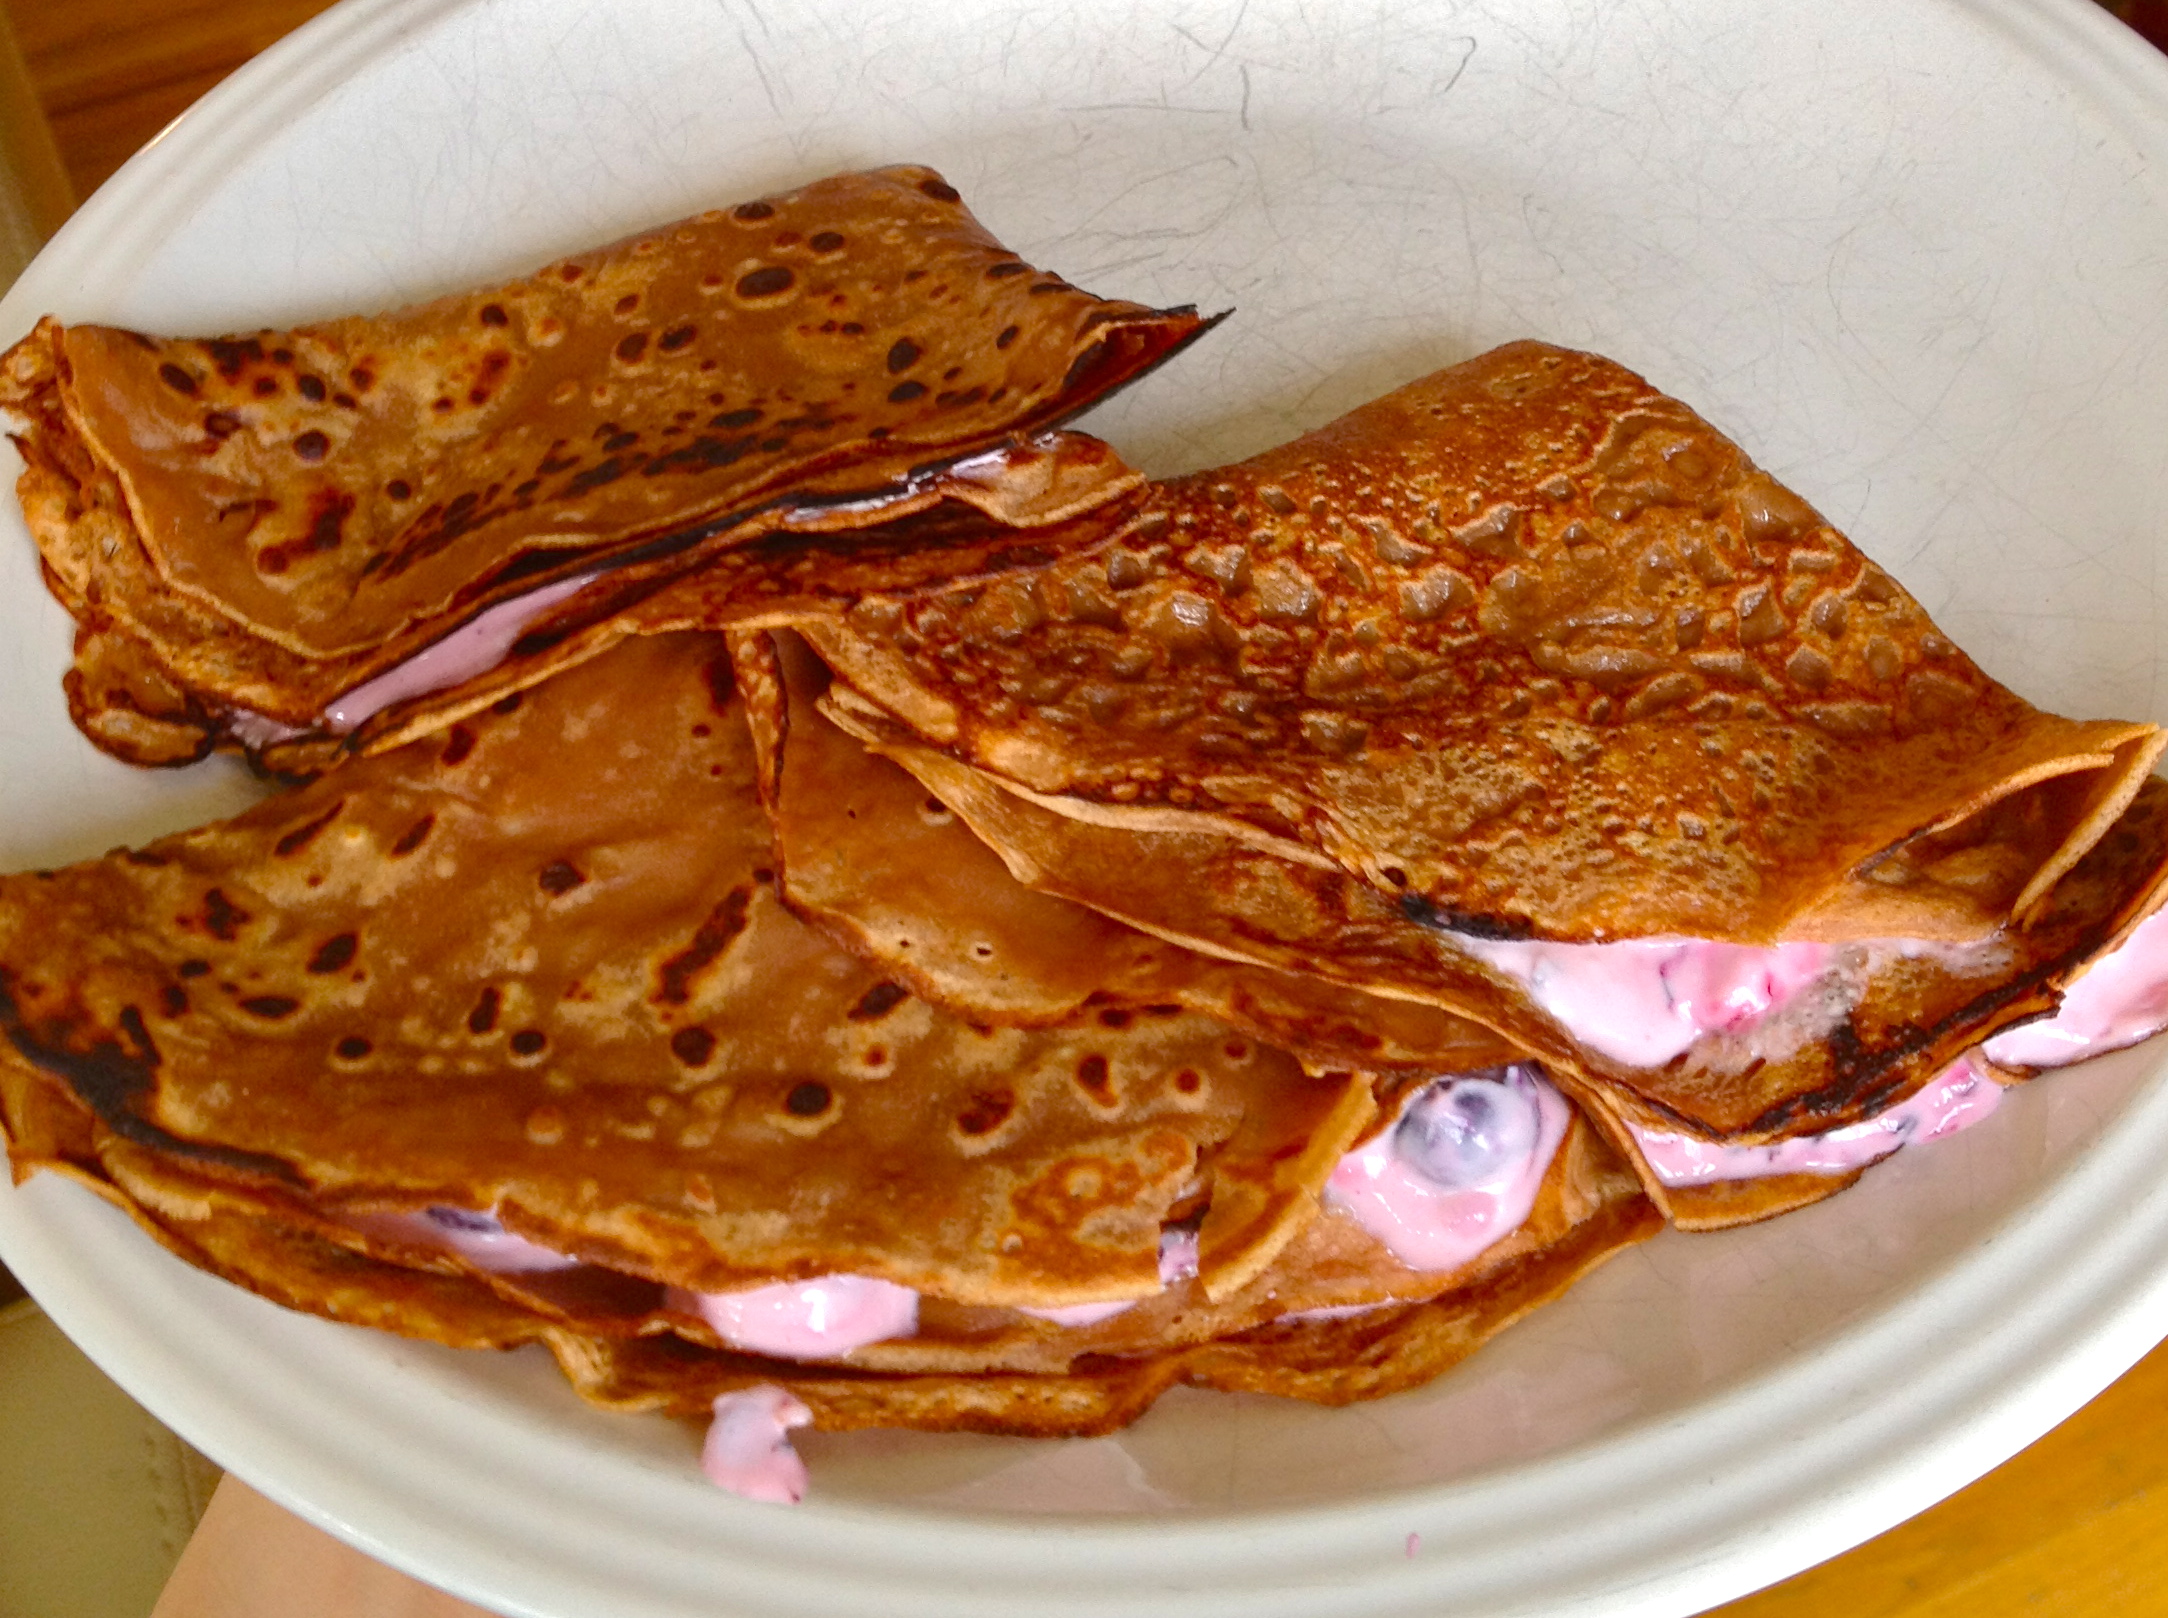
To finish, drizzle with a squeeze of lemon. Dust with powdered sugar if you like – we were too hungry and ate them up before I could go rustling through the baking cabinet.

Back from Scotland! and a Strawberry Custard Tart Recipe.

Hello again! I am safely returned from an amazing adventure in Scotland. Good whisky, otherworldly fish and chips, fun people, and gorgeous hills and sky everywhere you look—not to mention, my calves still burn with the effort (and satisfaction) of summiting Ben Nevis, the British Isles’ tallest mountain. Here are a few highlights of the trip (culinary and otherwise)…

First, some gorgeous sightseeing with my family, who hosted me for a night of authentic Scottish food and great fun!

Then in Edinburgh, my fabulous traveler friend Caroline and I met up. We had a very tasty breakfast and great cup of tea at an adorable cafe called Urban Angel (note the butter portion):


My first souvenir purchase was, of course, Nigella Lawson’s new book Nigellissima (which I love with every centilitre of blood in my body, despite the book’s use of the metric system).

We tried haggis

…and devoured it!

And we couldn’t say no to my favorite Irish late-night classic, garlic cheese chips:

One of my favorite parts of the trip was our visit to the battlefield at Culloden Moor near Inverness. Not only was it very moving and historically cool, but you could pretty much turn your camera in any random direction and still end up with a gorgeous photo:

Then in Fort William, we befriended an Aussie and a Kiwi, and together we climbed Ben Nevis in a rather impressive 6 hours flat! I’m pretty proud of us. Fans of The Simpsons will appreciate the similarities between Ben Nevis and Springfield’s Murderhorn (“yes, that’s it….just to the right of the one you’re looking at.”) Who needs PowerSauce Bars?

And another favorite moment was our glorious high tea at Stewart Victorian Tearooms in Glasgow. Mmmmm. Clotted cream.

It was a fantastic trip.

But my hands were itchin’ for the kitchen by the time I got home, and this was the first treat I prepared: my own birthday custard fruit tart. This tart is inspired by a custard from Laura Calder and a shell from Ina Garten, and it’s every bit as good as you’d expect a dessert from those two to be. It was super easy even though I did make the shell myself, but if you really want to streamline the whole process, you can buy a premade pie shell and simply cook the custard and top with berries. Creamy and light and a great alternative to birthday cake!

INGREDIENTS

for tart shell:
12 tbsp cold butter
1/2 cup sugar
1/2 tsp vanilla extract
1 3/4 cups all-purpose flour
pinch of salt
water, if needed

for filling:
3 eggs
1/4 cup sugar
splash of vanilla
1 scant cup Greek yogurt
pinch of ground nutmeg
2 cups strawberries, sliced
lemon juice

DIRECTIONS

First, prepare the tart shell. In a food processor, pulse butter and sugar until just combined. Add the vanilla and pulse. Then combine the flour and salt in a bowl and add in two batches, pulsing until just combined. The dough should just hold together when pressed, so if it doesn’t at this point (mine didn’t), add a few drops of water and pulse until it reaches the right consistency. Turn the dough out onto wax paper and press into a disc. Wrap in paper and let it rest in the refrigerator at least half an hour.

Take the cold dough and carefully roll it out to to the size of your greased tart tin or pie dish. Press the dough into the dish and up the sides. Put it back into the fridge for 30 minutes.

Preheat oven to 350 F. Take the tart shell out of the fridge and carefully lay a sheet of parchment paper over the dough. Fill the parchment-lined shell with dried beans, or fit another smaller pan into the shell. This will help it keep its shape while it bakes.

Bake for 20 minutes, then remove the beans or pan and use a spatula to touch up any thin or slipping parts of the shell base or sides. Prick a few times with a fork and place it back in the oven to cook another 13-17 minutes until golden brown.

Remove shell from heat and set aside to cool slightly while you prepare the custard. Whisk together eggs and sugar. Then add vanilla and yogurt and stir until smooth.

Pour the custard into the shell through a sieve so that it’s totally smooth. Sprinkle with a pinch of nutmeg.

Bake 18-24 minutes, until set. Let cool completely.

When the tart is completely cooled, arrange the strawberry slices on top of the custard. Top with a squeeze of lemon juice and enjoy! Happy birthday to me.

Apple Walnut Cake.

Many many thanks to fantastic art director and mi amiga Vanessa Palacio for photographing this cake for me! These are by far the most expert and mouth-wateringly gorgeous shots that have graced KellyintheKitchen. And not only that, but she also picked the apples herself on a recent apple orchard excursion, so muchas muchas gracias a ti, Vane!! We got together on Sunday at my apartment to bake this yummy apple walnut cake, inspired by a similar recipe from smitten kitchen. It’s a pretty unique cake—we loved that instead of butter, this recipe calls for olive oil and lemon-flavored yogurt, which really changes the texture and makes it super moist and soft. After all our hard cake-prep work, it was quite a struggle waiting for our pastel de manzanas y nogales to finish baking, but once it was done (and had posed for its close-up), each bite was everything we dreamed of and more. Nos gusta comer manzanas.

INGREDIENTS

1 cup sugar
1/4 cup packed brown sugar
4 eggs
1 cup lemon yogurt
1 tbsp vanilla extract
2 1/4 cups all-purpose flour, sifted
1 1/4 tsp baking powder, sifted
1/2 cup plus 2 tbsp olive oil (NOT extra virgin)
3 apples, peeled, cored, and diced
1/2 cup walnuts, toasted and chopped
1 tsp cinnamon

DIRECTIONS

Preheat oven to 350 F.

Beat the sugar, brown sugar, and eggs until totally smooth and incorporated. Stir in the yogurt and vanilla.

Sift the flour and baking soda in a bowl. Alternate adding half the flour mixture and half the oil, stirring between each addition.

Then fold in the apples and walnuts.

Pour into a greased springform pan and shake from side to side, to distribute batter evenly. Sift the cinnamon over the cake.

Use the handle end of your spoon to swirl the cinnamon into the top of the batter.

Bake for 55-60 minutes until the top of the cake is golden brown and springs back when you press it gently. If you find that a toothpick inserted into the cake never comes out clean, don’t worry—the toothpick test doesn’t work with this cake. It’s too moist!

Dust with powdered sugar…

…and enjoy!

Baked Apples.

Baked apples were one of the first desserts I ever baked up all on my own; I’ve probably been making these, with variations here and there, for ten years. Read: they’re incredibly easy. I made them ahead of time and left them to sit for a few hours before popping them in the oven. It’s also a super versatile recipe, because you can mix up a filling out of whatever you have on hand. This version has a filling made of oats, cranberries, and almonds, and a creamy cinnamon vanilla yogurt topping, but really any kind of nut and any kind of dried fruit will do. It’s a great way to use up any leftovers from your apple-picking harvest!

INGREDIENTS

for apples:
4 apples, cored, with a little slice off the bottom so they have a flat base to stand on
1/4 cup old-fashioned oats
2 heaping tsp brown sugar (I used white sugar because we were out of brown, and it was almost as good)
1/4 cup dried cranberries
1/4 cup roasted salted almonds, ground
1/8 tsp cinnamon
4 pats butter (or use earth balance for vegan baked apples)

for topping:
1 cup vanilla yogurt
1/8 tsp cinnamon

DIRECTIONS

Preheat oven to 325 F.

Combine oats, sugar, cranberries, almonds, and cinnamon in a bowl.

Stuff each apple with the filling. Really pack it in. Then top each apple with a pat of butter and place in a dish.

Cover the apple dish with foil and bake for forty minutes. Then remove the foil and bake another ten minutes.

Mix up the yogurt and cinnamon and dollop over the apples. Enjoy!

Naked Apple Tart.

Crinkly leaves, still attached to the tress, bristling as the wind moves. Staggering your gait so that each footstep crunches an acorn. A season of transition: from breezy summer to homey fall warmth. At this time of year, I have an uncontrollable urge to bake—and thank goodness my mother and sister are nearby to help me with the eating! This hybrid tart-galette, inspired by a similar smitten kitchen recipe, is a rustic apple and nut dessert that I’ve gussied up a bit. A brush of butter, a sprinkle of sugar, and a coating of pink spiced apple syrup—this on top of melt-in-your-mouth apples, nestled on a bed of sweet ground nuts. It’s a “naked tart” because the apples are the centerpiece here, with very little dough. For me, galettes tend to be too crust-heavy, so this tart is my compromise. And whether you’re describing or eating it, that’s quite a mouthful.

INGREDIENTS

crust:
1/2 cup all-purpose flour
1/4 tsp sugar
pinch of salt
3 tbsp cold butter, cubed
2 tbsp cold water

filling:
2-3 apples, peeled, cored, and sliced (save the peels and cores)
squeeze of lemon juice
1/8 tsp cinnamon
1/4 cup walnuts
1/4 cup almonds
1 tsp all-purpose flour
2 heaping tbsp sugar, divided
1 tbsp butter, melted

glaze:
the reserved peels and cores from the apples
1/4 cup sugar
pinch ground ginger
pinch nutmeg

DIRECTIONS

First, the apples. In a mixing bowl, toss the slices with lemon juice and cinnamon. Set aside.

In a mixing bowl, combine flour, sugar, and salt. Add the cold butter to the bowl and combine using the tips of your fingers. Little lumps are okay.

Stir in the cold water, little by little, until the dough just holds together. Form it into a disk, wrap it in plastic wrap, and refrigerate 1 hour.

To make the almond filling base, pulse nuts, flour, and sugar in a food processor until finely ground.

Preheat oven at 400 F. Take the dough out of the fridge and let it sit for 5 minutes, to bring the temperature down a bit so that you can work with it. Place it on a floured surface and roll it out to a thin thin circle, slightly larger than the size of the pan you’re using. Lay it in the pan.

Spread the nut mixture over the bottom of the crust.

Now, lay the apples in an overlapping spiral. I suggest putting the less-asthetically-pleasing slices on the bottom layer, quietly tucked out of sight. Fold any extra dough up and over the sides of the apples (there won’t be much–this is a naked galette, after all). Brush crust and apples with 1 tbsp melted butter, sprinkle with sugar, and pop in the oven. Cook about 45 minutes, rotating every 15 or so. If you find that the slices of apple are browning too quickly (I did!), cover the pan with a sheet of foil, and just remove the foil 10 minutes or so before you take the pie out, so it can finish browning up.

While the tart cooks, prepare the syrup topping. In a saucepan, combine apple peels and cores, sugar, nutmeg, ginger, and just enough water to cover them. Simmer for about 25 minutes, then remove from heat and strain out the pieces.

When the crust is golden brown, remove from the oven and cool for 15 minutes. Then brush all over with the spiced apple syrup.

Serve as is, or with a scoop of vanilla ice cream. Yummy.


One final note: it’s never too early to start baking in your Christmas apron.

Maple and Orange Marmalade Cookies.

Yesterday I posted a goodbye-to-summer cocktail. Today I’m posting a hello-to-fall cookie. Now that I’m thinking about it, apple pie would probably be the most appropriate late summer/early fall baked good, but to me, maple syrup and fall just go together. Why is that? Maybe it’s the tree connection, I’m not sure. But I do know that these cookies, from a sweet beet & green bean recipe, make me want to cuddle up with a warm blanket and a hot cup of tea and watch the leaves change. Fall is cozy and comforting and so are these cookies, so get excited – my favorite season is on its way!

INGREDIENTS

for cookies:
1 stick butter, room temperature
1/2 cup brown sugar, packed
1/2 cup maple syrup
1 tsp cinnamon
1 tsp powdered ginger
1 generous tsp vanilla extract
3/4 cup all-purpose flour
3/4 cup, plus 3 tbsp whole wheat flour
1 tsp baking powder
healthy pinch of salt

for glaze:
2 tbsp orange marmalade
1/3 generous cup powdered sugar
splash or two of water

DIRECTIONS

Preheat oven to 350 F.

Stir together butter, brown sugar, syrup, cinnamon, ginger, and vanilla in a mixing bowl until combined. If you’re as impatient as I am and your butter hasn’t softened all the way, no worries. Then gently mix in the egg.

In a separate bowl, sift together flour, baking powder, and salt.

Add the dry ingredients to the wet in 3 batches, stirring to full incorporate between each addition.

Using a spoon, scoop the dough in small knobs onto a cookie sheet, either floured or lined with parchment paper. They’ll spread out a bit, so leave some room between each one.

Bake for 10 minutes, then turn the pans around for the final 2-4 minutes of bake time. They’re done with the outsides have just barely started to brown.

While the cookies cool, mix up the glaze. First combine the marmalade and powdered sugar. Then slowly add water until it’s thin but still spreadable.

When the cookies have completely cooled, spread or brush the glaze over each one. Let the glaze harden a bit before packing them up. Share them and get ready for a change in the seasons!