Toasted Marshmallow Coffee Brownies.

My many experiments in non-traditional baking have had mixed results—sometimes they turn out delicious, sometimes they are horrible failures, and sometimes they’re surprisingly, differently good. Because I’m lucky enough not to have any food allergies (*knocks on wood*), I’ve tried a lot of different methods, including gluten-free, grain-free, low-sugar, low-carb, and always with as little processed foods as possible. I feel experienced enough now to say that most of these substitution-based recipes are only better than the original if you have no other options (or are totally delusional). It’s the hard truth about healthy desserts.

The results definitely range though, depending on the baked good, and I think cookie recipes are the worst offenders. No matter what healthier option you try to sub in or out, there is no cookie better than the one on the back of the Toll House bag (that recipe is nearly perfect, by the way – if you use a little less flour than called for, and a little more vanilla and brown sugar, you’ll have the ABSOLUTE perfect chocolate chip cookie).

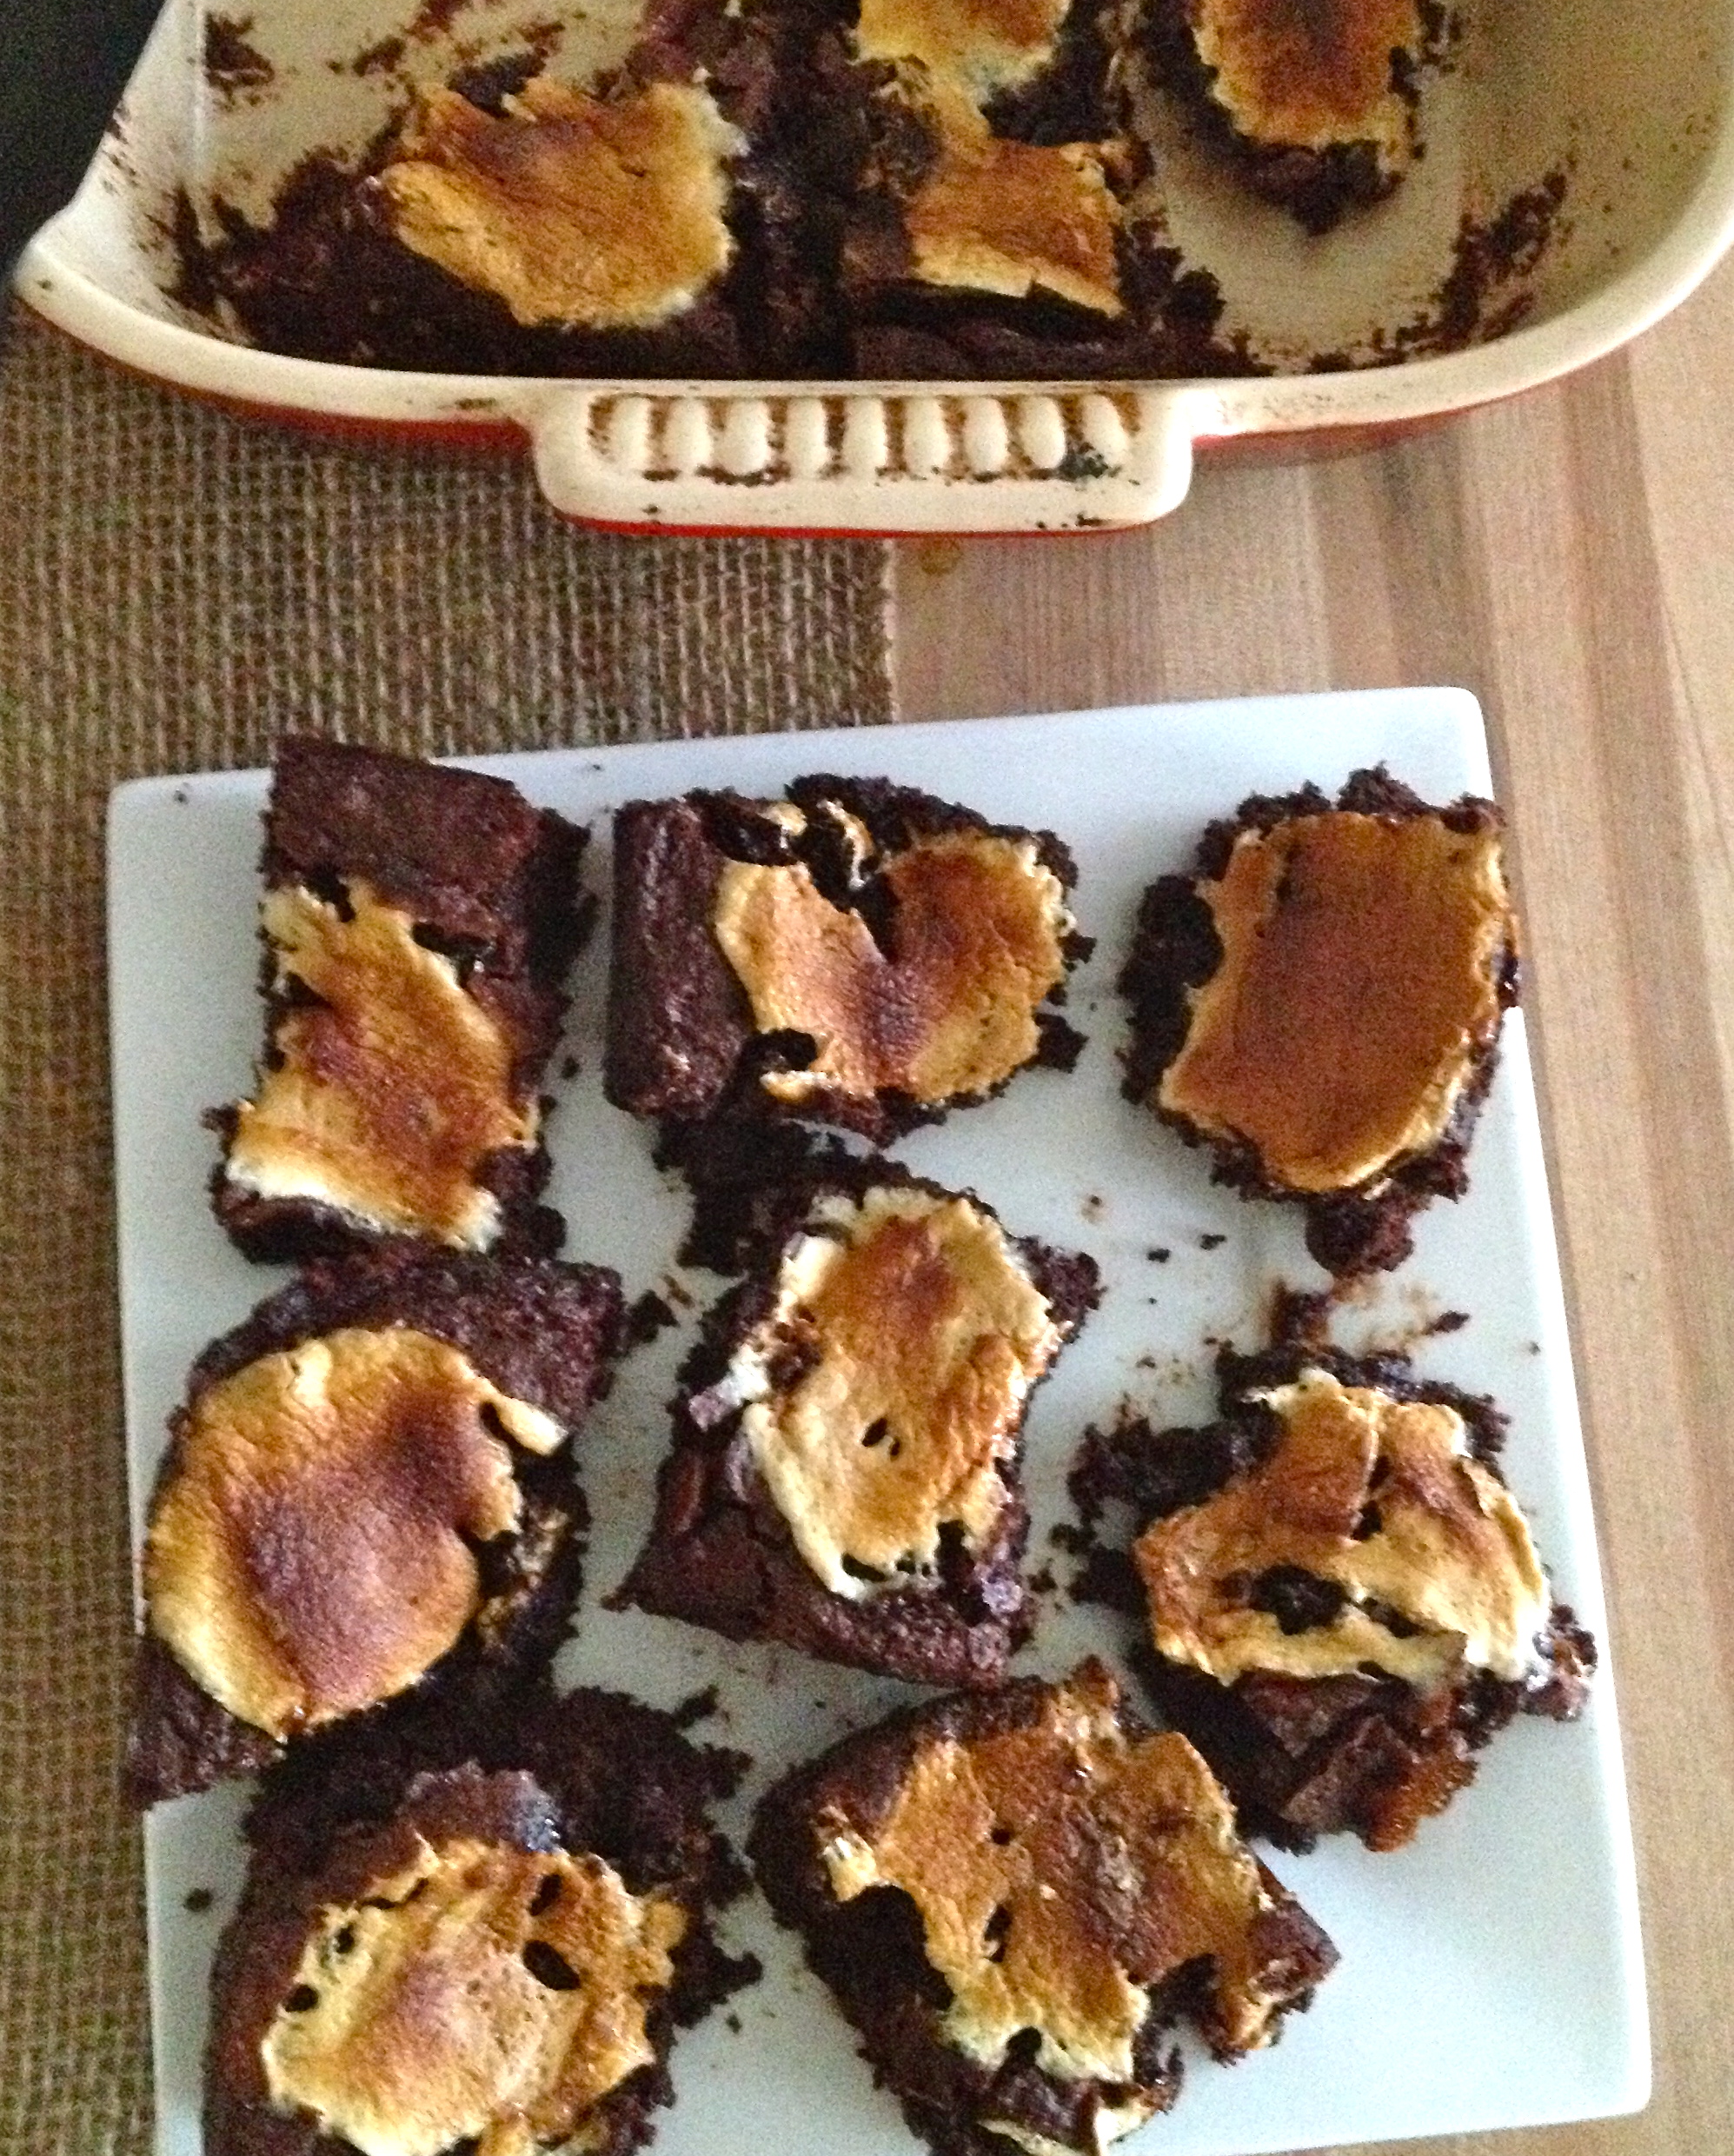
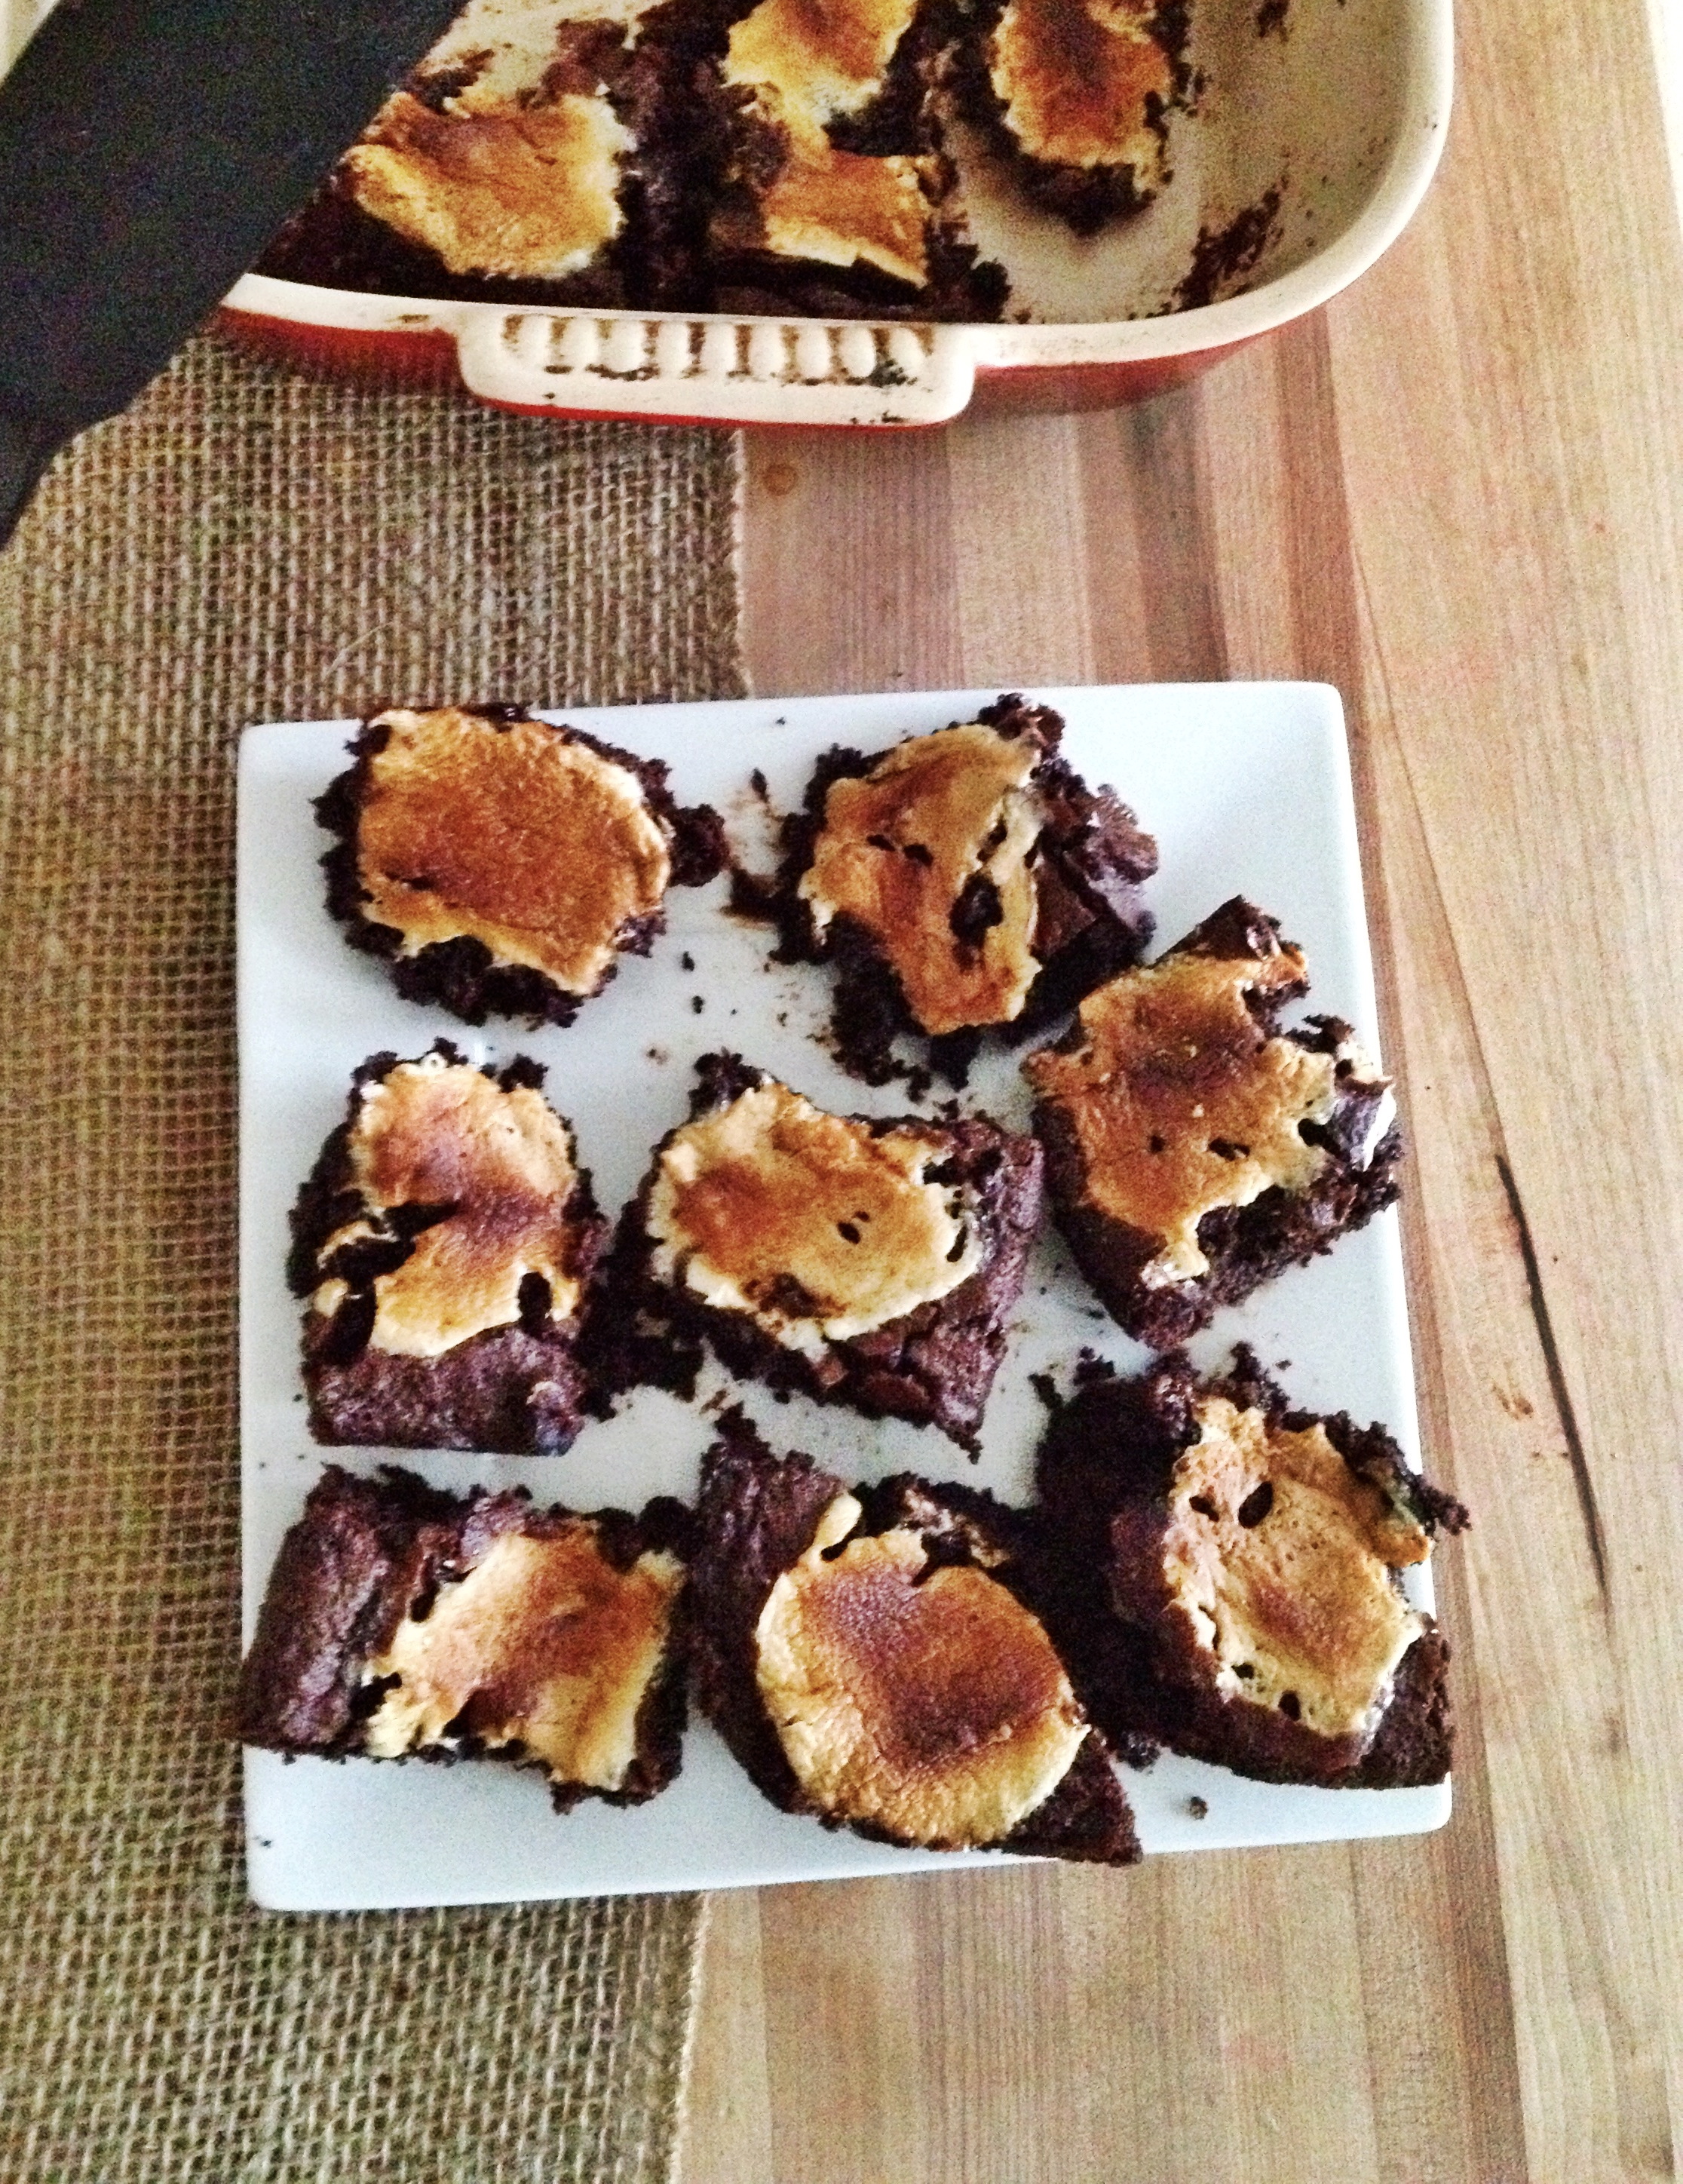
Meanwhile, I’ve found that brownies are the most flexible when it comes to subbing. For whatever reason, they can take a replacement here and there and still turn out totally delicious. That’s what we have here – a gluten-free, grain-free, soft and chewy chocolatey brownie recipe, with a little something special on top. I’d put these crumbly goodies up against any other brownie recipe I’ve made! What a wonderful taste test that would be…

IMG_1535

INGREDIENTS

6 tbsp butter
1 cup semisweet chocolate chips
2 eggs, room temperature
1/3 cup hot coffee
splash of vanilla
1/2 packed brown sugar
1/4 cup unsweetened cocoa powder
2 packed tbsp coconut flour
3 tbsp potato starch (I haven’t tried it, but corn starch should work here, too)
1/2 tsp baking soda
1/4 tsp salt
about 14 jumbo marshmallows

DIRECTIONS

Preheat oven to 350 F.

In a double-boiler, melt the butter and chocolate chips together until smooth. Remove from heat and let cool slightly before stirring in one egg at a time, followed by coffee, vanilla, and brown sugar.

Sift together cocoa powder, coconut flour, potato starch, baking soda, and salt. Stir dry ingredients into batter and pour into greased 8×8 baking dish.

IMG_1506

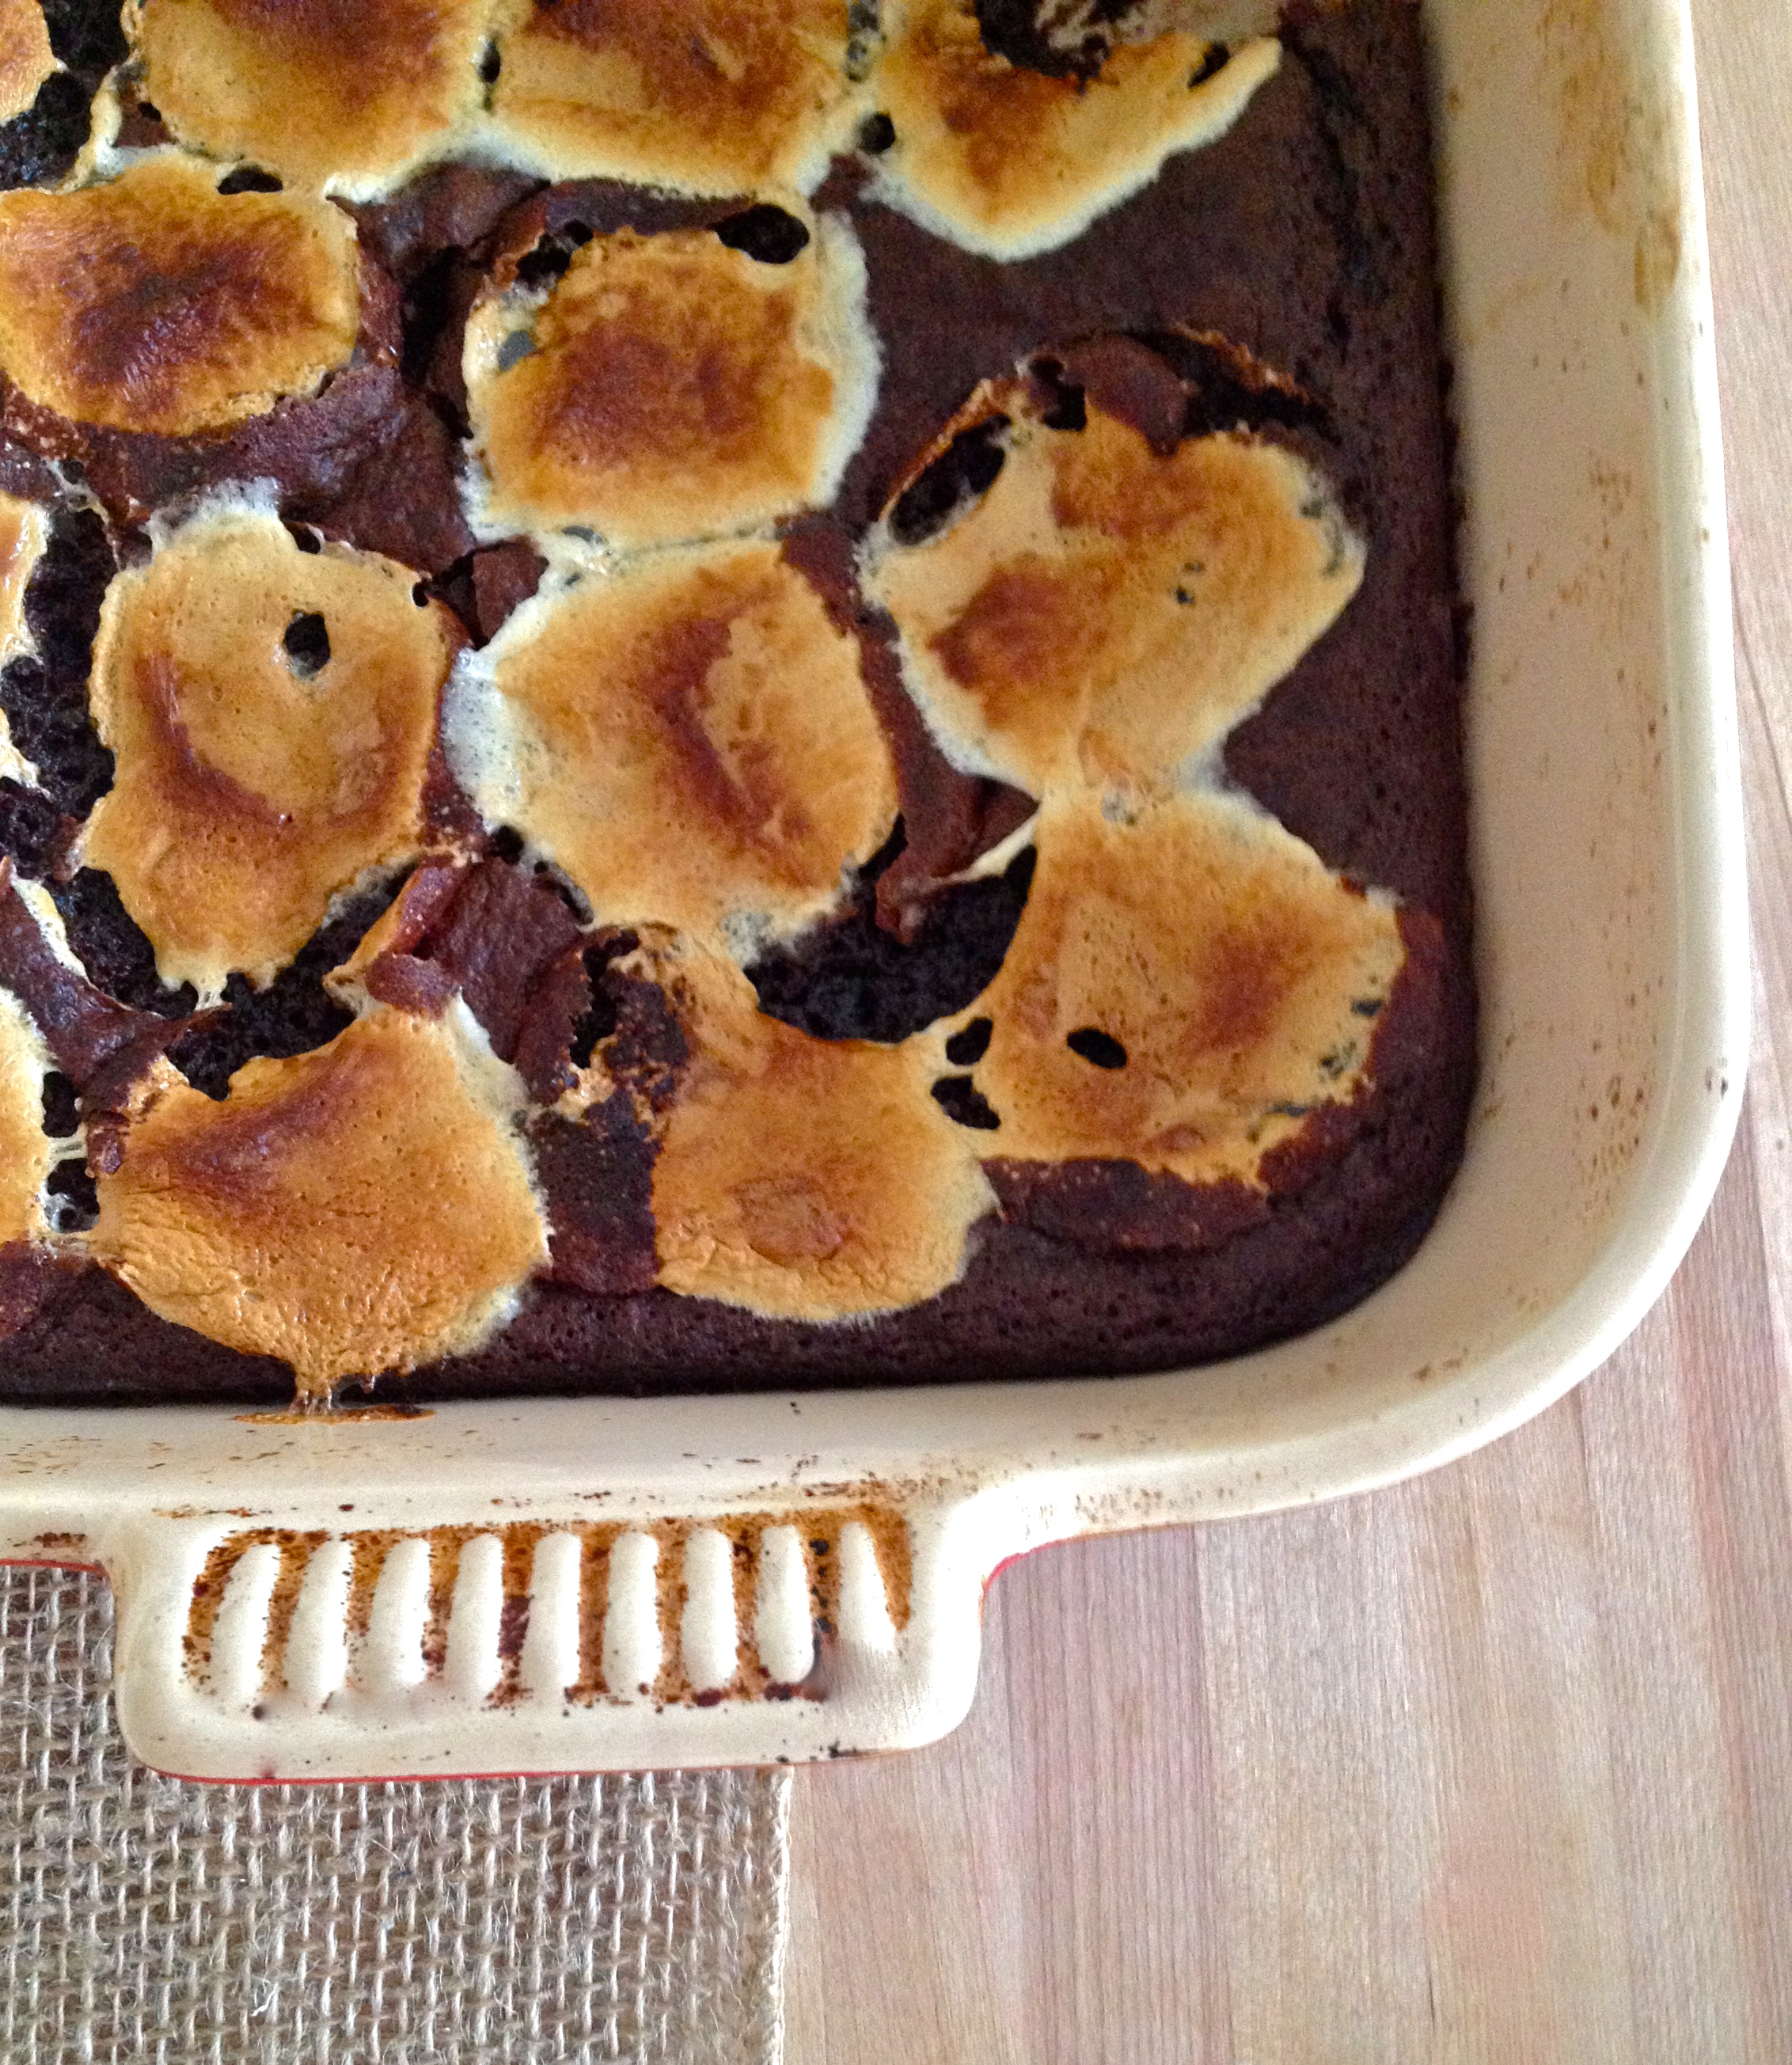
Dot the surface of the batter with marshmallows. Love those cute & fluffy little pillows.

IMG_1518

Bake for 25-30 minutes, until the center is set. If you stick a toothpick into the center, it doesn’t need to come out totally clean, but it shouldn’t be wet. Be conscious of the marshmallows burning; I ended up tenting a sheet of foil over the pan to slow the browning partway through the bake time. When the brownies are baked, remove them from the oven.

IMG_1529

As they cool, the brownies and marshmallows will deflate and fall a little bit. Good, the more condensed the better! If you’re planning to cut the brownies into nice neat squares, you may want to adjust your expectations, because these are gooey and crumbly. You’ll want to cool them at least an hour, if not more, and potentially give them some fridge time to firm up if you need them to really hold together. If you don’t mind a crumbly brownie, then ignore me and eat them whenever you want. They’re dang delicious!

IMG_1534

Advertisement

Glazed Apple Bundt Cake.

First, let me mention that you don’t need a bundt pan to make this cake. That said, bundt cakes are adorable. I’ve admired them from afar for years, but I never owned a bundt pan myself…until now. This year, I asked my maternal Santa for one, and when I woke up on Christmas morning, there was a beautiful ornate bundt pan under the tree with my name on it! Here is the link to my bundt pan. Isn’t it a glory?! It’s like something out of Beauty and the Beast. I think there will be a lot of bundt-baking in my future. And if this first foray is any indication, beauty and taste definitely go together, because it tastes as good as it looks. Inspired by a recipe from The Bite Sized Baker, the addition of shredded apples and Greek yogurt keep this cake moist and almost creamy, and a sweet maple glaze is both figuratively and literally the icing on the cake. Please come to my apartment for tea and take this cake off my hands before I eat it all. Thank you.

IMG_0464

INGREDIENTS

for cake: (makes about 6 cups of batter)
8 tbsp (1 stick) butter, room temperature
1 1/2 cups light brown sugar, packed
2 eggs
1 tsp vanilla extract
1 cup Greek yogurt
2 cups all-purpose flour
1 tsp baking soda
1 tsp ground cinnamon
1/2 tsp salt
about 2 cups apples, peeled, then shredded in a food processor or grated by hand (I used 3 Granny Smith apples)

for glaze:
2 tbsp butter
1 1/4 cup powdered sugar
2 tbsp maple syrup
about 1-2 tbsp water

Just the Recipe link: Glazed Apple Bundt Cake

DIRECTIONS

Preheat oven to 350 F.

Cream together the butter and brown sugar, until smooth. Add the eggs one at a time, beating between each addition until incorporated. Then stir in the vanilla extract and yogurt.

In a second bowl, sift together the flour, baking soda, cinnamon, and salt. Add half the flour mixture to the butter mixture and stir until just incorporated. Then add the second half of the flour mixture and stir, again just until it comes together. Don’t overmix. Finally, stir in the shredded apple until it’s distributed throughout the batter. It should smell pretty amazing at this point.

Pour the apple-y batter into a greased bundt pan (if you don’t have one, a loaf pan or even a springform cake pan will work too). Don’t over-fill the pan, as the cake will rise as it bakes. Two-thirds filled is a good rule of thumb for bundt pans, and for my pan, that means about 6 cups. Which is how much batter this makes!

IMG_0434

Put the pan in the oven and bake 35-45 minutes, until the center of the cake is set but still moist and tender. You know the toothpick test? The one where you poke a toothpick into the center of your cake to see if it comes out clean, thereby showing that your cake is done? Well, bundt pans are very deep…too deep for a tiny little toothpick. So instead, I use a wooden chopstick as my tester, and when it comes out clean from the center of the cake, I know it’s ready.

IMG_0436

Let the cake cool in the pan for 10 minutes before removing to a cooling rack. You have two options for cooling: if you want your glaze to soak into the cake, let the cake cool for 15 minutes, or if you want the glaze to harden and look more like icing, let the cake cool completely. I opted for the quick-cool soaking option, mostly because I was impatient to dig in.

IMG_0444

As the cake cools, make the glaze. In a saucepan, melt the butter and use a fork to stir in the powdered sugar and maple syrup until smooth. Then slowly add water until it reaches the consistency you want – a slightly runny syrup. When your cake is cooled, drizzle the glaze along the top and allow it to spill over the sides, inside and out. Messy is good!

IMG_0456

Oh baby. Look at the glaze drip happening here. That’s what this cake is all about. It’s soft and tender and not too sweet, and this beautiful glaze just pushes it right over the edge. Amazing with a hot cup of tea on a winter day!

IMG_0460

Glazed Lemon Madeleines.

I’ve been looking for the perfect homemade madeleine. I think this is it. I would say that this recipe is “adapted from David Lebovitz,” but I realized that I really didn’t change much of anything! His recipe is perfect just the way it is (if you’ve never been to his website, please check it out – he usually inspires me either to cook something beautiful or to speed along my plan-making for another trip to Paris).

IMG_7527

I love these lemon madeleines anytime. My roommate can attest that for some inexplicable reason I even made them during the Super Bowl this year–not BEFORE the Super Bowl, but actually DURING THE GAME. I have no excuse or explanation for that. And while they’re fine with football, they’re especially well-paired with tea. Lemon madeleines are actually one of the only things in this world for which I will actually delay drinking my daily pot of tea in order to whip up a quick batch.

IMG_7531

To give these adorable little cookie-cakes their distinctive shell shape, you need a special pan, called a madeleine pan (go figure). The pan gives them their scalloped bottom and humped and fluffy top. I’m quite happy with my madeleine pan, so if you ask me, it’s worth the investment for this little lemony French treat. However, if you want to try these but don’t have a madeleine pan of your own, just follow the directions exactly as written but use a mini muffin pan instead.

IMG_7532

INGREDIENTS

3 eggs, room temperature
2/3 cup sugar
2 healthy pinches of salt
1 1/4 cups flour
1 tsp baking powder (optional – it helps them rise when baking, and I haven’t decided my opinion on it yet.)
zest of one medium lemon
9 tbsp butter, melted and cooled to room temperature
1 tbsp lemon juice
3/4 cup powdered sugar
up to 2 tbsp water

Just the Recipe link: Glazed Lemon Madeleines

IMG_7540

DIRECTIONS

First, grease your madeleine pan and put it in the freezer. This will make sure the madeleines hump up when they’re in the oven.

Add eggs, sugar, and salt to a bowl. Whisk like crazy until frothy and thickened.

IMG_7518

Sift in the flour and baking powder and fold into the egg mixture.

IMG_7519

Gently stir the lemon zest into the butter and pour into the flour and egg batter, stirring until just combined. Pop the batter into the refrigerator for about 15 minutes.

IMG_7521

As the batter chills, preheat the oven to 425 F.

Once the batter is slightly chilled, use a spoon to scoop into the cold madeleine pan. Don’t fill the scalloped cups up all the way to the rim, as the cakes will rise quite a bit.

IMG_7523

The same goes if you’re using a mini muffin pan – give them a little room to grow.

IMG_8261

Pop them in the oven for 8-9 minutes, until the tops are set and the bottoms are lightly browned. While they’re baking, mix the powdered sugar and lemon juice together for the lemon glaze, thinning with water until you reach the consistency you like – it should be pretty thin (think of a glazed doughnut).

Set the baked cakes to cool on a cooling rack. As soon as they’re cool enough to handle, dip each one in the glaze, both sides (!), and set back on the cooling rack, scalloped-side up, letting the glaze set as the cakes cool all the way.

IMG_7535

Here they are as little mini muffins. Not as dainty as the madeleine-shaped madeleines, but just as tasty!

IMG_8266

Serve immediately with a beautiful cup of tea or coffee. Make sure to use one of your prettiest cup-and-saucer pairs.

IMG_7536

Russian Sour Cream Coffee Cake.

Yesterday it was my turn to bring breakfast for our weekly work Breakfast Club. Taking a more traditional approach than I did last time, when I brought in my quesadilla maker (Olé), I volunteered to bring in two coffee cakes.  One had to be Sicilian Orange Cake, because it just might be the king of all coffee cakes. But I wanted to try something new for my second offering, so I made this Russian recipe. Its sour cream base makes it creamy and moist, and the nut topping gives a little bit of texture and spice. And if the “king” title is already taken, this one can be the coffee cake Tsar.

*Wondering where the photo of the finished product is? Well, in the chaos of my cake-laden commute that morning, I forgot to give it its proper photo shoot. I guess that means I’ll just have to make it again!

INGREDIENTS

1 cup (2 sticks) butter, softened
1 cup sour cream
1 cup sugar, plus 1/2 cup, divided
3 eggs
1 tbsp vanilla extract
2 1/2 cups flour
1 tsp baking soda
3 tsp baking powder
1/4 tsp salt
3/4 cup chopped walnuts
1/8 tsp powdered ginger
pinch of nutmeg

DIRECTIONS

Preheat oven to 350 F.

Cream together butter,  sour cream, 1 cup of the sugar, eggs, and vanilla. In a separate bowl, combine flour, baking soda, baking powder, and salt. Add the dry ingredients to the wet in three batches, stirring well after each addition.

In a separate bowl, combine the walnuts, ginger, nutmeg, and the 1/2 cup of sugar.

Grease a baking pan. Spread half the batter into the pan and top with half the nut mixture. Then spread the rest of the batter over the top and add the rest of the nut mixture. Using a knife, make several slashes through the batter; this draws some of the nut mixture deeper into the cake.

Bake on middle rack for about 50 minutes, or until a toothpick inserted into the middle comes out clean. Priyatnogo appetita!