Marbled Cheesecake Brownies.

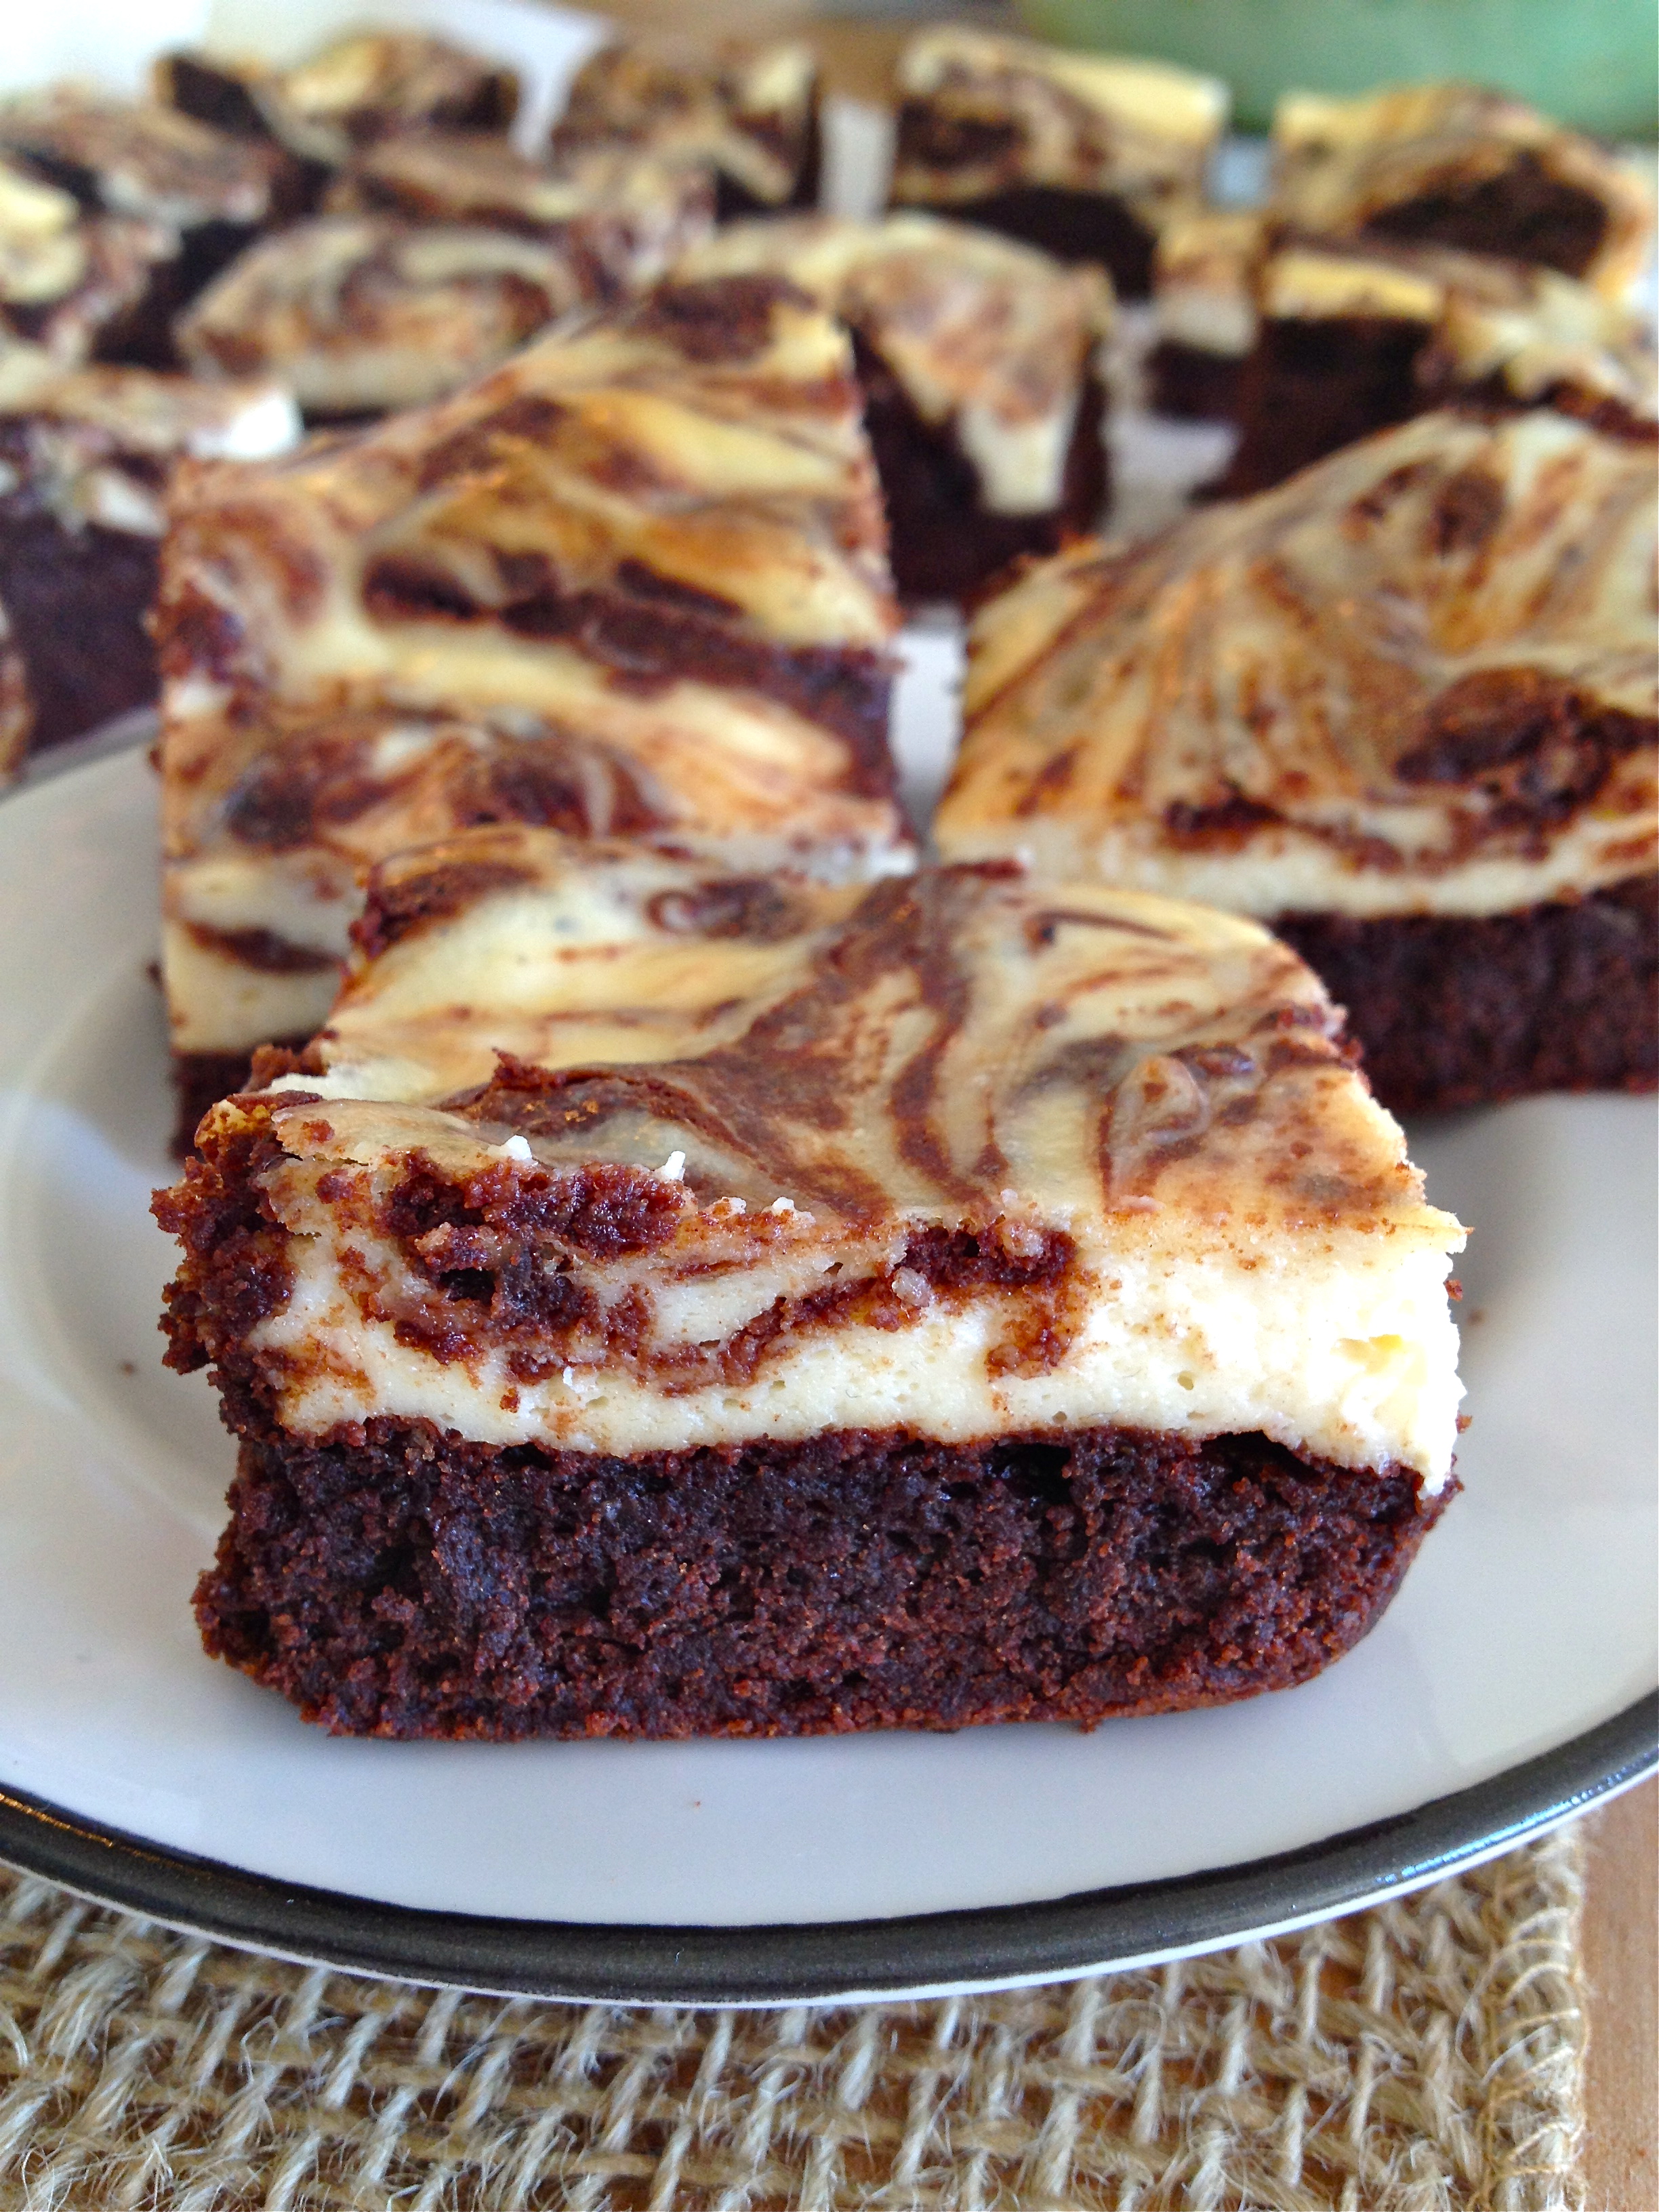
I pin and bookmark a lot of recipes that involve marbling, because I think that swirly mingling of colors is just so loose and free and pretty. This particular recipe has been on my list for at least three years. “On my list” is what I say about literally anything that I want to try eventually but have no real motivation to try right now. Mostly I use it about recipes, books, and TV shows. There is no time constraint for how long something can be “on the list;” case in point: it took me three friggin’ years to try this recipe. And someday I’ll watch 24 and read William Faulkner, but I have no plan to do either of those right at this moment.But wow am I glad I finally got down to business with this recipe, because it’s easy and tasty and fancy, all at the same time. I brought a batch to a Memorial Day barbecue, and while there was also an offering of special brownies at the party, mine more than held their own. What they lack in the party enhancement department, they make up for with major tasty goodness. Score one for cheesecake!!

Marbled Cheesecake Brownies | KellyintheKitchen  | For brownie layer: 6 tbsp butter, 1 cup semisweet chocolate chips, 3/4 cup packed brown sugar, splash of vanilla extract, 2 eggs, 1/4 cup unsweetened cocoa powder, 2 packed tbsp coconut flour, 3 tbsp potato starch (I haven’t tried it, but corn starch should work here, too), 1/2 tsp baking soda, 1/4 tsp salt. For cheesecake layer: 8 oz cream cheese, 1/4 cup granulated sugar, 1 tsp vanilla, 1 egg

INGREDIENTS

for brownie layer:
6 tbsp butter
1 cup semisweet chocolate chips
3/4 cup packed brown sugar
splash of vanilla extract
2 eggs, room temperature
1/4 cup unsweetened cocoa powder
2 packed tbsp coconut flour
3 tbsp potato starch (I haven’t tried it, but corn starch should work here, too)
1/2 tsp baking soda
1/4 tsp salt

for cheesecake layer:
8 oz (1 package) cream cheese, room temperature
1/4 cup granulated sugar
1 tsp vanilla
1 egg, room temperature

DIRECTIONS

Preheat oven to 350 F.

To make the brownie layer, use a double-boiler to melt the butter and chocolate chips together, stirring until smooth. Remove from heat and mix in brown sugar and vanilla. Let cool slightly before stirring in one egg at a time.

Sift in the cocoa powder, coconut flour, potato starch, baking soda, and salt, and stir into chocolate mixture. Line an 8×8 baking dish with parchment paper and pour in all the batter except 4-6 tbsp (we’ll swirl this portion into the cheesecake). Set aside.

To make the cheesecake layer, put the cream cheese in a mixing bowl and beat with a spoon until smooth. Mix in the sugar and vanilla, and then stir in the egg. The mixture will look curdled, but continue to stir gently until the egg is worked in and the mixture is smooth.

Marbled Cheesecake Brownies | KellyintheKitchen

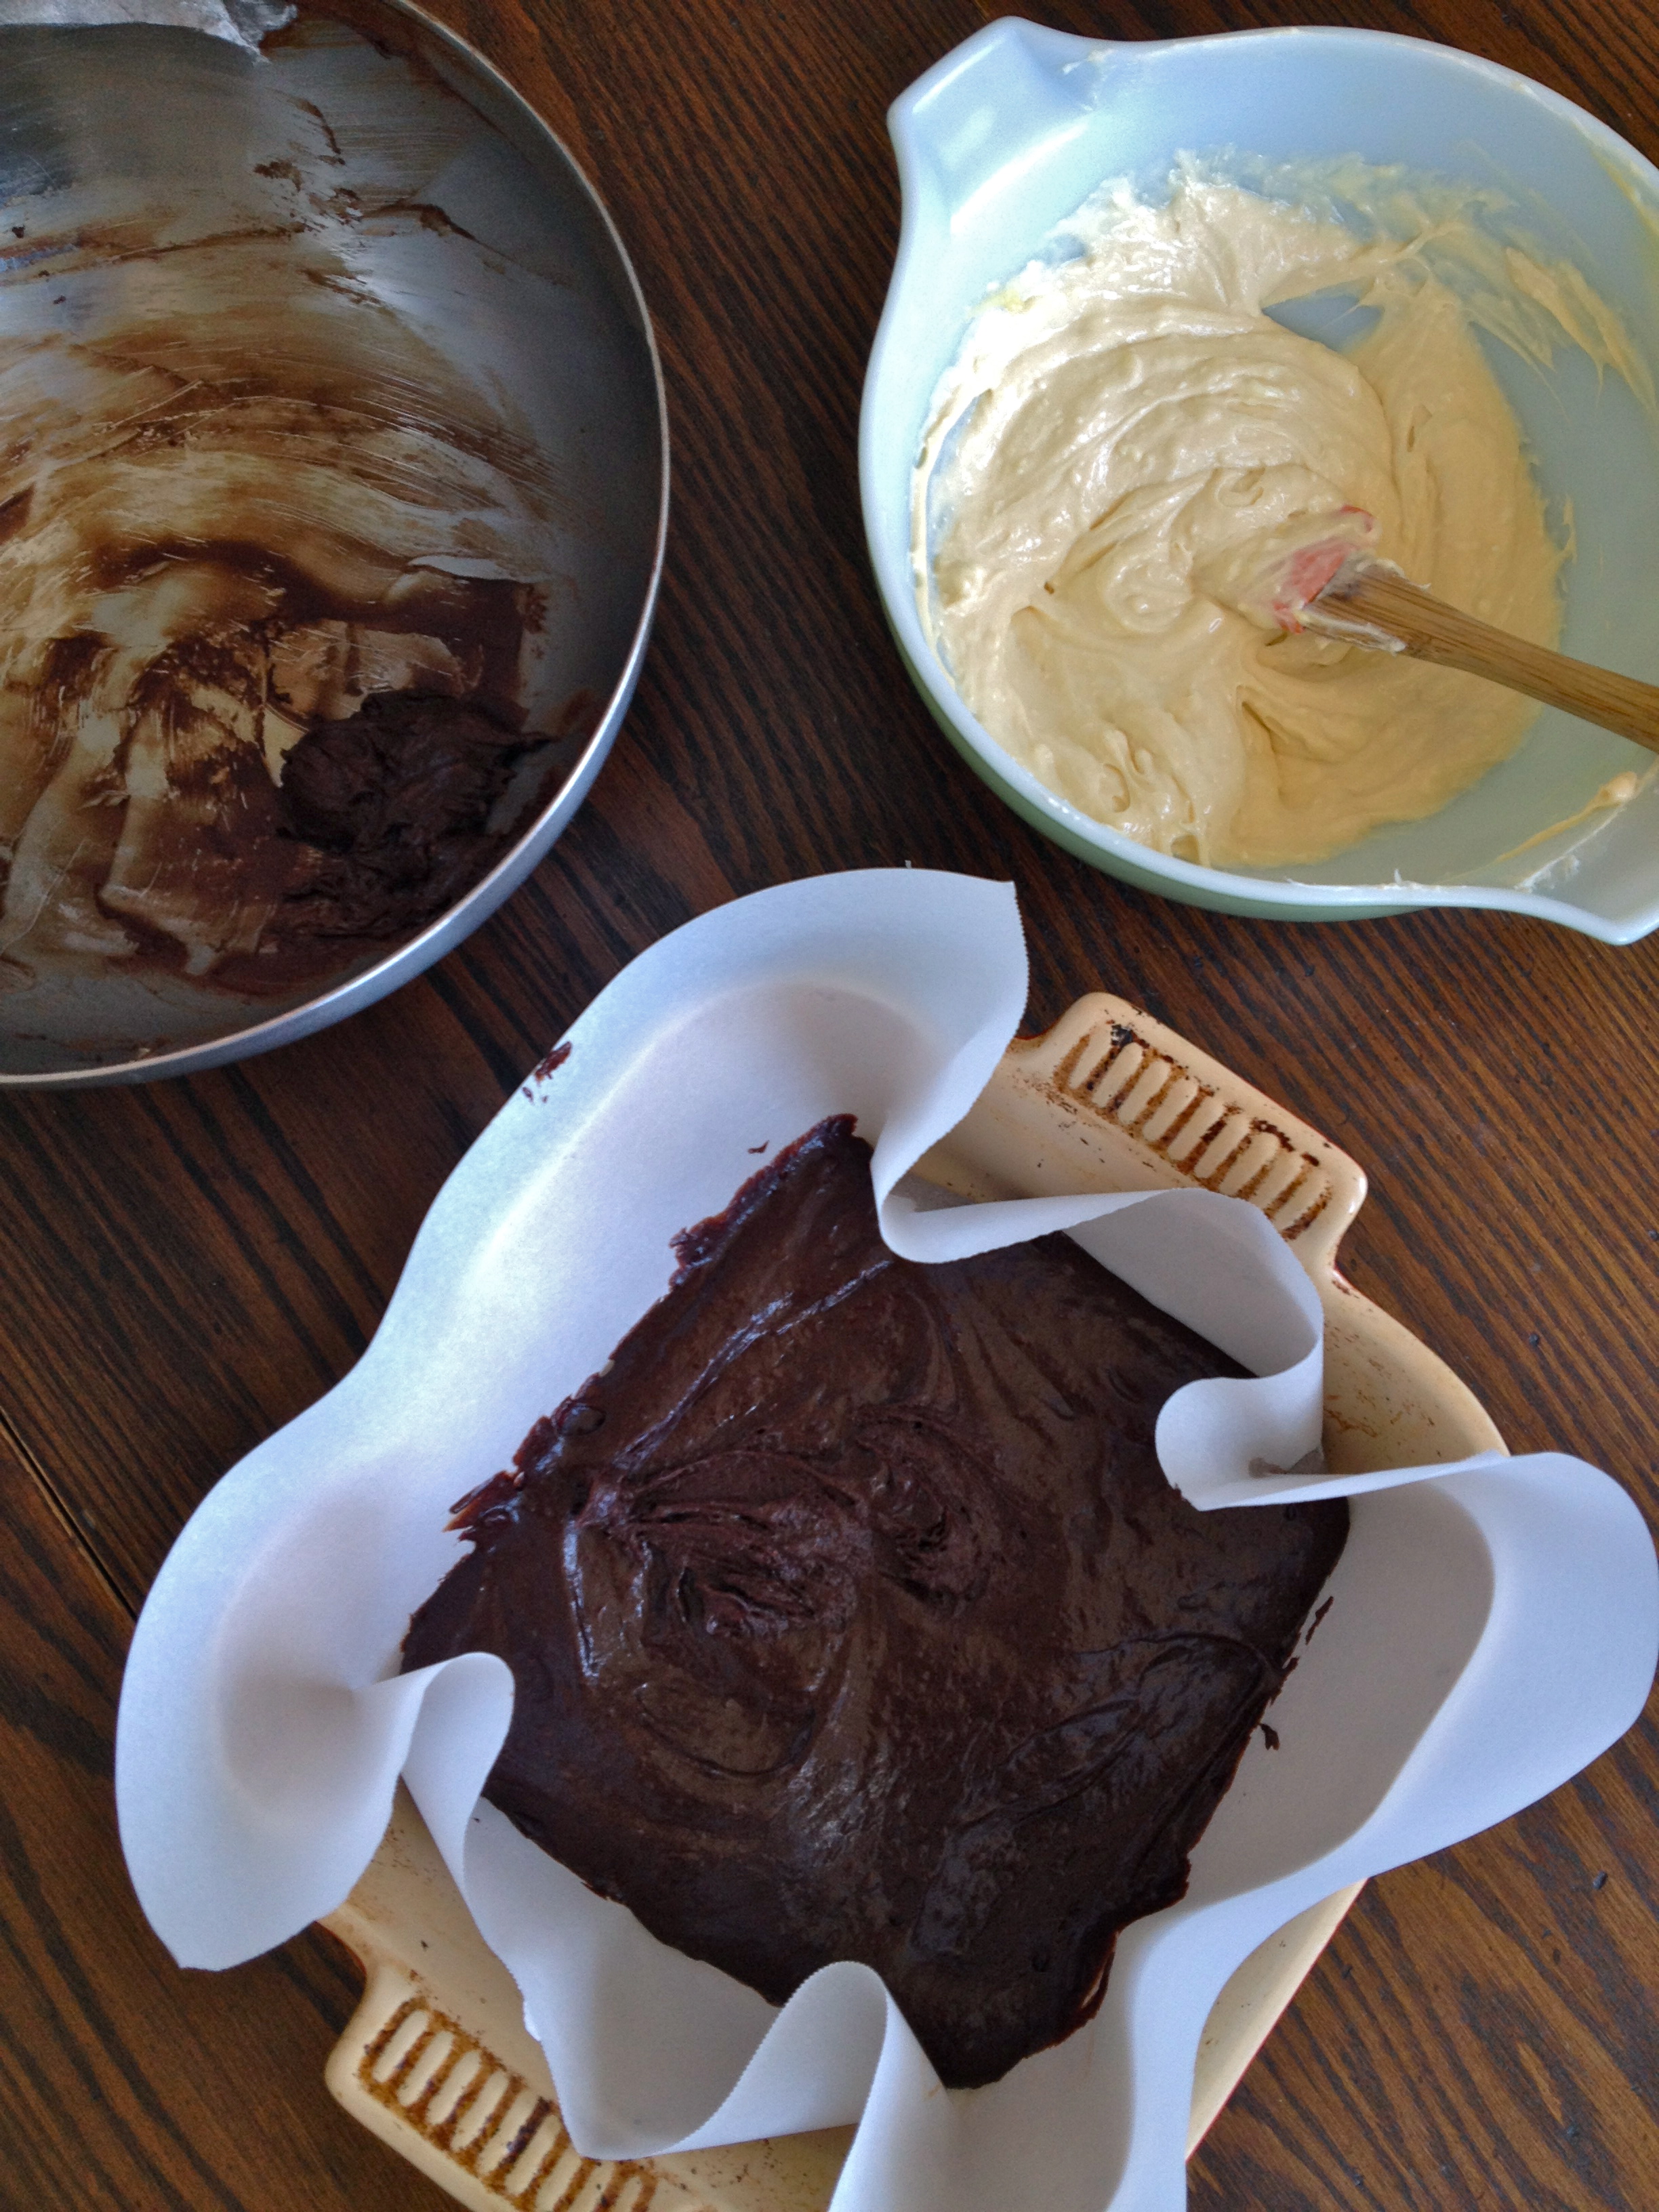
Pour the cheesecake mixture over the brownie batter and carefully spread it into an even layer. Drop the remaining brownie batter in a line down the middle of the cheesecake. To marble the top, use a knife or toothpick to drag the chocolate part up through the cheesecake, making whatever marbling shape you like (or just marble at random).

Marbled Cheesecake Brownies | KellyintheKitchen  | For brownie layer: 6 tbsp butter, 1 cup semisweet chocolate chips, 3/4 cup packed brown sugar, splash of vanilla extract, 2 eggs, 1/4 cup unsweetened cocoa powder, 2 packed tbsp coconut flour, 3 tbsp potato starch (I haven’t tried it, but corn starch should work here, too), 1/2 tsp baking soda, 1/4 tsp salt. For cheesecake layer: 8 oz cream cheese, 1/4 cup granulated sugar, 1 tsp vanilla, 1 egg

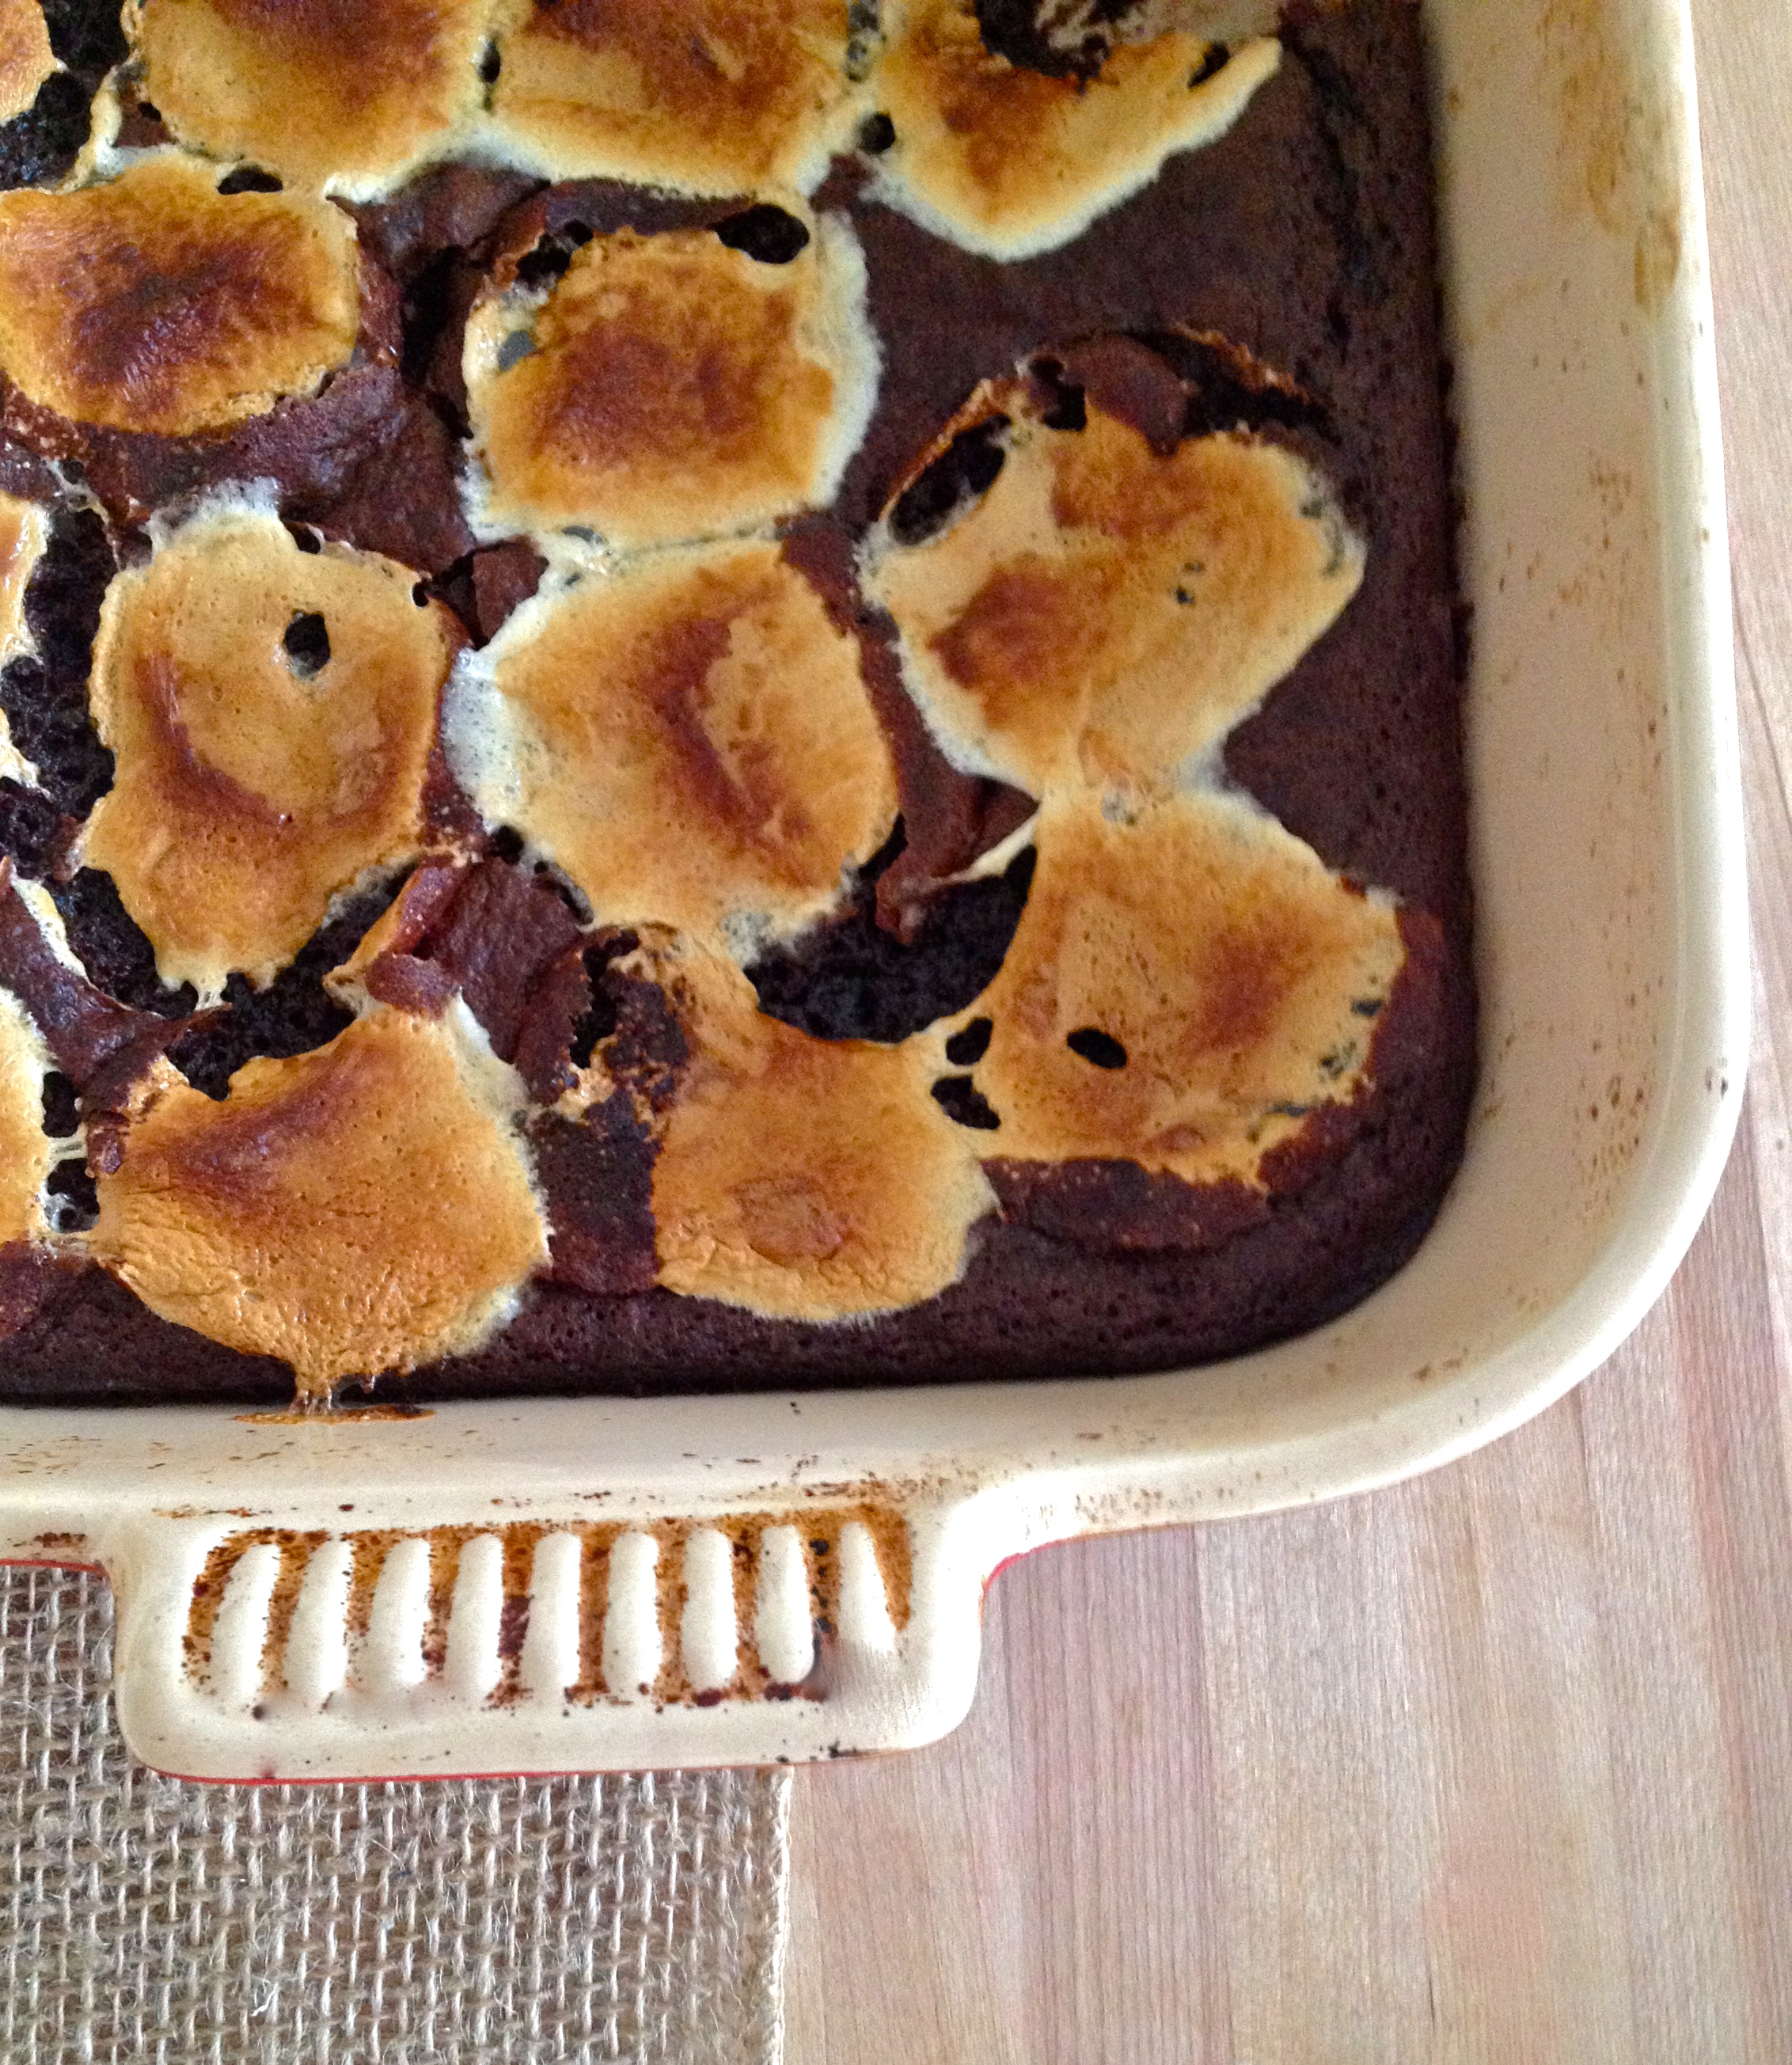
Put the dish in the oven and bake for about 30 minutes, until the cheesecake is set but still a little bit wobbly. The way I decide if cheesecake is done is by Nigella Lawson‘s helpful suggestion to look for the top to be barely-set, with “a hint of inner thigh wibble.”

Marbled Cheesecake Brownies | KellyintheKitchen

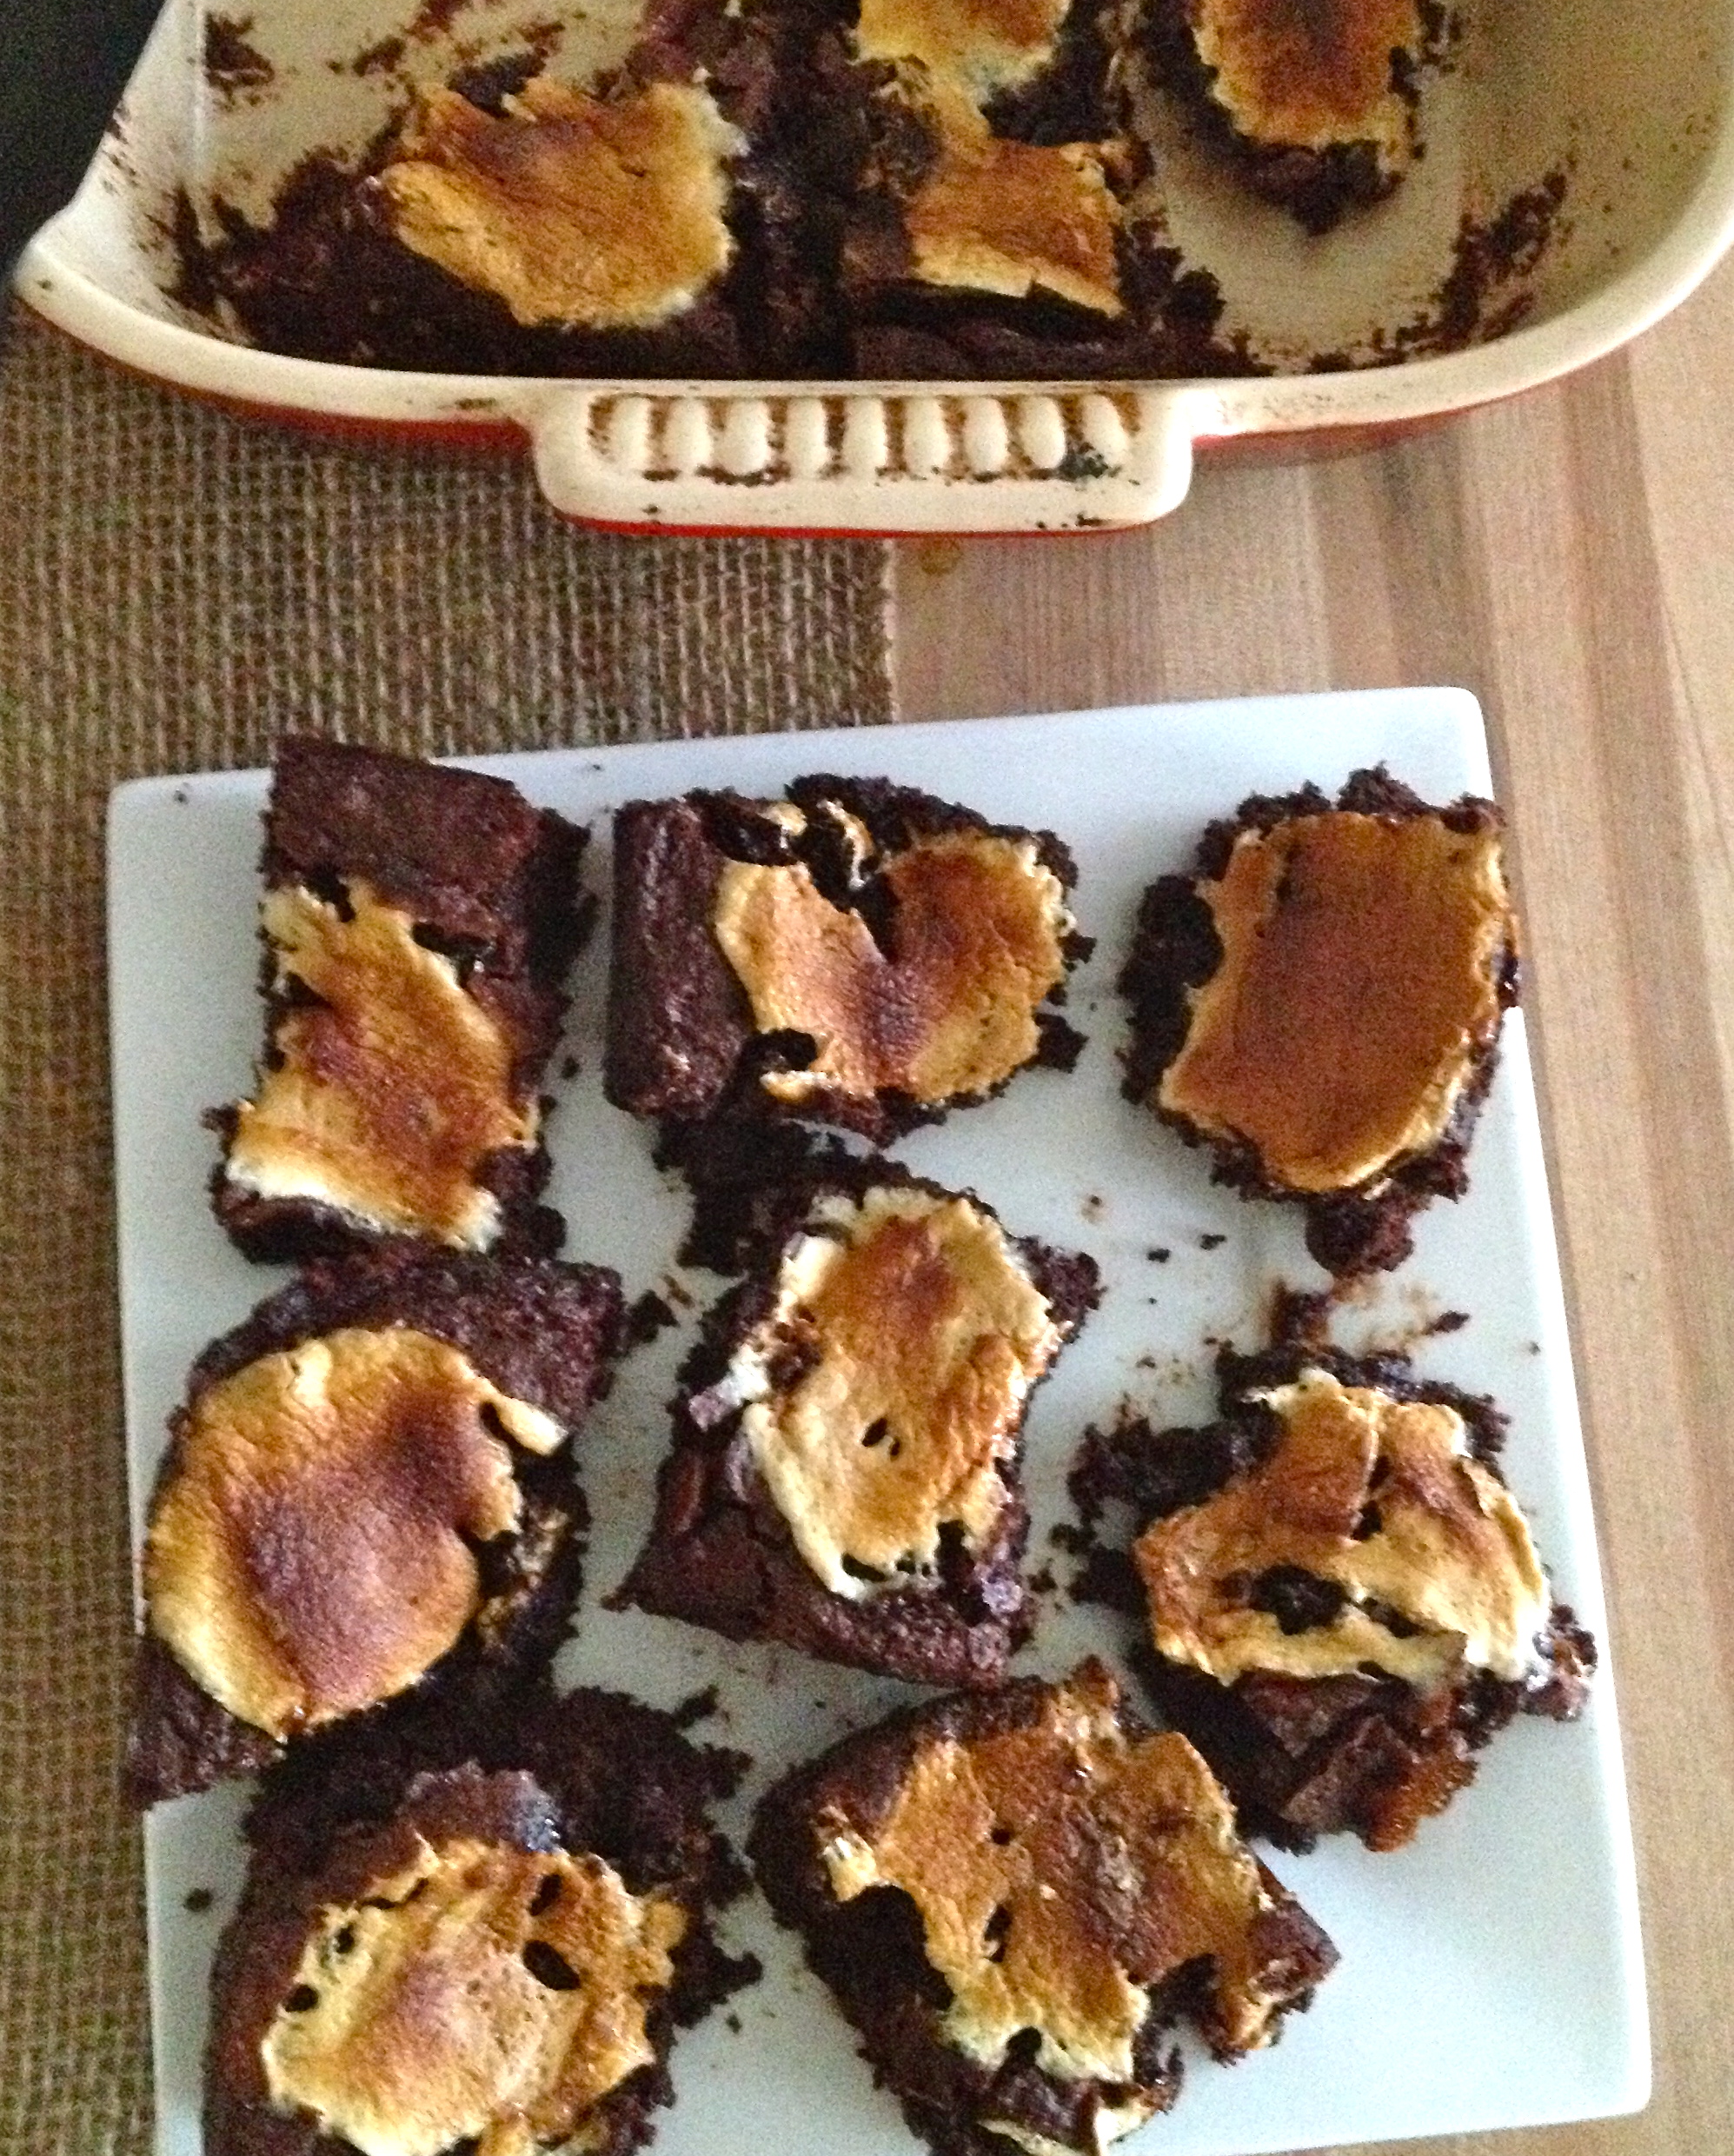
Cool at least an hour before cutting the brownies.

Marbled Cheesecake Brownies | KellyintheKitchen  | For brownie layer: 6 tbsp butter, 1 cup semisweet chocolate chips, 3/4 cup packed brown sugar, splash of vanilla extract, 2 eggs, 1/4 cup unsweetened cocoa powder, 2 packed tbsp coconut flour, 3 tbsp potato starch (I haven’t tried it, but corn starch should work here, too), 1/2 tsp baking soda, 1/4 tsp salt. For cheesecake layer: 8 oz cream cheese, 1/4 cup granulated sugar, 1 tsp vanilla, 1 egg

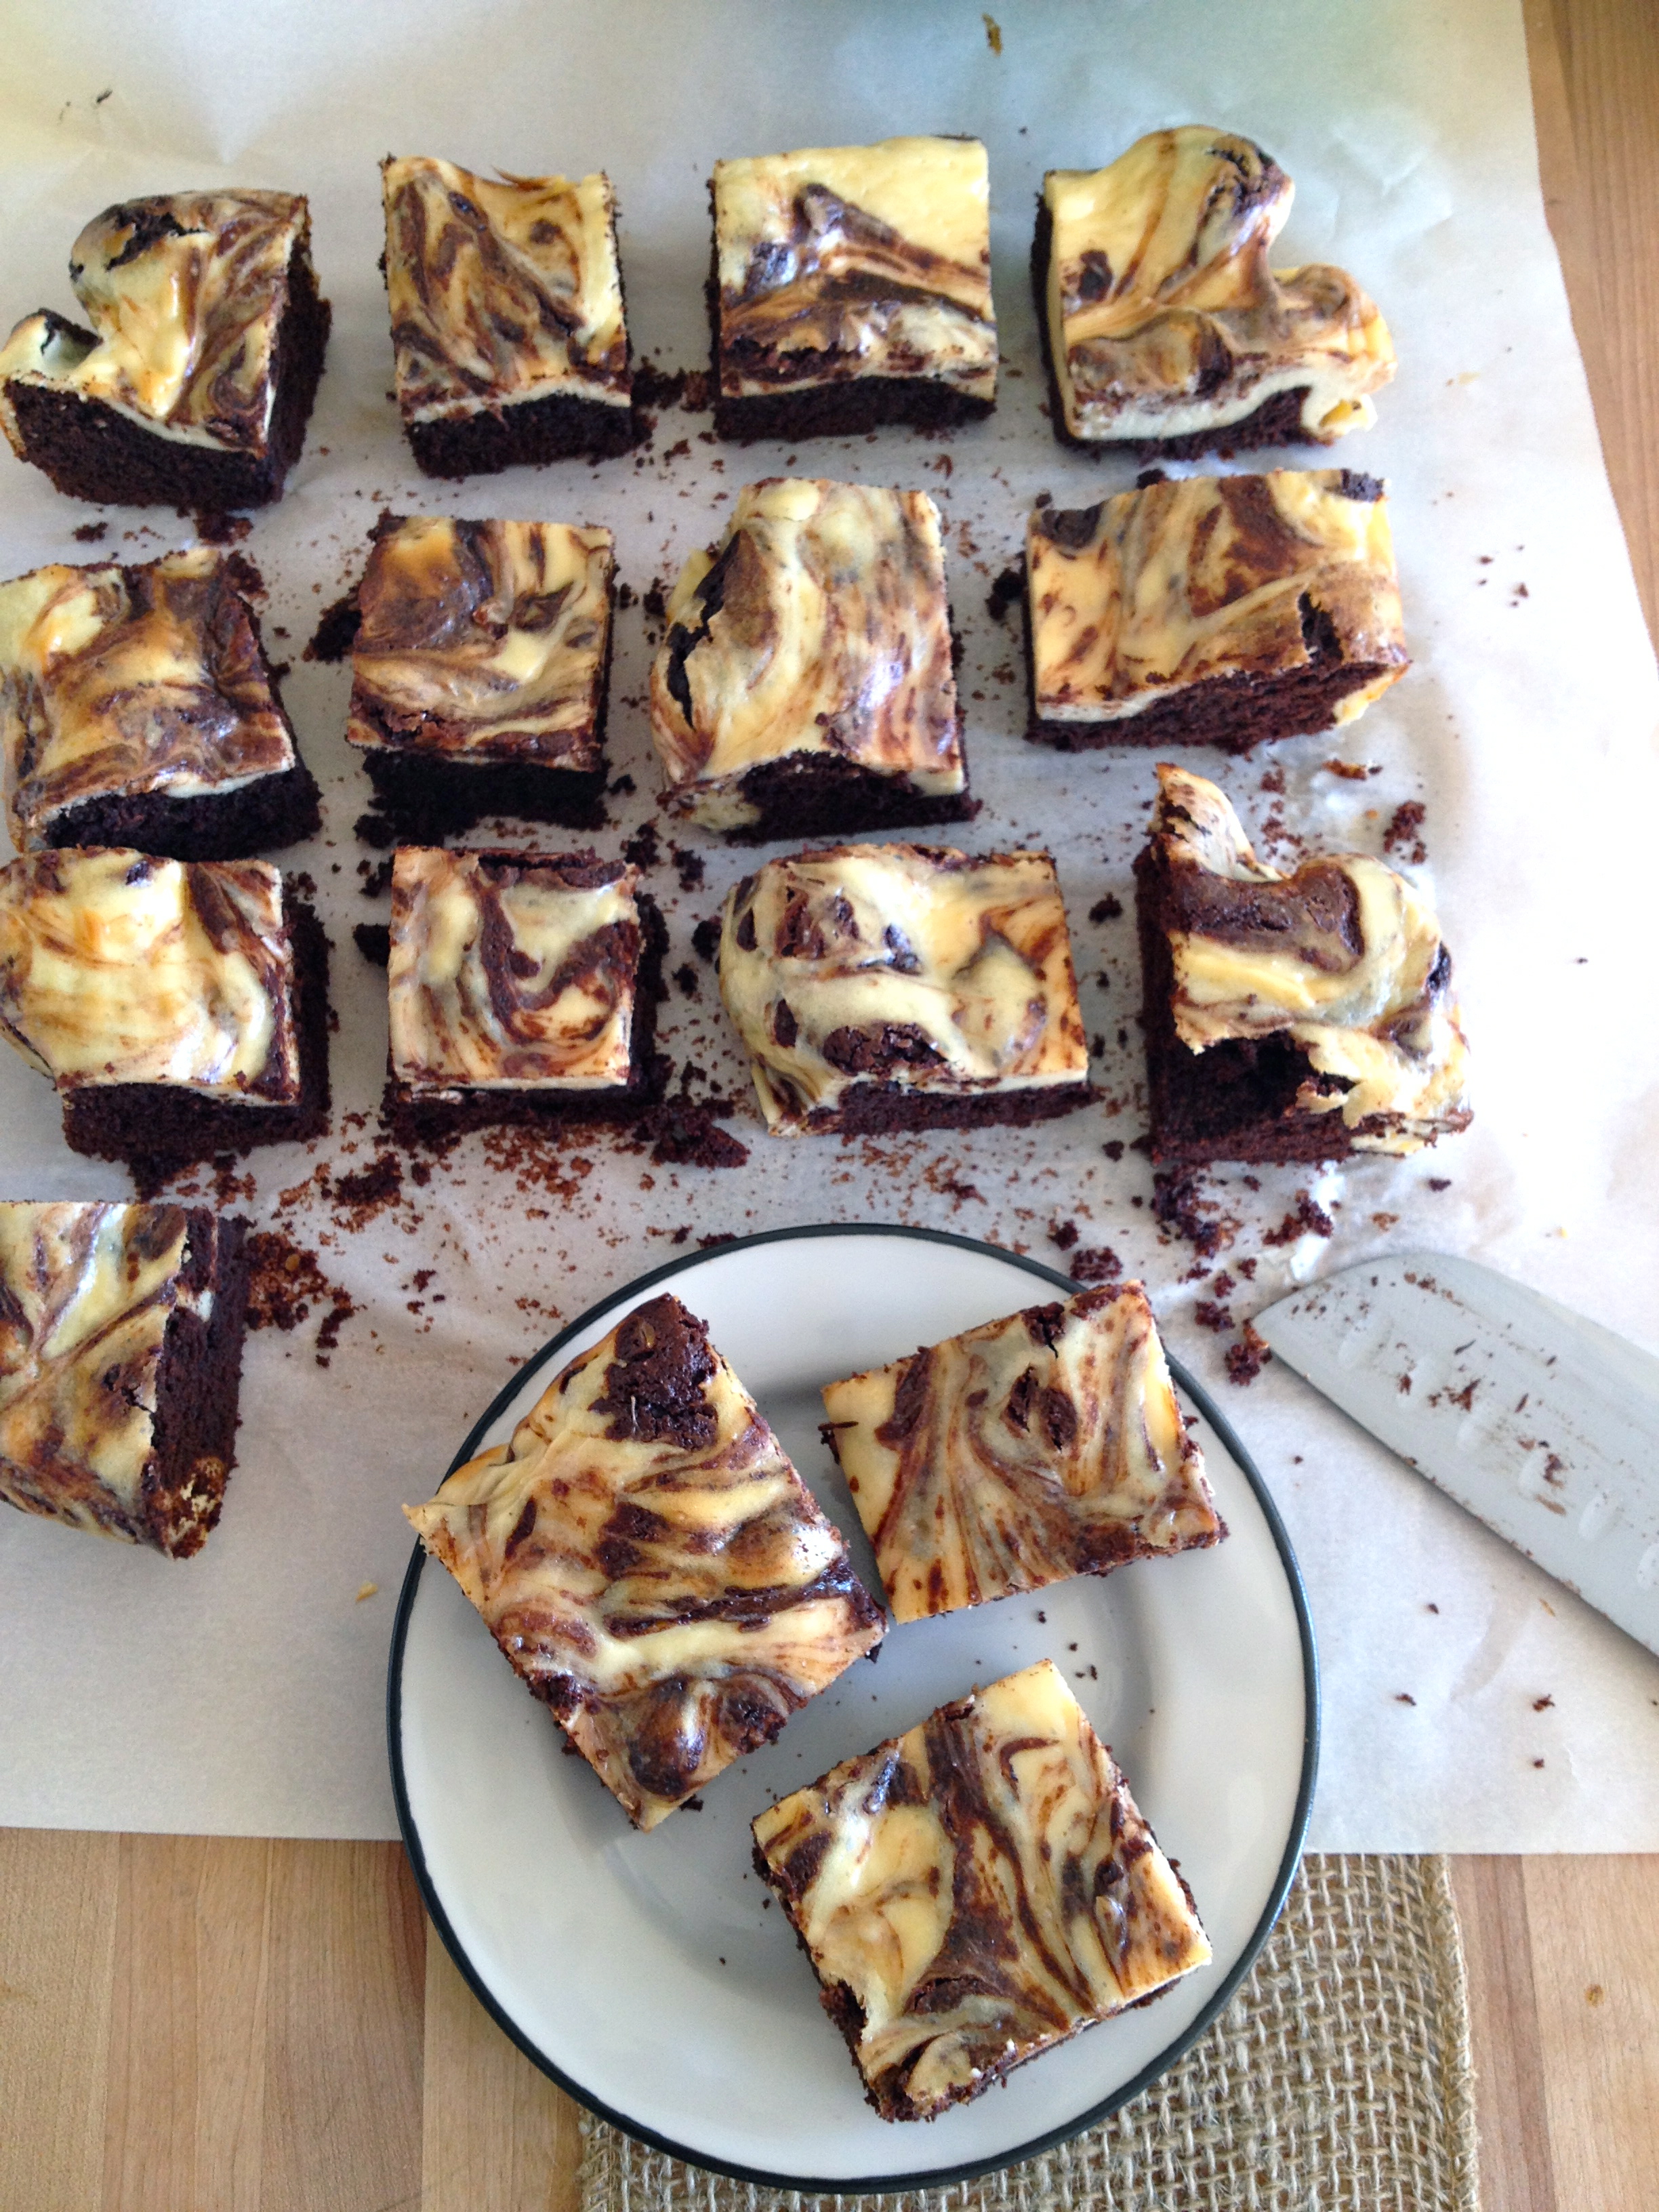
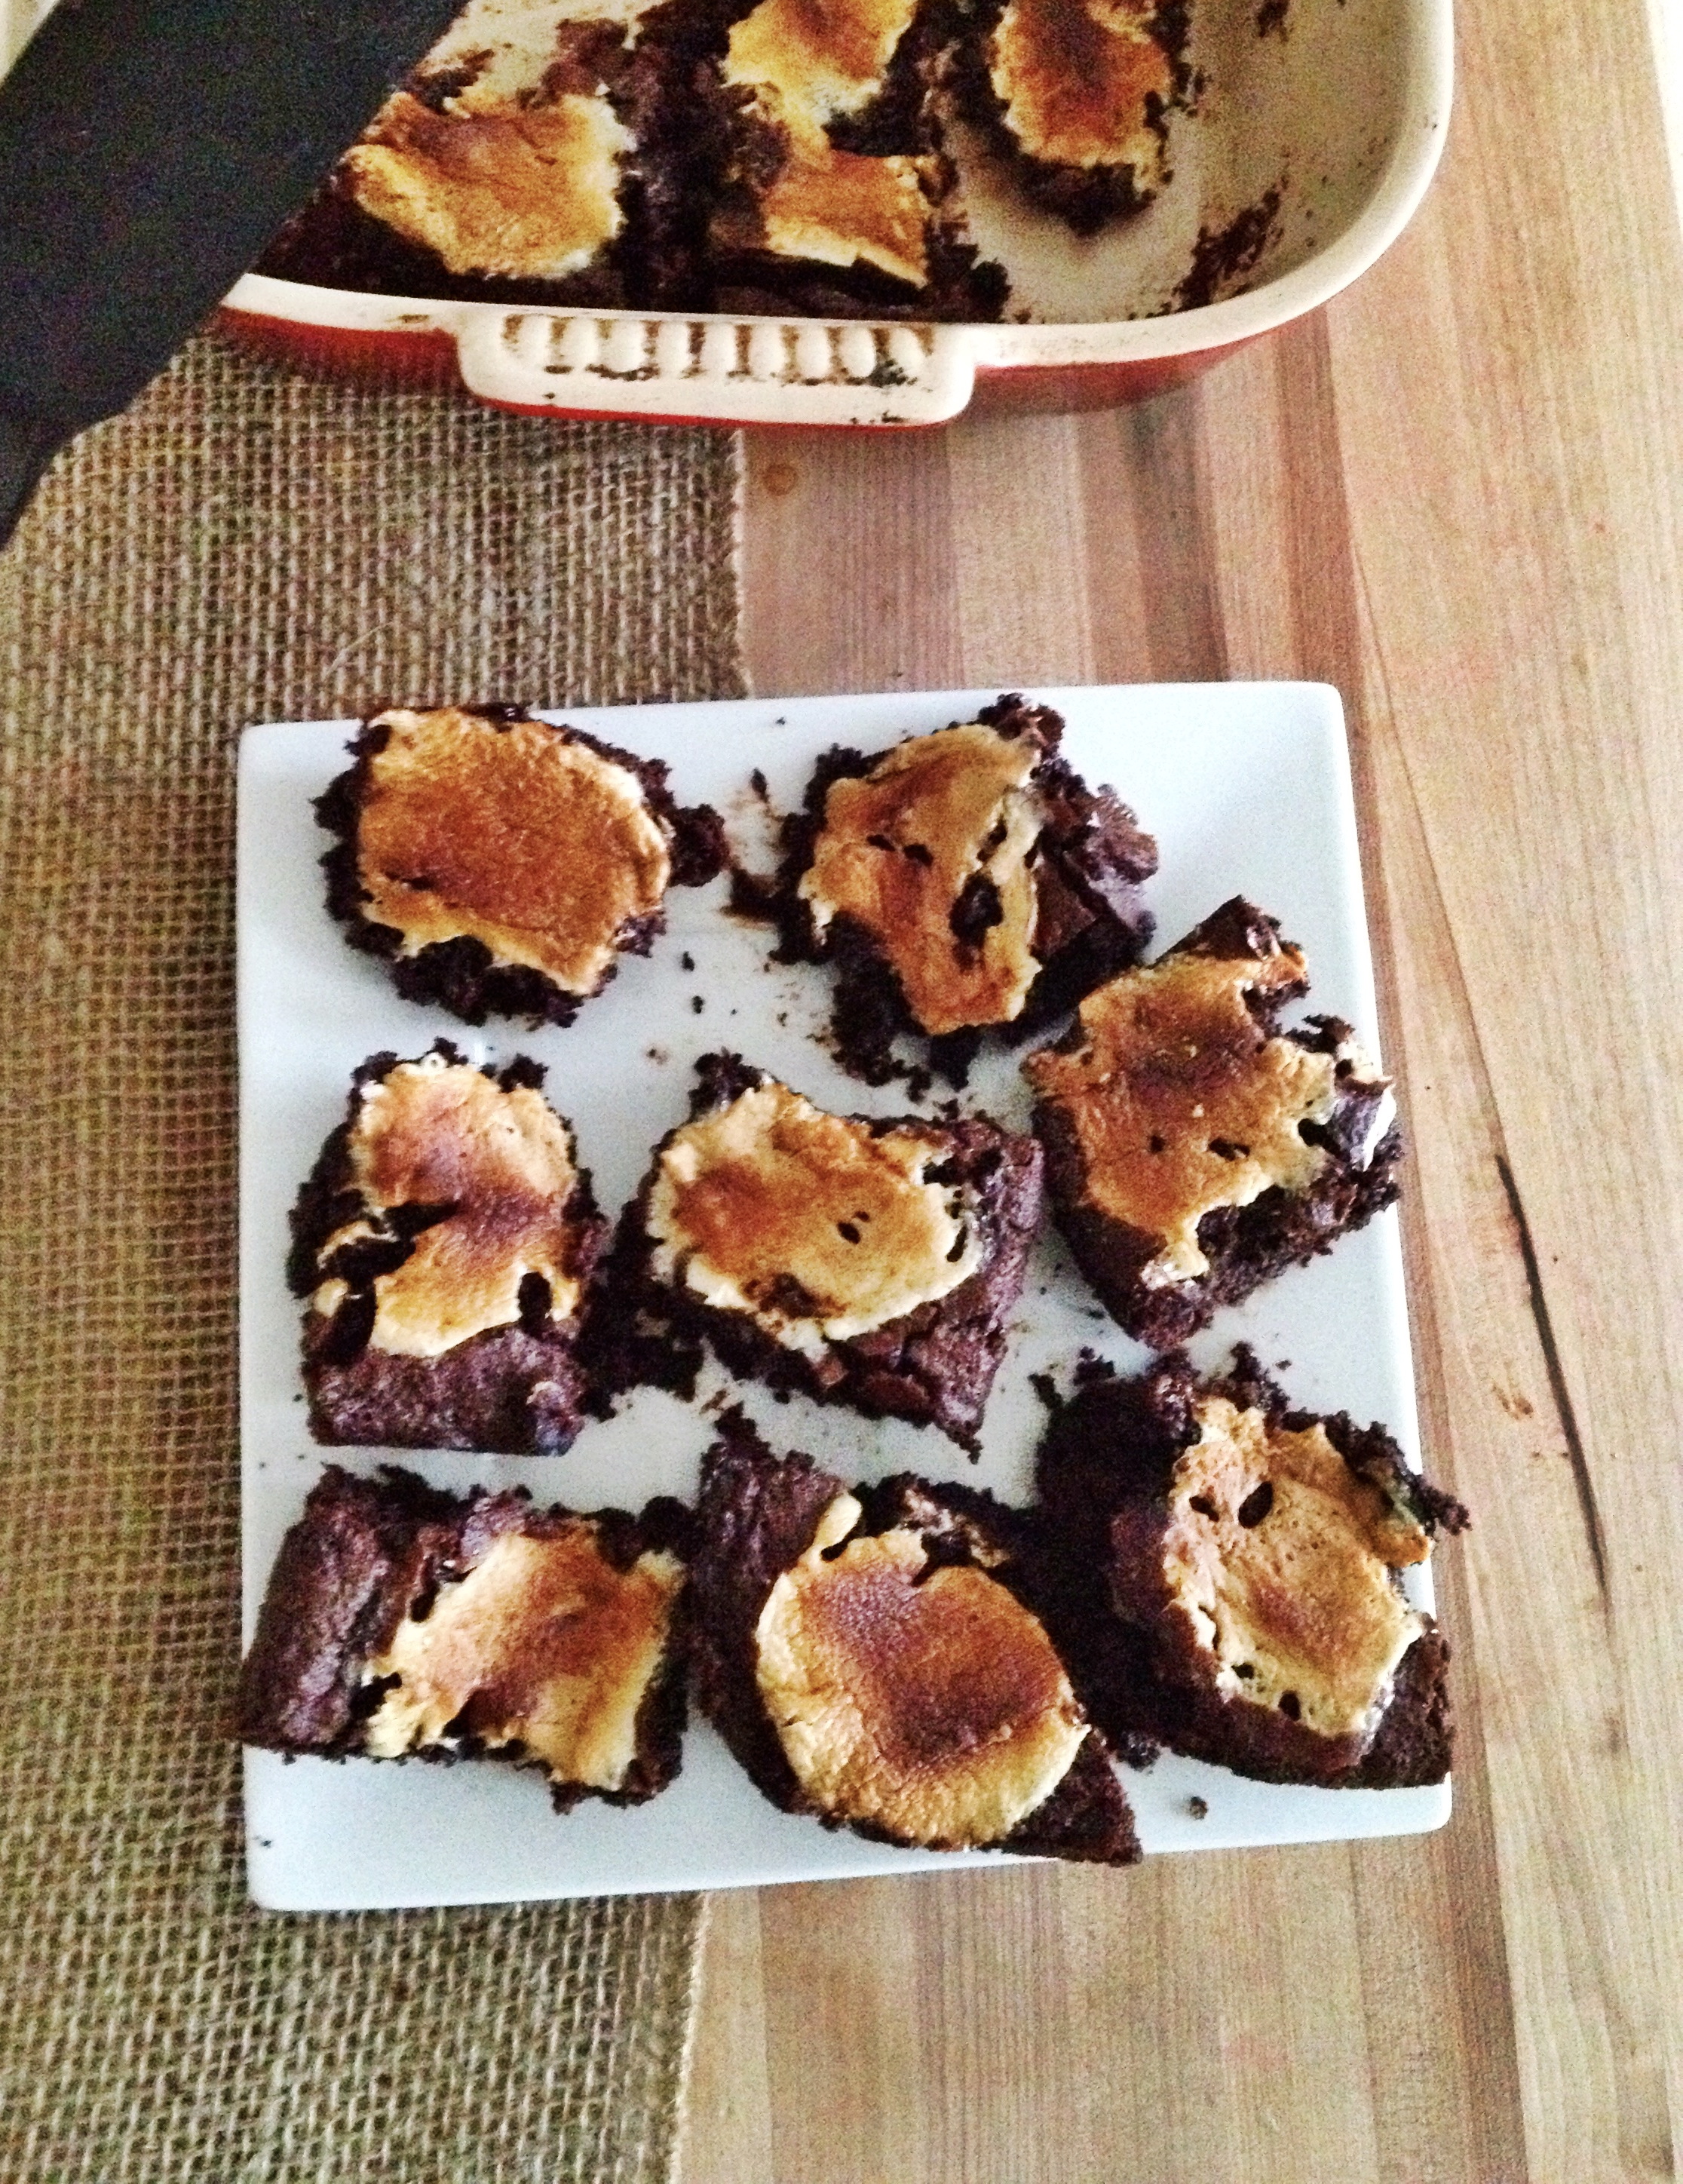
I actually recommend keeping them in the fridge at all times. Serving them cold just makes such a difference – the consistency is creamy and almost fudge-like, and the chilly cheesecake is perfection!

Marbled Cheesecake Brownies | KellyintheKitchen  | For brownie layer: 6 tbsp butter, 1 cup semisweet chocolate chips, 3/4 cup packed brown sugar, splash of vanilla extract, 2 eggs, 1/4 cup unsweetened cocoa powder, 2 packed tbsp coconut flour, 3 tbsp potato starch (I haven’t tried it, but corn starch should work here, too), 1/2 tsp baking soda, 1/4 tsp salt. For cheesecake layer: 8 oz cream cheese, 1/4 cup granulated sugar, 1 tsp vanilla, 1 egg

Advertisement

Toasted Marshmallow Coffee Brownies.

My many experiments in non-traditional baking have had mixed results—sometimes they turn out delicious, sometimes they are horrible failures, and sometimes they’re surprisingly, differently good. Because I’m lucky enough not to have any food allergies (*knocks on wood*), I’ve tried a lot of different methods, including gluten-free, grain-free, low-sugar, low-carb, and always with as little processed foods as possible. I feel experienced enough now to say that most of these substitution-based recipes are only better than the original if you have no other options (or are totally delusional). It’s the hard truth about healthy desserts.

The results definitely range though, depending on the baked good, and I think cookie recipes are the worst offenders. No matter what healthier option you try to sub in or out, there is no cookie better than the one on the back of the Toll House bag (that recipe is nearly perfect, by the way – if you use a little less flour than called for, and a little more vanilla and brown sugar, you’ll have the ABSOLUTE perfect chocolate chip cookie).

Meanwhile, I’ve found that brownies are the most flexible when it comes to subbing. For whatever reason, they can take a replacement here and there and still turn out totally delicious. That’s what we have here – a gluten-free, grain-free, soft and chewy chocolatey brownie recipe, with a little something special on top. I’d put these crumbly goodies up against any other brownie recipe I’ve made! What a wonderful taste test that would be…

IMG_1535

INGREDIENTS

6 tbsp butter
1 cup semisweet chocolate chips
2 eggs, room temperature
1/3 cup hot coffee
splash of vanilla
1/2 packed brown sugar
1/4 cup unsweetened cocoa powder
2 packed tbsp coconut flour
3 tbsp potato starch (I haven’t tried it, but corn starch should work here, too)
1/2 tsp baking soda
1/4 tsp salt
about 14 jumbo marshmallows

DIRECTIONS

Preheat oven to 350 F.

In a double-boiler, melt the butter and chocolate chips together until smooth. Remove from heat and let cool slightly before stirring in one egg at a time, followed by coffee, vanilla, and brown sugar.

Sift together cocoa powder, coconut flour, potato starch, baking soda, and salt. Stir dry ingredients into batter and pour into greased 8×8 baking dish.

IMG_1506

Dot the surface of the batter with marshmallows. Love those cute & fluffy little pillows.

IMG_1518

Bake for 25-30 minutes, until the center is set. If you stick a toothpick into the center, it doesn’t need to come out totally clean, but it shouldn’t be wet. Be conscious of the marshmallows burning; I ended up tenting a sheet of foil over the pan to slow the browning partway through the bake time. When the brownies are baked, remove them from the oven.

IMG_1529

As they cool, the brownies and marshmallows will deflate and fall a little bit. Good, the more condensed the better! If you’re planning to cut the brownies into nice neat squares, you may want to adjust your expectations, because these are gooey and crumbly. You’ll want to cool them at least an hour, if not more, and potentially give them some fridge time to firm up if you need them to really hold together. If you don’t mind a crumbly brownie, then ignore me and eat them whenever you want. They’re dang delicious!

IMG_1534

Superfood Berry Crisp.

I loved the blueberry almond crisp recipe I posted last time SO MUCH that I’ve made it twice since then. It has that great balance of nutty, buttery, and sweet that I’ve found pretty addicting lately. And after a few tweaks and additions, I have another crisp recipe to share. It’s the nutritionally-amplified fruit dessert of my health food dreams, packing in tons of superfoods: almonds and walnuts, flax seeds and chia seeds, and any mixture of berries your heart desires (I used blueberries, but Trader Joe’s frozen section has a nice mixed berry medley that I bought for next time!). This superfood berry crisp works overtime to give your body what it needs, in terms of both nutrition and sweet tooth satisfaction. And while these healthy ingredients are totally awesome, I think I may start a petition to give butter and brown sugar their own superfood status (their kind of “super” is slightly different, however). Then there would be no stopping this thing!

Superfood Berry Crisp | KellyintheKitchen

INGREDIENTS

1/2 cup ground almonds
1/2 cup whole almonds, chopped
1/2 cup whole walnuts, chopped
1 tbsp ground flax seed
1 tsp chia seed
1/4 tsp salt
3 tbsp brown sugar
4 tbsp cold butter, cubed
splash of vanilla
2 cups frozen berries
1 tsp lemon juice
1 tsp corn starch
2 tsp granulated sugar
optional: 1 heaping tbsp turbinado sugar (or another large-crystal sugar like demerara)

DIRECTIONS

Preheat oven to 350 F.

In a mixing bowl, stir together ground almonds, chopped almonds, chopped walnuts, flax seed, chia seed, salt, and brown sugar. Use a fork to work the cold butter into the dry mixture until there are no more chunks of butter. Then add the vanilla and stir.

In a pie pan or other baking dish, stir together the berries and lemon juice. Then add the corn starch and sugar and stir to coat.

IMG_1489

Starting at the outside and working your way to the middle, sprinkle the nut mixture over the top of the berries. Then finish with a sprinkle of turbinado sugar for an extra bit of sweetness and crunch.

IMG_1490

Lightly lay a sheet of tinfoil over the pan, but don’t tuck the ends around the pan. This keeps the nuts from browning too quickly as the fruit bakes. Bake until the fruit filling is bubbling and the topping is fragrant and browned, about 15-25 minutes.

IMG_1471

Let the crisp cool slightly and serve warm with a scoop of ice cream, or frozen Greek yogurt. Another superfood, look at that!

I forget – what did I say about how to serve this? Was it, “use a spoon and eat it right out of the pan even if it’s too hot”? Because that’s a pretty good way, too.

IMG_1480

Blueberry Almond Crisp in a Skillet.

I was up in the suburbs for some errands and visiting my family on Saturday, and it was the year’s first really gorgeous day of spring in Chicago. My mom and I did yoga outside while our nearly-two-year-old black lab did her best to interrupt us. It’s hard to be graceful in an inversion or a balancing pose when a 70-pound dog is sitting under you. Later, I decided I needed to make a blueberry crisp for dessert, since we had a huge bag of them in the freezer. Blueberries are definitely not my favorite fruit, and recipes like this are really the only ways I enjoy them. And how could you not? The blueberries bubble into a tart and juicy sauce and the topping is golden and buttery and good. Compared to your average fruit crisp, I’ve reduced the added sugars a wee bit, but feel free to add more. And if you like a lot of topping on your fruit crisps–as in, you want the fruit to be fully, thoroughly covered in the good stuff–you could add another 1/2 cup or so of almonds and another tablespoon or two of butter. I was trying to be well-behaved here, but my usual approach to topping a fruit crisp is the more, the merrier. Same goes for all that sun today – bring on the warm weather!

Blueberry Almond Crisp | KellyintheKitchen

INGREDIENTS

3/4 cup almonds
3 tbsp brown sugar
1/4 tsp salt
4 tbsp cold butter, cubed
splash of vanilla
4 cups frozen blueberries
1 tsp lemon juice
2 tbsp granulated sugar
1 tsp corn starch

DIRECTIONS

Preheat oven to 375 F.

In a food processor, blitz almonds, brown sugar, and salt until the almonds are ground to about the size of small pebbles, crumbly but not powdery. Add the butter and vanilla and blitz again, until the butter is broken up into the almonds and no big hunks of butter remain. Set aside (or, if it’s gonna be a while, keep it in the fridge so the butter doesn’t melt).

Grease a cast iron skillet (or pie dish) and pour in the blueberries. Squeeze over the lemon juice and then toss with the sugar and corn starch.

IMG_1353

Sprinkle the topping over the blueberries, starting at the edges and working your way inward. Bake for 25-30 minutes or until the fruit is bubbly and the top is golden brown. If your topping starts to brown too quickly (mine did), just lay a sheet of tinfoil over the pan. Don’t tuck the foil over the pan, but just lightly tent it.

IMG_1357

When the crisp is done, take it out of the oven and let it cool until it’s out of the “molten” stage. I love to eat blueberry crisp hot with a scoop of ice cream, but it’s good at room temperature, too. Whatever floats your boat. Yum.

IMG_1367

Balsamic Chicken with Sauteed Vegetables and Lentils.

Can we talk about lentils? Why don’t we eat more lentils in this life we lead? I realize I’m speaking for you, readers, when really I should just speak for myself…maybe you eat a lot of lentils already, or maybe you’re allergic to lentils and I’m being insensitive to your needs. Sorry. But everyone else, why aren’t lentils a bigger part of our lives?! They are cheap, good for you, SO easy to make, and incredibly versatile. They can be the star of a dish, the sidekick, or the background canvas for another ingredient’s greatness. And let me repeat how cheap they are. Most stores in my neighborhood sell a pound bag of lentils for less than a dollar, and since they do plump when you cook ’em, you end up with a LOT of lentils for very little money. They are also a great high-protein substitute for rice if that’s your thang, and since you prepare them basically the same way you prepare rice, it’s not hard to learn to make lentils. Also they taste great. Are you convinced? Good. Make this. IMG_1270 INGREDIENTS

for chicken:
3 small chicken breasts
fav all-purpose spice rub (there are 2 kinds of people: those who know that Back-of-the-Yards rub from the Spice House is the best seasoning ever, and those who haven’t tried it yet)
salt and pepper
balsamic vinegar
butter

for lentils:
1/2 lb lentils
1 cup chicken stock
3 cups water
pinch of parsley
pinch of rosemary
pinch of thyme

for veggies:
1/4 onion, diced
2 carrots, peeled and diced
1 garlic clove, minced
2 cups spinach leaves, chopped
salt and pepper
lemon juice (optional)

DIRECTIONS

IMG_1281 I believe marinades are an art, not a science. With that in mind, have a bowl or plastic bag handy and rub the chicken breasts with some spice rub and salt and pepper. Put the chicken in the bowl or bag and pour in a few teaspoons of balsamic vinegar. Let this concoction marinate in the fridge for at least 20 minutes, or as long as overnight.

The lentils take a little while, so get them going next. Sort through and pick out any stones or weird looking ones, and rinse the remaining beauties. In a small pot, combine lentils, chicken stock, water, parsley, rosemary, and thyme. Bring to a boil and turn down to a simmer and cover. Cook until tender, and drain any remaining liquid. Set the lentils aside.

When you’re almost ready to cook the chicken, preheat the oven to 350 F.

To cook the chicken, heat a skillet or other stove-to-oven-safe pan over medium high heat. Add some butter to the pan and let it melt, and then add the chicken breasts. I like to move each one around a little bit in the butter so that I know they’ve all had their turn in the good stuff. Make sure the chicken breasts are not touching or crowded too closely (we don’t want them to steam or braise).

When one side of the chicken has browned nicely, flip the chicken over and get some color on the second side. Once you’ve got some good color on both sides, turn off the heat and finish cooking the chicken all the way through in the oven. It’s done when the center is white, not pink, and the juices run clear. Remove from the pan and set chicken aside.

But don’t do anything to that wonderful pan! It has awesome flavor in it from the chicken. So put the pan back on the stove and turn the heat to medium low. It should still be a pretty hot pan, so add the onions, carrots, and garlic, and stir around to pick up the beautiful browned bits of flavor. Cook until softened and add the spinach, cooking just until wilted. Squeeze over a bit of lemon juice if you like.

Then add the lentils into the pan and stir to create a beautiful mottled mosaic of colorful veggies. Taste for salt and pepper, and then top with your chicken breasts for a gorgeous, rustic meal!

IMG_1284 This lasted me a few days of lunches at work, and man was it good. Lentils are just awesome. IMG_1236

Apple Crumble Ice Cream.

I try to make sure that most of the recipes I post here–and most of the recipes I make in general–are not overly complicated, difficult, or time-consuming. I try to keep the process simple and the active attention time to under an hour. I try to keep the dish-dirtying and utensil-using to a minimum. It’s just not practical to expect anyone to devote hours to cooking one recipe, at least not on a regular basis.

But every once in a while, I think of a recipe that means a commitment of time an effort, and today, I’m unapologetically sharing one of those. There are three separate components to this finished product: an ice cream base, an apple “filling,” and a crumble topping. And you’ll use a saucepan (twice), three bowls, an ice cream maker, and a baking dish before we’re finished. So when you read the recipe and raise your eyebrows a little bit, don’t say I didn’t warn you. Just know that I’m so absolutely crazy about this apple crumble ice cream that I’ll happily go through the process again and again, because I know the finished product is so damn good.

IMG_1190

INGREDIENTS

for ice cream:
1 can full-fat coconut milk
3 tbsp brown sugar
pinch of cinnamon
1 tbsp vanilla extract

for apple “filling”:
1 apple, peeled and diced
1/2 cup water

for crumble topping:
1 tbsp almond meal
2 tbsp chopped almonds
1 tbsp ground flax seeds
1 tbsp brown sugar
pinch of salt
1 tbsp cold butter (I left it out of the fridge for 15 minutes before working with it)

DIRECTIONS

First, make sure your ice cream maker is ready to go, according to its directions. For me, that means the bowl of the ice cream maker has been in the freezer for at least 24 hours before I even start the recipe.

Once you’re ready to go, start with the ice cream base. In a saucepan over medium heat, combine coconut milk, brown sugar, cinnamon, and vanilla extract. Heat gently for about 5 minutes, stirring occasionally, just so the ingredients come together.

IMG_1150

Transfer to a bowl and put in the refrigerator overnight, or at least 4 hours. Some people seem to get away with shorter cooling times when they’re making ice cream, so maybe it’s just my ice cream maker, but for me it’s gotta be overnight.

Next, the apple “filling.” Rinse out the sauce pan and add the apples and ¼ cup of the water. Cook over medium low heat, adding more water to the pan if the apples start to dry out. Cook for 40-45 minutes, stirring occasionally, until the apples are browned and softened. Be patient – this step isn’t a quick one, but it’s worth it.

Once the apples are done, transfer to a bowl and put in the fridge. They should also be fully cooled before you start the next step.

Once everything is cooled, you’re ready for the ice cream maker. Make sure you follow your ice cream maker’s directions for churning.

When the ice cream is churned, transfer to a container with a lid, stir in the apples, put the lid on the container, and freeze.

IMG_1168

Last step is the crumble topping. Preheat oven to 350 F.

Mix together all remaining ingredients except the butter. Then use a fork to work the butter into the nut mixture. Line a baking dish with parchment paper and pour in the crumble, and bake for about 15 minutes, until golden brown. Refrigerate to cool.

Okay, the home stretch! Use a fork to break up the crumble topping into, well, crumbles. You can either sprinkle over the whole portion of ice cream, like I do, or keep it separate and sprinkle over each individual serving.

IMG_1187

Yes, I know, it’s a long recipe with a ton of steps and a lot of waiting, but ohmygod is the result fantastic.

IMG_1194