Strawberry “Nutri-grain” Snack Bars.

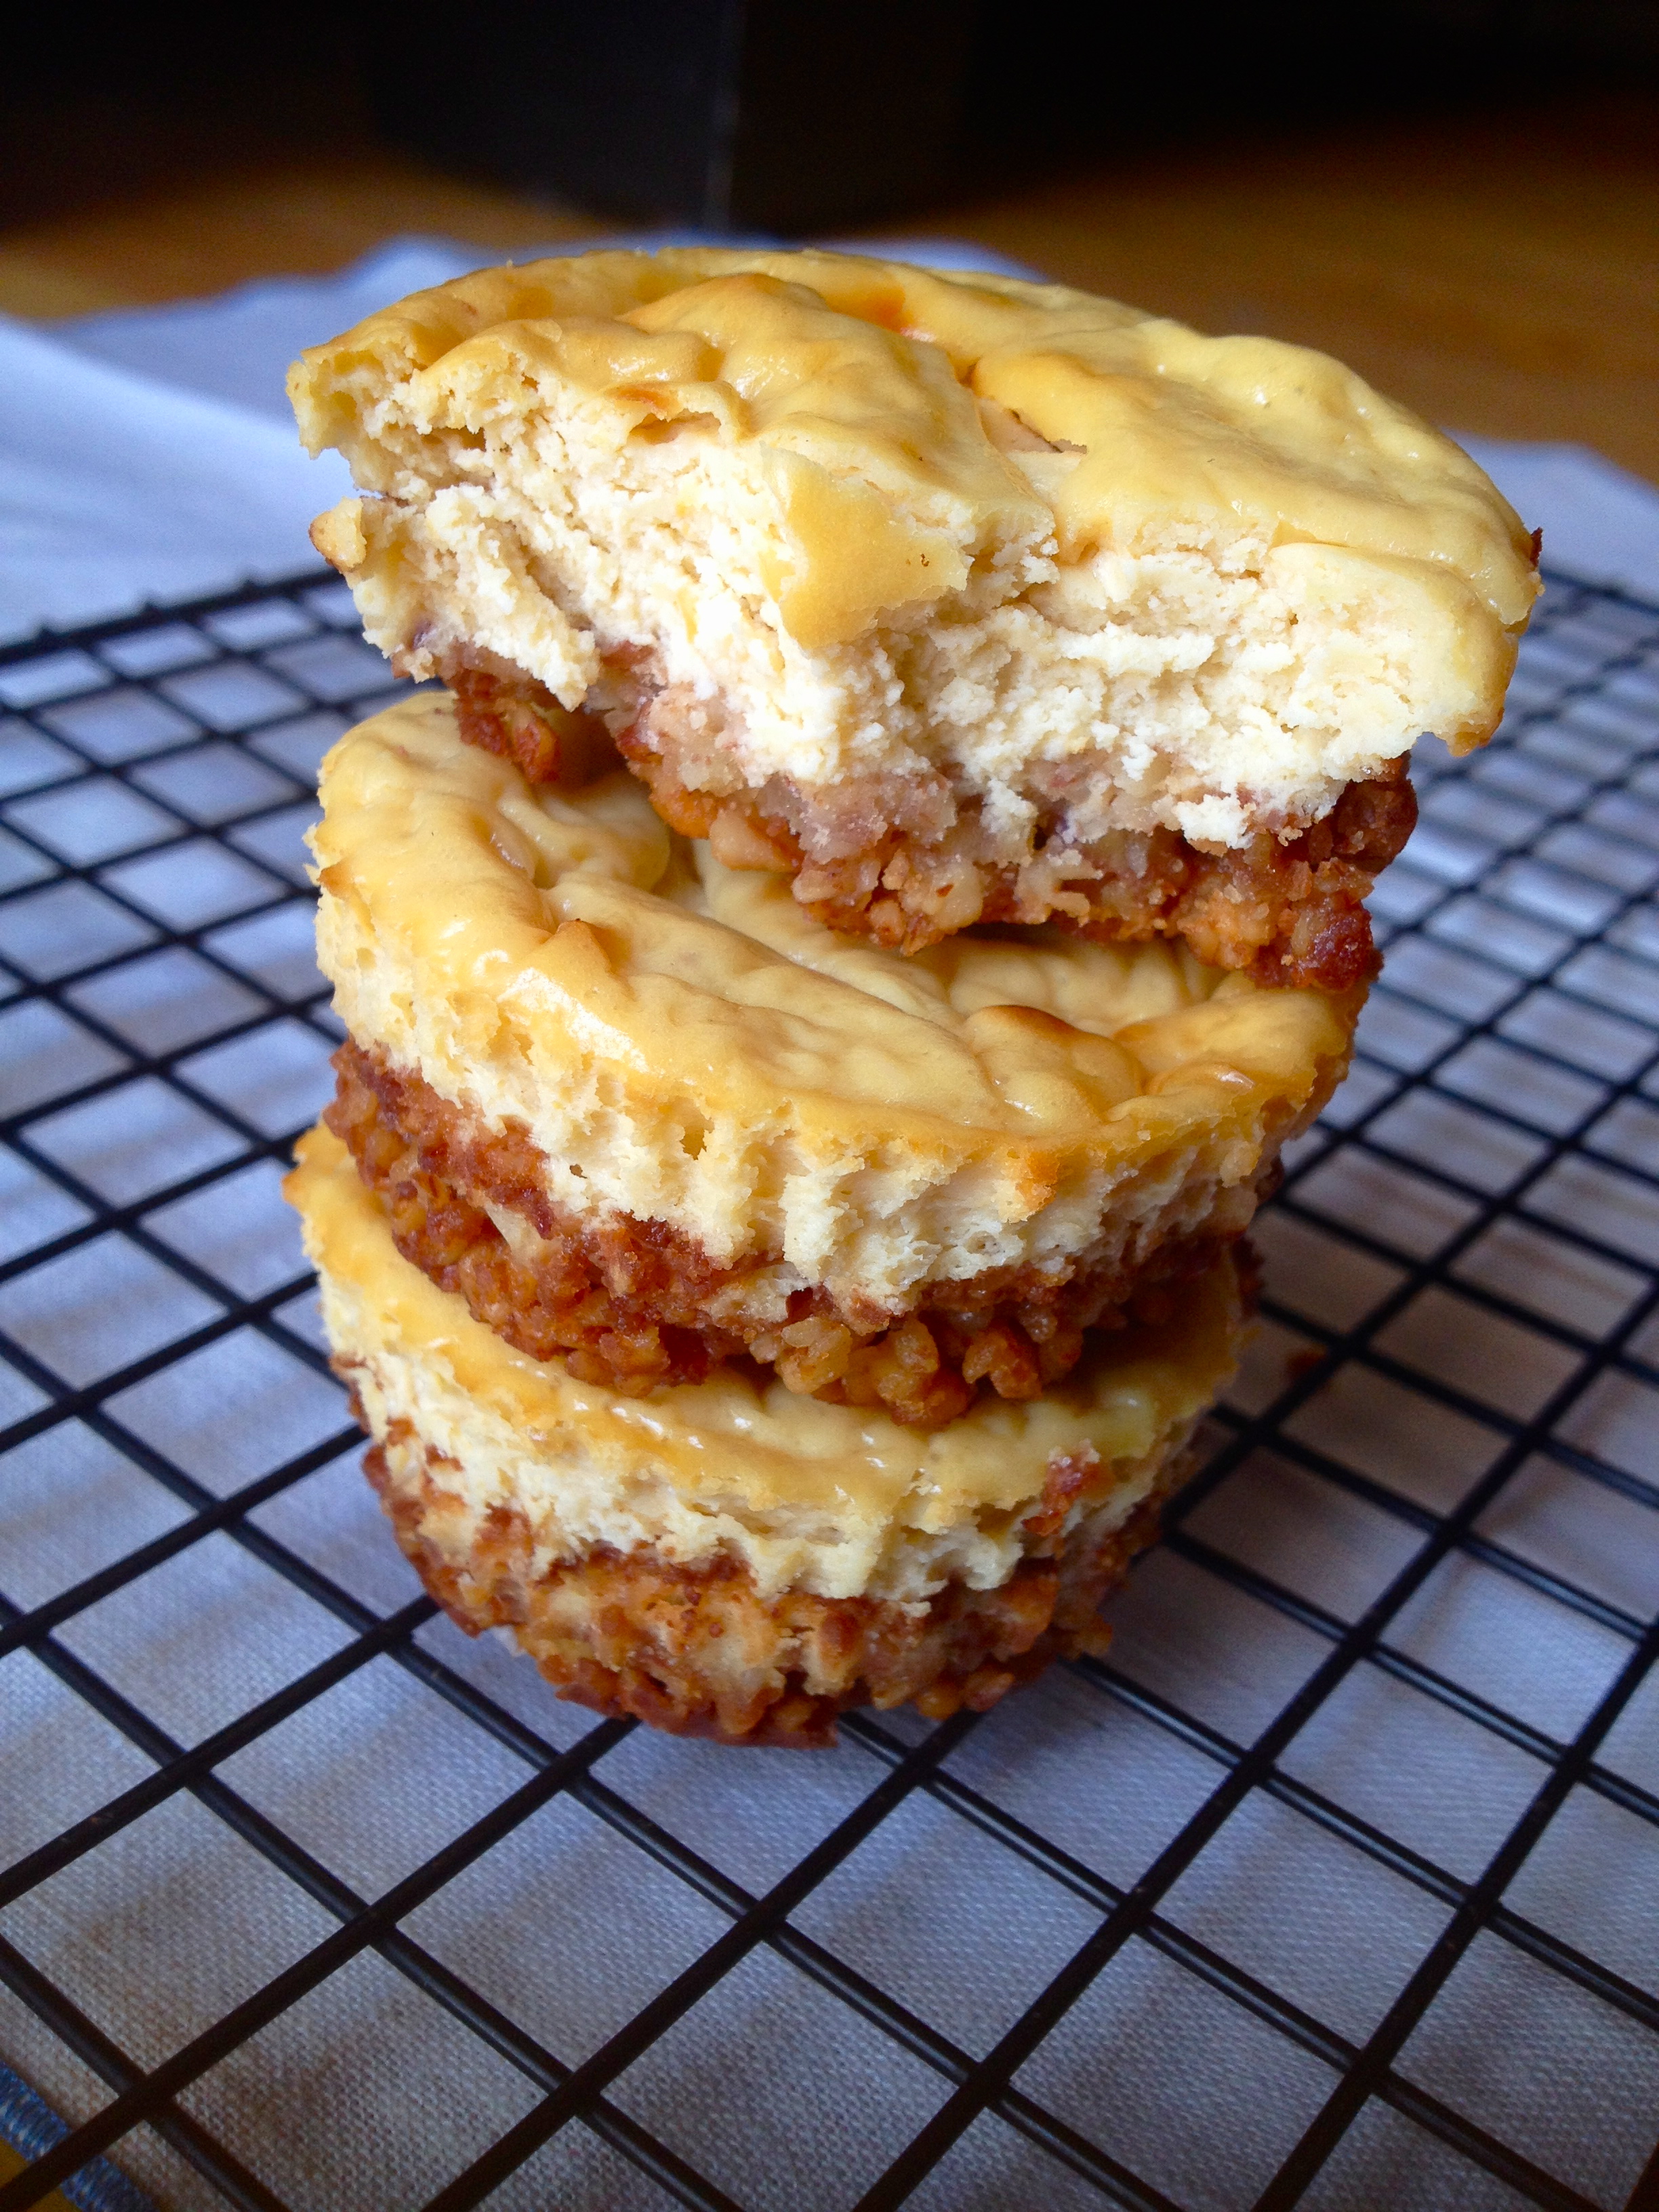
I was traveling for work this week. That meant four nights in a hotel, with – dun dun DUN – no access to a kitchen! And as nice as it is to have the hotel make you breakfast every morning, I am now sick to death of *other people’s* food. I want Kelly food again! After all, who is Kelly if she isn’t in the Kitchen? So to celebrate being home again, I made these snack bars. Snacks might be the worst part of travel food – the standard options are almost always processed, over-salted, and packed with sugar. Gross. These are the opposite of the airport convenience store snacks I ate this week. Strawberry Nurtri-grain-esque snack bars – yay, I’m home!

Strawberry "Nutri-grain" Snack Bars | KellyintheKitchen | 1/4 cup maple syrup, 1/4 cup honey, 1/4 cup peanut butter, 2 tbsp butter, melted (or coconut oil), 1 tsp vanilla extract, 2 1/4 cups almond meal, 1 tbsp coconut flour, 1/4 tsp salt, 10 medium-sized strawberries, 1 tbsp honey, pinch salt

INGREDIENTS

for crust:
1/4 cup maple syrup
1/4 cup honey
1/4 cup peanut butter
2 tbsp butter, melted (or go for coconut oil if you want)
1 tsp vanilla extract
2 1/4 cups almond meal
1 tbsp coconut flour
1/4 tsp salt

for filling*:
10 medium-sized strawberries, washed, dried, stems removed
1 tbsp honey
pinch salt
*if you don’t want to make the filling, just skip this step and use use 1/2 cup pre-made jam.

DIRECTIONS

First, make the crust. Combine maple syrup, honey, peanut butter, butter, and vanilla extract. Stir in almond meal and salt until dough comes together. Refrigerate 1 hour.

While the dough chills, make the filling. Use a food processor to totally blitz the strawberries and honey. Transfer the puree to a pan, add salt, and heat over medium low. Bring to a low bubble and stir occasionally. Cook about 15 minutes, until reduced and thickened. You should end up with about 1/2 cup of cooked filling. Put it in the fridge to cool down.

IMG_2087

Preheat oven to 350 F. Then take the chilled dough out of the fridge and split it into quarters. Put one quarter on a sheet of parchment paper and put the rest back in the fridge. Roll the dough out between two pieces of parchment paper, into a long rectangle. Trim the sides so that it’s actually a rectangle and not a free-form wavy-edge shape. Then spread one quarter of the strawberry filling over half of the rectangle.

IMG_2092

Use the parchment paper to gently fold the non-filling half over the filling half, creating a long seam. Cut into bars and use your fingers to pinch the sides closed, so the filling doesn’t leak out (mine did leak out a bit and it really wasn’t a big deal). Carefully move the bars to a baking sheet and put them in the fridge to keep cool while you repeat the process with the rest of the dough.

IMG_2099

Bake for about 10 minutes, until the tops are golden brown and the edges are darkened.

IMG_2103

That’s it! These are good right out of the oven, but they’re also super good at room temperature. Make sure to cool them completely before storing in a sealed container; they’re best when eaten within 2-3 days.

Advertisement

Marbled Cheesecake Brownies.

I pin and bookmark a lot of recipes that involve marbling, because I think that swirly mingling of colors is just so loose and free and pretty. This particular recipe has been on my list for at least three years. “On my list” is what I say about literally anything that I want to try eventually but have no real motivation to try right now. Mostly I use it about recipes, books, and TV shows. There is no time constraint for how long something can be “on the list;” case in point: it took me three friggin’ years to try this recipe. And someday I’ll watch 24 and read William Faulkner, but I have no plan to do either of those right at this moment.But wow am I glad I finally got down to business with this recipe, because it’s easy and tasty and fancy, all at the same time. I brought a batch to a Memorial Day barbecue, and while there was also an offering of special brownies at the party, mine more than held their own. What they lack in the party enhancement department, they make up for with major tasty goodness. Score one for cheesecake!!

Marbled Cheesecake Brownies | KellyintheKitchen  | For brownie layer: 6 tbsp butter, 1 cup semisweet chocolate chips, 3/4 cup packed brown sugar, splash of vanilla extract, 2 eggs, 1/4 cup unsweetened cocoa powder, 2 packed tbsp coconut flour, 3 tbsp potato starch (I haven’t tried it, but corn starch should work here, too), 1/2 tsp baking soda, 1/4 tsp salt. For cheesecake layer: 8 oz cream cheese, 1/4 cup granulated sugar, 1 tsp vanilla, 1 egg

INGREDIENTS

for brownie layer:
6 tbsp butter
1 cup semisweet chocolate chips
3/4 cup packed brown sugar
splash of vanilla extract
2 eggs, room temperature
1/4 cup unsweetened cocoa powder
2 packed tbsp coconut flour
3 tbsp potato starch (I haven’t tried it, but corn starch should work here, too)
1/2 tsp baking soda
1/4 tsp salt

for cheesecake layer:
8 oz (1 package) cream cheese, room temperature
1/4 cup granulated sugar
1 tsp vanilla
1 egg, room temperature

DIRECTIONS

Preheat oven to 350 F.

To make the brownie layer, use a double-boiler to melt the butter and chocolate chips together, stirring until smooth. Remove from heat and mix in brown sugar and vanilla. Let cool slightly before stirring in one egg at a time.

Sift in the cocoa powder, coconut flour, potato starch, baking soda, and salt, and stir into chocolate mixture. Line an 8×8 baking dish with parchment paper and pour in all the batter except 4-6 tbsp (we’ll swirl this portion into the cheesecake). Set aside.

To make the cheesecake layer, put the cream cheese in a mixing bowl and beat with a spoon until smooth. Mix in the sugar and vanilla, and then stir in the egg. The mixture will look curdled, but continue to stir gently until the egg is worked in and the mixture is smooth.

Marbled Cheesecake Brownies | KellyintheKitchen

Pour the cheesecake mixture over the brownie batter and carefully spread it into an even layer. Drop the remaining brownie batter in a line down the middle of the cheesecake. To marble the top, use a knife or toothpick to drag the chocolate part up through the cheesecake, making whatever marbling shape you like (or just marble at random).

Marbled Cheesecake Brownies | KellyintheKitchen  | For brownie layer: 6 tbsp butter, 1 cup semisweet chocolate chips, 3/4 cup packed brown sugar, splash of vanilla extract, 2 eggs, 1/4 cup unsweetened cocoa powder, 2 packed tbsp coconut flour, 3 tbsp potato starch (I haven’t tried it, but corn starch should work here, too), 1/2 tsp baking soda, 1/4 tsp salt. For cheesecake layer: 8 oz cream cheese, 1/4 cup granulated sugar, 1 tsp vanilla, 1 egg

Put the dish in the oven and bake for about 30 minutes, until the cheesecake is set but still a little bit wobbly. The way I decide if cheesecake is done is by Nigella Lawson‘s helpful suggestion to look for the top to be barely-set, with “a hint of inner thigh wibble.”

Marbled Cheesecake Brownies | KellyintheKitchen

Cool at least an hour before cutting the brownies.

Marbled Cheesecake Brownies | KellyintheKitchen  | For brownie layer: 6 tbsp butter, 1 cup semisweet chocolate chips, 3/4 cup packed brown sugar, splash of vanilla extract, 2 eggs, 1/4 cup unsweetened cocoa powder, 2 packed tbsp coconut flour, 3 tbsp potato starch (I haven’t tried it, but corn starch should work here, too), 1/2 tsp baking soda, 1/4 tsp salt. For cheesecake layer: 8 oz cream cheese, 1/4 cup granulated sugar, 1 tsp vanilla, 1 egg

I actually recommend keeping them in the fridge at all times. Serving them cold just makes such a difference – the consistency is creamy and almost fudge-like, and the chilly cheesecake is perfection!

Marbled Cheesecake Brownies | KellyintheKitchen  | For brownie layer: 6 tbsp butter, 1 cup semisweet chocolate chips, 3/4 cup packed brown sugar, splash of vanilla extract, 2 eggs, 1/4 cup unsweetened cocoa powder, 2 packed tbsp coconut flour, 3 tbsp potato starch (I haven’t tried it, but corn starch should work here, too), 1/2 tsp baking soda, 1/4 tsp salt. For cheesecake layer: 8 oz cream cheese, 1/4 cup granulated sugar, 1 tsp vanilla, 1 egg

Toasted Marshmallow Coffee Brownies.

My many experiments in non-traditional baking have had mixed results—sometimes they turn out delicious, sometimes they are horrible failures, and sometimes they’re surprisingly, differently good. Because I’m lucky enough not to have any food allergies (*knocks on wood*), I’ve tried a lot of different methods, including gluten-free, grain-free, low-sugar, low-carb, and always with as little processed foods as possible. I feel experienced enough now to say that most of these substitution-based recipes are only better than the original if you have no other options (or are totally delusional). It’s the hard truth about healthy desserts.

The results definitely range though, depending on the baked good, and I think cookie recipes are the worst offenders. No matter what healthier option you try to sub in or out, there is no cookie better than the one on the back of the Toll House bag (that recipe is nearly perfect, by the way – if you use a little less flour than called for, and a little more vanilla and brown sugar, you’ll have the ABSOLUTE perfect chocolate chip cookie).

Meanwhile, I’ve found that brownies are the most flexible when it comes to subbing. For whatever reason, they can take a replacement here and there and still turn out totally delicious. That’s what we have here – a gluten-free, grain-free, soft and chewy chocolatey brownie recipe, with a little something special on top. I’d put these crumbly goodies up against any other brownie recipe I’ve made! What a wonderful taste test that would be…

IMG_1535

INGREDIENTS

6 tbsp butter
1 cup semisweet chocolate chips
2 eggs, room temperature
1/3 cup hot coffee
splash of vanilla
1/2 packed brown sugar
1/4 cup unsweetened cocoa powder
2 packed tbsp coconut flour
3 tbsp potato starch (I haven’t tried it, but corn starch should work here, too)
1/2 tsp baking soda
1/4 tsp salt
about 14 jumbo marshmallows

DIRECTIONS

Preheat oven to 350 F.

In a double-boiler, melt the butter and chocolate chips together until smooth. Remove from heat and let cool slightly before stirring in one egg at a time, followed by coffee, vanilla, and brown sugar.

Sift together cocoa powder, coconut flour, potato starch, baking soda, and salt. Stir dry ingredients into batter and pour into greased 8×8 baking dish.

IMG_1506

Dot the surface of the batter with marshmallows. Love those cute & fluffy little pillows.

IMG_1518

Bake for 25-30 minutes, until the center is set. If you stick a toothpick into the center, it doesn’t need to come out totally clean, but it shouldn’t be wet. Be conscious of the marshmallows burning; I ended up tenting a sheet of foil over the pan to slow the browning partway through the bake time. When the brownies are baked, remove them from the oven.

IMG_1529

As they cool, the brownies and marshmallows will deflate and fall a little bit. Good, the more condensed the better! If you’re planning to cut the brownies into nice neat squares, you may want to adjust your expectations, because these are gooey and crumbly. You’ll want to cool them at least an hour, if not more, and potentially give them some fridge time to firm up if you need them to really hold together. If you don’t mind a crumbly brownie, then ignore me and eat them whenever you want. They’re dang delicious!

IMG_1534

Superfood Berry Crisp.

I loved the blueberry almond crisp recipe I posted last time SO MUCH that I’ve made it twice since then. It has that great balance of nutty, buttery, and sweet that I’ve found pretty addicting lately. And after a few tweaks and additions, I have another crisp recipe to share. It’s the nutritionally-amplified fruit dessert of my health food dreams, packing in tons of superfoods: almonds and walnuts, flax seeds and chia seeds, and any mixture of berries your heart desires (I used blueberries, but Trader Joe’s frozen section has a nice mixed berry medley that I bought for next time!). This superfood berry crisp works overtime to give your body what it needs, in terms of both nutrition and sweet tooth satisfaction. And while these healthy ingredients are totally awesome, I think I may start a petition to give butter and brown sugar their own superfood status (their kind of “super” is slightly different, however). Then there would be no stopping this thing!

Superfood Berry Crisp | KellyintheKitchen

INGREDIENTS

1/2 cup ground almonds
1/2 cup whole almonds, chopped
1/2 cup whole walnuts, chopped
1 tbsp ground flax seed
1 tsp chia seed
1/4 tsp salt
3 tbsp brown sugar
4 tbsp cold butter, cubed
splash of vanilla
2 cups frozen berries
1 tsp lemon juice
1 tsp corn starch
2 tsp granulated sugar
optional: 1 heaping tbsp turbinado sugar (or another large-crystal sugar like demerara)

DIRECTIONS

Preheat oven to 350 F.

In a mixing bowl, stir together ground almonds, chopped almonds, chopped walnuts, flax seed, chia seed, salt, and brown sugar. Use a fork to work the cold butter into the dry mixture until there are no more chunks of butter. Then add the vanilla and stir.

In a pie pan or other baking dish, stir together the berries and lemon juice. Then add the corn starch and sugar and stir to coat.

IMG_1489

Starting at the outside and working your way to the middle, sprinkle the nut mixture over the top of the berries. Then finish with a sprinkle of turbinado sugar for an extra bit of sweetness and crunch.

IMG_1490

Lightly lay a sheet of tinfoil over the pan, but don’t tuck the ends around the pan. This keeps the nuts from browning too quickly as the fruit bakes. Bake until the fruit filling is bubbling and the topping is fragrant and browned, about 15-25 minutes.

IMG_1471

Let the crisp cool slightly and serve warm with a scoop of ice cream, or frozen Greek yogurt. Another superfood, look at that!

I forget – what did I say about how to serve this? Was it, “use a spoon and eat it right out of the pan even if it’s too hot”? Because that’s a pretty good way, too.

IMG_1480

Blueberry Almond Crisp in a Skillet.

I was up in the suburbs for some errands and visiting my family on Saturday, and it was the year’s first really gorgeous day of spring in Chicago. My mom and I did yoga outside while our nearly-two-year-old black lab did her best to interrupt us. It’s hard to be graceful in an inversion or a balancing pose when a 70-pound dog is sitting under you. Later, I decided I needed to make a blueberry crisp for dessert, since we had a huge bag of them in the freezer. Blueberries are definitely not my favorite fruit, and recipes like this are really the only ways I enjoy them. And how could you not? The blueberries bubble into a tart and juicy sauce and the topping is golden and buttery and good. Compared to your average fruit crisp, I’ve reduced the added sugars a wee bit, but feel free to add more. And if you like a lot of topping on your fruit crisps–as in, you want the fruit to be fully, thoroughly covered in the good stuff–you could add another 1/2 cup or so of almonds and another tablespoon or two of butter. I was trying to be well-behaved here, but my usual approach to topping a fruit crisp is the more, the merrier. Same goes for all that sun today – bring on the warm weather!

Blueberry Almond Crisp | KellyintheKitchen

INGREDIENTS

3/4 cup almonds
3 tbsp brown sugar
1/4 tsp salt
4 tbsp cold butter, cubed
splash of vanilla
4 cups frozen blueberries
1 tsp lemon juice
2 tbsp granulated sugar
1 tsp corn starch

DIRECTIONS

Preheat oven to 375 F.

In a food processor, blitz almonds, brown sugar, and salt until the almonds are ground to about the size of small pebbles, crumbly but not powdery. Add the butter and vanilla and blitz again, until the butter is broken up into the almonds and no big hunks of butter remain. Set aside (or, if it’s gonna be a while, keep it in the fridge so the butter doesn’t melt).

Grease a cast iron skillet (or pie dish) and pour in the blueberries. Squeeze over the lemon juice and then toss with the sugar and corn starch.

IMG_1353

Sprinkle the topping over the blueberries, starting at the edges and working your way inward. Bake for 25-30 minutes or until the fruit is bubbly and the top is golden brown. If your topping starts to brown too quickly (mine did), just lay a sheet of tinfoil over the pan. Don’t tuck the foil over the pan, but just lightly tent it.

IMG_1357

When the crisp is done, take it out of the oven and let it cool until it’s out of the “molten” stage. I love to eat blueberry crisp hot with a scoop of ice cream, but it’s good at room temperature, too. Whatever floats your boat. Yum.

IMG_1367

Mini Cheesecake Cupcakes.

I’ve been doing some experimentation with healthier crusts for the desserts in my life. My main criteria are that the recipe must taste amazing, be low in carbs and sugars, and be free of any processed ingredients. Ground almonds really fit the bill; when combined with butter, they hold the crust together very well, can be flavored however you like, and don’t need much in the way of sweetening. And while nobody loves a good graham cracker crust more than I do, I’ve found that this buttery almond crust rocks in its own right. Filled with creamy, tangy cheesecake awesomeness that has just a hint of coffee flavor, I think I need to start stockpiling cream cheese so I can make these whenever I want. Score another one for the low-impact dessert category!

IMG_1123

INGREDIENTS

1/2 cup almonds, ground to powder in the food processor (or use a scant cup of almond meal)
6 tbsp butter, room temperature
1-2 tsp honey, to taste
12 oz cream cheese, room temperature (if it’s cold, it won’t mix smoothly)
1 tsp vanilla extract
1 1/2 tsp coffee (this is a very subtle flavor here. But if coffee’s not your thing, you could substitute with Kahlua, Bailey’s, or any other peppy flavoring you like… or a little bit more vanilla)
2-3 tbsp honey, to taste
2 eggs

DIRECTIONS

Preheat oven to 350 F. Line a cupcake pan with paper liners. Set aside.

In a small bowl, mix together ground almonds, butter, and honey. Spoon mixture into bottom of cupcake liners and bake for about 8 minutes. You may see little bubbles in the crust as some of the liquid evaporates – this is fine. When the crust smells nutty and good and is starting to brown and set, remove the pan from the oven and set aside while you make the filling.

IMG_1108

To make the filling, use a fork to break up the cream cheese and make sure it’s totally smooth and creamy. Stir in the vanilla, coffee, & honey, and taste. Add more honey if you want it sweeter. Then add one egg and stir until combined before repeating with the second egg.

Spoon filling into cups, and fill as high as you like – these don’t rise as they cook, so need to worry about expansion or overflow. Bake for 12-18 minutes, until the tops are just barely set and starting to take on a golden color.

Let the baked cheesecakes cool in their pan for 2 minutes before taking them out. Then move them to the fridge for at least 2 hours (overnight is best, but that’s asking a lot of your self-control!). They taste good at any temperature, but if not given their proper cooling time, the crust won’t hold together as well and the cheesecake filling won’t be as satisfyingly creamy.

IMG_1127

I considered melting a bit of chocolate or topping with a raspberry or in some way dressing ’em up, but they really can stand on their own as a yummy dessert you can feel good about eating.