Stuffed Potato Skins.

Mmmmm. I love when amazing recipes are born of leftovers. What to do with leftover Christmas ham? This is a totally sumptuous and indulgent use of that holiday bounty, and it’s worth it in every way. My stuffed skins are the lovechild of a twice-baked potato and a potato skin, with the best of each coming together in this dish. It’s the steamy meatiness of a twice-baked, with the crispiness and the magical fillings/toppings of potato skins. Make this now or forever regret missing a wonderful food opportunity!

IMG_6339

INGREDIENTS

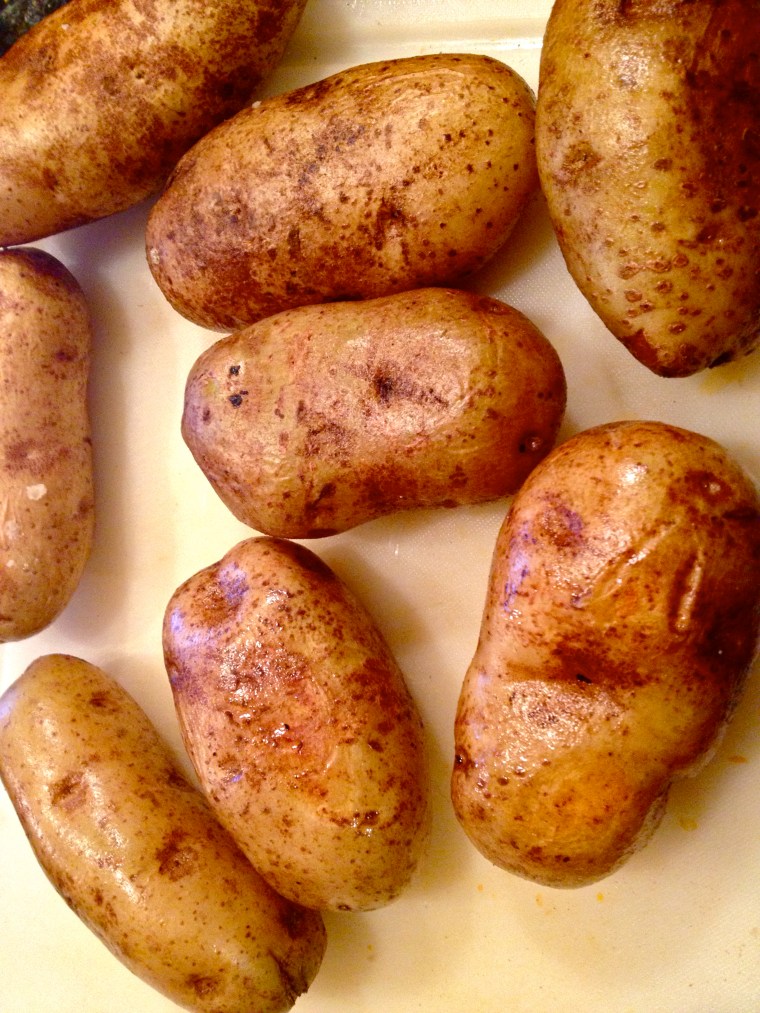
8 medium baking potatoes, washed
canola oil
1 1/2 cups cheddar cheese, shredded
1 cup Greek yogurt or sour cream
1 tbsp butter
3-5 tbsp milk
2 cloves garlic, minced
1/2 tsp seasoning salt (I used Bridgeport seasoning from the Spice House)
1 1/2 cups ham, diced (great for any holiday’s leftovers!!)
salt and pepper to taste
5 scallions, chopped

Just the Recipe link: Stuffed Potato Skins

DIRECTIONS

Preheat oven to 425 F.

Rub each potato lightly with oil and place on a baking sheet. Bake until fork-tender, about 40 minutes.

IMG_6329

While the potatoes cook, get the toppings/fillings ready. Shred the cheese, dice up the ham, and chop the garlic and scallions.

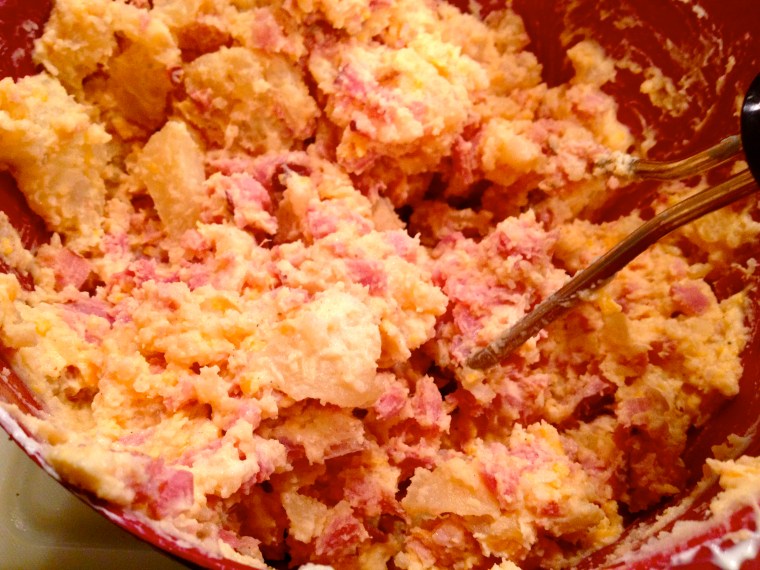
When the potatoes are done, slice them in half long-ways and use an oven mitt hold them while you scoop out the middles. You want each potato to have enough room to stuff with filling, but enough potato remaining inside so that it still holds its shape. Put the potato meat that you scoop out into a large mixing bowl. Place the empty potato skins back in the pan, drizzle with olive oil, and put back in the oven to crisp up a bit more, about 10-15 minutes (or longer, if you want the skins really nice and crispy. I didn’t have the patience to wait!).

Now, mix up the filling. Stir together the potatoes with the sour cream, milk, butter, garlic, seasoning salt, ham, salt, pepper, and 1 cup of the cheese.

IMG_6331

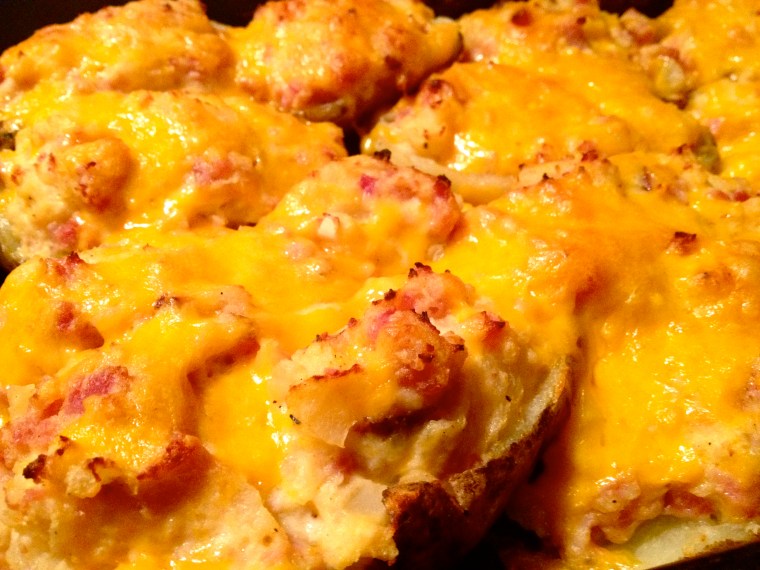
Take the skins out of the oven and stuff with the filling.

IMG_6333

Sprinkle with the rest of the cheese.

IMG_6334

Bake until the cheese is melted and the skins are even crispier. Sprinkle with scallions. These go great with sour cream and/or ketchup. Enjoy!

IMG_6337

Advertisement

Cream Potatoes Anna.

Pommes Anna is a classic potato dish in French cuisine. It’s usually made with butter, but, taking a page out of chef Laura Calder’s book, I used half and half. It’s melty and creamy. It’s herby and warm. It’s the perfect side to any kind of meat, but especially pork chops. Or chicken breasts. Or steak. Or buffalo. Or zebra filets. Okay fine, everything! And pommes Anna is fun to make too. Lots of layering and a bit of flexibility with herbs and spices. These were very calming to make, and the finished product proved a satisfying reward after having spent the morning tiring out a new puppy. Please welcome Penny the Black Lab Puppy, a much-loved new addition to our family!

IMG_6134

She tried her hardest to get at these potato goodies while I was shooting them, but only managed to snag my red and white checked towel in her little mouth, prancing away as she tripped over the dragging ends of it. What a little troublemaker.

IMG_6164

INGREDIENTS

4 potatoes (small-ish – this recipe makes 2 ramekins, so adjust accordingly), peeled and thinly sliced into discs
1/2 cup half and half or heavy cream
rosemary and thyme, chopped
pinch of paprika
salt and pepper
butter or non-stck spray

Just the Recipe link: Cream Potatoes Anna

DIRECTIONS

Preheat oven to 400 F.

Place the potatoes in a large dish and toss them in the half and half. Let them soak about 15 minutes.

IMG_6145

Meanwhile, break out the parchment paper. You’ll need to trace a sheet of paper that will fit into the bottom of whatever baking dish you’re using (I used two ramekins, so I cut two circles to fit into the bottom). Then, you’ll need a slightly larger sheet of parchment paper to fit on top of the dish, covering the assembled potatoes. I find it easier to just cut all the parchment paper pieces at once and then set the top pieces aside. Butter or spray the bottom piece(s) and place into the bottom of the pan, butter side up.

IMG_6139

Next, take the potatoes out of the cream and start layering them into your dish. Make a single layer of potatoes, then sprinkle with a bit of the salt, pepper, paprika, rosemary, and thyme. Keep alternating potatoes and seasonings until you use up all the potatoes.

IMG_6149

Butter the top piece(s) of parchment paper and place firmly on top of the potatoes. If you’re using ramekins, place them in another larger pan.

IMG_6157

Place a heavy pan on top of the potatoes; this weighs them down and bakes them into a creamy potato cake. Yum. Bake until super tender and let cool before turning out into a beautiful, delectably melty potato cake.

IMG_6161

Enjoy! Oh and P.S. – happy Mayan end of the world day! See you all tomorrow….or not?!

IMG_6170

Roasted Carrots.

Nothing fancy here, just an easy side dish. But there’s something kind of magical that happens when you roast carrots this way. They develop a silky texture with a warm, rich flavor that’s both sweet and savory. I love these—if you’re not usually a cooked carrot fan, make these and you will totally rethink your stance on the vegetable. They go great with baked chicken, lamb steaks, pork chops, and almost any other simple main dish you can think of. And the added perk that makes me even more excited about this recipe is the garlic cloves: after the carrots are done and the cloves are softened in the oven, toast up a piece of crusty bread, slather it with some good butter, and then spread the garlic all over that baby. Just don’t try to kiss anyone afterwards. Or alternatively, make them eat some garlic, too.

INGREDIENTS

6-10 whole carrots, washed and dried
olive oil
salt
pepper
3 cloves garlic, skin on, crushed

DIRECTIONS

Preheat oven to 350 F.

In a pan or baking dish, toss carrots in olive oil, salt, and pepper. Drop in the garlic cloves.

Bake until tender and slightly caramelized. Yum.

Roasted Brussels Sprouts and Homemade Garlic Mayonnaise.

There are certain recipes that all chefs should know how to prepare. Some are grand and time-consuming, like coq au vin or borsch, and others are simple and versatile, like cream scones or chicken stock. Often these types of recipes are all about getting the technique right, which can be much more difficult than it sounds. I always have a couple of difficult recipes that I’m working on, trying a few times to make sure I’ve got them right before I post anything about them. Luckily for me, homemade mayo was one I got right the first time! It takes a strong arm, a steady hand, and a good eye, but it really isn’t so difficult when you get down to it. A whisk here, a few drops there, followed by a bit of frantic whisking-while-pouring, and you’ve got yourself a beautiful homemade mayonnaise. Crispy golden brown Brussels sprouts are the perfect accompaniment to this garlic mayo, but you’ll definitely have some leftovers on you hands, so go crazy and mayonnaise it up while you’ve got this beautiful fresh stuff around. Chicken salad sandwiches maybe? Or BLTs spread with a generous glob of mayo on perfectly toasted wheat bread? If there ever were a time to be glamorous and indulgent with your food, it’s when you’ve got access to your own homemade mayonnaise.

INGREDIENTS

for Brussels sprouts:
a few handfuls of Brussels sprouts, the smaller ones halved and the larger ones quartered
olive oil
salt and pepper to taste

for mayonnaise:
1 egg yolk, room temperature (raw egg warning blah blah blah)
1 tsp vinegar (I used white vinegar)
3/4 tsp dijon mustard
not quite 1 cup oil (I used a mixture of olive and canola, with a bit more olive than canola)
2 cloves garlic, minced
salt and pepper to taste

DIRECTIONS

Preheat oven to 400 F.

Toss Brussels sprouts with olive oil, salt, and pepper, and spread in a single layer on a foil-lined pan. Bake until slightly crispy and browned.

While the Brussels sprouts cook, mix up the mayo. Whisk together egg yolk, vinegar, and mustard. Whisking constantly, add a few tiny drops of the oil mixture at a time until the mixture emulsifies. Add the rest of the oil in a steady stream until it’s all incorporated into a smooth, pale yellow mayo.


At this point, whisk in the lemon juice, salt, pepper, and garlic.

That’s all! Scoop the mayo into a ramekin and serve it as is, at room temperature, or cool it off in the fridge for a while. Serve as a dip with the hot Brussels sprouts. You’ll have a lot of mayo leftover, so do something amazing with it (it won’t last as long as preservative-y store-bought mayo so use it up quick!).

Baked Zucchini and Summer Squash Chips.

I always seem to buy zucchini and summer squash as a pair. I’m not sure why they always go together in my mind, and I never eat one without the other. For whatever reason, these vegetables are a couple, and I intended my recipe to be no exception to that rule. But while I was slicing up these green and yellow beauties, I wondered, why should they always go one with the other? It’s just as tasty to pair two zucchini or two summer squash—I defy their ingredients to tell the difference. In fact, I firmly believe that a vegetable can and should be with any vegetable partner they choose, regardless of what the traditional pairing might be. So make these chips with whatever you’ve got in the fridge and celebrate the right of everyone–vegetable or even human–to be with whoever they work best with!

Baked Zucchini and Summer Squash Chips | KellyintheKitchen | 2 zucchini and/or summer squash, 3 tbsp half and half, 1/4 cup grated parmesan cheese, 1 clove garlic, 1/4 cup panko bread crumbs, 1/2 tsp Lawry's seasoned salt, pepper

INGREDIENTS

2 zucchini and/or summer squash, sliced about 8th of an inch thick
3 tbsp half and half
1/4 cup grated parmesan cheese
1 clove garlic, minced
1/4 cup panko bread crumbs
1/2 tsp Lawry’s seasoned salt
pepper

Just the Recipe link: Baked Zucchini and Summer Squash Chips

DIRECTIONS

Preheat oven to 425 F.

Put half and half in a shallow dish. Put parmesan, garlic, bread crumbs, Lawry’s seasoned salt, and pepper in a bowl and whisk together.

Using one hand for dipping in half and half and the other for tossing in crumbs (so that neither hand gets cake-y), dip each slice of zucchini first in the half and half…

…and then into the bread crumbs, coating each side.

Place slices in a single layer on a foil-lined baking sheet.

Bake until golden brown and crispy. Serve immediately. Any ideas for a dip? They’re good on their own, but I’m sure there’s a great dip out there that I wasn’t able to think of.

And thanks for indulging my soapbox moment—even us food bloggers feel the need to take a stand every once in a while :)

Baba Ganoush.

I’m no farmer and I don’t know anything about the seasonality of produce. Visiting most American grocery stores, the average shopper would have no idea when various fruits and veggies were in season, because stores sell pretty much everything, all year round. And while it can be nice to have fresh avocados in winter and apples in spring, there’s really nothing as good as in-season local produce, picked by farmers and eaten by me on the very same day! On Saturday morning at the farmers market, I saw more eggplants in more different varieties than I even knew existed, so my keen non-farmer Spidey Sense tells me it must be eggplant season in the midwest. I picked up a nice big one and made this classic Middle Eastern roasted eggplant spread. Go get your own before the season passes!

INGREDIENTS

1 large eggplant
4 cloves garlic, peeled and cut in half
1 tbsp good quality extra virgin olive oil
1 tbsp tahini
2 tsp lemon juice
fresh parsley, chopped
1/8 tsp hot paprika, plus more for dusting
salt and pepper to taste

A successful morning at the farmers market.

DIRECTIONS

Preheat oven to 375 F.

Pierce eggplant 8 times. Place on hot grill or directly on gas stove over medium high flame. Turn so that each side chars evenly.

When the skin is charred, remove from heat.

Stuff garlic cloves into the slits in the eggplant.

Roast on baking sheet for about 20 minutes, until eggplant is completely softened. Set aside to cool.

While eggplant cools, combine all other ingredients in a bowl.

When the eggplant has cooled enough to touch, cut off the stem and peel off as much of the skin as you can.

Cut into three pieces and add to a food processor along with all other ingredients.

Spoon into a bowl and dust with more paprika. I forgot to do it for the photo, but an extra drizzle of olive oil isn’t a bad idea either.