Balsamic Chicken with Sauteed Vegetables and Lentils.

Can we talk about lentils? Why don’t we eat more lentils in this life we lead? I realize I’m speaking for you, readers, when really I should just speak for myself…maybe you eat a lot of lentils already, or maybe you’re allergic to lentils and I’m being insensitive to your needs. Sorry. But everyone else, why aren’t lentils a bigger part of our lives?! They are cheap, good for you, SO easy to make, and incredibly versatile. They can be the star of a dish, the sidekick, or the background canvas for another ingredient’s greatness. And let me repeat how cheap they are. Most stores in my neighborhood sell a pound bag of lentils for less than a dollar, and since they do plump when you cook ’em, you end up with a LOT of lentils for very little money. They are also a great high-protein substitute for rice if that’s your thang, and since you prepare them basically the same way you prepare rice, it’s not hard to learn to make lentils. Also they taste great. Are you convinced? Good. Make this. IMG_1270 INGREDIENTS

for chicken:
3 small chicken breasts
fav all-purpose spice rub (there are 2 kinds of people: those who know that Back-of-the-Yards rub from the Spice House is the best seasoning ever, and those who haven’t tried it yet)
salt and pepper
balsamic vinegar
butter

for lentils:
1/2 lb lentils
1 cup chicken stock
3 cups water
pinch of parsley
pinch of rosemary
pinch of thyme

for veggies:
1/4 onion, diced
2 carrots, peeled and diced
1 garlic clove, minced
2 cups spinach leaves, chopped
salt and pepper
lemon juice (optional)

DIRECTIONS

IMG_1281 I believe marinades are an art, not a science. With that in mind, have a bowl or plastic bag handy and rub the chicken breasts with some spice rub and salt and pepper. Put the chicken in the bowl or bag and pour in a few teaspoons of balsamic vinegar. Let this concoction marinate in the fridge for at least 20 minutes, or as long as overnight.

The lentils take a little while, so get them going next. Sort through and pick out any stones or weird looking ones, and rinse the remaining beauties. In a small pot, combine lentils, chicken stock, water, parsley, rosemary, and thyme. Bring to a boil and turn down to a simmer and cover. Cook until tender, and drain any remaining liquid. Set the lentils aside.

When you’re almost ready to cook the chicken, preheat the oven to 350 F.

To cook the chicken, heat a skillet or other stove-to-oven-safe pan over medium high heat. Add some butter to the pan and let it melt, and then add the chicken breasts. I like to move each one around a little bit in the butter so that I know they’ve all had their turn in the good stuff. Make sure the chicken breasts are not touching or crowded too closely (we don’t want them to steam or braise).

When one side of the chicken has browned nicely, flip the chicken over and get some color on the second side. Once you’ve got some good color on both sides, turn off the heat and finish cooking the chicken all the way through in the oven. It’s done when the center is white, not pink, and the juices run clear. Remove from the pan and set chicken aside.

But don’t do anything to that wonderful pan! It has awesome flavor in it from the chicken. So put the pan back on the stove and turn the heat to medium low. It should still be a pretty hot pan, so add the onions, carrots, and garlic, and stir around to pick up the beautiful browned bits of flavor. Cook until softened and add the spinach, cooking just until wilted. Squeeze over a bit of lemon juice if you like.

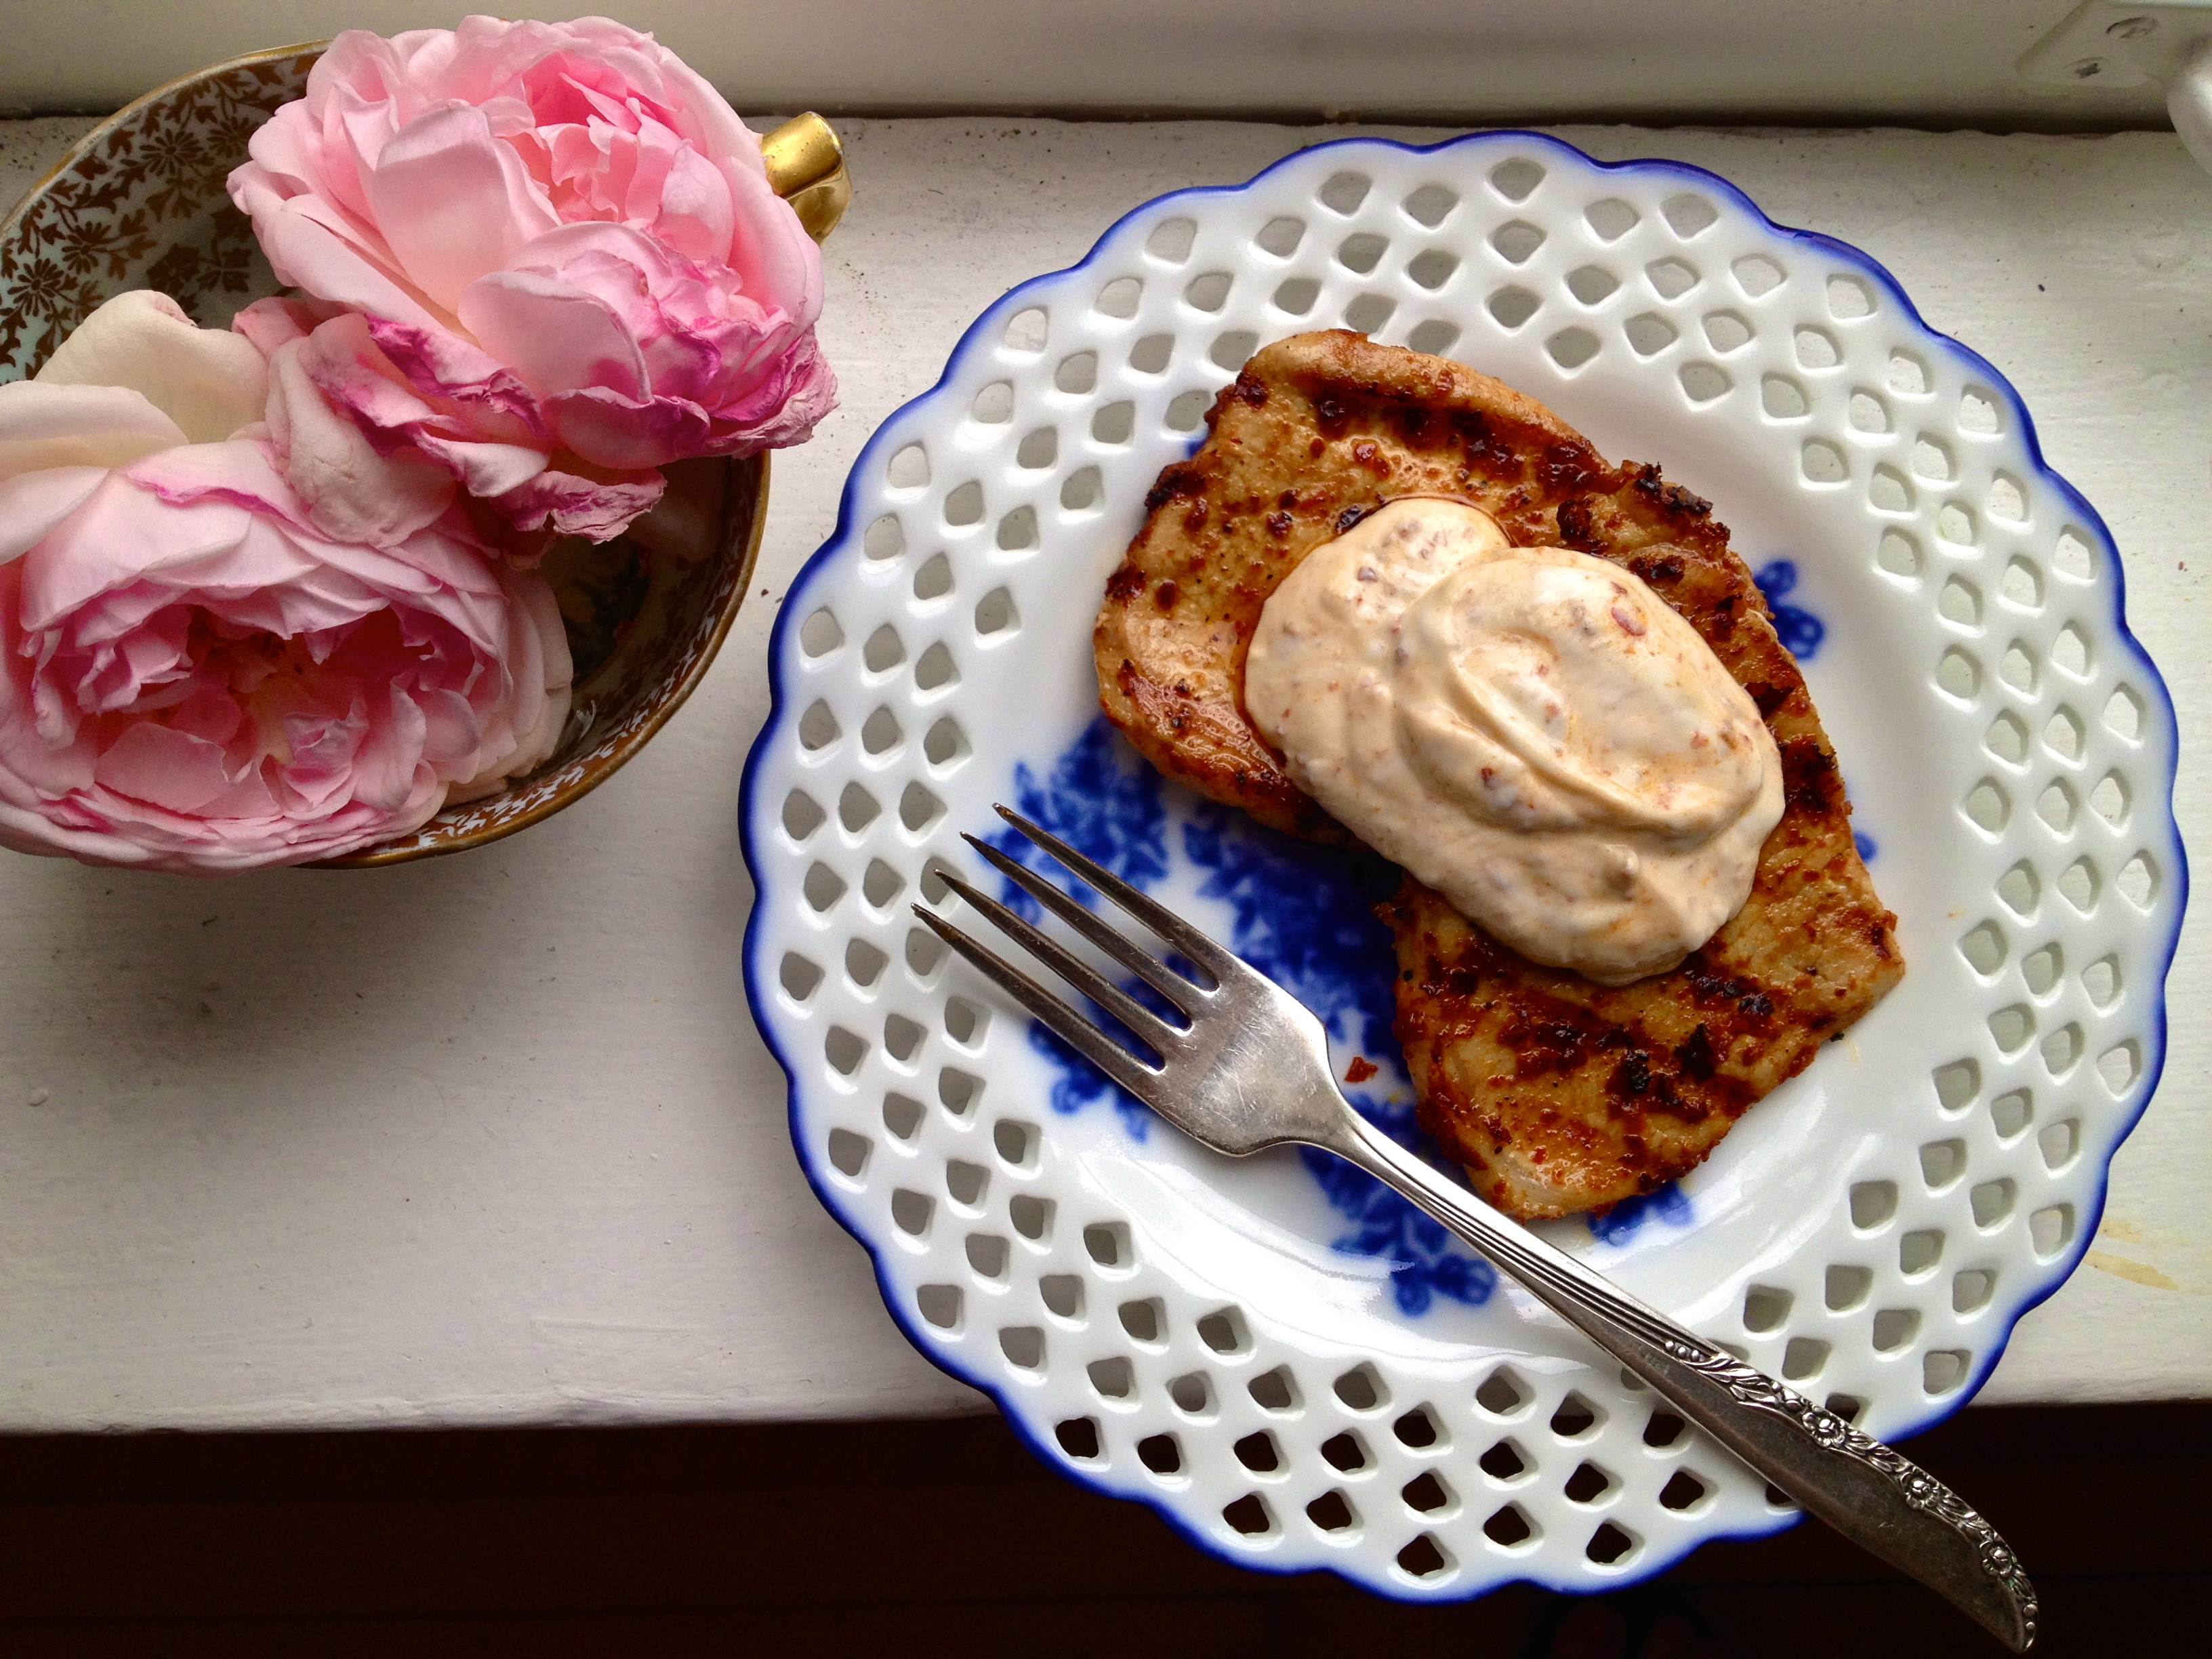
Then add the lentils into the pan and stir to create a beautiful mottled mosaic of colorful veggies. Taste for salt and pepper, and then top with your chicken breasts for a gorgeous, rustic meal!

IMG_1284 This lasted me a few days of lunches at work, and man was it good. Lentils are just awesome. IMG_1236

Advertisement

Apple Crumble Ice Cream.

I try to make sure that most of the recipes I post here–and most of the recipes I make in general–are not overly complicated, difficult, or time-consuming. I try to keep the process simple and the active attention time to under an hour. I try to keep the dish-dirtying and utensil-using to a minimum. It’s just not practical to expect anyone to devote hours to cooking one recipe, at least not on a regular basis.

But every once in a while, I think of a recipe that means a commitment of time an effort, and today, I’m unapologetically sharing one of those. There are three separate components to this finished product: an ice cream base, an apple “filling,” and a crumble topping. And you’ll use a saucepan (twice), three bowls, an ice cream maker, and a baking dish before we’re finished. So when you read the recipe and raise your eyebrows a little bit, don’t say I didn’t warn you. Just know that I’m so absolutely crazy about this apple crumble ice cream that I’ll happily go through the process again and again, because I know the finished product is so damn good.

IMG_1190

INGREDIENTS

for ice cream:
1 can full-fat coconut milk
3 tbsp brown sugar
pinch of cinnamon
1 tbsp vanilla extract

for apple “filling”:
1 apple, peeled and diced
1/2 cup water

for crumble topping:
1 tbsp almond meal
2 tbsp chopped almonds
1 tbsp ground flax seeds
1 tbsp brown sugar
pinch of salt
1 tbsp cold butter (I left it out of the fridge for 15 minutes before working with it)

DIRECTIONS

First, make sure your ice cream maker is ready to go, according to its directions. For me, that means the bowl of the ice cream maker has been in the freezer for at least 24 hours before I even start the recipe.

Once you’re ready to go, start with the ice cream base. In a saucepan over medium heat, combine coconut milk, brown sugar, cinnamon, and vanilla extract. Heat gently for about 5 minutes, stirring occasionally, just so the ingredients come together.

IMG_1150

Transfer to a bowl and put in the refrigerator overnight, or at least 4 hours. Some people seem to get away with shorter cooling times when they’re making ice cream, so maybe it’s just my ice cream maker, but for me it’s gotta be overnight.

Next, the apple “filling.” Rinse out the sauce pan and add the apples and ¼ cup of the water. Cook over medium low heat, adding more water to the pan if the apples start to dry out. Cook for 40-45 minutes, stirring occasionally, until the apples are browned and softened. Be patient – this step isn’t a quick one, but it’s worth it.

Once the apples are done, transfer to a bowl and put in the fridge. They should also be fully cooled before you start the next step.

Once everything is cooled, you’re ready for the ice cream maker. Make sure you follow your ice cream maker’s directions for churning.

When the ice cream is churned, transfer to a container with a lid, stir in the apples, put the lid on the container, and freeze.

IMG_1168

Last step is the crumble topping. Preheat oven to 350 F.

Mix together all remaining ingredients except the butter. Then use a fork to work the butter into the nut mixture. Line a baking dish with parchment paper and pour in the crumble, and bake for about 15 minutes, until golden brown. Refrigerate to cool.

Okay, the home stretch! Use a fork to break up the crumble topping into, well, crumbles. You can either sprinkle over the whole portion of ice cream, like I do, or keep it separate and sprinkle over each individual serving.

IMG_1187

Yes, I know, it’s a long recipe with a ton of steps and a lot of waiting, but ohmygod is the result fantastic.

IMG_1194

Creamy Chocolate-Coffee Tart with an Almond Crust.

Yogurt is good. Chocolate is good. Coffee is good. Almonds are good. Chocolate is really good. So naturally, this recipe is good. The buttery almond crust is like the delicious nutty cousin of your standard graham cracker crust, but it’s much easier on us carb-avoiders and any gluten-free peeps among us. And the creamy chocolate-coffee filling is just sweet and decadent enough, without going sugar-overboard. It’s a quick and easy road to creamy nutty goodness. I like to give it a sprinkling of chocolate chips, but it would be pretty groovy to drizzle some melted chocolate over the top and really up that glamor factor.

NOTE: This isn’t a good dessert to make far in advance. It will last in the fridge about 36 hours before the yogurt starts to dry out from air exposure. The good news is, it doesn’t take long to make, but if you need to do some prep ahead of time, make and bake the crust and keep it in the fridge. Then, a few hours before you’ll need it, mix up the filling and assemble the tart.

IMG_0742

INGREDIENTS

for crust:
4 tbsp butter, melted
1 tbsp honey
1 1/2 cups almond meal
1/2 tsp salt
1/2 tsp cinnamon

for filling:
1 1/2 cups Greek yogurt (I use Fage because it’s SUBLIME)
2 1/2 tbsp cocoa powder
1 tsp instant coffee granules (not coffee grounds!)
2 tbsp hot water (the point of the hot water plus instant coffee granules is to get 2 tbsp coffee, so if you want, skip the granules and hot water step and just use 2 tbsp coffee)
2 tbsp brown sugar
chocolate chips

DIRECTIONS

Preheat oven to 350 F.

Stir honey into melted butter. In a mixing bowl, combine butter and honey with almonds, salt, and cinnamon. Press into a tart shell or pie dish. Bake for 15-20 minutes, until it’s a medium brown color. I would tell you to wait for it to be “golden brown,” but it’s pretty much golden brown before it even starts cooking. If it starts to brown too quickly (mine did), tent the crust with tinfoil to protect it from burning. When the crust is done, remove it from the oven and let it cool at least half an hour.

While the crust cools, prepare the filling. Dissolve the coffee granules in the hot water. Stir together the Greek yogurt, coffee, cocoa powder, and brown sugar. Keep it in the fridge until the crust has cooled.

IMG_0738

Once the crust is cooled, spread the yogurt filling evenly over it. Sprinkle with chocolate chips and dig in!

IMG_0745

Eternally-Fresh Berries and Greek Yogurt.

This is definitely not a “recipe” in my usual sense. It’s more of a favorite technique, and I’m sharing it with you because ever since I started doing it, I’ve saved money by not letting fruit go to waste and I’ve made my breakfasts a lot healthier and better-tasting. I used to eat those single-serve yogurts that come with a layer of sugary fruit to stir in, which is of course delicious and convenient, but not such a great way to start the morning. Then I started doing fruit and yogurt this way instead, and man is it ever good! Here’s the basics of why this method rocks:

  • the berries last longer because I wash and dry them before they go in the fridge/freezer, which helps fend off mold/mushiness
  • my berries are washed and ready to go whenever I need them, so I never have to eat wet and drippy berries
  • I freeze half, so I have gorgeous berries on hand all the time
  • The fresh berries are (obviously) delicious, and the frozen berries break up easily when stirred into yogurt (just like the sugary stuff, only healthier!)

Convinced? Because I love this stuff berry much. Now orange you laughing at my fruit jokes?

INGREDIENTS

2 packets of fresh berries – raspberries are my favorite, and blackberries are great too, but any berry you like should work
Greek yogurt (let me HEARTILY suggest Fage brand yogurt. I’ve reached the point where if it isn’t Fage, I don’t even want it. Seriously unbeatable stuff)

DIRECTIONS

As soon as you get home with your berries, rinse them under cold water. Then turn them out onto a towel and flip each one upside-down; if you’re using raspberries, for example, turn them so that they’re standing up on their hollow end. This helps them dry completely, which is what we’re going for. Leave the berries for an hour or two, until dry.

IMG_0181

When the berries are dry, put them back in their little plastic basket or other similar container (which should also be dry).

IMG_0191

Put one of the containers in the fridge and use within 2-3 days. Not only can you eat these on the go, without stopping to rinse them and then have them wet and drippy, but they also last a lot longer when they’ve gotten a chance to dry before they get piled on top of each other in the fridge.

Put the other container of berries in the freezer. Because they are dry, the berries will freeze individually, without sticking to one another, and they’ll keep their perfect picturesque berry shape.

IMG_0193

Here’s how I use the frozen berries: before I leave for work, I spoon a portion of Fage Greek yogurt into a tupperware and toss in 8 or so of these frozen gems. By the time I get to work and dig into the yogurt, the berries have defrosted and gone a little bit soft. They’re the perfect consistency to crush up with my spoon and stir into the creamy yogurt. I LOVE this because it’s just as delicious as one of those yogurt-and-fruit single serving cups, but it’s so pure and healthy!

IMG_0195

Here’s what it looks like once I get it to the office and stir everything up. Best easy workday breakfast ever!

IMG_0205

Nutty Cinnamon Cream of No-Wheat, a.k.a. “Faux-tmeal”

Cream of No-Wheat: a hot cereal made with nuts, dried fruit, seeds, and cinnamon – but with no wheat and no oats. Considering how I’ve altered the way I eat pretty dramatically over the past few months, moving away from processed grains and sugar and toward protein, fruits, veggies, and the like, this recipe is the answer to my breakfast dreams! That’s because, while I really haven’t looked back following these big changes, I have to admit that there are a few things I have truly, truly missed, and one of those things is my morning oatmeal.  When I saw a recipe from A Girl Worth Saving via salixisme that looked like a great hot cereal compromise, I had to give it a try. And it is absolutely delicious: creamy, nutty, with just enough sweetness from the dates, and a slightly chewier consistency from the nuts and seeds. It’s a very flexible recipe, and you can swap various ingredients in or out as you like: pumpkin seeds, wheat germ, pecans, dried apples, or brown sugar would all do a little something special if you wanted to try them out in here. And because this recipe makes about 8 servings, you can prep the “oatmeal” dry mix ahead of time, and just cook however many servings you need that morning. I calculated it out, just to see what this dish looks like from a protein perspective: each 3/4 cup serving has about 8g of protein, plus about 10g from the milk, making this a breakfast with about 18g of protein. Yay for hot breakfast!

UPDATE: I recently made another version of this – I was out of sunflower seeds, so instead of the 1/2 cup of sunflower seeds, I used about 3 tbsp of chia seeds and an additional 1/4 cup of chopped walnuts. The chia seeds were awesome here, thickening the consistency to that it more closely resembled cream of wheat. I’m definitely adding chia seeds to this every time I make it from now on!

IMG_9564

INGREDIENTS:

the dry mix*:
1/2 cup roasted sunflower seeds, chopped
1/2 cup flaxseed meal (or use whole flax seeds and grind them)
1/2 cup walnuts, chopped
1/2 cup almonds, slivered
1/2 lb pitted dates, chopped
1/2 tsp salt
1/2 tsp ground cinnamon
1/2 tsp vanilla extract
*NOTE: chop your ingredients finer if you want a smoother, more cream-of-wheat-esque finished product, or leave them bigger for a chunkier consistency. I tried to opt for a middle ground.

to cook the oatmeal:
3/4 cups of dry mix per person
1 1/4 cup milk per person (dairy milk, almond milk, whatever you like)

Just the Recipe link: Nutty Cinnamon Cream of No-Wheat, a.k.a. “Faux-tmeal”

DIRECTIONS

Combine all the dry mix ingredients in a bowl and stir together.

IMG_9553

Measure out the amount you’d like to make now (about 3/4 cups per person should do it), and store the rest in an air-tight container in the fridge, for future use.

IMG_9554

To cook the oatmeal, bring the milk to a gentle bubble on the stove and stir in the dry mix.

IMG_9558

Stirring occasionally, simmer gently until thickened to your liking (mine took about 10 minutes, give or take). Remove from heat.

IMG_9560

Spoon the good stuff into a bowl and stir in any extras you like – more milk, fruit, nuts, whatever! Then dig in.

IMG_9563

Harissa Grilled Pork Chops.

Often the best meals are the simplest, and these simple harissa pork chops are both easy to make and a little bit special, too. It’s the harissa. This spicy Tunisian mix of flavors has a real transformational power when it comes to seasoning meat, and I find myself using it more and more these days. You’ll see the rest of this recipe’s ingredient list is quite simple and basic – the harissa really stands on its own, with very little else needed by way of flavoring. And I just love recipes that are a breeze like this one: throw the marinade together with the meat in the morning, let the flavors develop and sink in all day in the fridge, and at the end of the day you’re just 15 minutes away from a tasty and speedy dinner. I’m having this for dinner again tonight!

IMG_8440

INGREDIENTS (serves 2)

for marinade:
4 small pork chops (I used 4 2oz chops)
2 tsp harissa (I get mine from The Spice House)
extra virgin olive oil
1 garlic clove, crushed with the side of a knife
salt and pepper, to taste

for yogurt sauce:
1/4 cup Greek yogurt
harissa, to taste
squeeze of lemon
salt and pepper to taste

Just the Recipe link: Harissa Grilled Pork Chops

DIRECTIONS

In a small bowl, stir together harissa, olive oil, garlic clove, and salt and pepper. Pour the marinade over the pork chops and use your hands to work it into the meat a bit. Cover and let the chops marinate in the fridge; I waited  about 45 minutes for the first batch I made, and 24 hours for the second. Both were great.

IMG_8421

When the chops have had their time with the marinade, remove them from the fridge and let them come to room temperature a bit while you preheat the grill or pan. Over medium high heat, cook the chops a few minutes on each side, depending on how think they are, until cooked through. Mine took about 3 minutes per side.

IMG_8431

The yogurt sauce couldn’t be simpler: just combine all the ingredients. Serve a big scoop of sauce over the chops and enjoy.

IMG_8434