Harissa Grilled Pork Chops.

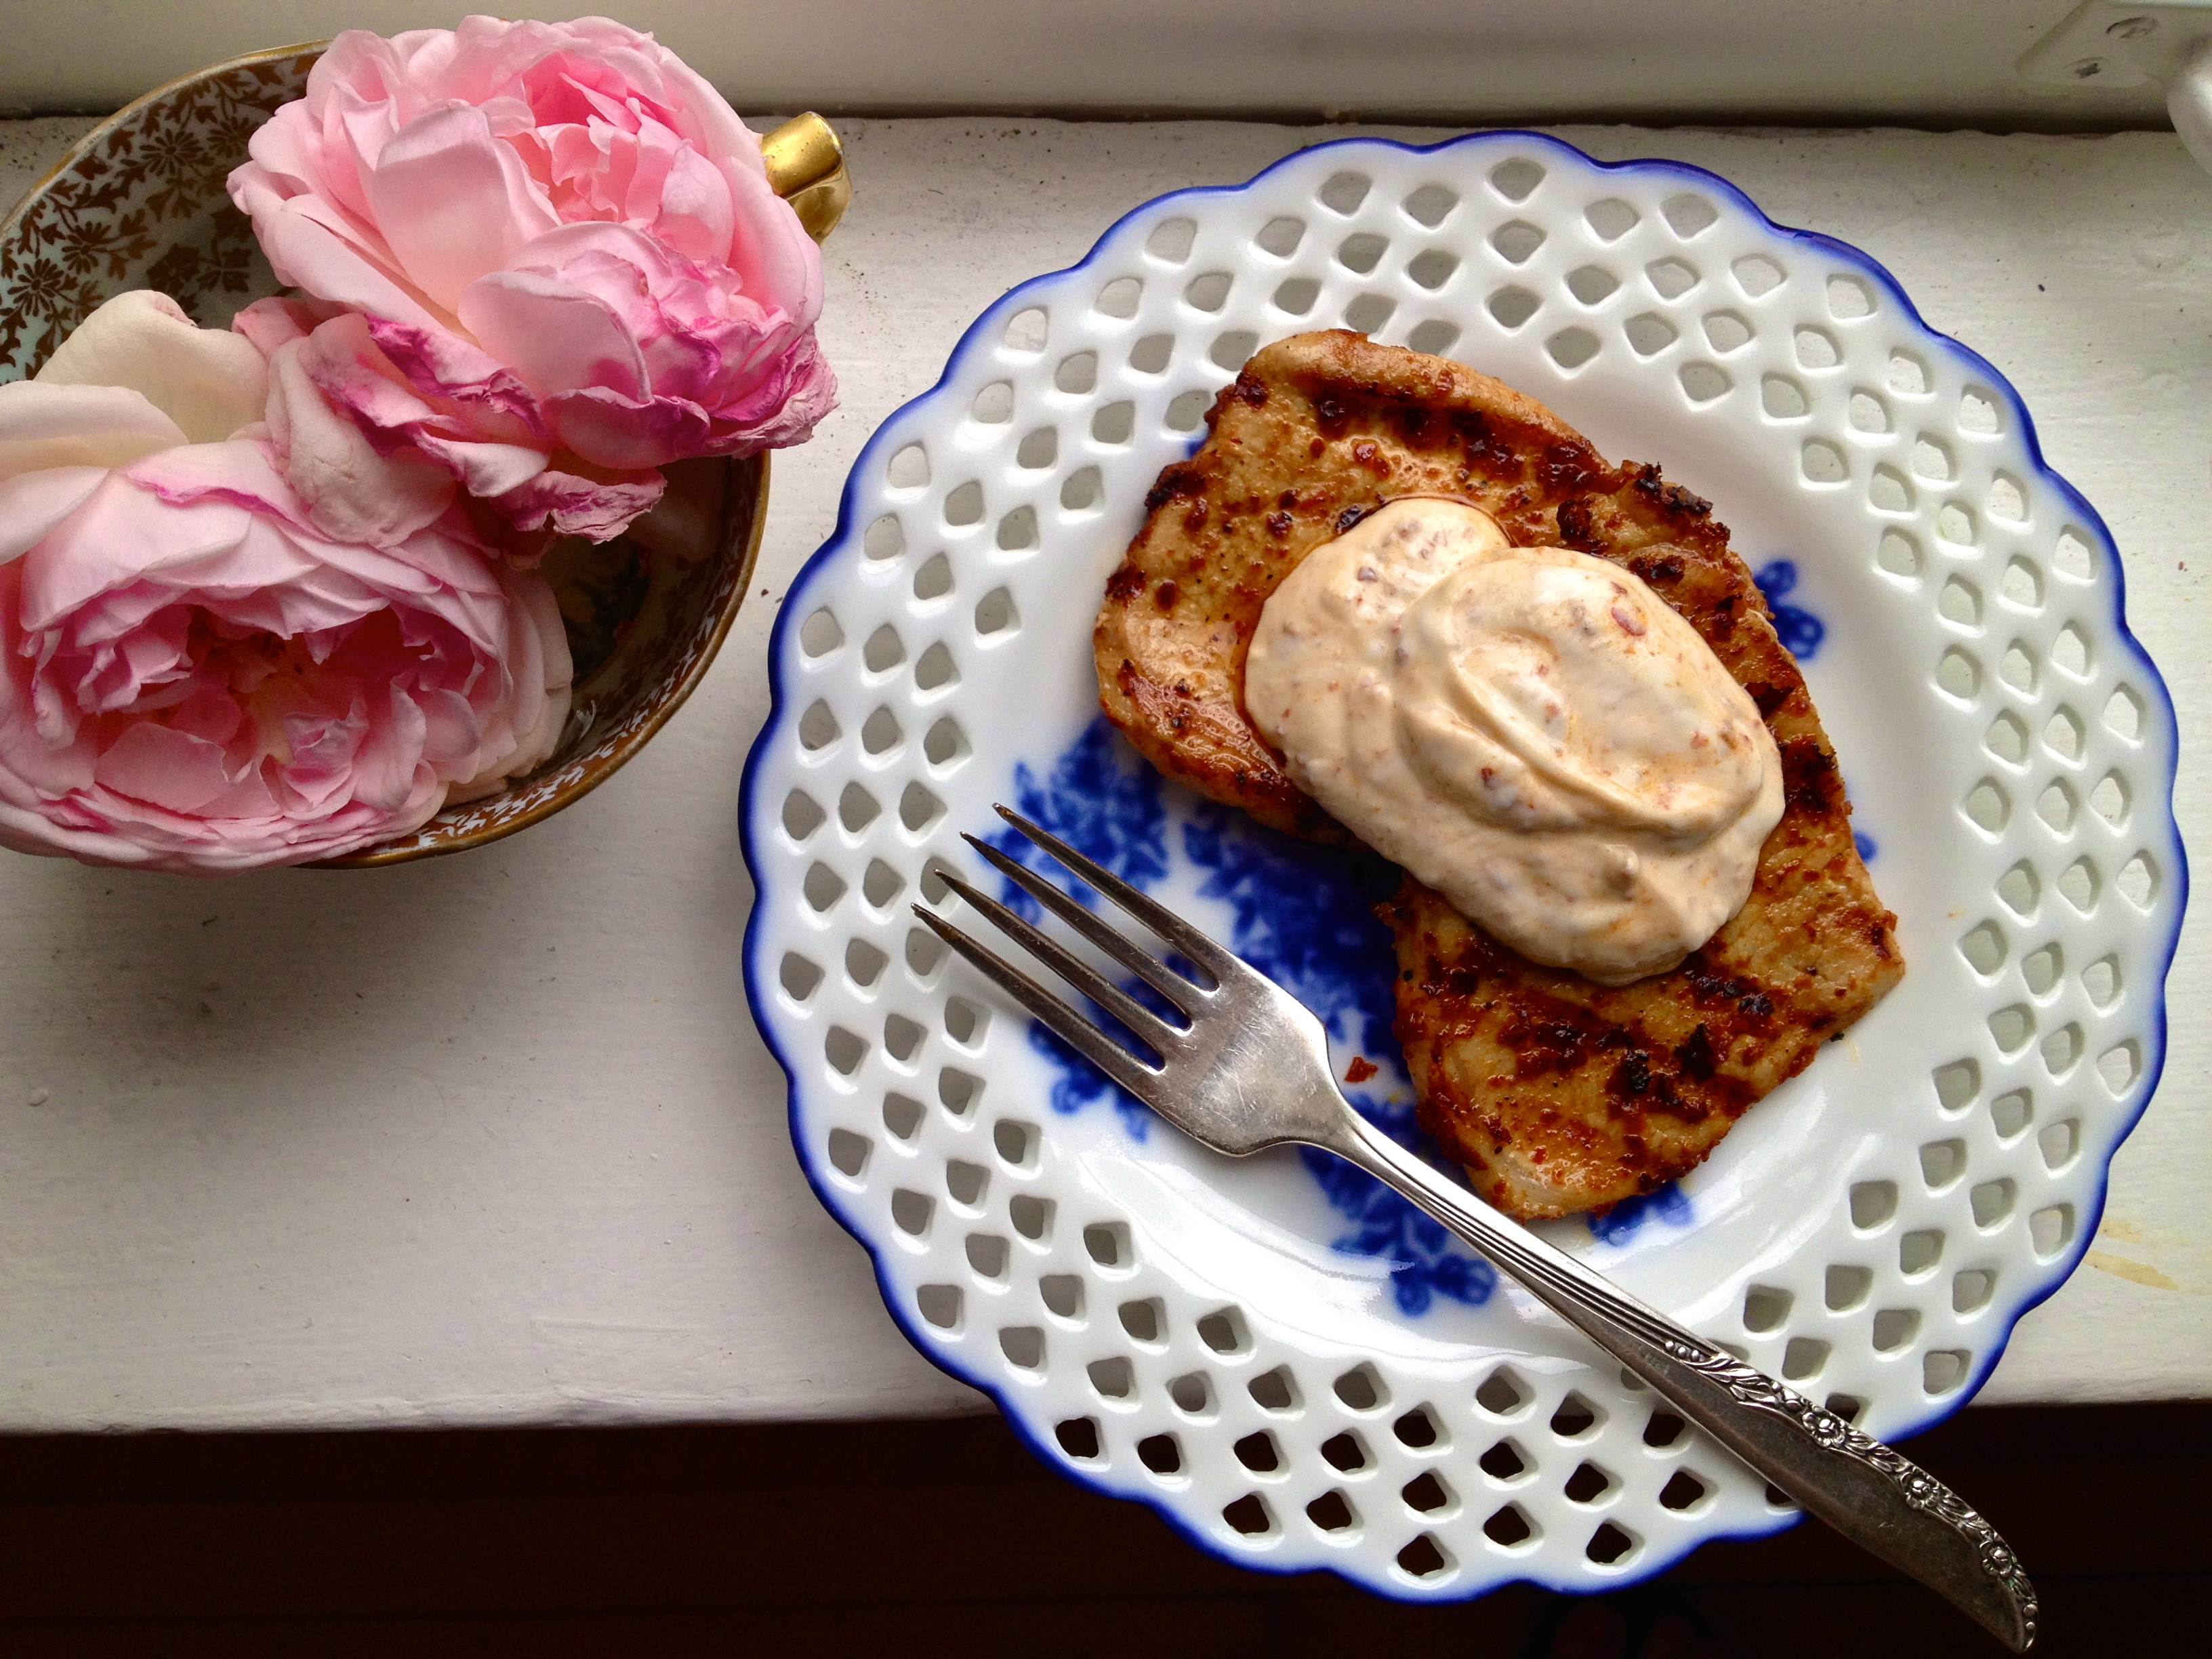
Often the best meals are the simplest, and these simple harissa pork chops are both easy to make and a little bit special, too. It’s the harissa. This spicy Tunisian mix of flavors has a real transformational power when it comes to seasoning meat, and I find myself using it more and more these days. You’ll see the rest of this recipe’s ingredient list is quite simple and basic – the harissa really stands on its own, with very little else needed by way of flavoring. And I just love recipes that are a breeze like this one: throw the marinade together with the meat in the morning, let the flavors develop and sink in all day in the fridge, and at the end of the day you’re just 15 minutes away from a tasty and speedy dinner. I’m having this for dinner again tonight!

IMG_8440

INGREDIENTS (serves 2)

for marinade:
4 small pork chops (I used 4 2oz chops)
2 tsp harissa (I get mine from The Spice House)
extra virgin olive oil
1 garlic clove, crushed with the side of a knife
salt and pepper, to taste

for yogurt sauce:
1/4 cup Greek yogurt
harissa, to taste
squeeze of lemon
salt and pepper to taste

Just the Recipe link: Harissa Grilled Pork Chops

DIRECTIONS

In a small bowl, stir together harissa, olive oil, garlic clove, and salt and pepper. Pour the marinade over the pork chops and use your hands to work it into the meat a bit. Cover and let the chops marinate in the fridge; I waited  about 45 minutes for the first batch I made, and 24 hours for the second. Both were great.

IMG_8421

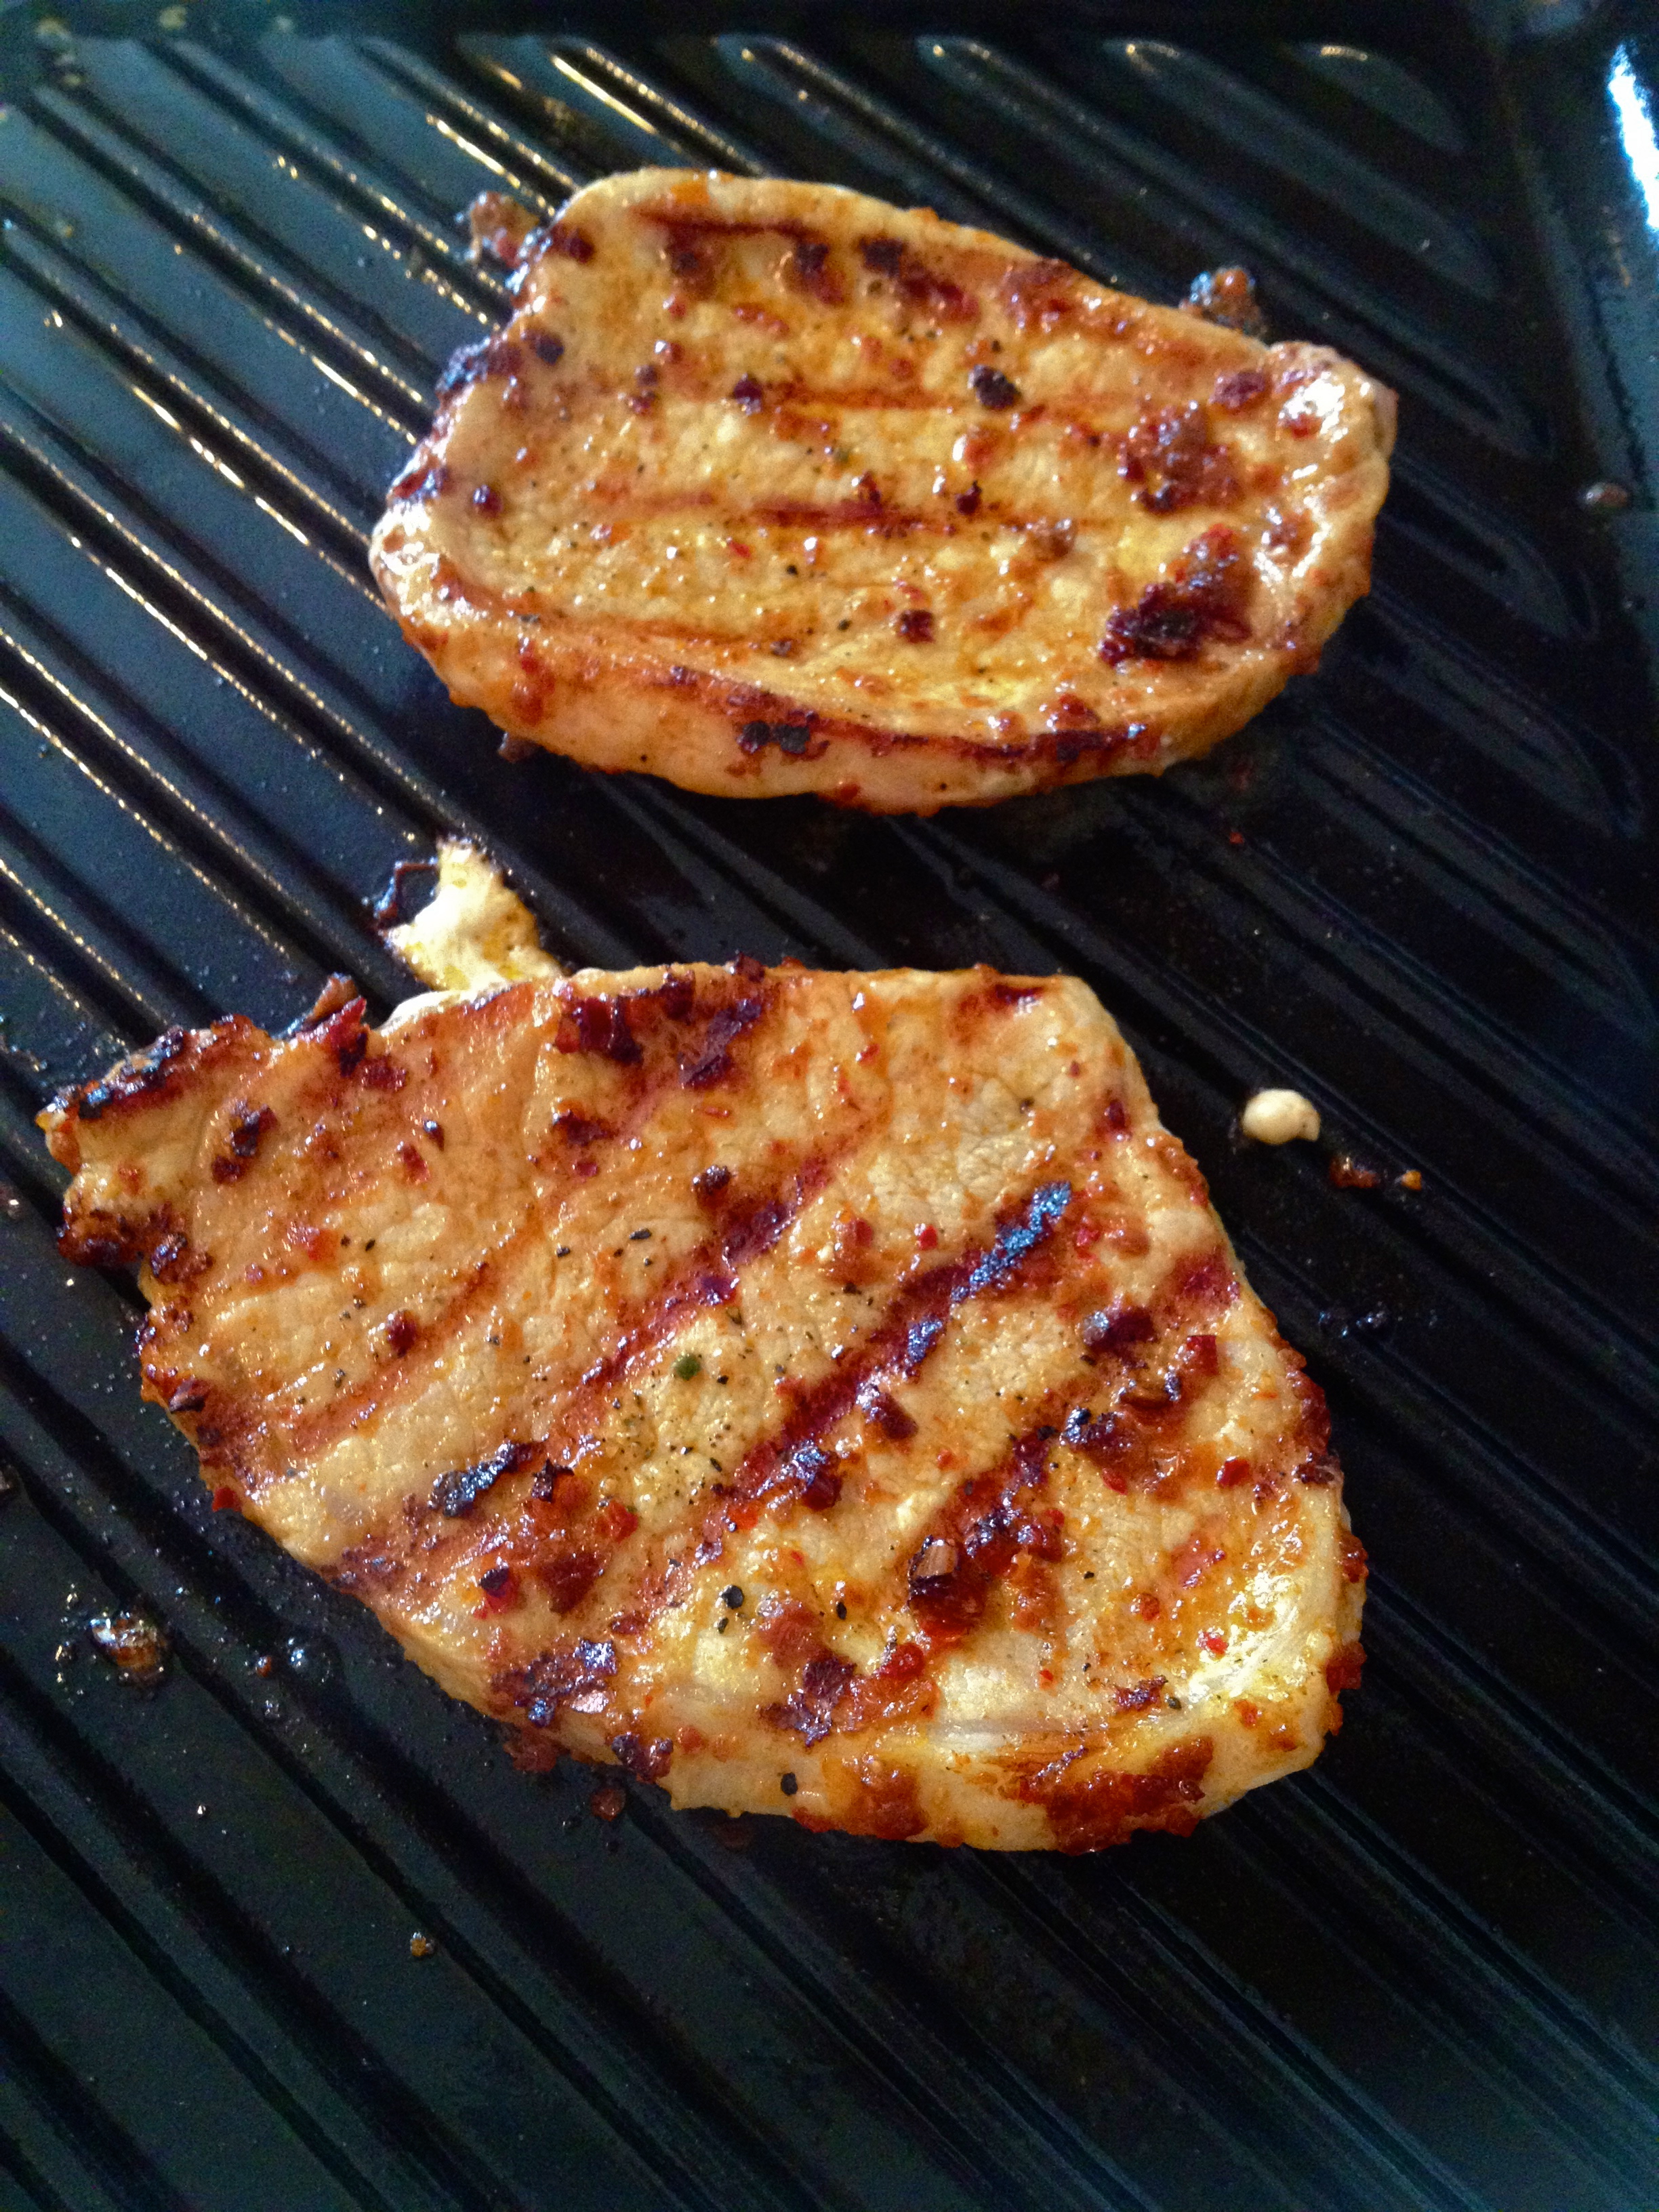
When the chops have had their time with the marinade, remove them from the fridge and let them come to room temperature a bit while you preheat the grill or pan. Over medium high heat, cook the chops a few minutes on each side, depending on how think they are, until cooked through. Mine took about 3 minutes per side.

IMG_8431

The yogurt sauce couldn’t be simpler: just combine all the ingredients. Serve a big scoop of sauce over the chops and enjoy.

IMG_8434

Advertisement

Loaded Chili.

Garnishes. Goodies. Fixins’. At least half the reason I love chili is the toppings you get to put on it. Oh, my, the toppings. This recipe is about making an amazing chili that will eventually become an Ode to Toppings, and I want you to use them all: avocado, cheese, cilantro, tomato—whatever your heart desires. And you know what? You are a great cook and a wonderful person, and you deserve a beautiful meal. So thank yourself for making this by plating it up like a work of art and garnishing the heck out of it. Heidi at 101 Cookbooks is the master at this. Here are some of her most gorgeously garnished soups: Split Pea, Broccoli Cheddar, Yellow Split Pea, and Posole in broth. Let life imitate art and load up this chili!

IMG_7707

INGREDIENTS

for the chili:
olive oil
1/2 onion, chopped
1/2 red bell pepper, chopped
2 cloves garlic, minced
1/4 tsp cayenne pepper
1 tsp oregano
1/2 tsp coriander
1/2 tsp cumin
1/4 tsp red pepper flakes
salt and pepper to taste
1 lb ground meat (I used pork)
1 28oz can diced tomatoes
2 cups stock (I used beef stock)
2 tbsp fresh cilantro, chopped
1 16oz can black beans, drained and rinsed
1 16 oz can corn, drained and rinsed

all the fixins’:
avocado, sliced
fresh cilantro, chopped
cheese, shredded
fresh tomato, chopped
onion or green onion, thinly sliced or minced
squeeze of lime

Just the Recipe link: Loaded Chili

DIRECTIONS

Heat oil in a pan and add onion and red pepper. Cook about 8 minutes, until softened.

IMG_7683

Add the garlic and the cayenne pepper, oregano, coriander, cumin, red pepper flakes, salt, and pepper. Stir and cook 1-2 minutes, until fragrant and yummy-smelling.

IMG_7687

Add the ground pork and use your spoon to break it up. Cook until browned, stirring occasionally.

IMG_7691

Once the meat is browned, pour in the canned tomatoes and the stock. Toss in a bay leaf for good measure. Bring to a boil and then turn down to a simmer. Simmer for 45 minutes.

IMG_7692

After 45 minutes have gone by, add the cilantro, corn, and beans, and simmer for another 15 minutes.

IMG_7699

Taste for seasoning and your chili is good to go! Now dress it up. And make it look beautiful, for heaven’s sake! You’re worth it.

IMG_7706

Roasted Spiced Chickpeas.

Lately at work, I’ve been hanging around a lot of talk about snack foods. Normally I’m not really much of a snacker; I never buy chips or pretzels or anything like that, because I generally don’t crave them. But for the past week, I’ve been taking a lot of notes about people’s snacking habits, and as a result, I found myself really craving salty snack foods. This led me to two thoughts: 1) I have a reaffirmed belief in the power of advertising to get people interested in products they never would have cared about before (i.e., me craving snack foods), and 2) I wanted to give these roasted chickpeas a go, after having seen them on a handful of blogs over the past month or so. Roasted chickpeas make a fantastic replacement for chips. They’re crunchy, salty, spicy, and come in any flavor you can make. So make some!

IMG_6710

INGREDIENTS

1 can chickpeas
olive oil
salt
extra virgin olive oil
seasonings of your choice (I used Ukrainian Village Seasoning from the Spice House)

Just the Recipe link: Roasted Spiced Chickpeas

DIRECTIONS

Preheat oven to 350 F.

The chickpeas require quite a bit of prep: Drain them. Rinse them off. Remove the skin from each little bean, pretending you’re a rabbi conducting a hundred brises. Lay them out on a towel and gently pat them dry. In a bowl, toss them with a drizzle of olive oil and a good sprinkling of salt.

IMG_6701

Lay the salted, oiled chickpeas out on a baking sheet.

IMG_6705

Bake about 50 minutes, until they’re crunchy and browned.

IMG_6708

Now, the seasoning part. There are so many flavor combos that I want to try! Paprika and cumin, parsley and granulated garlic, honey and cayenne pepper, and good old salt and pepper – all yummy pairings. For this batch, I used one of the Spice House‘s awesome Chicago neighborhoods spice blends – the Ukrainian Village seasoning – which has a great blend of onion and pepper flavors. I topped it off with a little sprinkle of truffle salt, just because I was feelin’ fancy.

IMG_6709

That’s it! I love these. They’re a great, substantial snack to munch on when you need a crunch but don’t want to go the chips or nuts route. Enjoy! And be sure to let them cool completely before you put them in any kind of container, or else the heat/condensation will make the chickpeas soggy.

Spiced Chicken and Chickpea Stew.

There’s nothing like a hearty and healthy stew on a Saturday afternoon in Fall. This spiced chicken and chickpea one-pot meal was a fun little cooking adventure because I don’t often use flavor combinations like these. Especially the cinnamon. I’ve never been brave enough to try cinnamon in a savory meat dish before, but I’m glad I did! The heat of the paprika and cayenne provide an great backdrop for the smokey exotic cumin and cinnamon. This is a filling dish that keeps well in the fridge—the bright spice flavors get even deeper if they’ve had a chance to marry a bit. Kidney beans or great northern beans would work just as well as chickpeas, and if you wanted to make this dish vegetarian or vegan, just cut out the chicken and add an extra can or two of beans. It’s all about protein and spice!

INGREDIENTS

3 chicken breasts (substitute with another can or two of beans for a vegetarian/vegan version)
salt and pepper
olive oil
1 onion, chopped
3-5 carrots, sliced into coins
3 bay leaves
1 1/2 tsp hot paprika
1 1/2 tsp garlic powder
1 tsp turmeric
1/2 tsp cayenne pepper
1/2 tsp cumin
1/2 tsp cinnamon
2 tbsp ketchup
14 oz can of diced tomatoes
1 can chickpeas, drained and rinsed
1 tsp dried parsley
lemon juice

DIRECTIONS

Season each chicken breast with salt and pepper. Heat oil over medium in a skillet or other large pan. Brown the chicken on each side, then set aside.

In the same pan, add another drizzle of oil if needed and stir in the onion and carrot. Sprinkle with a bit of salt, to keep the onion from browning. When the onion and carrot are softened, add the bay leaves, paprika, garlic powder, turmeric, cayenne pepper, cumin, and cinnamon. Turn the heat up a bit and cook the spices until fragrant, about 2 minutes.

Then add the ketchup, and put the chicken breasts back into the skillet. Add the tomatoes, and then fill the empty tomato can with water and pour into the pot. Stir and bring to a boil. Turn down to a high simmer and cook for 10 minutes.

Stir in the chickpeas and sprinkle over the parsley. Cover and simmer for about half an hour.

Remove the bay leaves, sprinkle with lemon juice and more parsley, and serve with couscous.

Herbed White Bean Dip.

I made chili with the first can of accidentally-purchased white beans; now, what to do with the second can? I considered making another batch of that heavenly chili, but a brave chef would branch out and try something new. And I really do try to be a brave chef, after all. So I took the advice of my cousin Caitie and my reader Laurie and made a bean dip. This herby, spicy dip is a great substitute for hummus (ironically, that’s what I meant to make when I picked up these cans of beans in the first place!), but spread a hefty scoop on a sandwich and you’ll go nuts! A totally guilt-free dip or spread–what more could I ask for from an ingredient I bought by accident?!

INGREDIENTS

2 cloves garlic, minced
1/8 tsp fresh rosemary, minced
1/8 tsp fresh lemon balm, minced
1/4 tsp fresh parsley, minced
1/4 tsp cumin
generous pinch of cayenne pepper
salt and pepper to taste (you’re gonna need more salt that you think, so go easy and add more as needed)
1 can great northern beans or other white beans, drained
1/4 cup olive oil, plus more as needed

DIRECTIONS

Combine all ingredients in a food processor: first the gorgeous garlic, herbs, and spices.

Then the beans and olive oil.

Blitz everything until you reach desired consistency. Add more olive oil as needed. Then add more cayenne pepper because you didn’t add enough the first time.

Garnish with parsley and serve with warm pita bread, tortilla chips, spread on a sandwich, or my favorite, with orange and purple carrot sticks.

Summer Carrot Salad.

While wandering around the farmers market on Saturday morning, I encountered a little boy standing in front of a big pile of purple carrots. He was trying so hard to make sense of these strangely-colored vegetables, and both his mother and the man behind the table were indulging his curious questions. I love to see little ones engaged in farmers market culture, so I decided to play along, too. “I think I have to get some of those,” I said to the boy. “Would you pick me out a nice bunch?” He looked back at me with wide eyes and then started to dig through the purple carrots, handing me a bunch that he seemed to have chosen for no reason in particular. I thanked him, smiled at his mother, paid the $3, and went home to make this salad for my family. Goes great with flank steak. A good day.

INGREDIENTS

1 small onion, diced
2 bunches orange carrots, grated to thin, long strips
1 bunch purple carrots, grated to thin, long strips
2 cloves garlic, minced almost to a paste
3 tbsp olive oil, plus more for sauteing the onions
1 tbsp white wine vinegar
1/8 tsp cayenne pepper
1/8 tsp ground coriander
1 tsp sugar
salt and pepper to taste
parsley for garnish
handful of raw almonds, crushed with the back of a knife

DIRECTIONS

Heat a splash of olive oil over medium heat and add onions and a pinch of salt. Saute until soft and translucent. Set aside to cool.

Combine garlic, the rest of the olive oil, vinegar, cayenne pepper, coriander, sugar, and salt and pepper. Mix well with a fork.

Combine carrots, onion, dressing, and almonds, and toss. Refrigerate for 4 hours before serving. Garnish with parsley and enjoy with steak or burgers as a healthier replacement for cole slaw.