Souffled Omelet with Sweet Peppers and Asparagus.

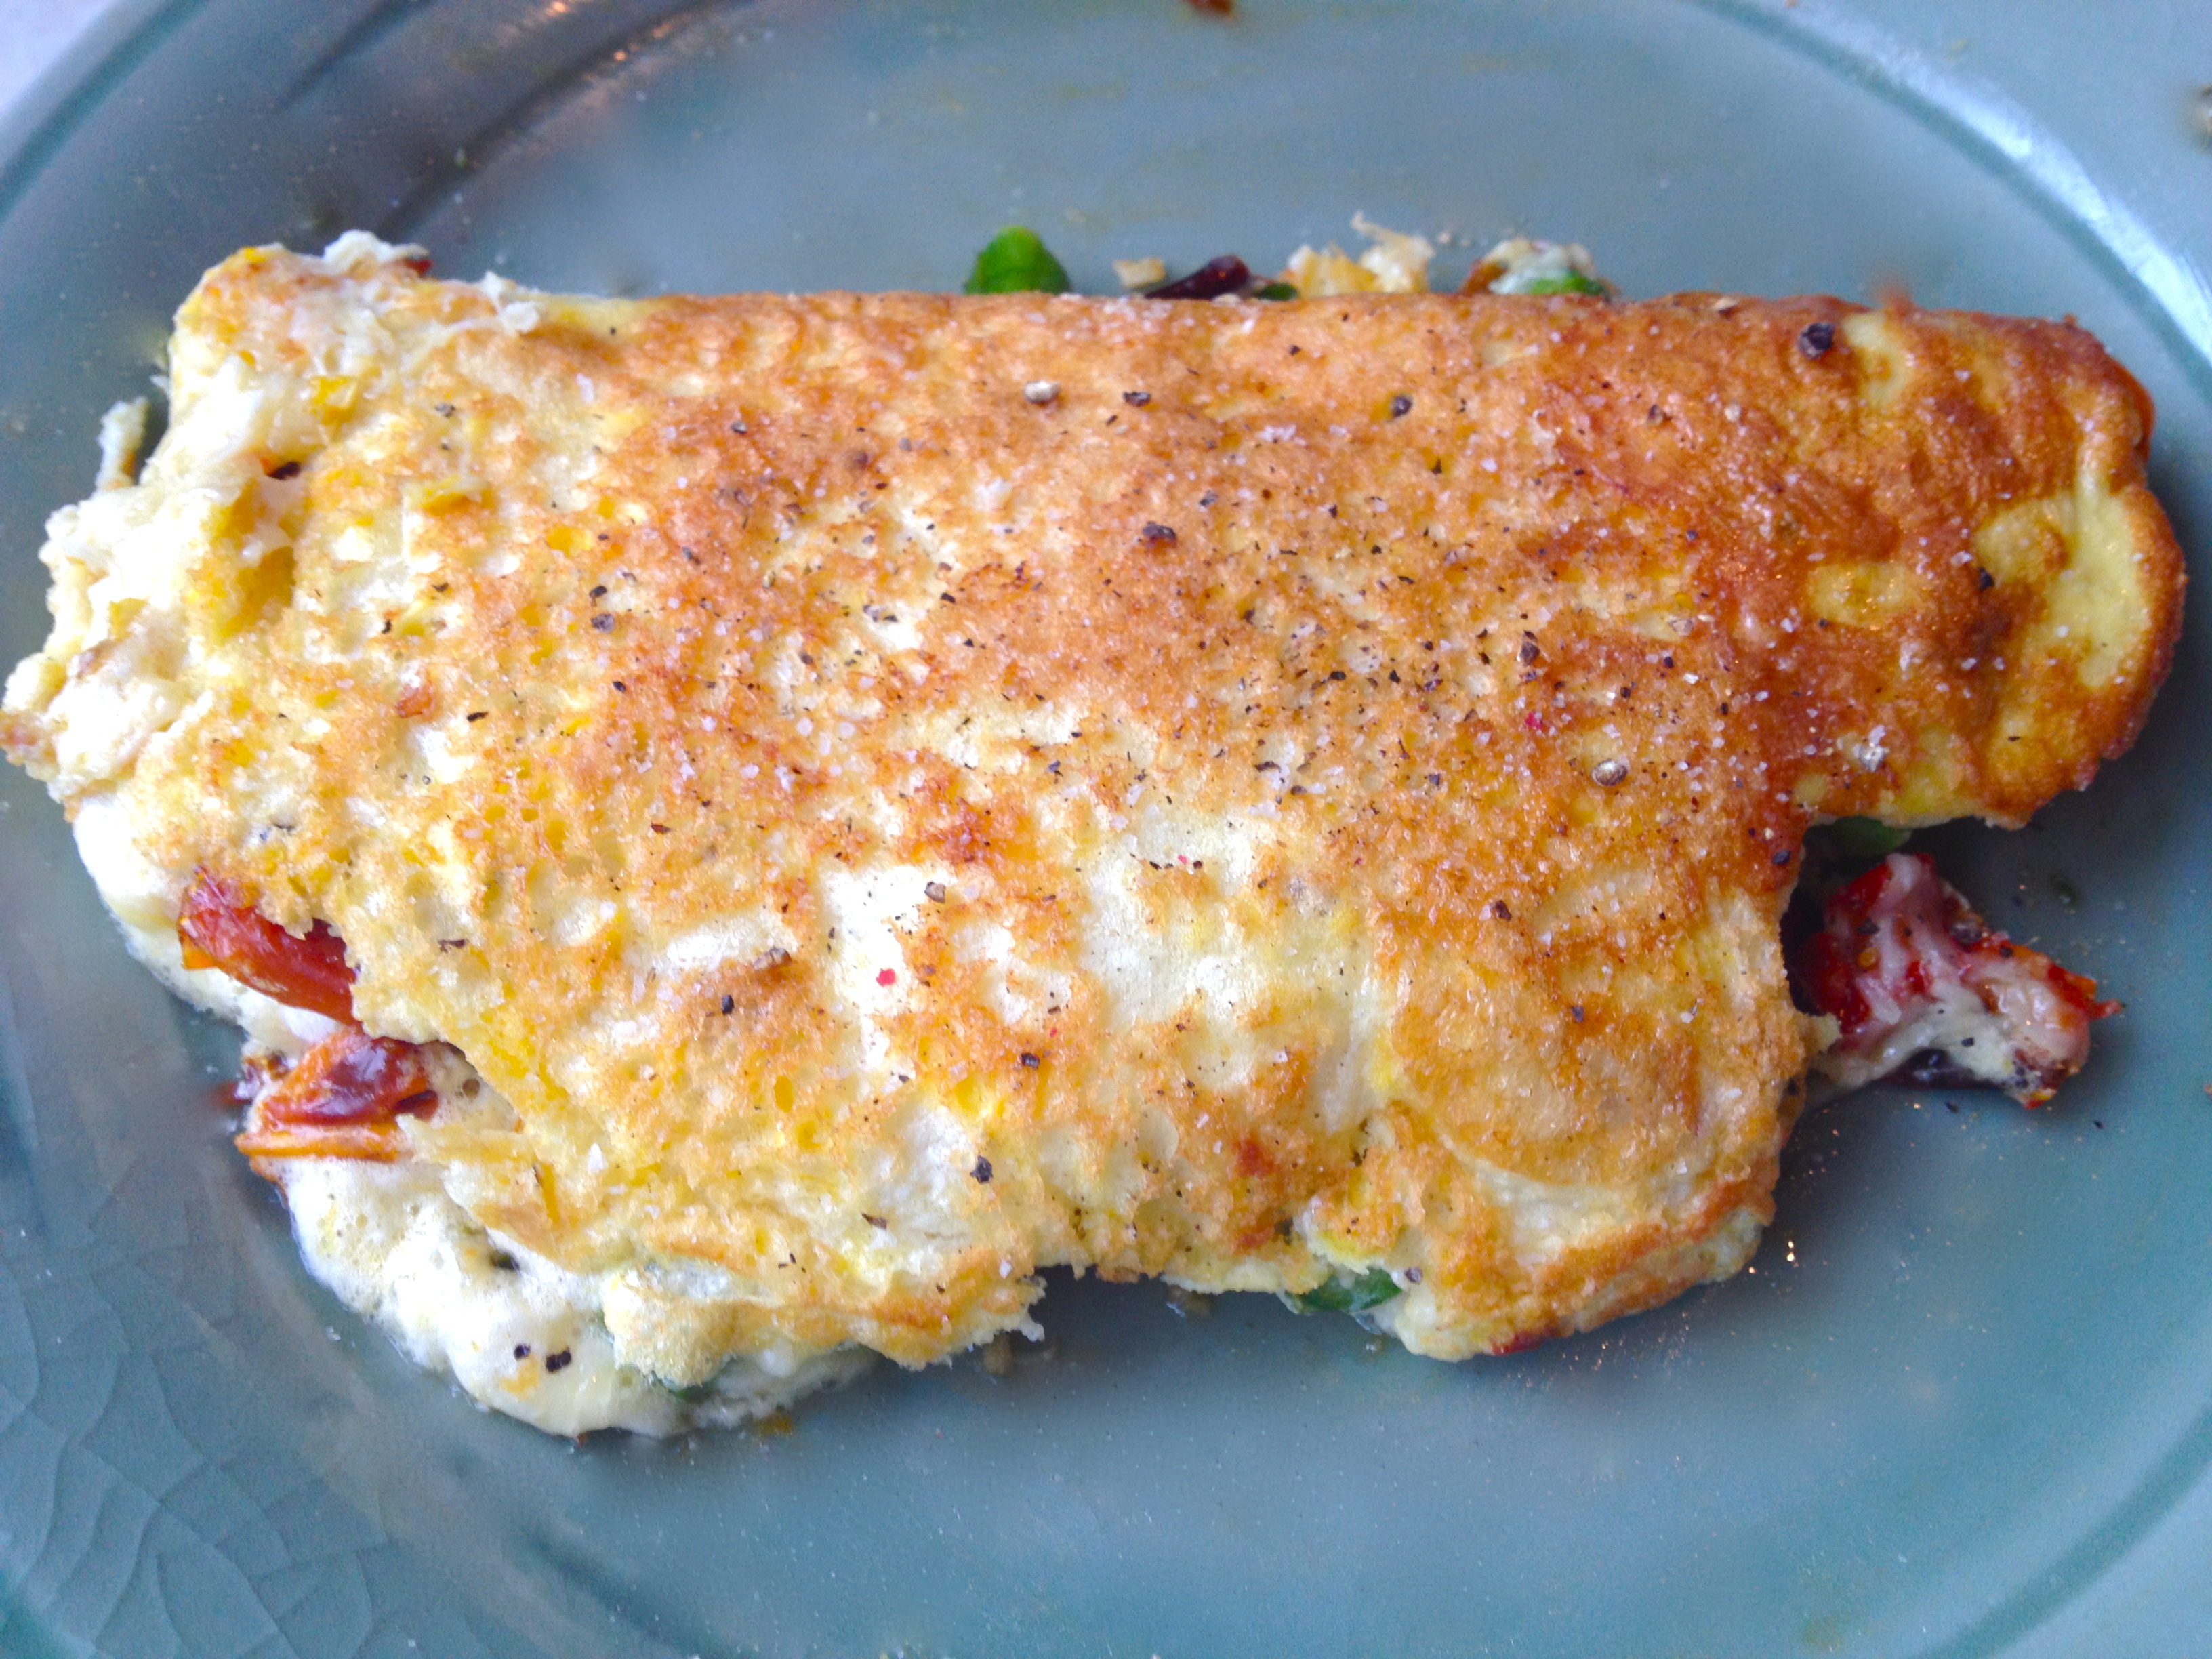
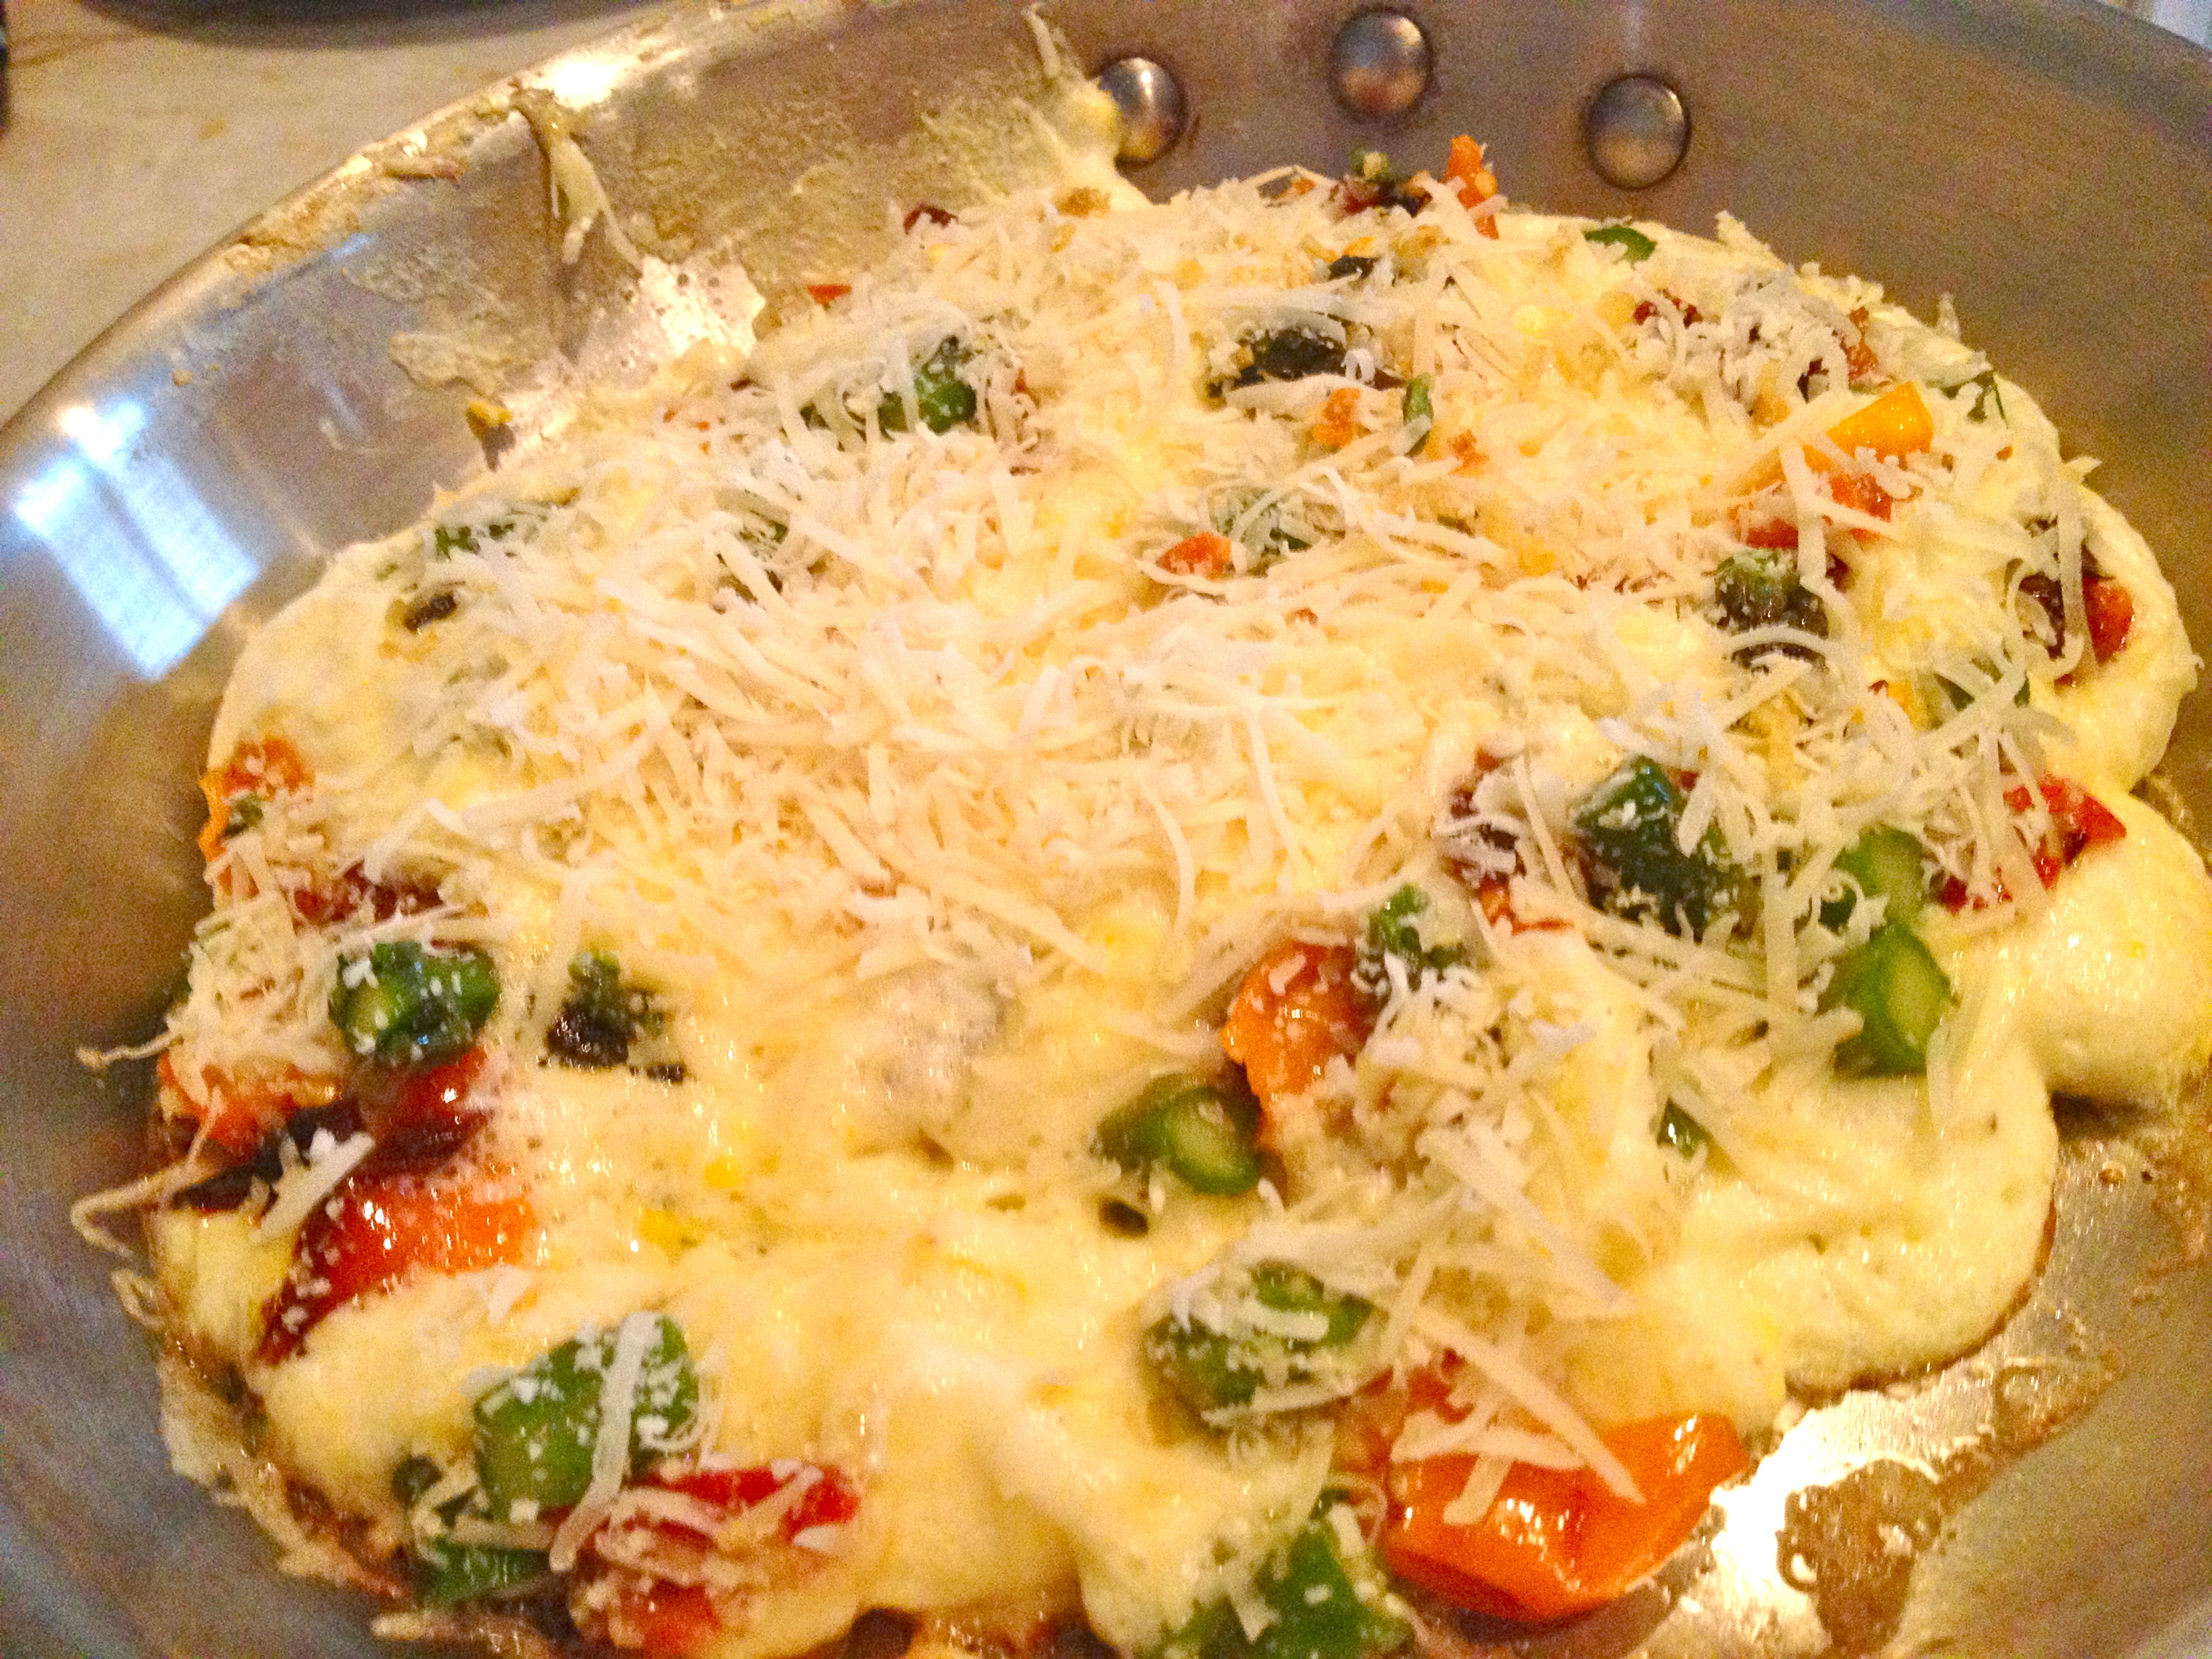
Introducing my new favorite breakfast item: the souffled omelet. So light it melts in your mouth, with a surprising textural contrast of the almost crispy bottom and the airy inner egginess. It’s a perfect example of how a simple change in technique can transform a dish. Rather than beating the eggs with a whisk (or even a fork) as you would for a standard omelet, this one is made by separating the yolks and the whites and fluffing them up pretty much as far as they can go—much like in a souffle. It’s a fun way to prep eggs and it makes them go so much further than they would in a regular omelet; just look at the photo, that big fluffy thing is a two egg omelet! And of course, you can stuff it with whatever fillings you like. I had some leftover grilled asparagus and mini sweet peppers, so I chopped them up and sprinkled them over along with the cheese. Thanks to Laura Calder for the recipe, who (as usual) inspired me to try something new, and (as usual) it turned out pretty groovy! Also pretty groovy: the truffle salt I used to finish the dish. Optional, but recommended.

IMG_6483

DIRECTIONS

2 eggs, whites and yolks separated
salt and pepper to taste
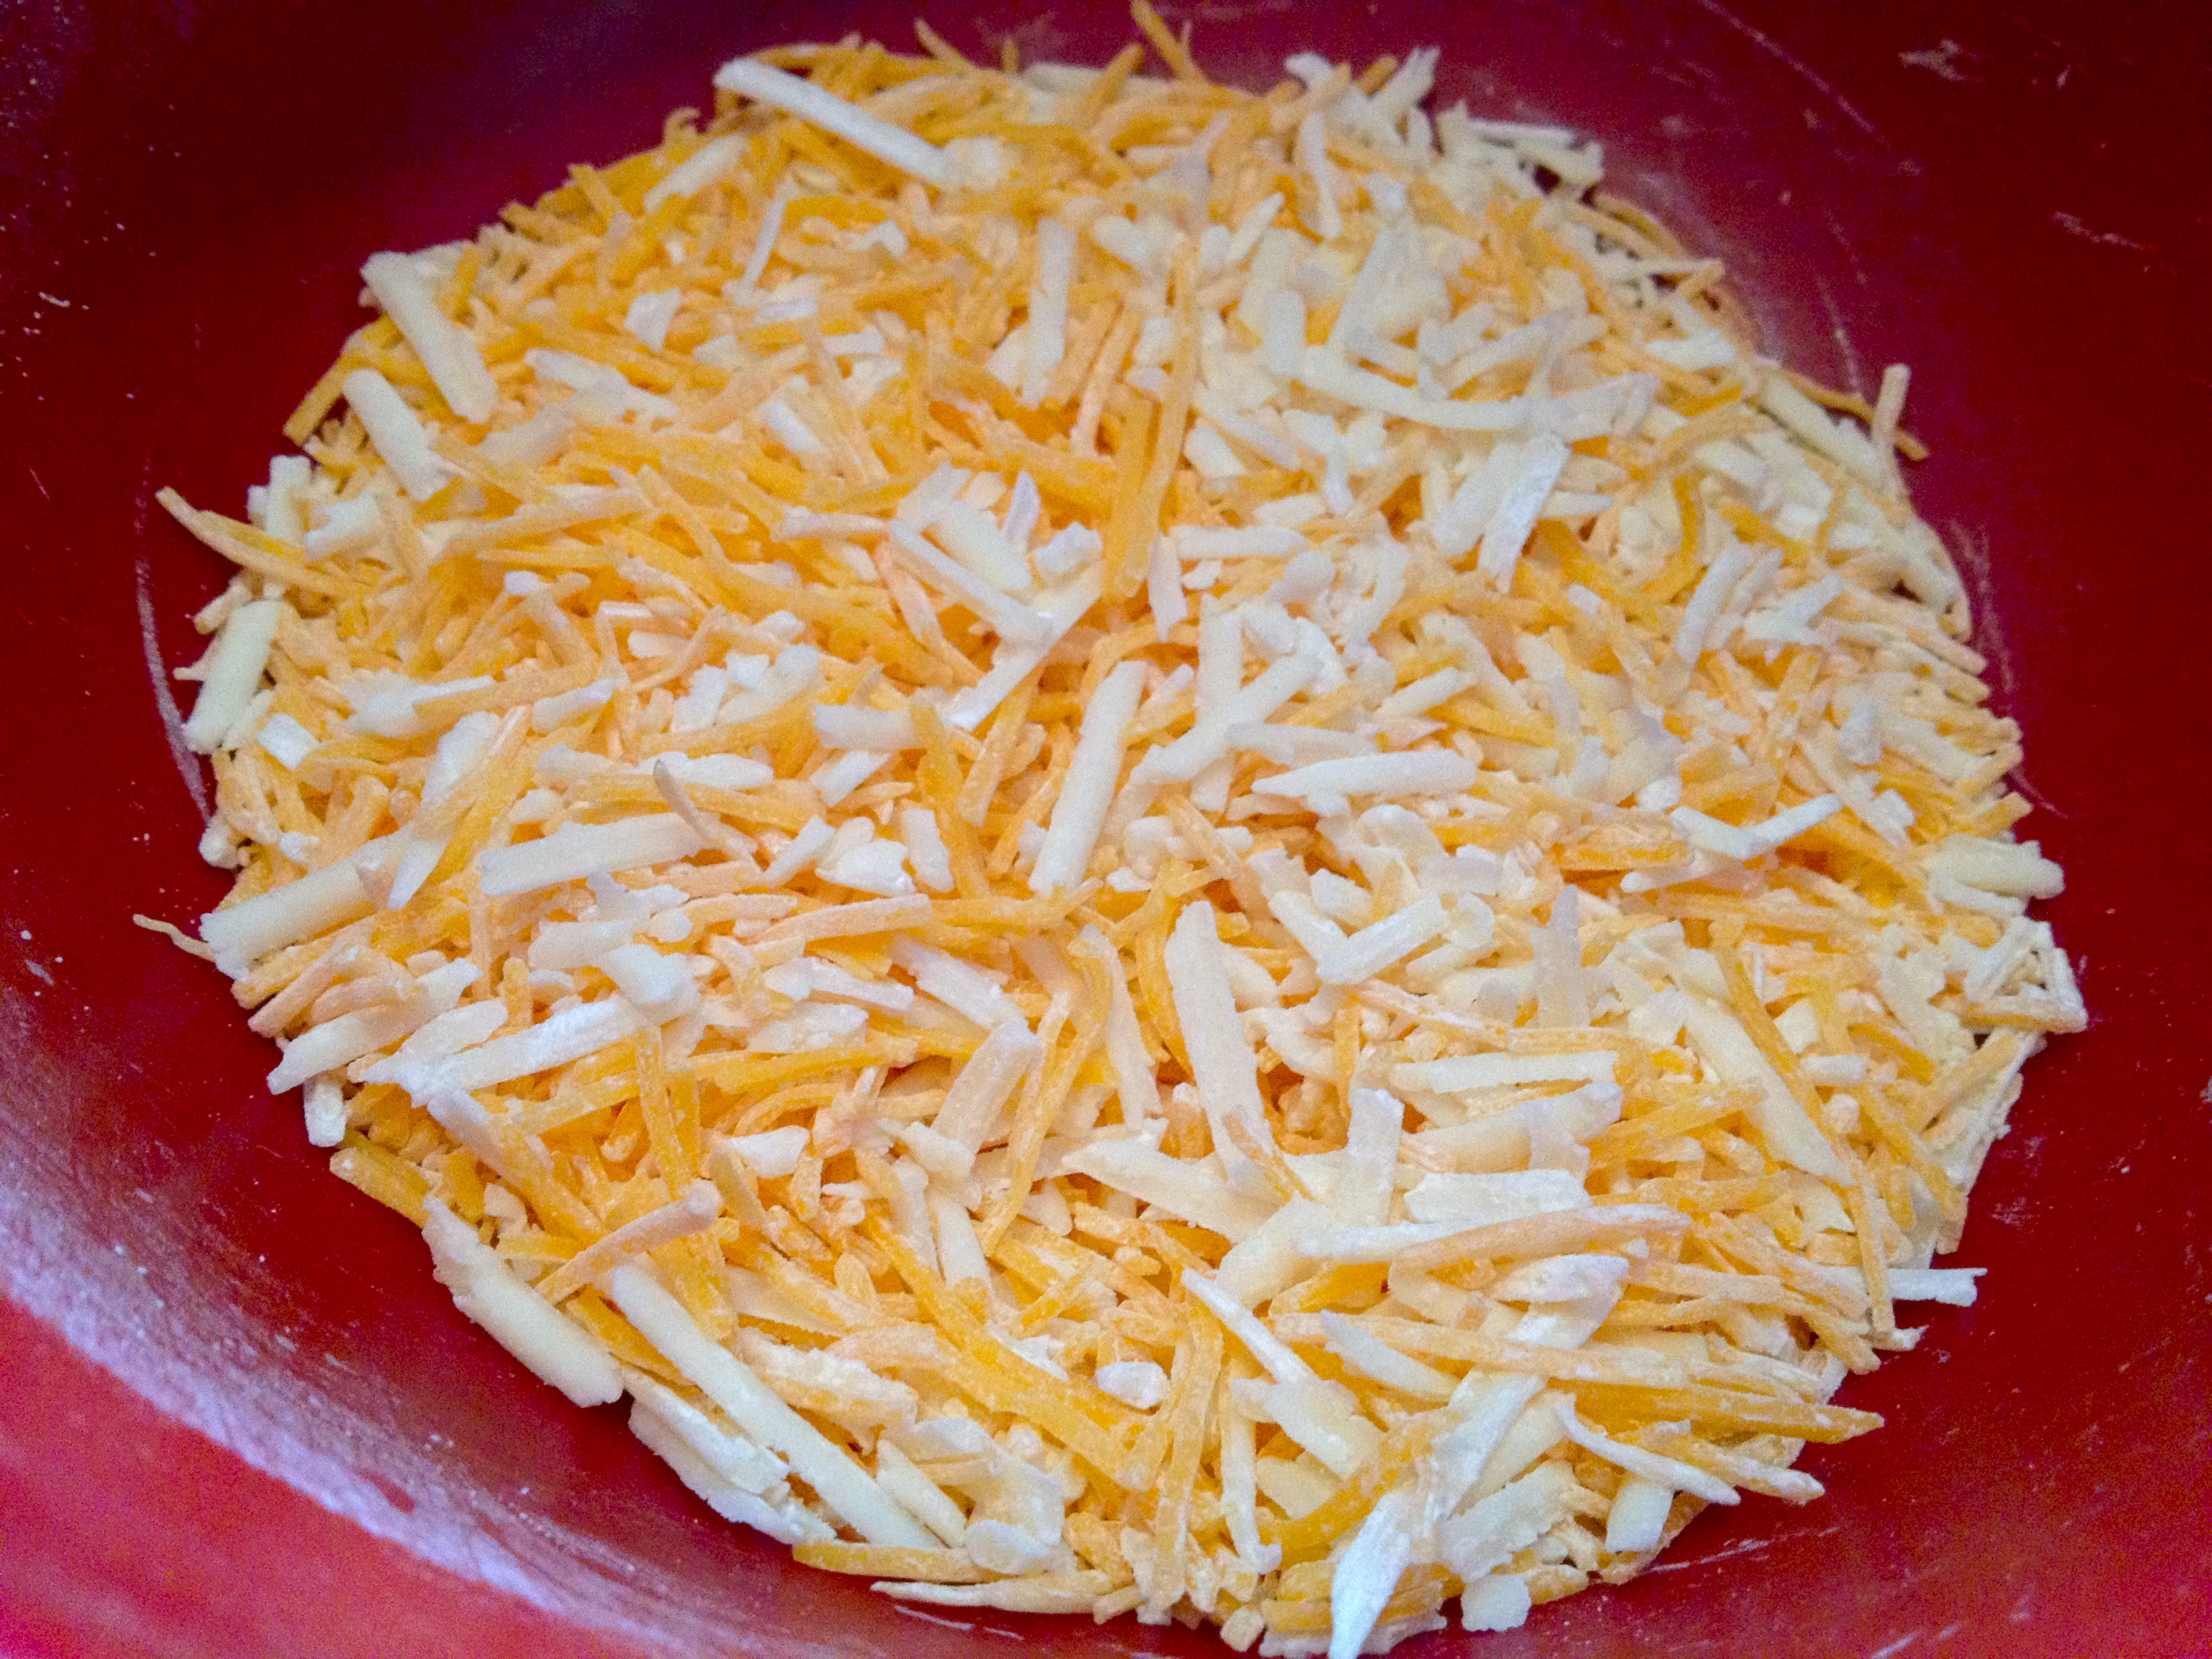
1/2 cup shredded cheese (I used Parmesan)
grilled veggies, like asparagus and sweet peppers, chopped
1 pat butter
truffle salt (optional)

Just the Recipe link: Souffled Omelet with Sweet Peppers and Asparagus

INGREDIENTS

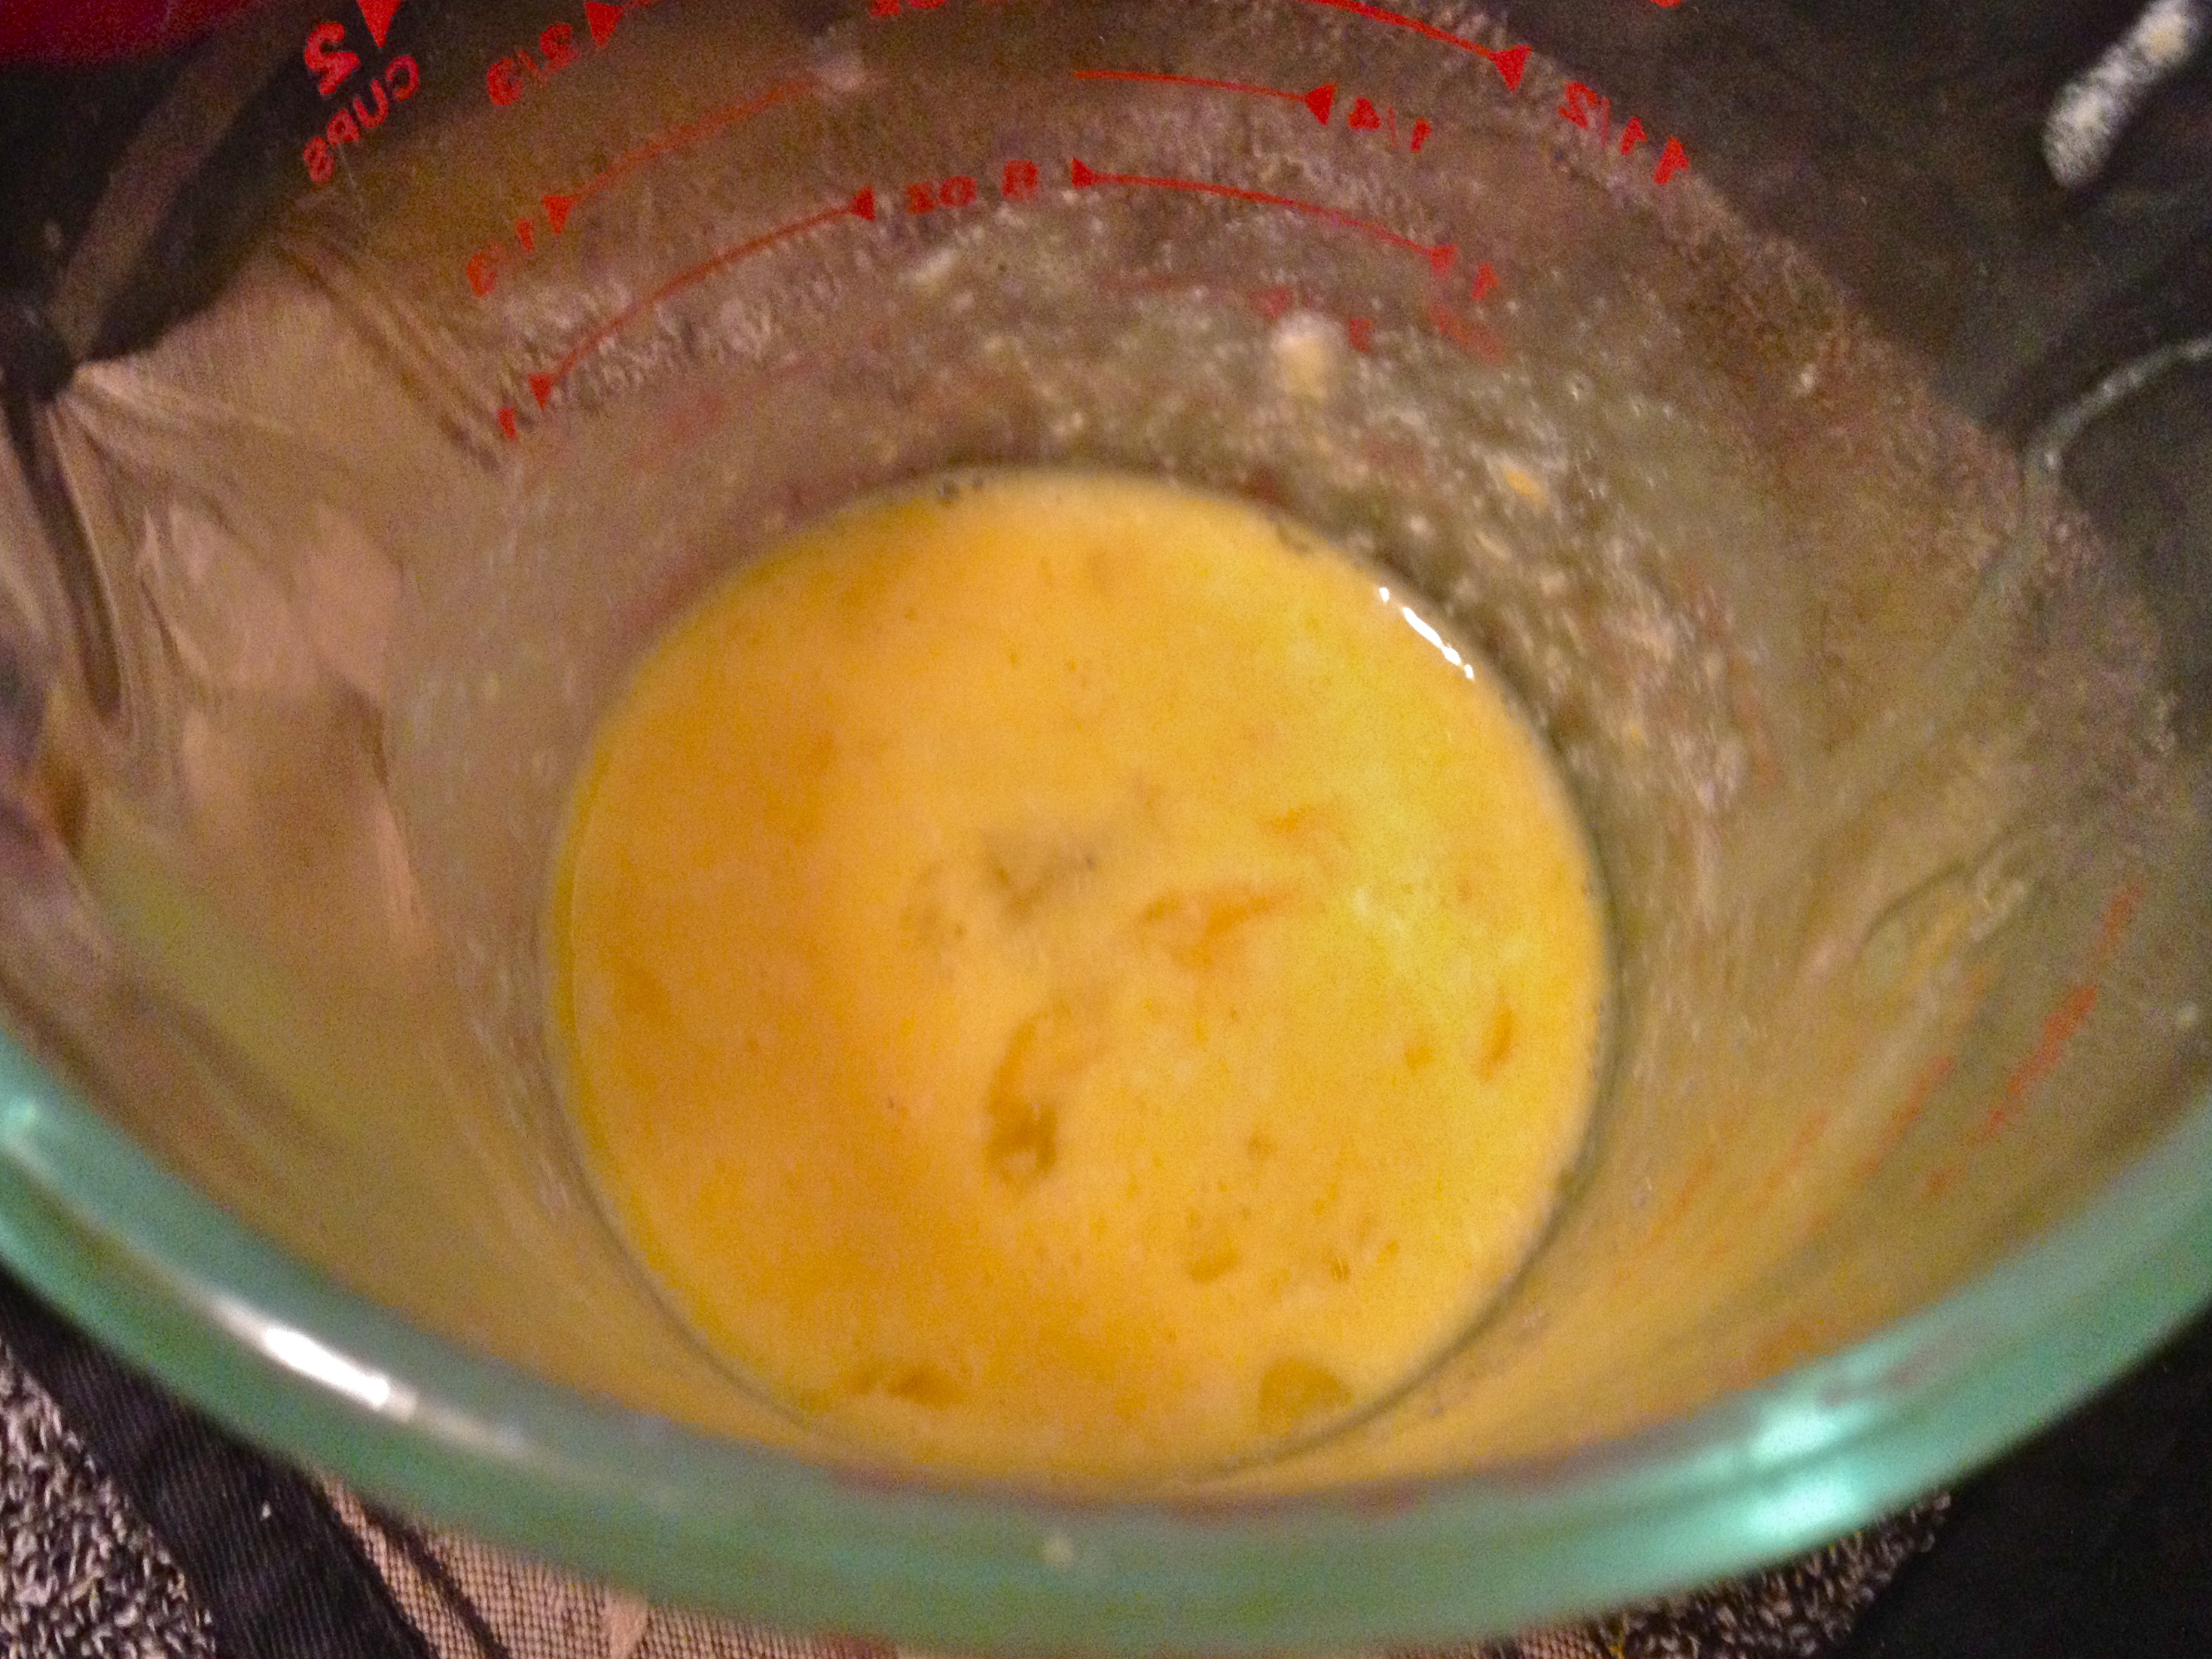
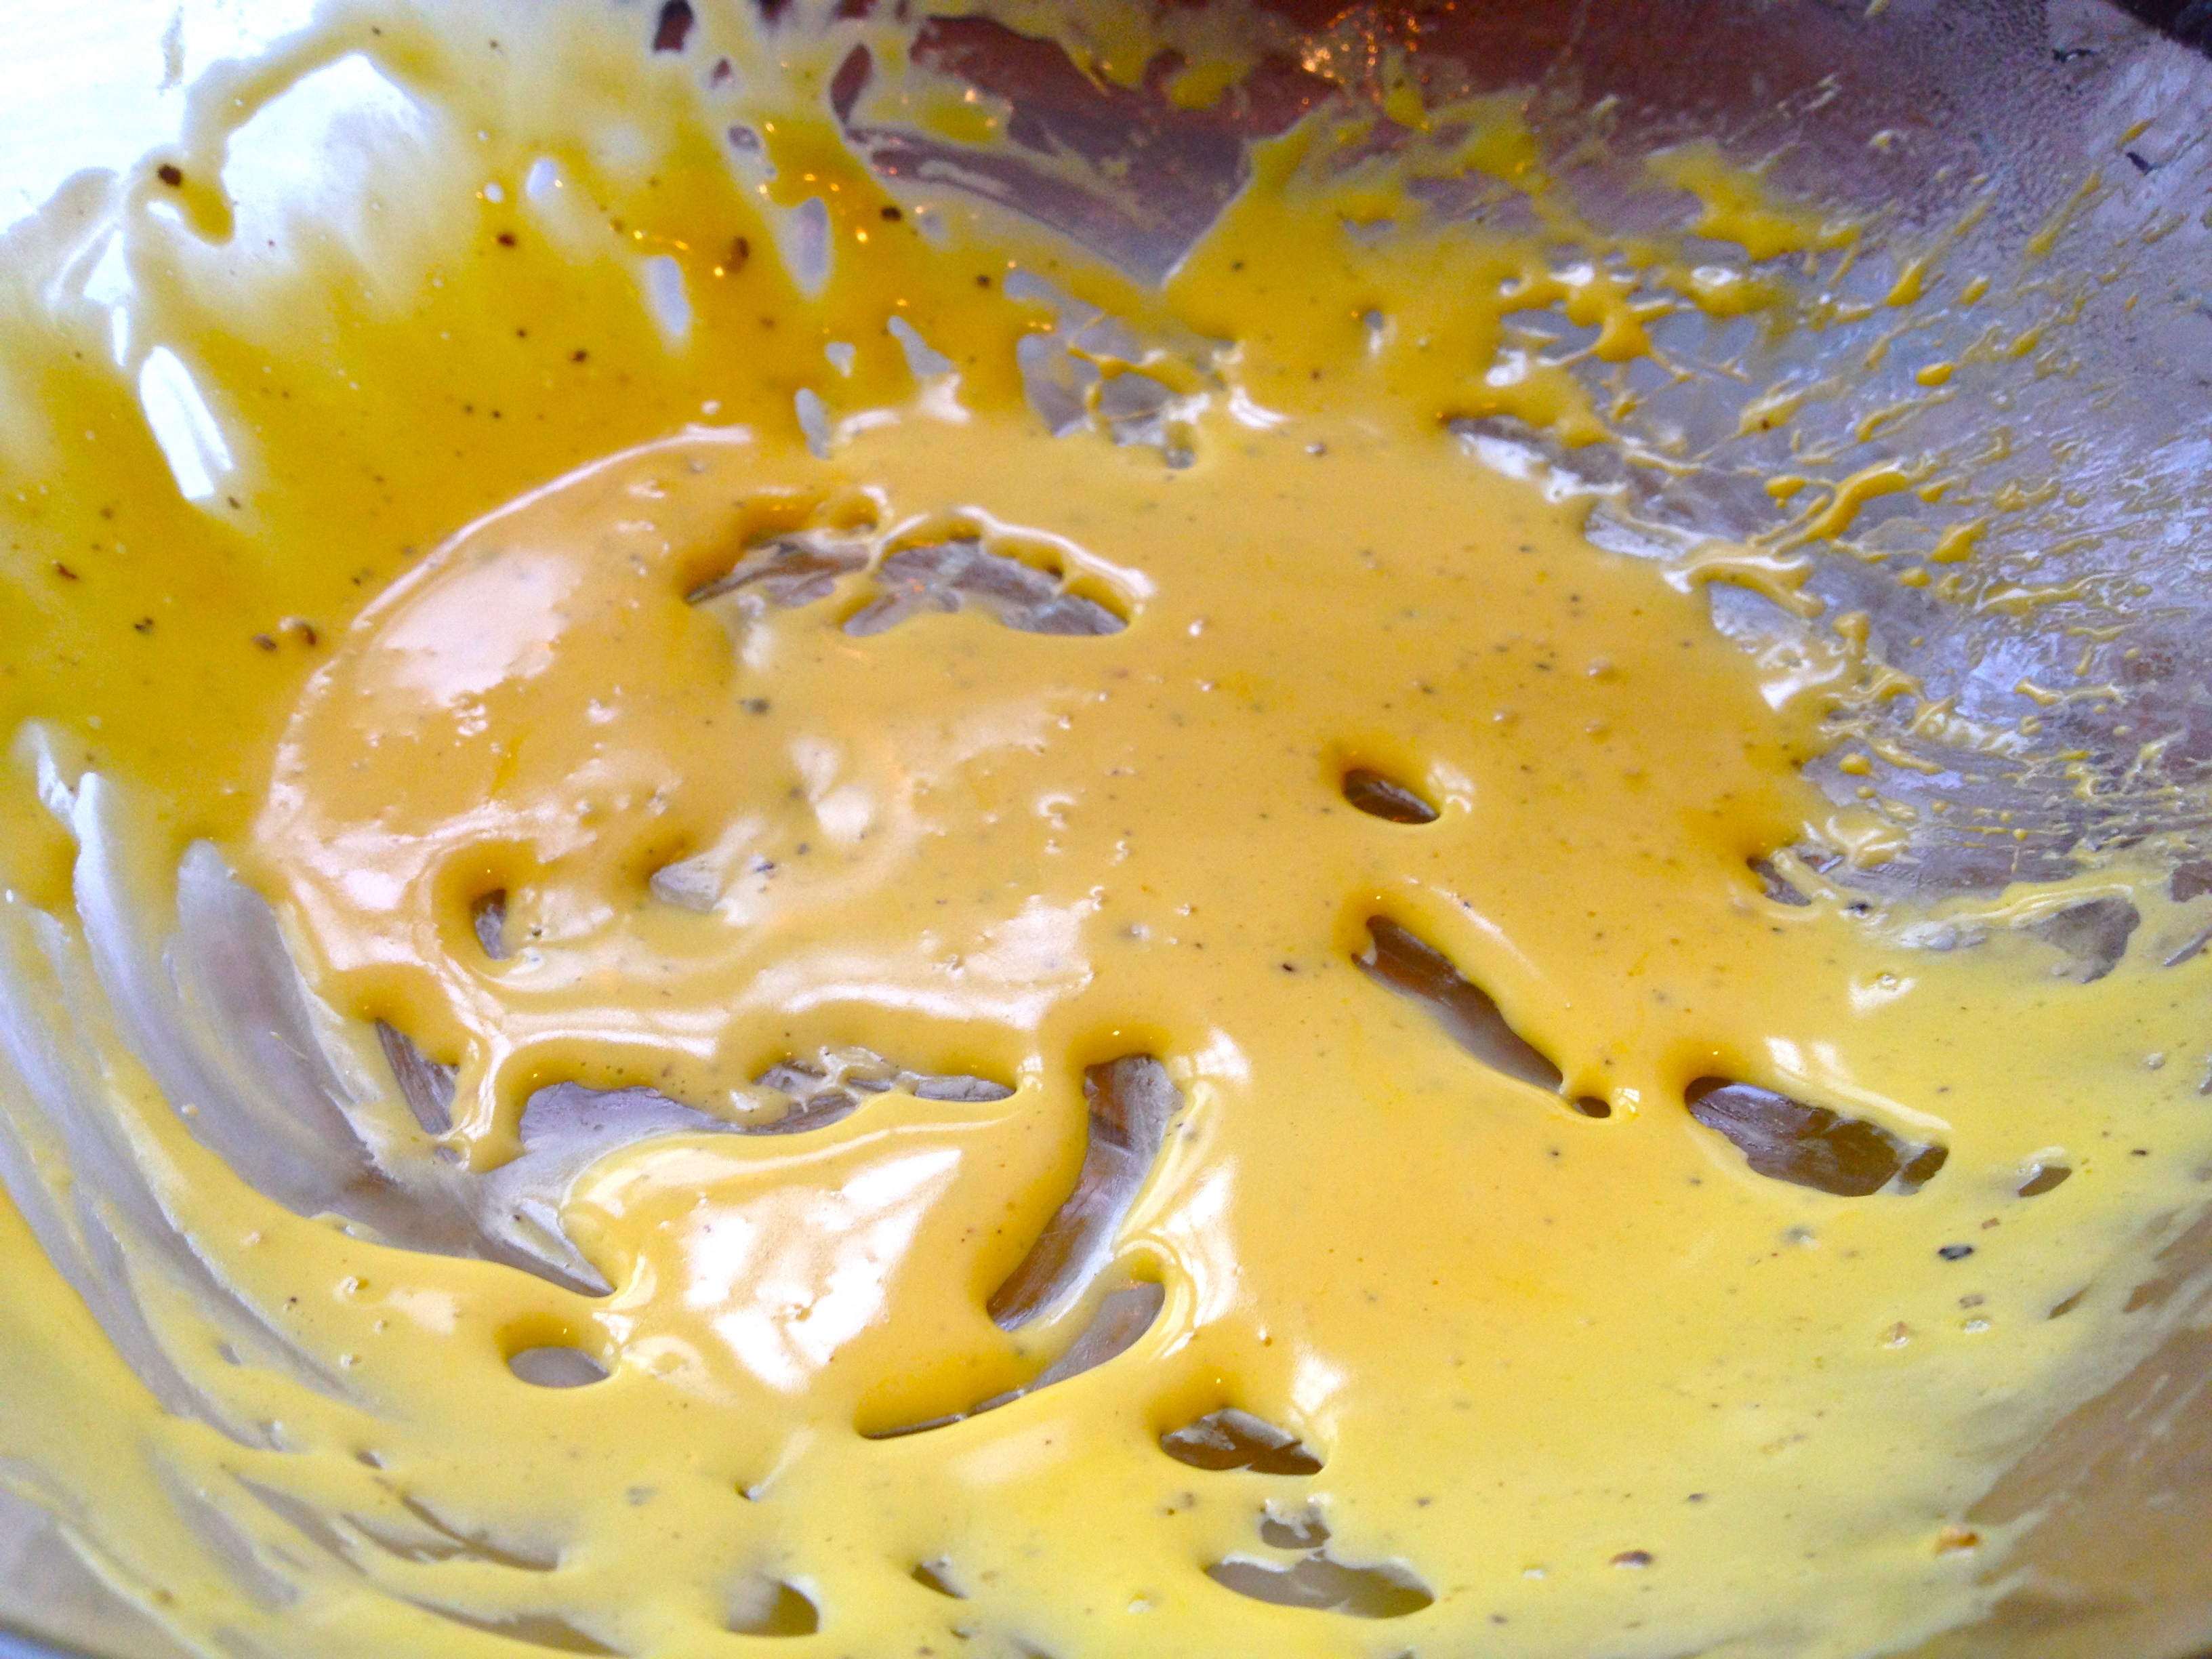
Eggs first. Put the yolks in a glass or metal bowl (they’re going over a double boiler). Season them with salt and pepper.

IMG_6472

Bring a small pot of water to a low boil in the stove, and set the yolk bowl over it (but don’t let the bottom of the bowl touch the water, or they’ll cook too fast.) Using a whisk, beat the yolks over the double boiler until they’re ribbony, pale yellow, and just about tripled in size. Scrape into the center of the bowl and set yolks aside.

IMG_6475

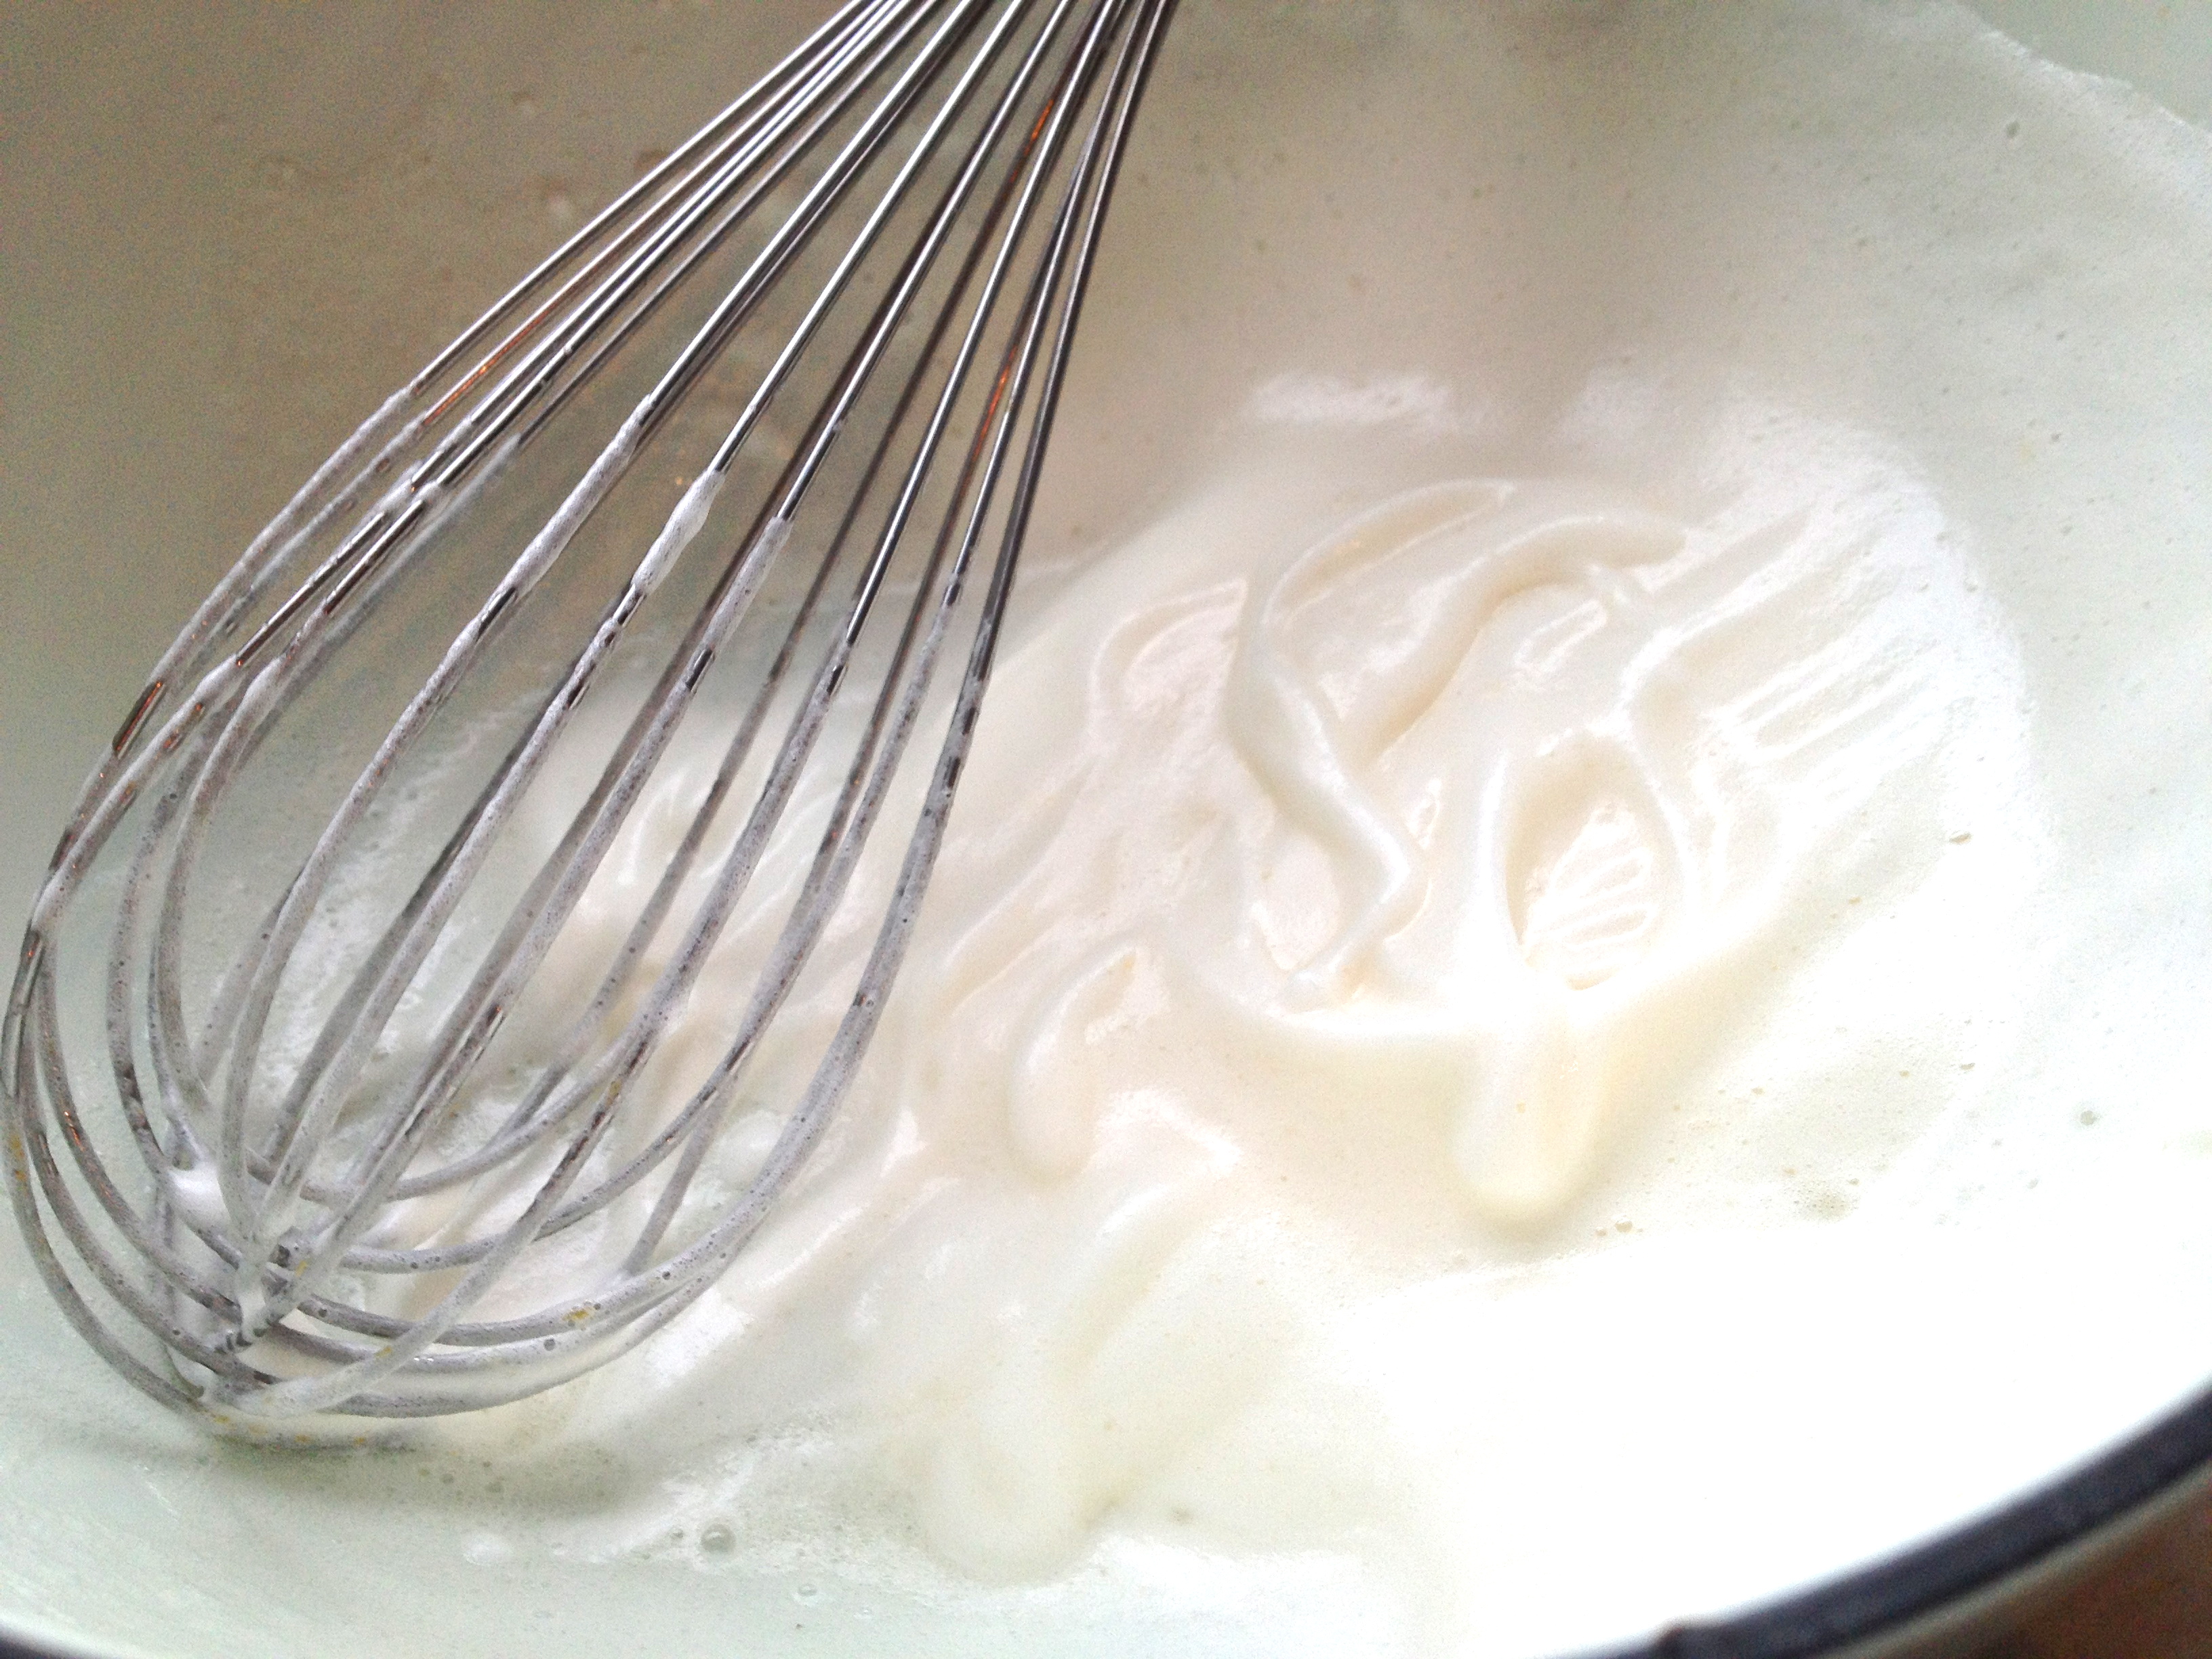
Next, use your whisk to beat the whites until they’re fluffy and stiff.

IMG_6476

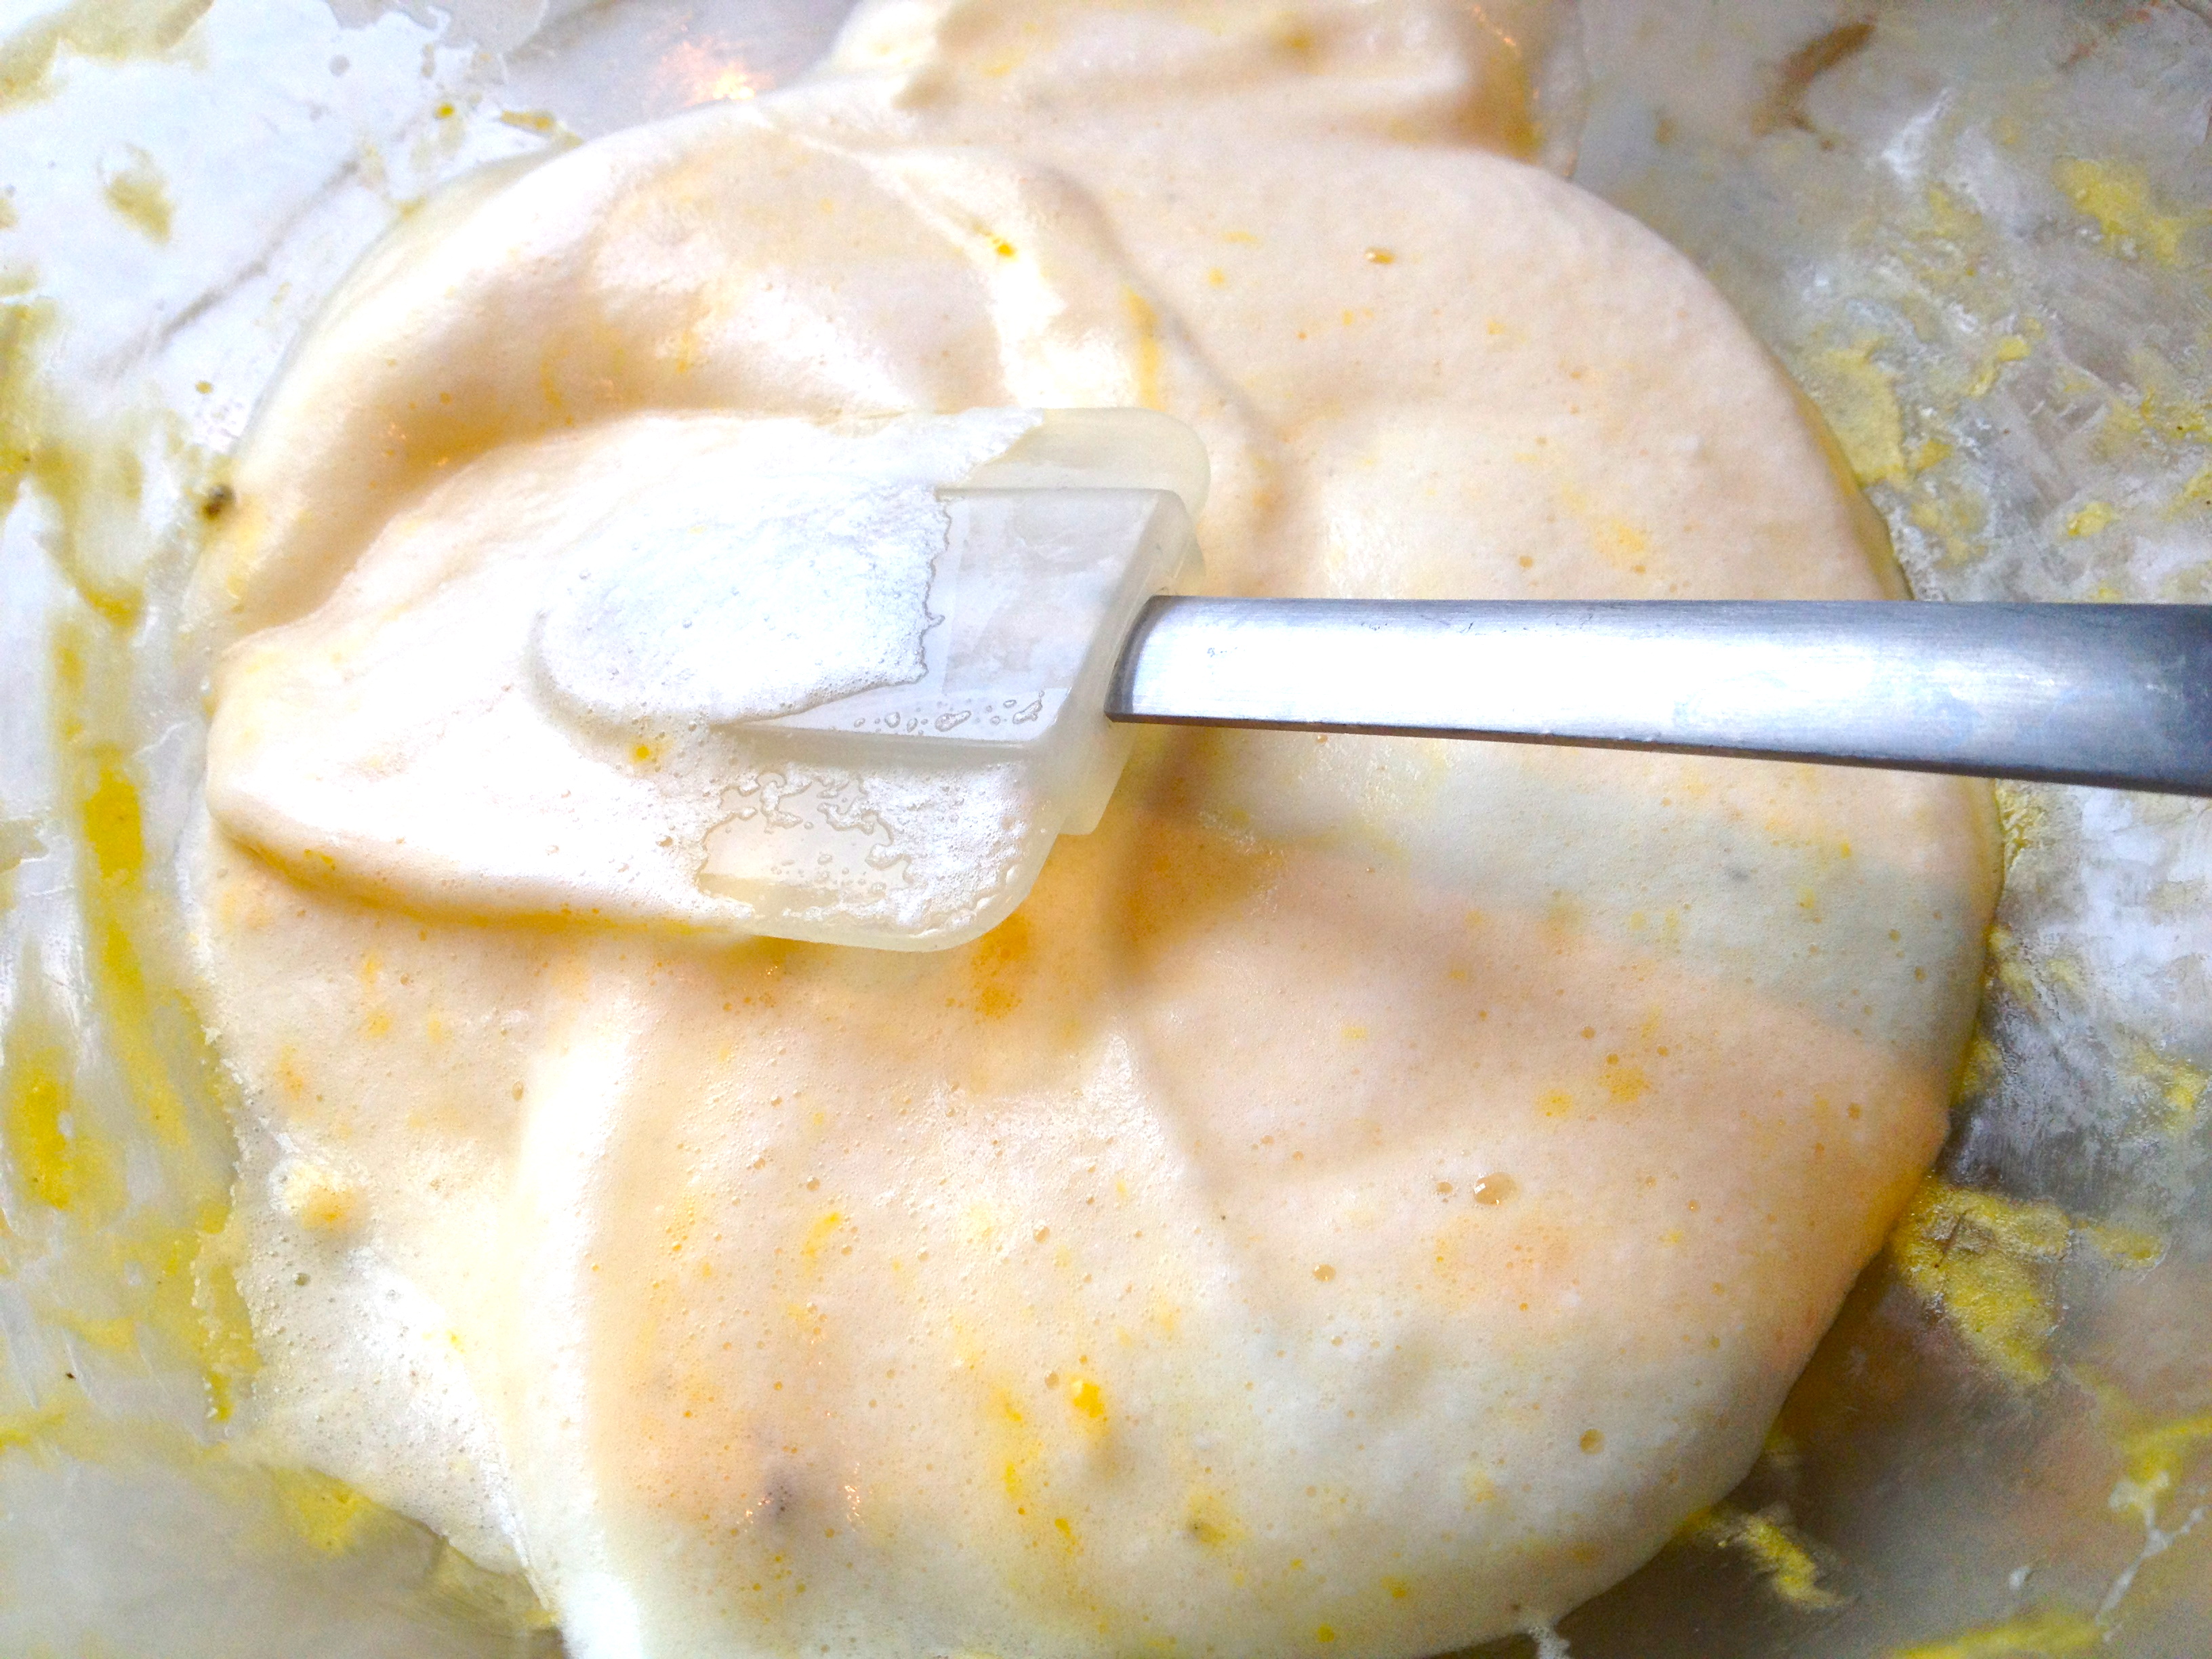
Pour the whites into the bowl with the yolks. Using a spatula, gently fold them together.

IMG_6477

Heat a pan over medium high and melt the butter. Pour the fluffy eggs into the pan and cover with a lid.

IMG_6478

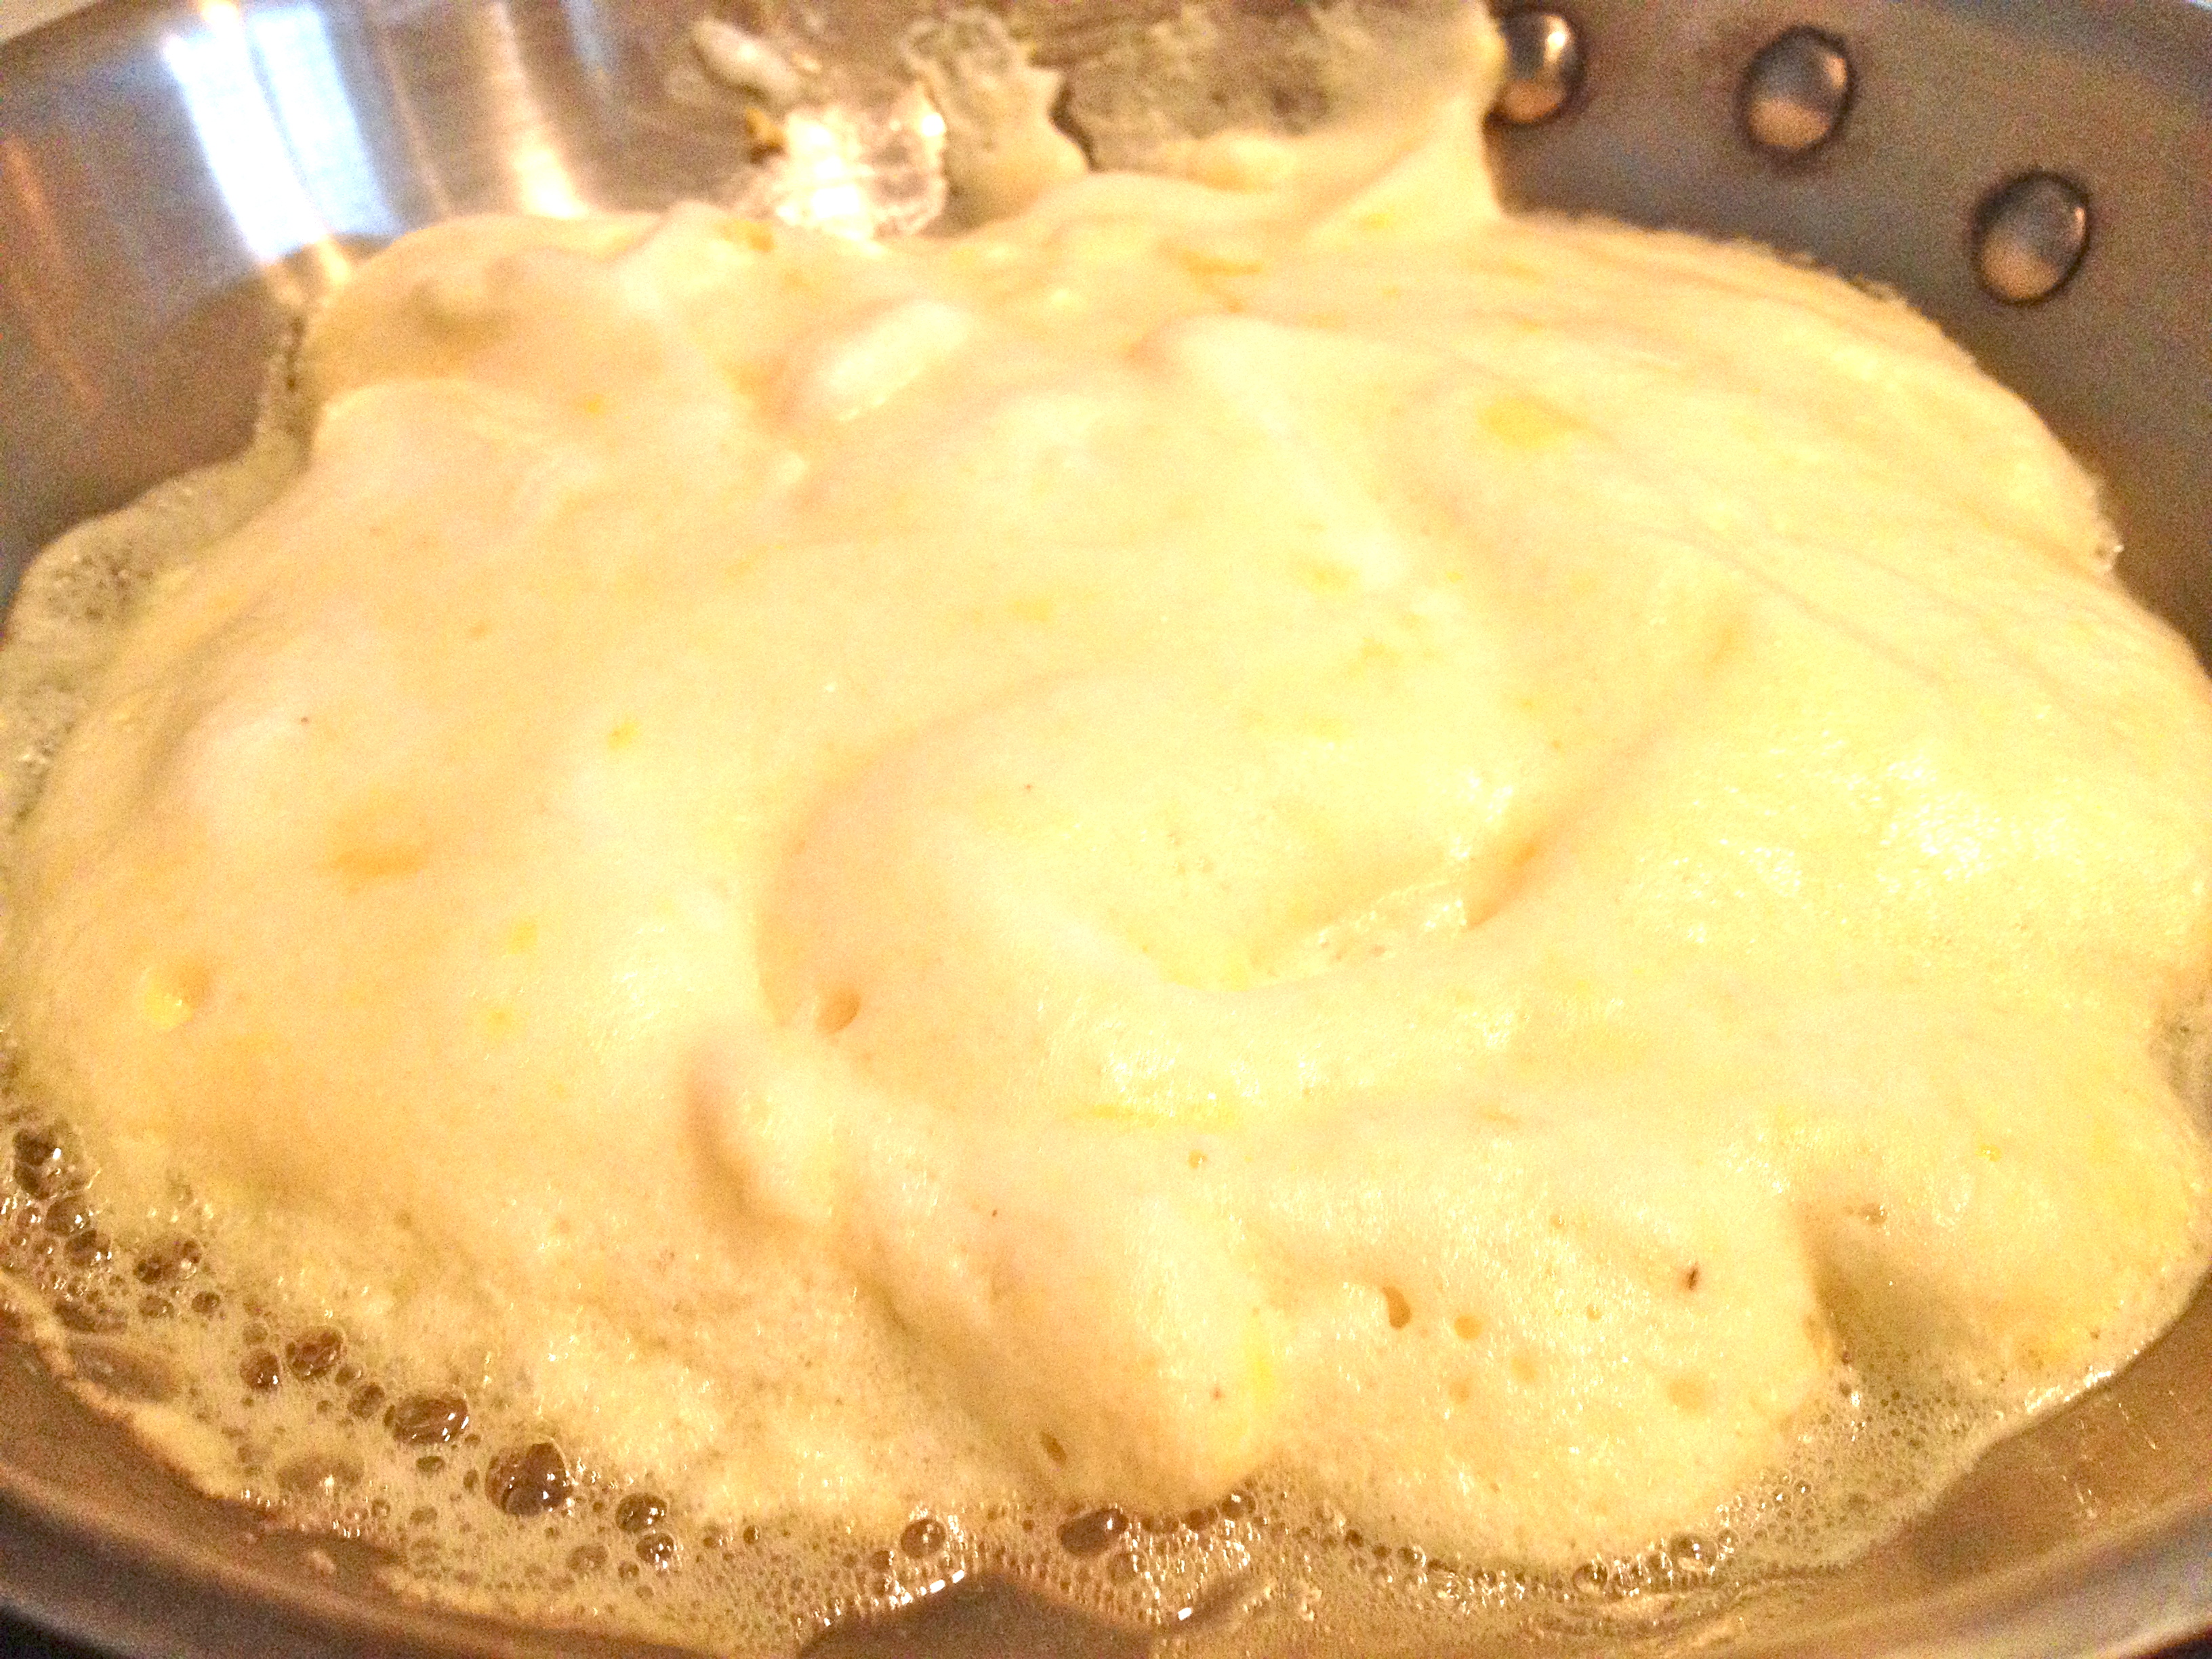
When the bottom is starting to turn golden brown and the foaminess on top is starting to firm up a bit, spread your veggies and cheese over the whole surface of the omelet.

IMG_6482

When the bottom is browned to your liking, gently loosen the sides of the omelet from the bottom of the pan and carefully slide it out. As you do so, fold one half of the omelet over the other. Sprinkle with pepper and truffle salt, if you’ve got it, or else regular salt. Then just float away on this cloud of a breakfast (or lunch, or dinner….).

IMG_6486

Blackened Onion and Lentil Pilaf.

On Wednesday night, I got home late from a busy day at work, and I was starving! Thinking to make something easy and quick, I decided to put together a really simple lentil dish to accompany the chicken drumsticks I was roasting. I love lentils and consider them an almost-perfect food. They taste good, they’re really versatile, they’re easy to cook, they’re good for you, they last forever, and they’re incredibly cheap! What’s not to love? Last night, I riffed on a Lebanese rice dish called mdardara, which I had learned about a long time ago but hadn’t ever made. It’s a really simple lentil and rice pilaf topped with blackened onion strings, but in my version, I replace the rice with quinoa and the regular brown lentils with the slightly fancier French lentils. What makes this dish so great is that you can really use any kind of lentil, any kind of onion, and any kind of grain that you have around the house. It’s so flexible – just use what you’ve got and you’ll be good to go with a tasty side or main dish that’s totally simple and healthy.

IMG_6457

INGREDIENTS

1/2 cup French lentils
2 cups stock or water (I used homemade vegetable stock)
bay leaf
1/2 onion, sliced
olive oil
salt and pepper
1/3 cup red quinoa (really this will work with any grain)

Just the Recipe link: Blackened Onion and Lentil Pilaf

DIRECTIONS

Add lentils, 1 1/2 cups stock or water, and bay leaf to a pan and bring to a boil.

IMG_6447

Reduce to a simmer and cook until lentils are tender, about 30-40 minutes. Remove the bay leaf, drain any excess liquid, season with salt and pepper, and set aside.

Meanwhile, heat olive oil in a frying pan and add the onions. Cook over medium low, stirring occasionally. When they start to take on a slightly blackened color, add a shallow layer of stock or water to the pan, to help them soften and brown rather than dry up and turn black. If you want them on the more charred side, use less stock; if you like them totally browned and almost caramelized, as I do, use a bit more stock.

IMG_6450

Turn the fire down to low and cook the onions until they’re a deep brown-black and the liquid is almost totally reduced.

Finally, the quinoa. Cook according to package directions. I recommend cooking the quinoa in any remaining stock you have on hand, as this really perks up the flavor of quinoa and makes it way more flavorful than when it’s cooked with water.

When everything is cooked, assemble! Mix the lentils and quinoa and make sure to season with salt and pepper. Spoon them into your bowl or serving dish and top with the onion strings. Add another sprinkle of salt to the onions and that’s it! A simple and easy yet very yummy after work meal that functions as a side or a main dish. And I’m saving the leftovers for lunch.

IMG_6455

Baked Italian Macaroni and Cheese.

As I’ve mentioned before, I came back from my trip to Scotland with crisps, chocolate bars, and Nigellissima, Nigella Lawson’s latest cookbook. On Sunday, in honor of Nigella’s birthday and our hungry stomachs, my sister and I cracked open this wonderful tome and made her Italian-inspired mac and cheese. After switching up a couple of things and converting all of the measurements from metric to standard (and laughing as we tried and failed to guess how much 60 ml and 125 g of things were….metric, it just doesn’t work for me), we got to dig in and enjoy this stuff. So good! We’re thinking that maybe next time we make this, we’ll stir in some caramelized onions, and bacon or pancetta or something nice and salty would be a good addition too. Either way, yum. Happy Birthday, beloved Lady Lawson!

IMG_6434

INGREDIENTS

4 cups macaroni
1 cup whole milk
2 cups chicken stock
2 bay leaves
1 1/2 cups cheddar, grated
3/4 cup parmesan, grated
1 1/2 tbsp corn starch
generous dash of dry mustard powder
generous dash of paprika
1 egg, beaten
3/4 cup fresh mozzarella, cubed
1 tbsp butter
salt and pepper to taste

Just the Recipe link: Baked Italian Macaroni and Cheese

DIRECTIONS

Preheat oven to 400 F.

Heat a pot of salted water for the pasta. Cook the pasta to a still-firm al dente (it’s going in the oven, so it should still be slightly undercooked). When you drain the pasta, reserve 1 cup of the cooking water, to add to the sauce later if needed.

Now, the cheese sauce. In a large saucepan that’ll be big enough to hold all the pasta, heat the milk, stock, and bay leaves and simmer for 5 minutes.

Meanwhile, put the cheddar in a bowl and toss it with the corn starch, mustard powder, and paprika (we had a brick of yellow cheddar about to run out, and then we started a new brick of white cheddar; hence the yellow and white. In mac and cheese as in life, color doesn’t matter).

IMG_6415

Then remove the bay leaves from the milk and stir in the cheddar. Turn the heat down to low, stirring as the sauce thickens, about 10 minutes.

IMG_6416

In a separate bowl, add a spoonful of the hot cheese sauce to the beaten egg to temper, and use a fork to stir.

IMG_6417

Take the sauce off the heat and whisk in the egg, mozzarella, butter, and salt and pepper. You’ll probably need a bit more salt and pepper than you think you’ll need, but be careful not to oversalt. Just try a bite after your first addition, and add seasoning as needed. Stir until melt-ily incorporated.

IMG_6419

Toss the pasta in the sauce to coat, and then pour into a greased baking dish. Sprinkle with a handful of cheddar and/or parmesan, if you like.

IMG_6422

Bake about 15 minutes, until the top just starts to brown. Leave it to cool and firm up a bit for 5-10 minutes and dig in!

IMG_6426

100th recipe! and, Roasted Garlic Refried Black Beans.

Happy 100th recipe from KellyintheKitchen! And just in time before the new year. These humble yet flexible refried black beans perhaps aren’t high-brow enough to be deserving of posting-milestone glory, but look beyond their simplicity to see the awesome possibilities. They work great as enchilada or taco filling, a topping for rice, a spread on top of toast, omelet filling or a side for scrambled eggs…the list goes on. My recipe includes ham, but these also make great vegan beans, sans ham of course. They are incredibly versatile. I ate them with a scoop of Greek yogurt and scallions on top and it was great. These are smart to have around. Happy 100!

IMG_6378

INGREDIENTS

3 cloves garlic, with peels still on
olive oil
1/2 red pepper, diced
4 scallions
1 cup diced ham (optional)
2 cans of black beans (one can drained and rinsed, the other with the liquid)
dash of seasoning salt (I used Pilsen Latino Seasoning from the Spice House) – optional
salt and pepper

Just the Recipe link: Roasted Garlic Refried Black Beans

DIRECTIONS

First, dry roast the garlic in a pan over medium low heat. Once they’re tender and soft, set the cloves aside until they’re cool enough to peel.

IMG_6359

In another pan, heat a drizzle of olive oil over medium heat and add the red pepper. Once it’s softened, add the peeled roasted garlic and scallions and, if you’re not doing vegan beans, the ham. Stir around to crisp it up a bit, cooking for about 3 minutes if you’re using ham, or about 1 minute if not.

IMG_6364

Add the black beans and go at the whole thing with a potato masher. Add a drizzle of olive oil, salt and pepper to taste, and if you want, a pinch of seasoning salt.

IMG_6367

Cook, stirring occasionally, until the beans are heated through. Add a splash or two of water if you want a looser texture – I left mine as they were and they were great. Then serve them however you like! I gave ’em a good dollop of Greek yogurt and an extra sprinkle of scallions and was good to go. Enjoy!

Stuffed Potato Skins.

Mmmmm. I love when amazing recipes are born of leftovers. What to do with leftover Christmas ham? This is a totally sumptuous and indulgent use of that holiday bounty, and it’s worth it in every way. My stuffed skins are the lovechild of a twice-baked potato and a potato skin, with the best of each coming together in this dish. It’s the steamy meatiness of a twice-baked, with the crispiness and the magical fillings/toppings of potato skins. Make this now or forever regret missing a wonderful food opportunity!

IMG_6339

INGREDIENTS

8 medium baking potatoes, washed
canola oil
1 1/2 cups cheddar cheese, shredded
1 cup Greek yogurt or sour cream
1 tbsp butter
3-5 tbsp milk
2 cloves garlic, minced
1/2 tsp seasoning salt (I used Bridgeport seasoning from the Spice House)
1 1/2 cups ham, diced (great for any holiday’s leftovers!!)
salt and pepper to taste
5 scallions, chopped

Just the Recipe link: Stuffed Potato Skins

DIRECTIONS

Preheat oven to 425 F.

Rub each potato lightly with oil and place on a baking sheet. Bake until fork-tender, about 40 minutes.

IMG_6329

While the potatoes cook, get the toppings/fillings ready. Shred the cheese, dice up the ham, and chop the garlic and scallions.

When the potatoes are done, slice them in half long-ways and use an oven mitt hold them while you scoop out the middles. You want each potato to have enough room to stuff with filling, but enough potato remaining inside so that it still holds its shape. Put the potato meat that you scoop out into a large mixing bowl. Place the empty potato skins back in the pan, drizzle with olive oil, and put back in the oven to crisp up a bit more, about 10-15 minutes (or longer, if you want the skins really nice and crispy. I didn’t have the patience to wait!).

Now, mix up the filling. Stir together the potatoes with the sour cream, milk, butter, garlic, seasoning salt, ham, salt, pepper, and 1 cup of the cheese.

IMG_6331

Take the skins out of the oven and stuff with the filling.

IMG_6333

Sprinkle with the rest of the cheese.

IMG_6334

Bake until the cheese is melted and the skins are even crispier. Sprinkle with scallions. These go great with sour cream and/or ketchup. Enjoy!

IMG_6337

Broccoli Cheddar Soup.

File this one under “tons of flavor in less than 20 minutes.” Also file it under “food for when you’re pretending it’s snowing,” because that’s what I did yesterday. It’s been something like 300 days since Chicago has had any measurable snowfall, and despite a snow-optimistic forecast, it’s just not happening for us. I woke up Friday morning to a depressingly still-green backyard, and it’s hard to feel Christmasy with such balmy weather. Global climate change is really throwing a wrench into my Christmas spirit! So I made this tasty, toasty dish for lunch, and I’m crossing my fingers we’ll get a white Christmas in the next few days. Until then, broccoli cheddar soup is a good distraction.

IMG_6197

INGREDIENTS

olive oil
butter
1 tsp all-purpose flour
1 clove garlic, minced
1/4 cup half and half
1 1/2 cups stock (I used leftover beef stock)
salt and pepper
pinch of nutmeg
a few handfuls of broccoli (I had some leftover cauliflower so I threw that in too)
about 1/3 cup grated cheddar cheese (don’t measure. Just add as much as you want.)

DIRECTIONS

In a saucepan over medium heat, heat a splash of olive oil and a bit of butter and add the flour, stirring constantly. Cook about a minute, then add the garlic and cook another minute.  Pour in the half and half, stock, salt, pepper, and nutmeg.

IMG_6189

Bring to a low boil and add the broccoli. Cover and simmer, stirring occasionally, until the broccoli is tender.

IMG_6190

Remove from heat and pour into a food processor or blender. Add the cheese and blitz to your liking.

IMG_6193

Serve with bread and butter and cross your fingers it will snow before Christmas.

IMG_6194