Cream Potatoes Anna.

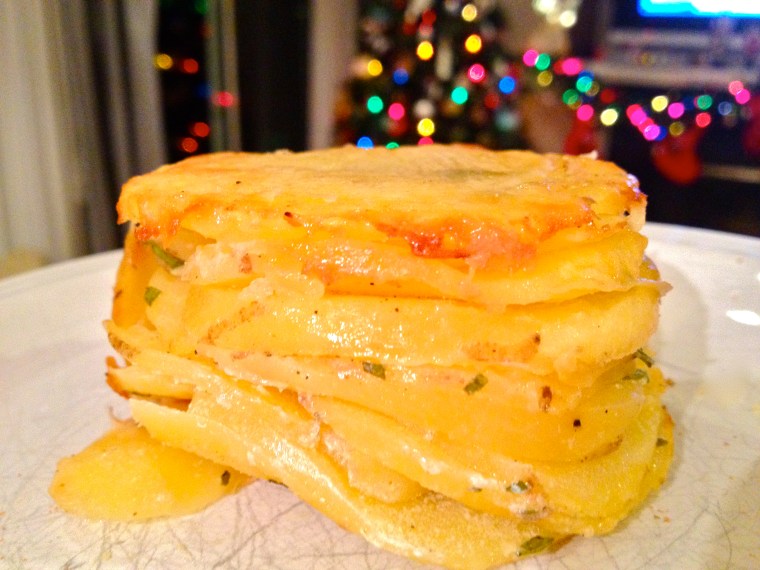
Pommes Anna is a classic potato dish in French cuisine. It’s usually made with butter, but, taking a page out of chef Laura Calder’s book, I used half and half. It’s melty and creamy. It’s herby and warm. It’s the perfect side to any kind of meat, but especially pork chops. Or chicken breasts. Or steak. Or buffalo. Or zebra filets. Okay fine, everything! And pommes Anna is fun to make too. Lots of layering and a bit of flexibility with herbs and spices. These were very calming to make, and the finished product proved a satisfying reward after having spent the morning tiring out a new puppy. Please welcome Penny the Black Lab Puppy, a much-loved new addition to our family!

IMG_6134

She tried her hardest to get at these potato goodies while I was shooting them, but only managed to snag my red and white checked towel in her little mouth, prancing away as she tripped over the dragging ends of it. What a little troublemaker.

IMG_6164

INGREDIENTS

4 potatoes (small-ish – this recipe makes 2 ramekins, so adjust accordingly), peeled and thinly sliced into discs
1/2 cup half and half or heavy cream
rosemary and thyme, chopped
pinch of paprika
salt and pepper
butter or non-stck spray

Just the Recipe link: Cream Potatoes Anna

DIRECTIONS

Preheat oven to 400 F.

Place the potatoes in a large dish and toss them in the half and half. Let them soak about 15 minutes.

IMG_6145

Meanwhile, break out the parchment paper. You’ll need to trace a sheet of paper that will fit into the bottom of whatever baking dish you’re using (I used two ramekins, so I cut two circles to fit into the bottom). Then, you’ll need a slightly larger sheet of parchment paper to fit on top of the dish, covering the assembled potatoes. I find it easier to just cut all the parchment paper pieces at once and then set the top pieces aside. Butter or spray the bottom piece(s) and place into the bottom of the pan, butter side up.

IMG_6139

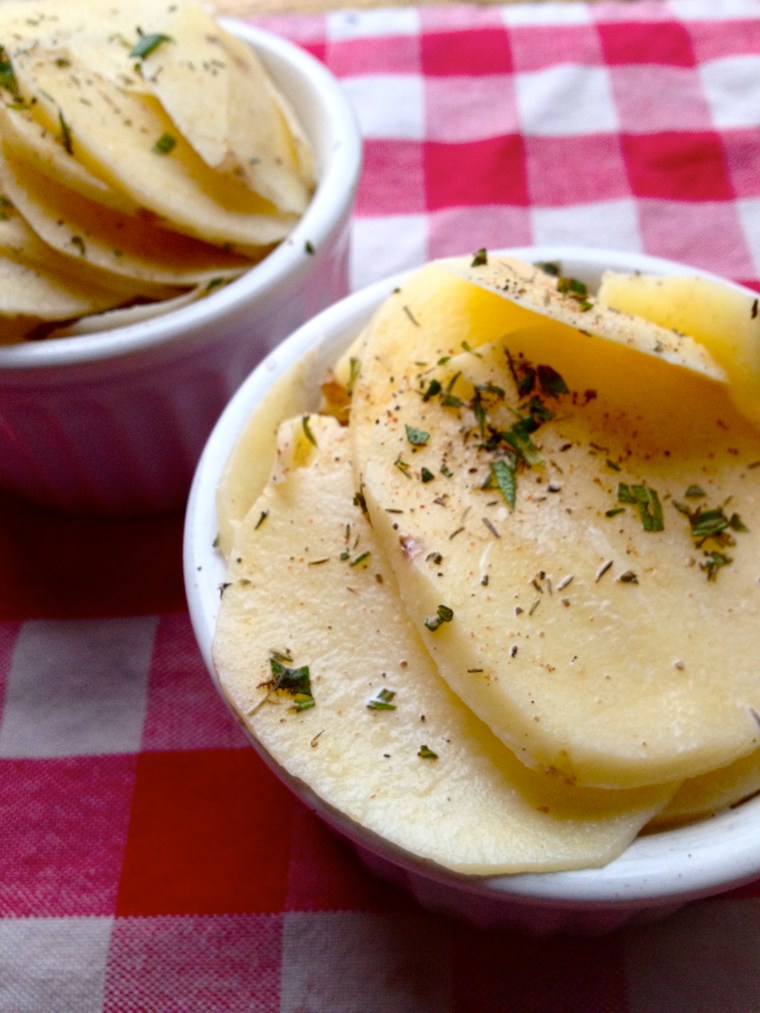
Next, take the potatoes out of the cream and start layering them into your dish. Make a single layer of potatoes, then sprinkle with a bit of the salt, pepper, paprika, rosemary, and thyme. Keep alternating potatoes and seasonings until you use up all the potatoes.

IMG_6149

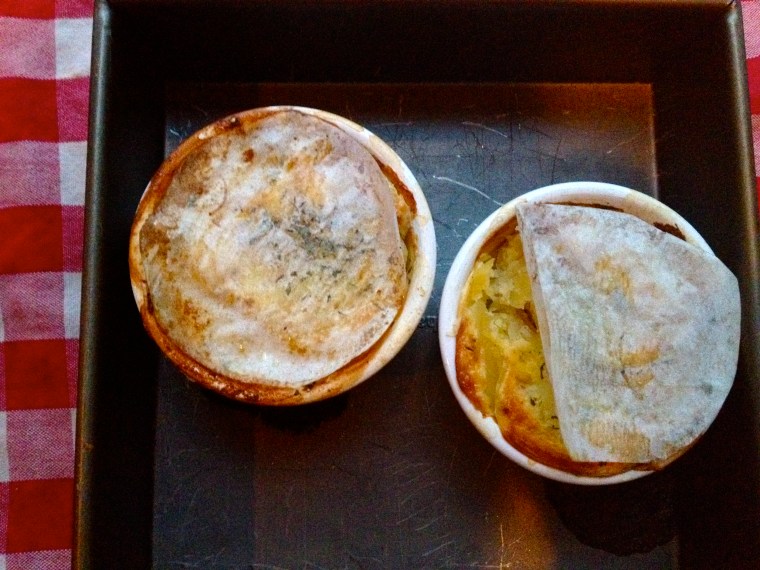
Butter the top piece(s) of parchment paper and place firmly on top of the potatoes. If you’re using ramekins, place them in another larger pan.

IMG_6157

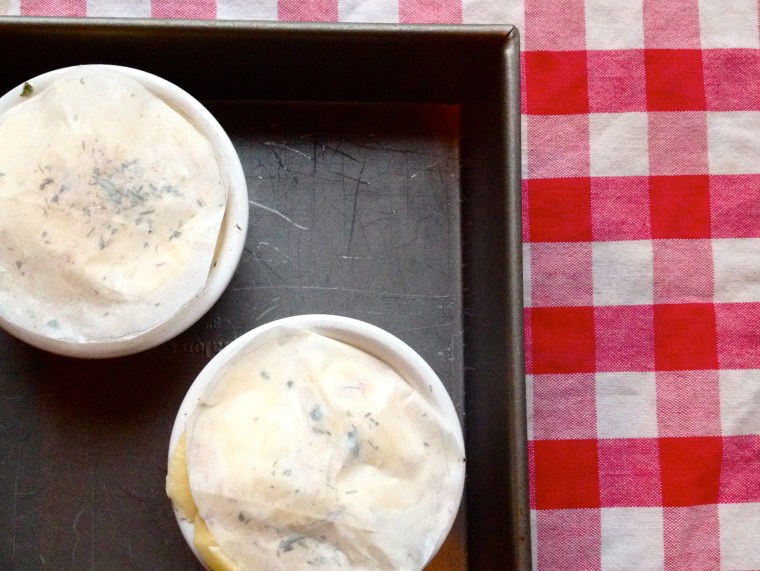
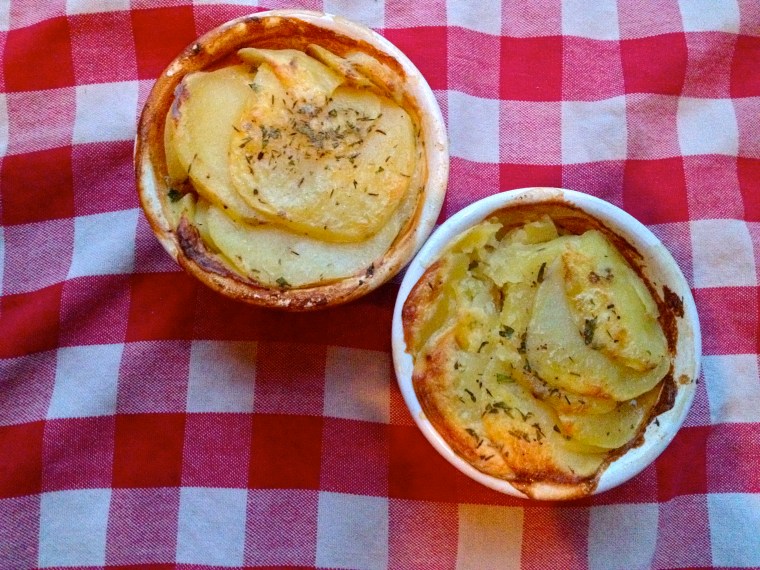
Place a heavy pan on top of the potatoes; this weighs them down and bakes them into a creamy potato cake. Yum. Bake until super tender and let cool before turning out into a beautiful, delectably melty potato cake.

IMG_6161

Enjoy! Oh and P.S. – happy Mayan end of the world day! See you all tomorrow….or not?!

IMG_6170

Roasted Carrots.

Nothing fancy here, just an easy side dish. But there’s something kind of magical that happens when you roast carrots this way. They develop a silky texture with a warm, rich flavor that’s both sweet and savory. I love these—if you’re not usually a cooked carrot fan, make these and you will totally rethink your stance on the vegetable. They go great with baked chicken, lamb steaks, pork chops, and almost any other simple main dish you can think of. And the added perk that makes me even more excited about this recipe is the garlic cloves: after the carrots are done and the cloves are softened in the oven, toast up a piece of crusty bread, slather it with some good butter, and then spread the garlic all over that baby. Just don’t try to kiss anyone afterwards. Or alternatively, make them eat some garlic, too.

INGREDIENTS

6-10 whole carrots, washed and dried
olive oil
salt
pepper
3 cloves garlic, skin on, crushed

DIRECTIONS

Preheat oven to 350 F.

In a pan or baking dish, toss carrots in olive oil, salt, and pepper. Drop in the garlic cloves.

Bake until tender and slightly caramelized. Yum.

Back from Scotland! and a Strawberry Custard Tart Recipe.

Hello again! I am safely returned from an amazing adventure in Scotland. Good whisky, otherworldly fish and chips, fun people, and gorgeous hills and sky everywhere you look—not to mention, my calves still burn with the effort (and satisfaction) of summiting Ben Nevis, the British Isles’ tallest mountain. Here are a few highlights of the trip (culinary and otherwise)…

First, some gorgeous sightseeing with my family, who hosted me for a night of authentic Scottish food and great fun!

Then in Edinburgh, my fabulous traveler friend Caroline and I met up. We had a very tasty breakfast and great cup of tea at an adorable cafe called Urban Angel (note the butter portion):


My first souvenir purchase was, of course, Nigella Lawson’s new book Nigellissima (which I love with every centilitre of blood in my body, despite the book’s use of the metric system).

We tried haggis

…and devoured it!

And we couldn’t say no to my favorite Irish late-night classic, garlic cheese chips:

One of my favorite parts of the trip was our visit to the battlefield at Culloden Moor near Inverness. Not only was it very moving and historically cool, but you could pretty much turn your camera in any random direction and still end up with a gorgeous photo:

Then in Fort William, we befriended an Aussie and a Kiwi, and together we climbed Ben Nevis in a rather impressive 6 hours flat! I’m pretty proud of us. Fans of The Simpsons will appreciate the similarities between Ben Nevis and Springfield’s Murderhorn (“yes, that’s it….just to the right of the one you’re looking at.”) Who needs PowerSauce Bars?

And another favorite moment was our glorious high tea at Stewart Victorian Tearooms in Glasgow. Mmmmm. Clotted cream.

It was a fantastic trip.

But my hands were itchin’ for the kitchen by the time I got home, and this was the first treat I prepared: my own birthday custard fruit tart. This tart is inspired by a custard from Laura Calder and a shell from Ina Garten, and it’s every bit as good as you’d expect a dessert from those two to be. It was super easy even though I did make the shell myself, but if you really want to streamline the whole process, you can buy a premade pie shell and simply cook the custard and top with berries. Creamy and light and a great alternative to birthday cake!

INGREDIENTS

for tart shell:
12 tbsp cold butter
1/2 cup sugar
1/2 tsp vanilla extract
1 3/4 cups all-purpose flour
pinch of salt
water, if needed

for filling:
3 eggs
1/4 cup sugar
splash of vanilla
1 scant cup Greek yogurt
pinch of ground nutmeg
2 cups strawberries, sliced
lemon juice

DIRECTIONS

First, prepare the tart shell. In a food processor, pulse butter and sugar until just combined. Add the vanilla and pulse. Then combine the flour and salt in a bowl and add in two batches, pulsing until just combined. The dough should just hold together when pressed, so if it doesn’t at this point (mine didn’t), add a few drops of water and pulse until it reaches the right consistency. Turn the dough out onto wax paper and press into a disc. Wrap in paper and let it rest in the refrigerator at least half an hour.

Take the cold dough and carefully roll it out to to the size of your greased tart tin or pie dish. Press the dough into the dish and up the sides. Put it back into the fridge for 30 minutes.

Preheat oven to 350 F. Take the tart shell out of the fridge and carefully lay a sheet of parchment paper over the dough. Fill the parchment-lined shell with dried beans, or fit another smaller pan into the shell. This will help it keep its shape while it bakes.

Bake for 20 minutes, then remove the beans or pan and use a spatula to touch up any thin or slipping parts of the shell base or sides. Prick a few times with a fork and place it back in the oven to cook another 13-17 minutes until golden brown.

Remove shell from heat and set aside to cool slightly while you prepare the custard. Whisk together eggs and sugar. Then add vanilla and yogurt and stir until smooth.

Pour the custard into the shell through a sieve so that it’s totally smooth. Sprinkle with a pinch of nutmeg.

Bake 18-24 minutes, until set. Let cool completely.

When the tart is completely cooled, arrange the strawberry slices on top of the custard. Top with a squeeze of lemon juice and enjoy! Happy birthday to me.

Vegetable Stock.

Homemade vegetable stock: SUCH a helpful ingredient to have around. I make this stuff in huge batches and keep it in my freezer for whenever I need it, which is as least once a week. I always cook couscous and quinoa in stock to boost their flavor, and it’s also fantastic for sauces, soups, and cooking veggies. Also, it’s practically free. Here’s why: in a freezer bag, I save up all of my otherwise-throw-away-able bits of carrot peel, onion skin, garlic skin, celery leaves, herb stems, whatever I’ve got around, and once the bag is full, I’m ready to make a gorgeous pot of stock out of things I would otherwise have tossed. So why not recycle by making your own stock? It tastes great, has no preservatives and no sodium, and it’s free. The ultimate homemaker’s trick!

INGREDIENTS

enough frozen vegetable bits to fill a pot – I use onion skins, garlic skins, carrot peels, and celery leaves
seasoning to taste – I try to stick with the Scarborough Fair rule of parsley, sage, rosemary, and thyme, but I was out of rosemary. Instead I used a bit of marjoram, just because I felt like it.
3 bay leaves
a palmful of peppercorns
Note: I go back and forth about salting my stocks. It’s a saltiness control thing. Stock absolutely needs salt, but then stock is also an ingredient in other dishes that get their own salt. Skipping the salt in your stock means you’ll have more control over the final dish’s saltiness. Does that make sense? Pun very much intended, salt is just a matter of taste. Add it, don’t add it, we’ll all survive.

DIRECTIONS

Put all the veggie leftovers and the flavorings in a Dutch oven or large pot. Cover with cold water.

Bring to a boil and then turn down to a simmer. Cover and cook 2-3 hours.

When the stock is done, turn off the heat and let it cool a little bit. Then use a mesh strainer to strain everything out.

You’re left with a giant bowl of super flavorful, glistening amber vegetable stock—lucky you. I reserve a few cups of it to keep in the fridge for use in the next week, and then I pour the rest of the stock into ice cube trays to freeze. I pop the stock cubes out of the trays and keep them in a bag, so I can use exactly the right frozen portion whenever I need them in the next few months. Unendingly convenient, this is definitely one of my favorite recipes!

Pea and Asparagus Risotto.

I get so excited when I’m out to lunch or dinner and I see a special risotto on the menu, and I almost always order it. I just think it doesn’t get any better than creamy, cheesey risotto, especially with some perky green vegetables in the mix. That’s why I made it for dinner this week! Risotto has a reputation as a hassle of a homemade dish, but I think that’s rather harsh and undeserved. It’s not that it’s at all difficult to make, it’s just that it takes some effort. In fact, risotto is actually pretty easy, if you can handle a bit of extended stirring in front of the stove. So if you find yourself with a free evening and you’re feeling like cooking up something special, risotto is definitely the perfect dish. Every time I make it, I’m amazed at how beautifully creamy it becomes—why is it so darn good?!

INGREDIENTS

1 bunch of asparagus, ends trimmed
4-6 cups chicken stock (vegetable stock is fine too)
3 green onions, sliced
olive oil
2 cups arborio rice
1 cup dry white wine
3/4 cup frozen peas
1/2 cup Parmesan cheese, shredded
fresh parsley, chopped
lemon zest, to taste (I like just a pinch)
salt and pepper to taste

DIRECTIONS

Because risotto demands your full attention, make sure to have everything prepped before you start. First, blanche your asparagus in a shallow pan of boiling water until just barely tender but still crisp, about 2 minutes, and then plunge them into an ice bath to stop the cooking process. Chop the asparagus into bite-sized pieces and set aside.

In a saucepan, heat stock to a low simmer and continue to simmer it, so that it’s nice and hot when you add it to the risotto. Cold stock will interfere with the rice cooking process because it will need to heat up each time you add it, so this step is important.

Now heat a Dutch oven or other large pot over medium to low heat. Oil the pan and add the green onion and a pinch of salt. Cook about 2 minutes, stirring occasionally, and then add the rice. Stir well and cook the rice until the sides are transparent and you see an opaque white spot in the center, about 3-5 minutes. That means it’s time to start adding the liquid!

First, pour in the wine and stir until almost all of the liquid is absorbed. Then, add the first ladle of stock—just enough to submerge all the rice.

Stir almost constantly as the rice absorbs the stock. Once nearly all this stock is absorbed, add the next ladle, again just submerging the rice. Repeat this process until you add your final ladle of stock.

Once you’ve added the last bit of stock, drop in the asparagus and peas. Then stir until all the stock is absorbed, and remove form heat. The rice should be creamy and tender, with a little bit of a chewy texture.

Sprinkle in the Parmesan cheese, parsley, lemon zest, and salt and pepper to taste. Serve with an extra sprinkle of cheese and enjoy the fruits of your foodie labor!

Apple Walnut Cake.

Many many thanks to fantastic art director and mi amiga Vanessa Palacio for photographing this cake for me! These are by far the most expert and mouth-wateringly gorgeous shots that have graced KellyintheKitchen. And not only that, but she also picked the apples herself on a recent apple orchard excursion, so muchas muchas gracias a ti, Vane!! We got together on Sunday at my apartment to bake this yummy apple walnut cake, inspired by a similar recipe from smitten kitchen. It’s a pretty unique cake—we loved that instead of butter, this recipe calls for olive oil and lemon-flavored yogurt, which really changes the texture and makes it super moist and soft. After all our hard cake-prep work, it was quite a struggle waiting for our pastel de manzanas y nogales to finish baking, but once it was done (and had posed for its close-up), each bite was everything we dreamed of and more. Nos gusta comer manzanas.

INGREDIENTS

1 cup sugar
1/4 cup packed brown sugar
4 eggs
1 cup lemon yogurt
1 tbsp vanilla extract
2 1/4 cups all-purpose flour, sifted
1 1/4 tsp baking powder, sifted
1/2 cup plus 2 tbsp olive oil (NOT extra virgin)
3 apples, peeled, cored, and diced
1/2 cup walnuts, toasted and chopped
1 tsp cinnamon

DIRECTIONS

Preheat oven to 350 F.

Beat the sugar, brown sugar, and eggs until totally smooth and incorporated. Stir in the yogurt and vanilla.

Sift the flour and baking soda in a bowl. Alternate adding half the flour mixture and half the oil, stirring between each addition.

Then fold in the apples and walnuts.

Pour into a greased springform pan and shake from side to side, to distribute batter evenly. Sift the cinnamon over the cake.

Use the handle end of your spoon to swirl the cinnamon into the top of the batter.

Bake for 55-60 minutes until the top of the cake is golden brown and springs back when you press it gently. If you find that a toothpick inserted into the cake never comes out clean, don’t worry—the toothpick test doesn’t work with this cake. It’s too moist!

Dust with powdered sugar…

…and enjoy!