Sticky Glazed Vanilla-Chocolate Shortbread Cookies.

I haven’t been baking much recently. I miss it! Cutting way down on sugar and processed grains, as I have been, means a lot of my favorite baking activities are on hold. This weekend, however, I was up at my family’s lakehouse in Wisconsin, celebrating my sister’s seventeenth birthday with a handful of her girlfriends. And I saw my chance. My chance to make these cookies, inspired by 101 Cookbooks. Ever the pragmatist, I recognized in this group of high schools girls a captive audience; I knew, if I placed a platter of gleaming sweets in the midst of their Beyonce-listening sunbathe-fest of Saturday, they’d happily help me out by disposing of the evidence. And they did not let me down—when we left the lakehouse on Sunday, only one cookie remained. Nicely done, girls. And happy birthday, Kathleen!

IMG_8701

INGREDIENTS:

for cookies:
12 tbsp (or 1 1/2 sticks) unsalted butter, softened to room temperature
2/3 cup brown sugar
, plus more for sprinkling
2 large egg yolks
1 tablespoon vanilla extract
2 1/2 cups all-purpose flour
1 teaspoon baking powder
1 scant teaspoon salt
about 3 tbsp chocolate, finely chopped (I used semi-sweet)
2-3 tablespoons milk (I ended up using about 1 ½ tbsp)

for glaze:
2 tbsp milk
about 6 heaping tbsp. powdered sugar
splash of good quality vanilla extract (you want to use the good stuff here – don’t skimp on quality)

Just the Recipe link: Sticky Glazed Vanilla-Chocolate Shortbread Cookies

DIRECTIONS:

Using an electric mixer (or your best elbow grease), cream the butter until it’s fluffy. Then add half the brown sugar, stir it in, and scrape the sides of the bowl, and repeat with the other half. Beat in the egg yolks and the vanilla until combined.

IMG_8647

In a separate bowl, mix together the flour, baking powder, salt, and chopped chocolate. You want the chocolate very finely chopped – if the pieces are too big, your dough won’t hold together as well when you’re rolling it out.

IMG_8637

Stirring by hand, gently mix part of the flour into the butter and sugar, just until it combines. Add the rest of the flour, careful not to over-mix. If the dough looks too dry, add a tbsp of milk or two – we’re looking for the dough to just hold together when pressed into a ball. Which, conveniently, is the next step.

IMG_8655

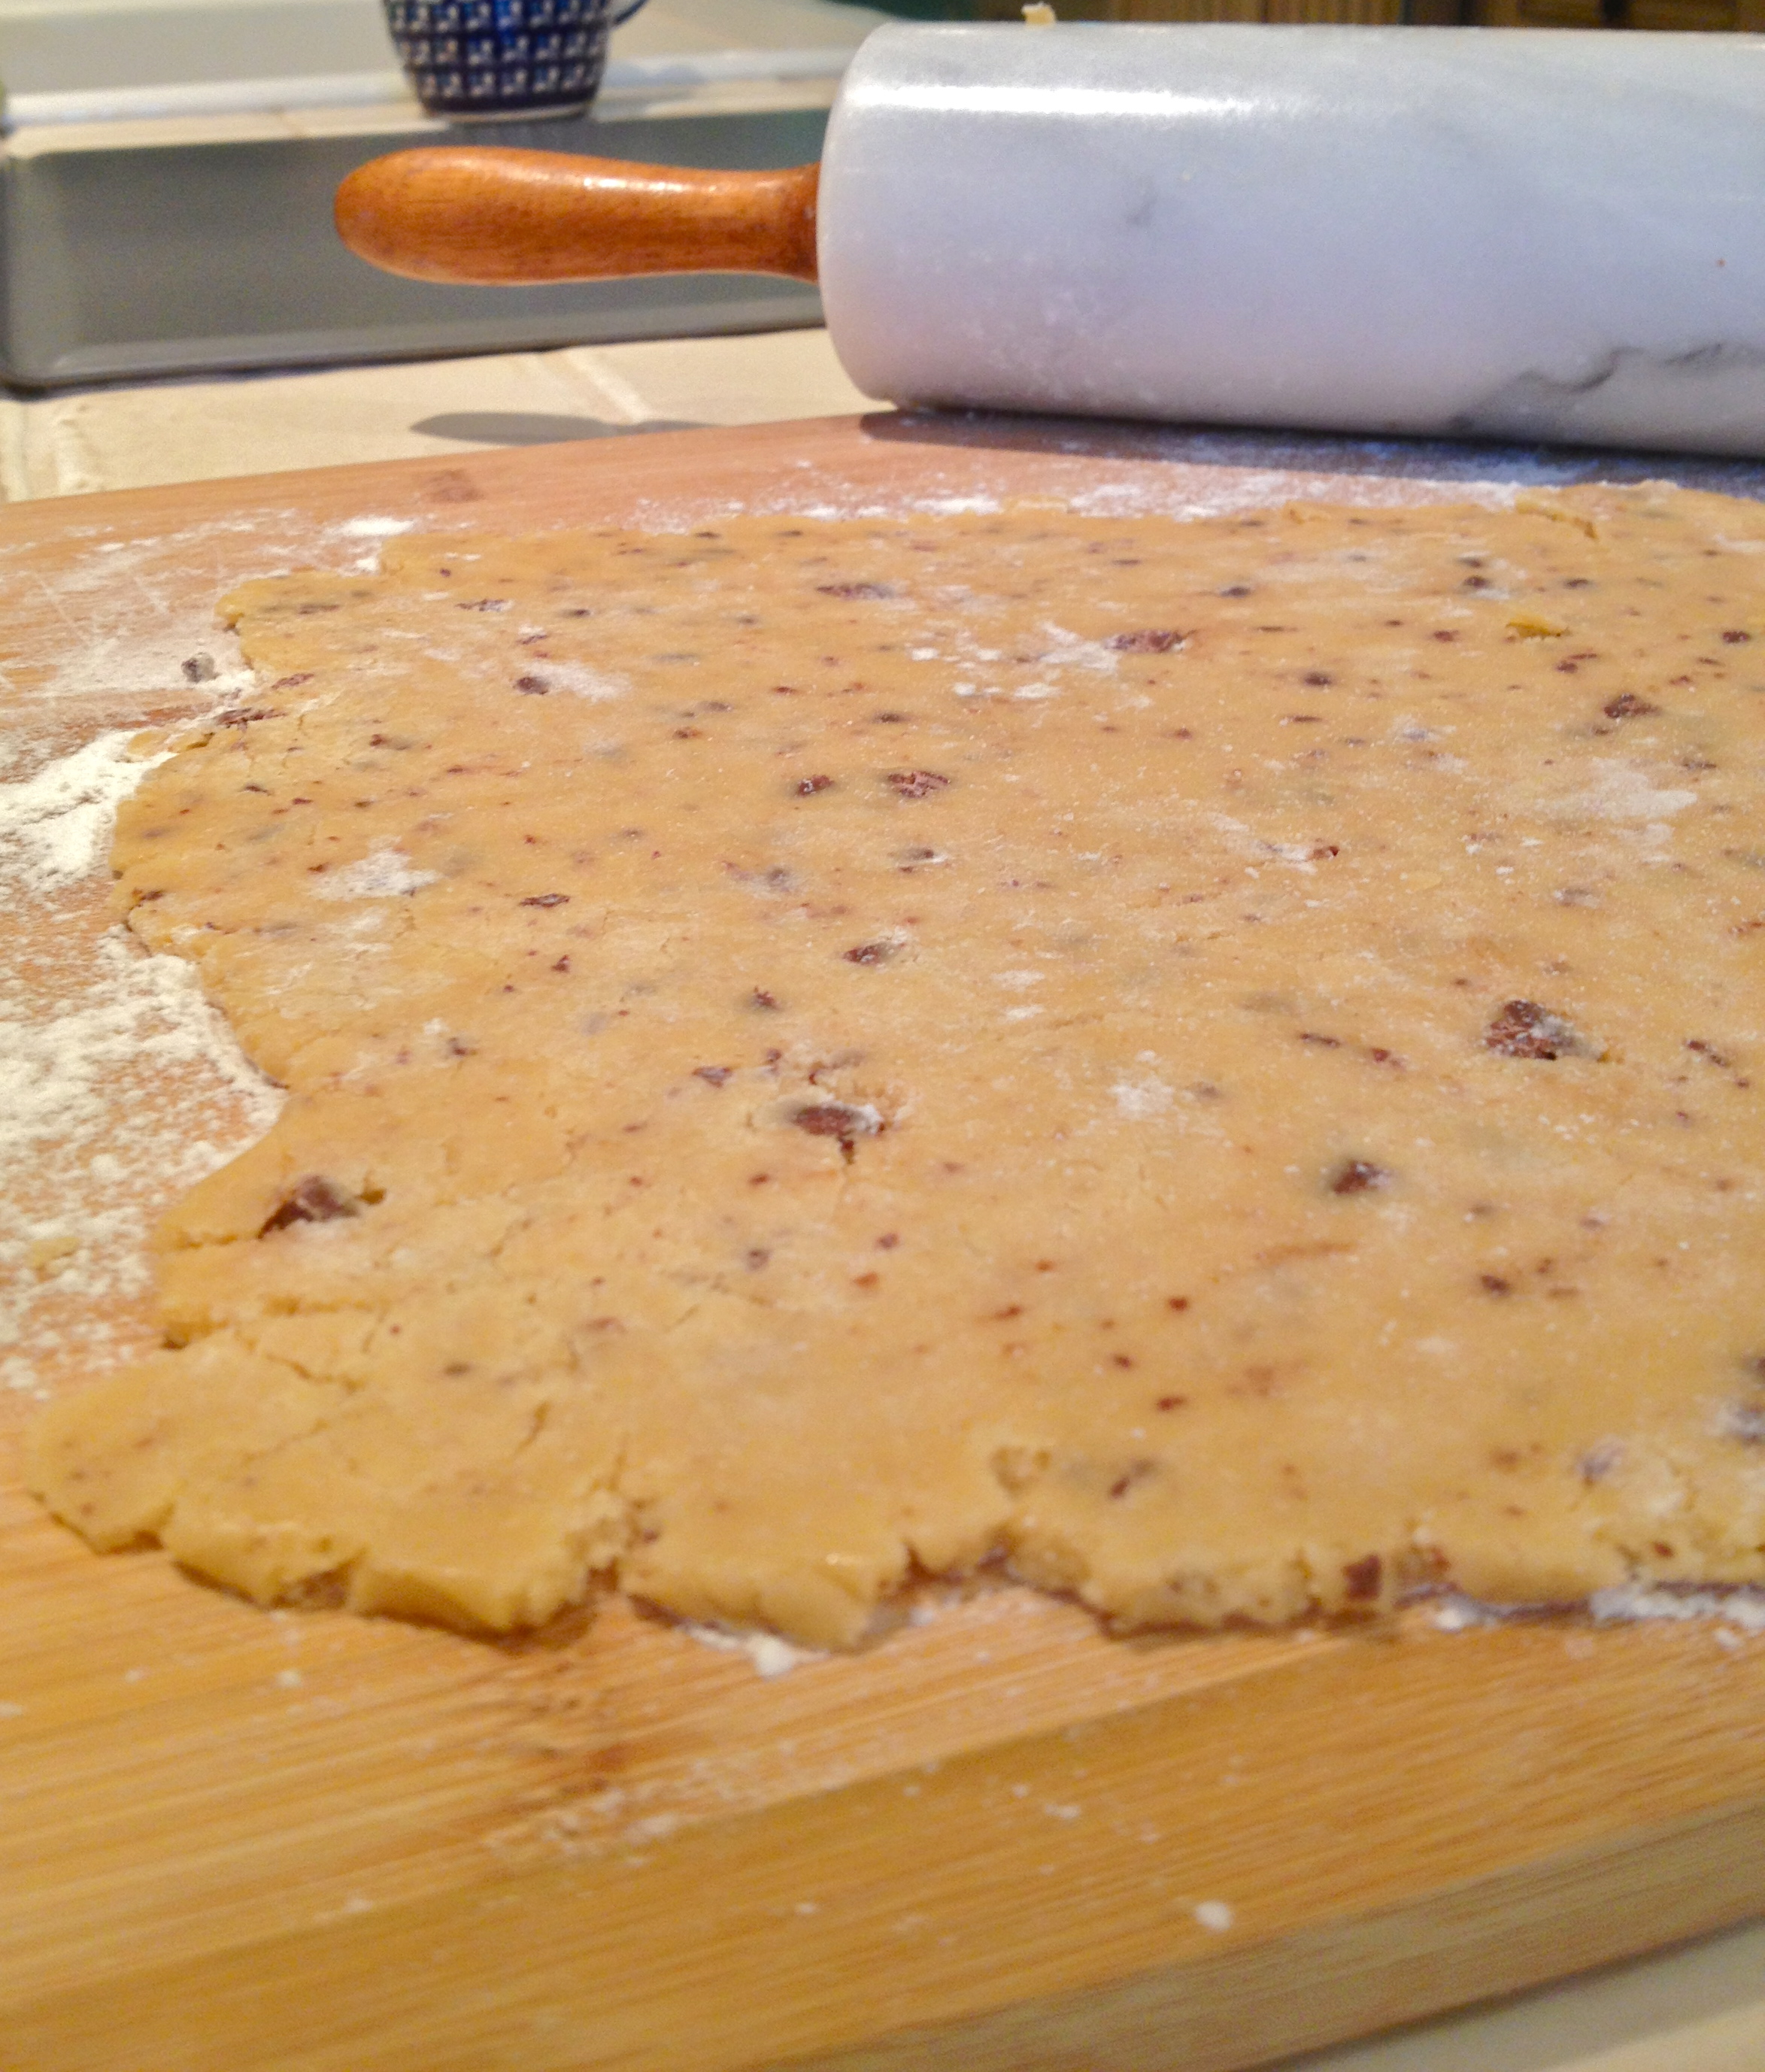
Turn out the dough into a cutting board or countertop and form it into a ball using your hands.

IMG_8656

Then divide the ball into 4 equal sections.

IMG_8660Form the sections into balls and then flatten them into discs. Wrap each disc in plastic wrap and refrigerate for at least half an hour.

IMG_8664

When the dough has chilled, preheat oven to 350 F.

Take one of the discs out of the fridge. Lightly flour a flat workspace and use a rolling pin to roll out the dough very very thin, like wafer thin.

IMG_8667

With a cookie cutter (or a small glass, because I couldn’t find any cookie cutters) cut out the cookies and place them on a baking sheet. They don’t spread out much, so crowding the cookies is okay. Sprinkle each one with a bit of brown sugar. Repeat with the other 3 sections of dough.

IMG_8668

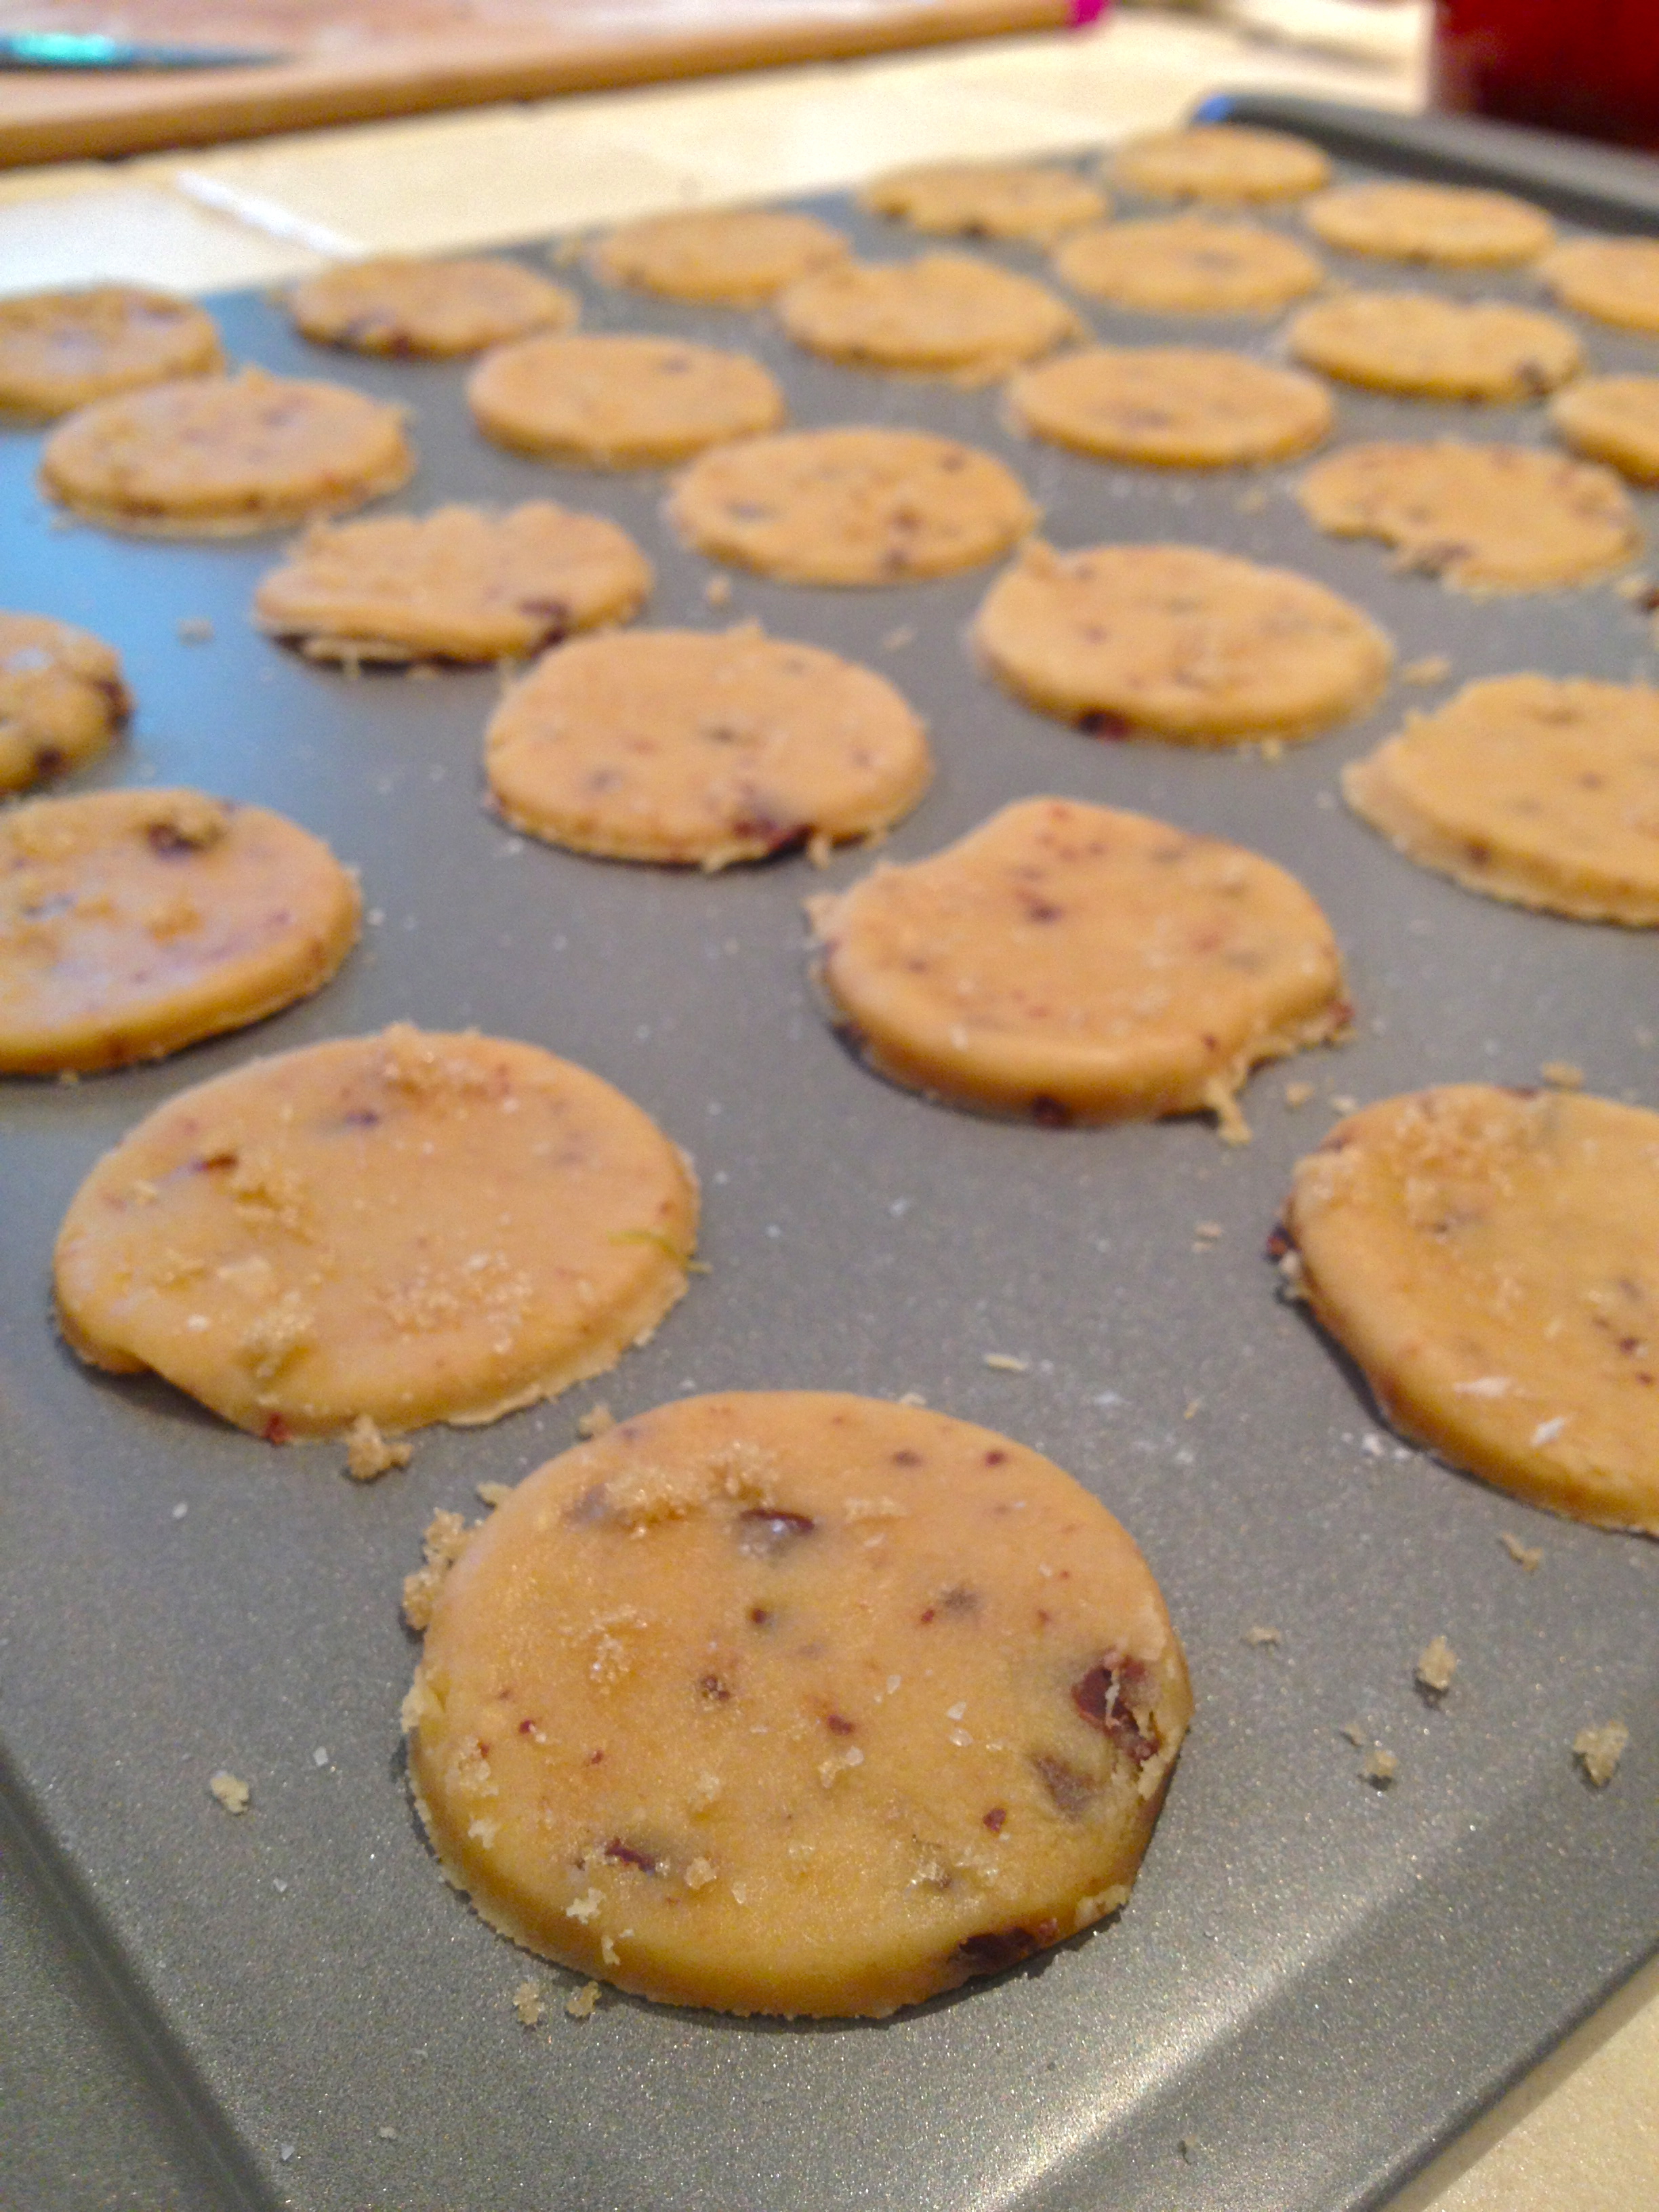
Now, to the oven. Depending on how big the cookie cutter you use is, these bake pretty quickly because of how flat they are, so watch them. Mine baked about 8 minutes, just until the edges started to turn golden brown.

IMG_8675

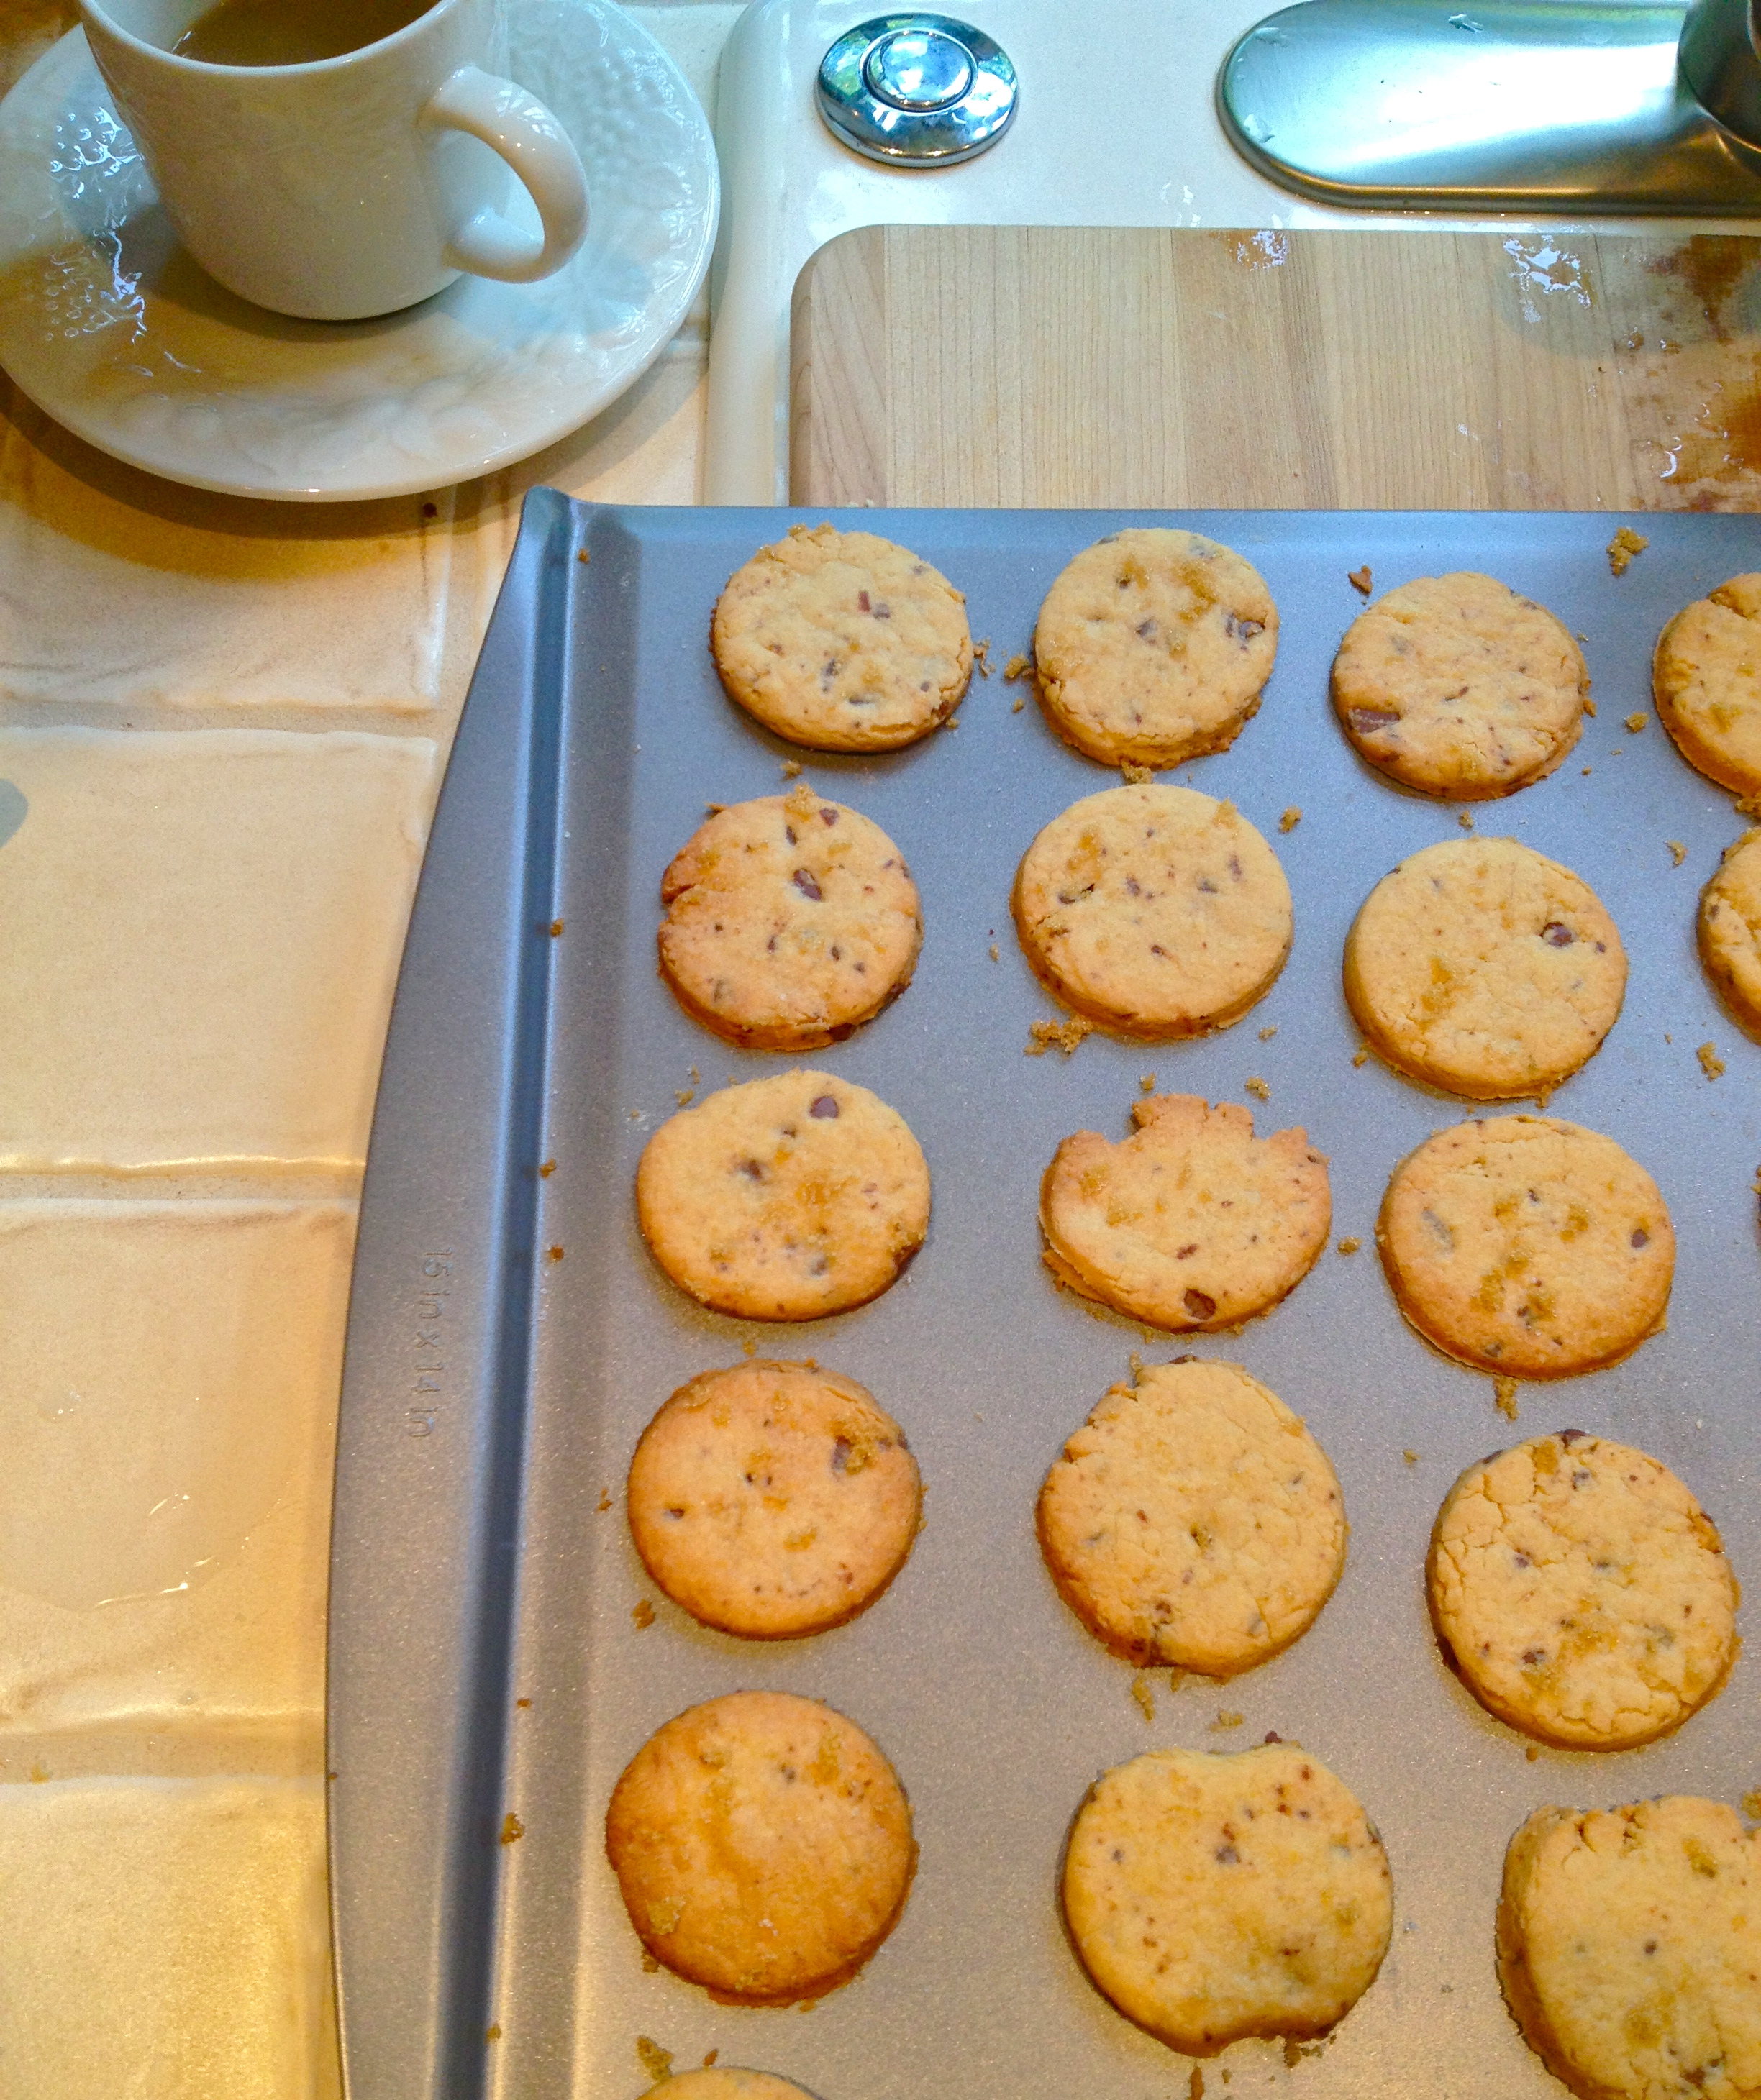
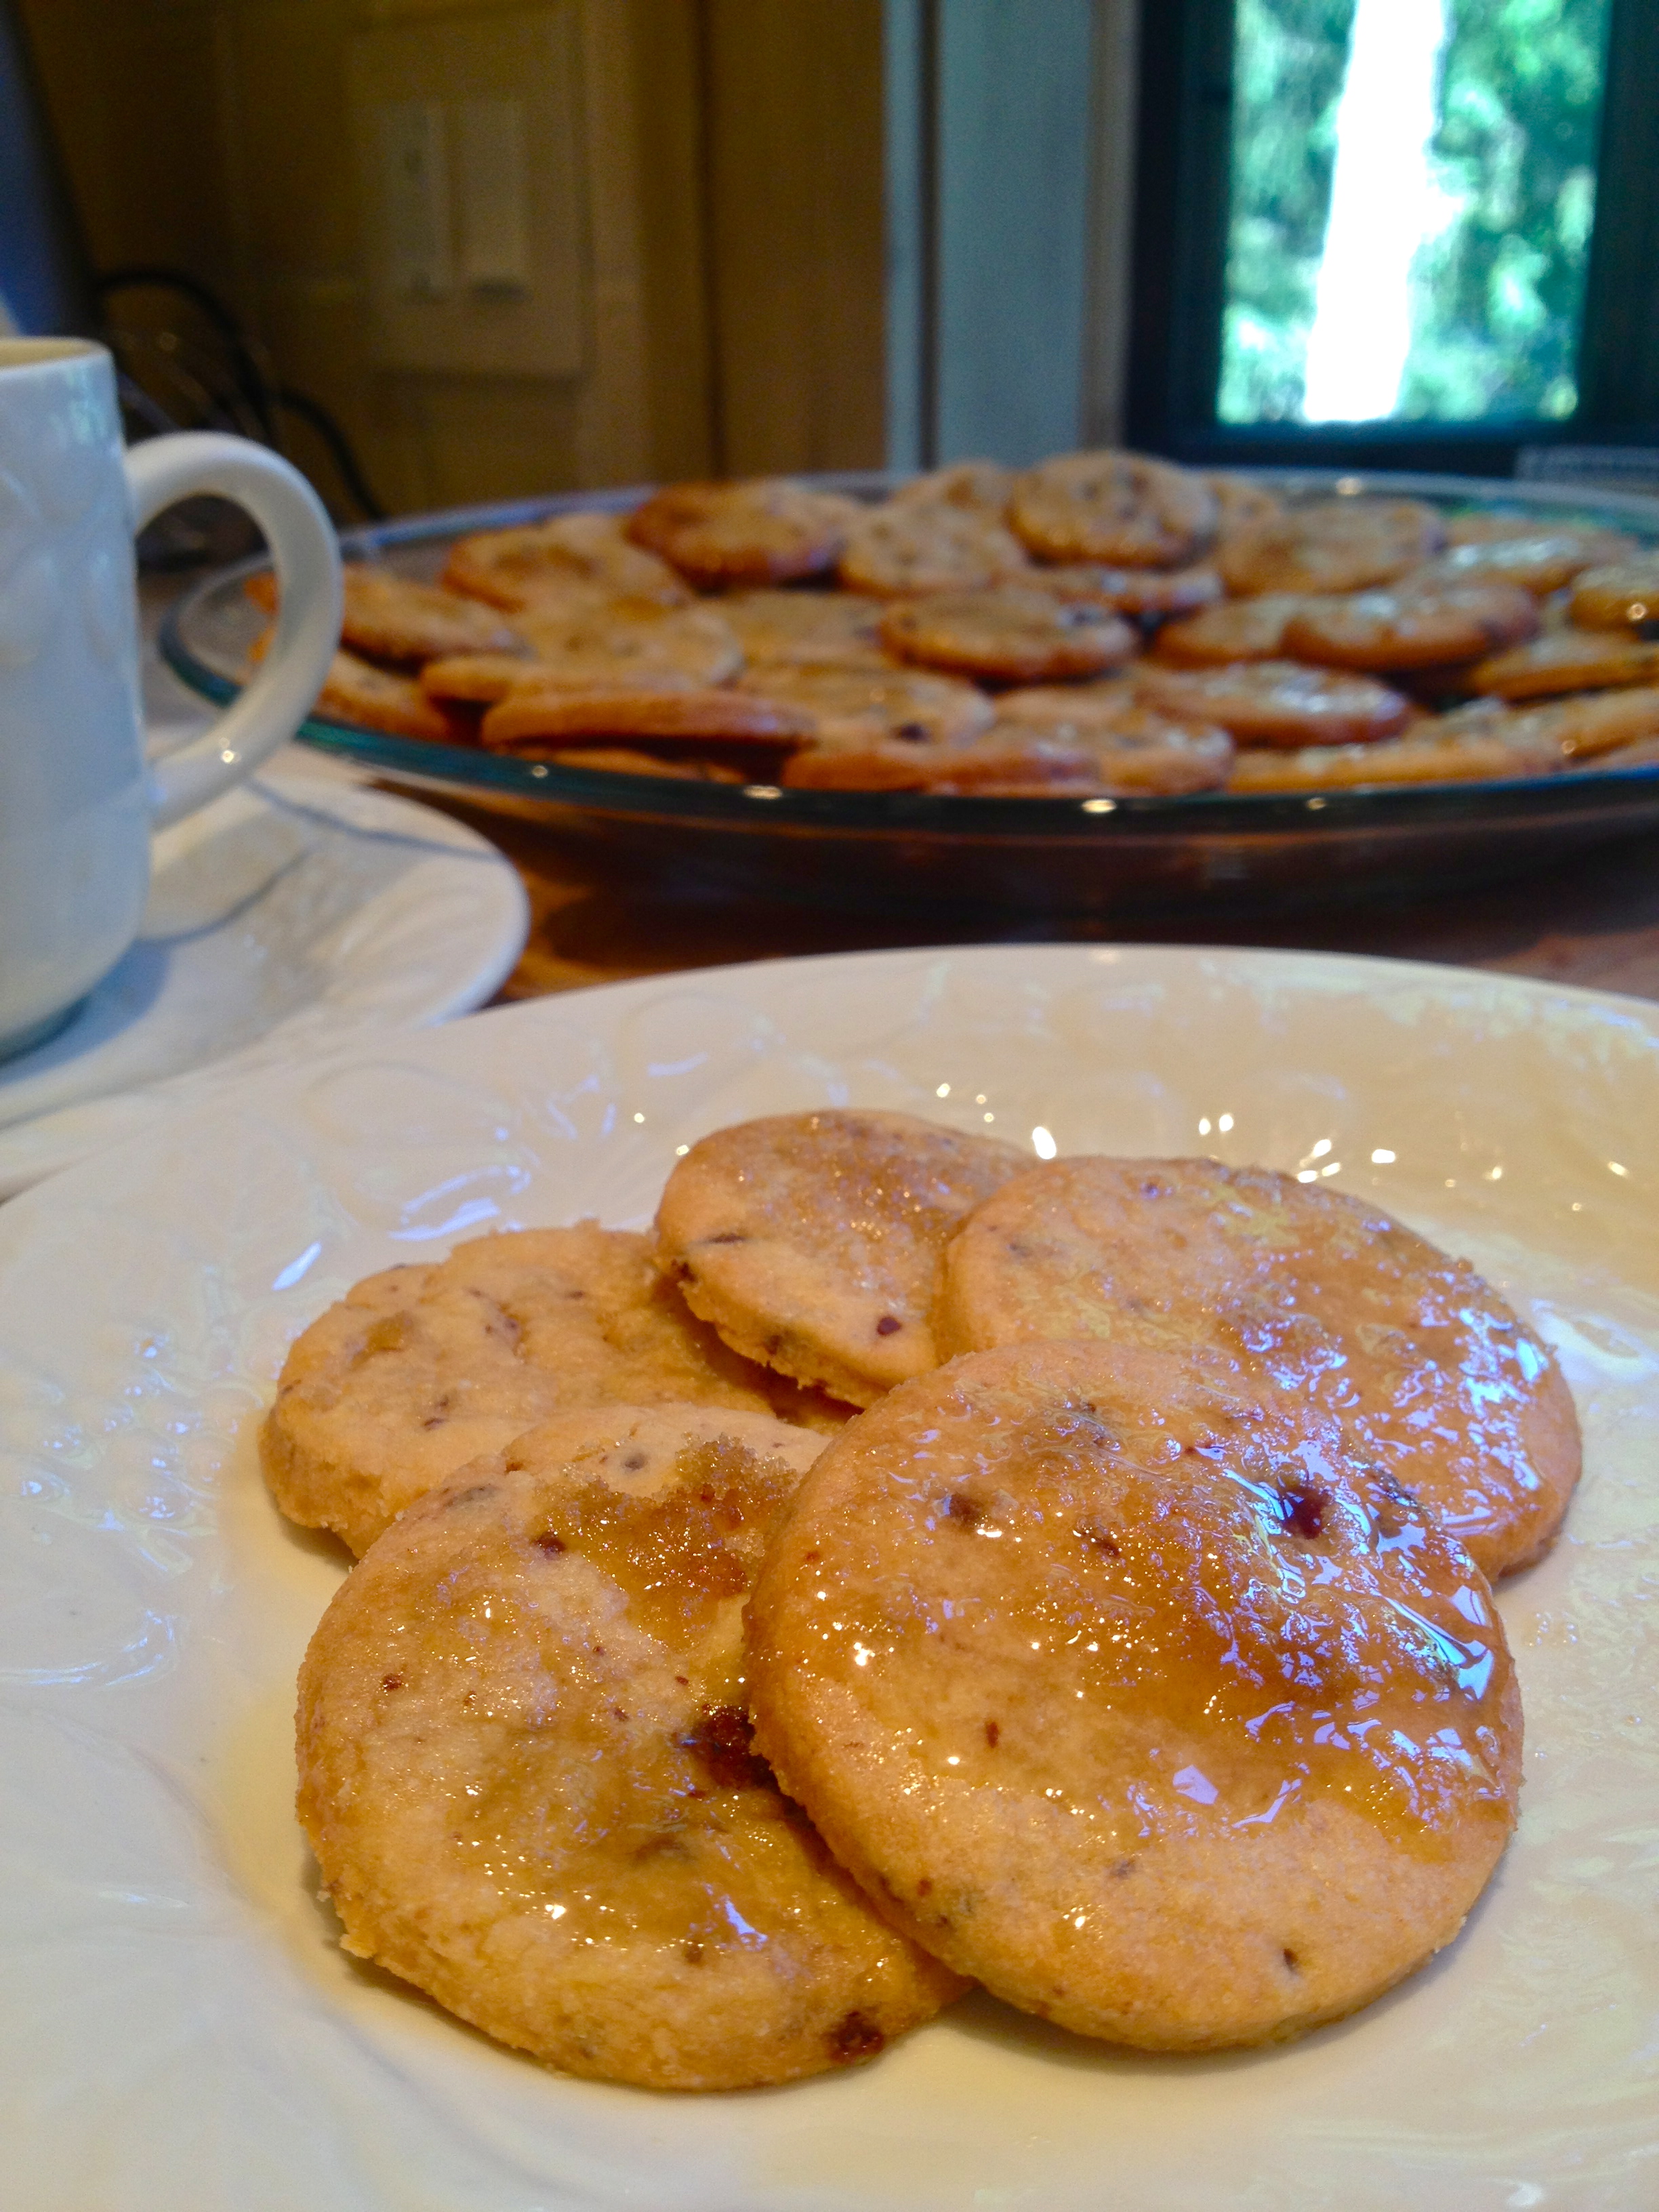
Put the cookies on a cooling rack and cool completely before glazing.

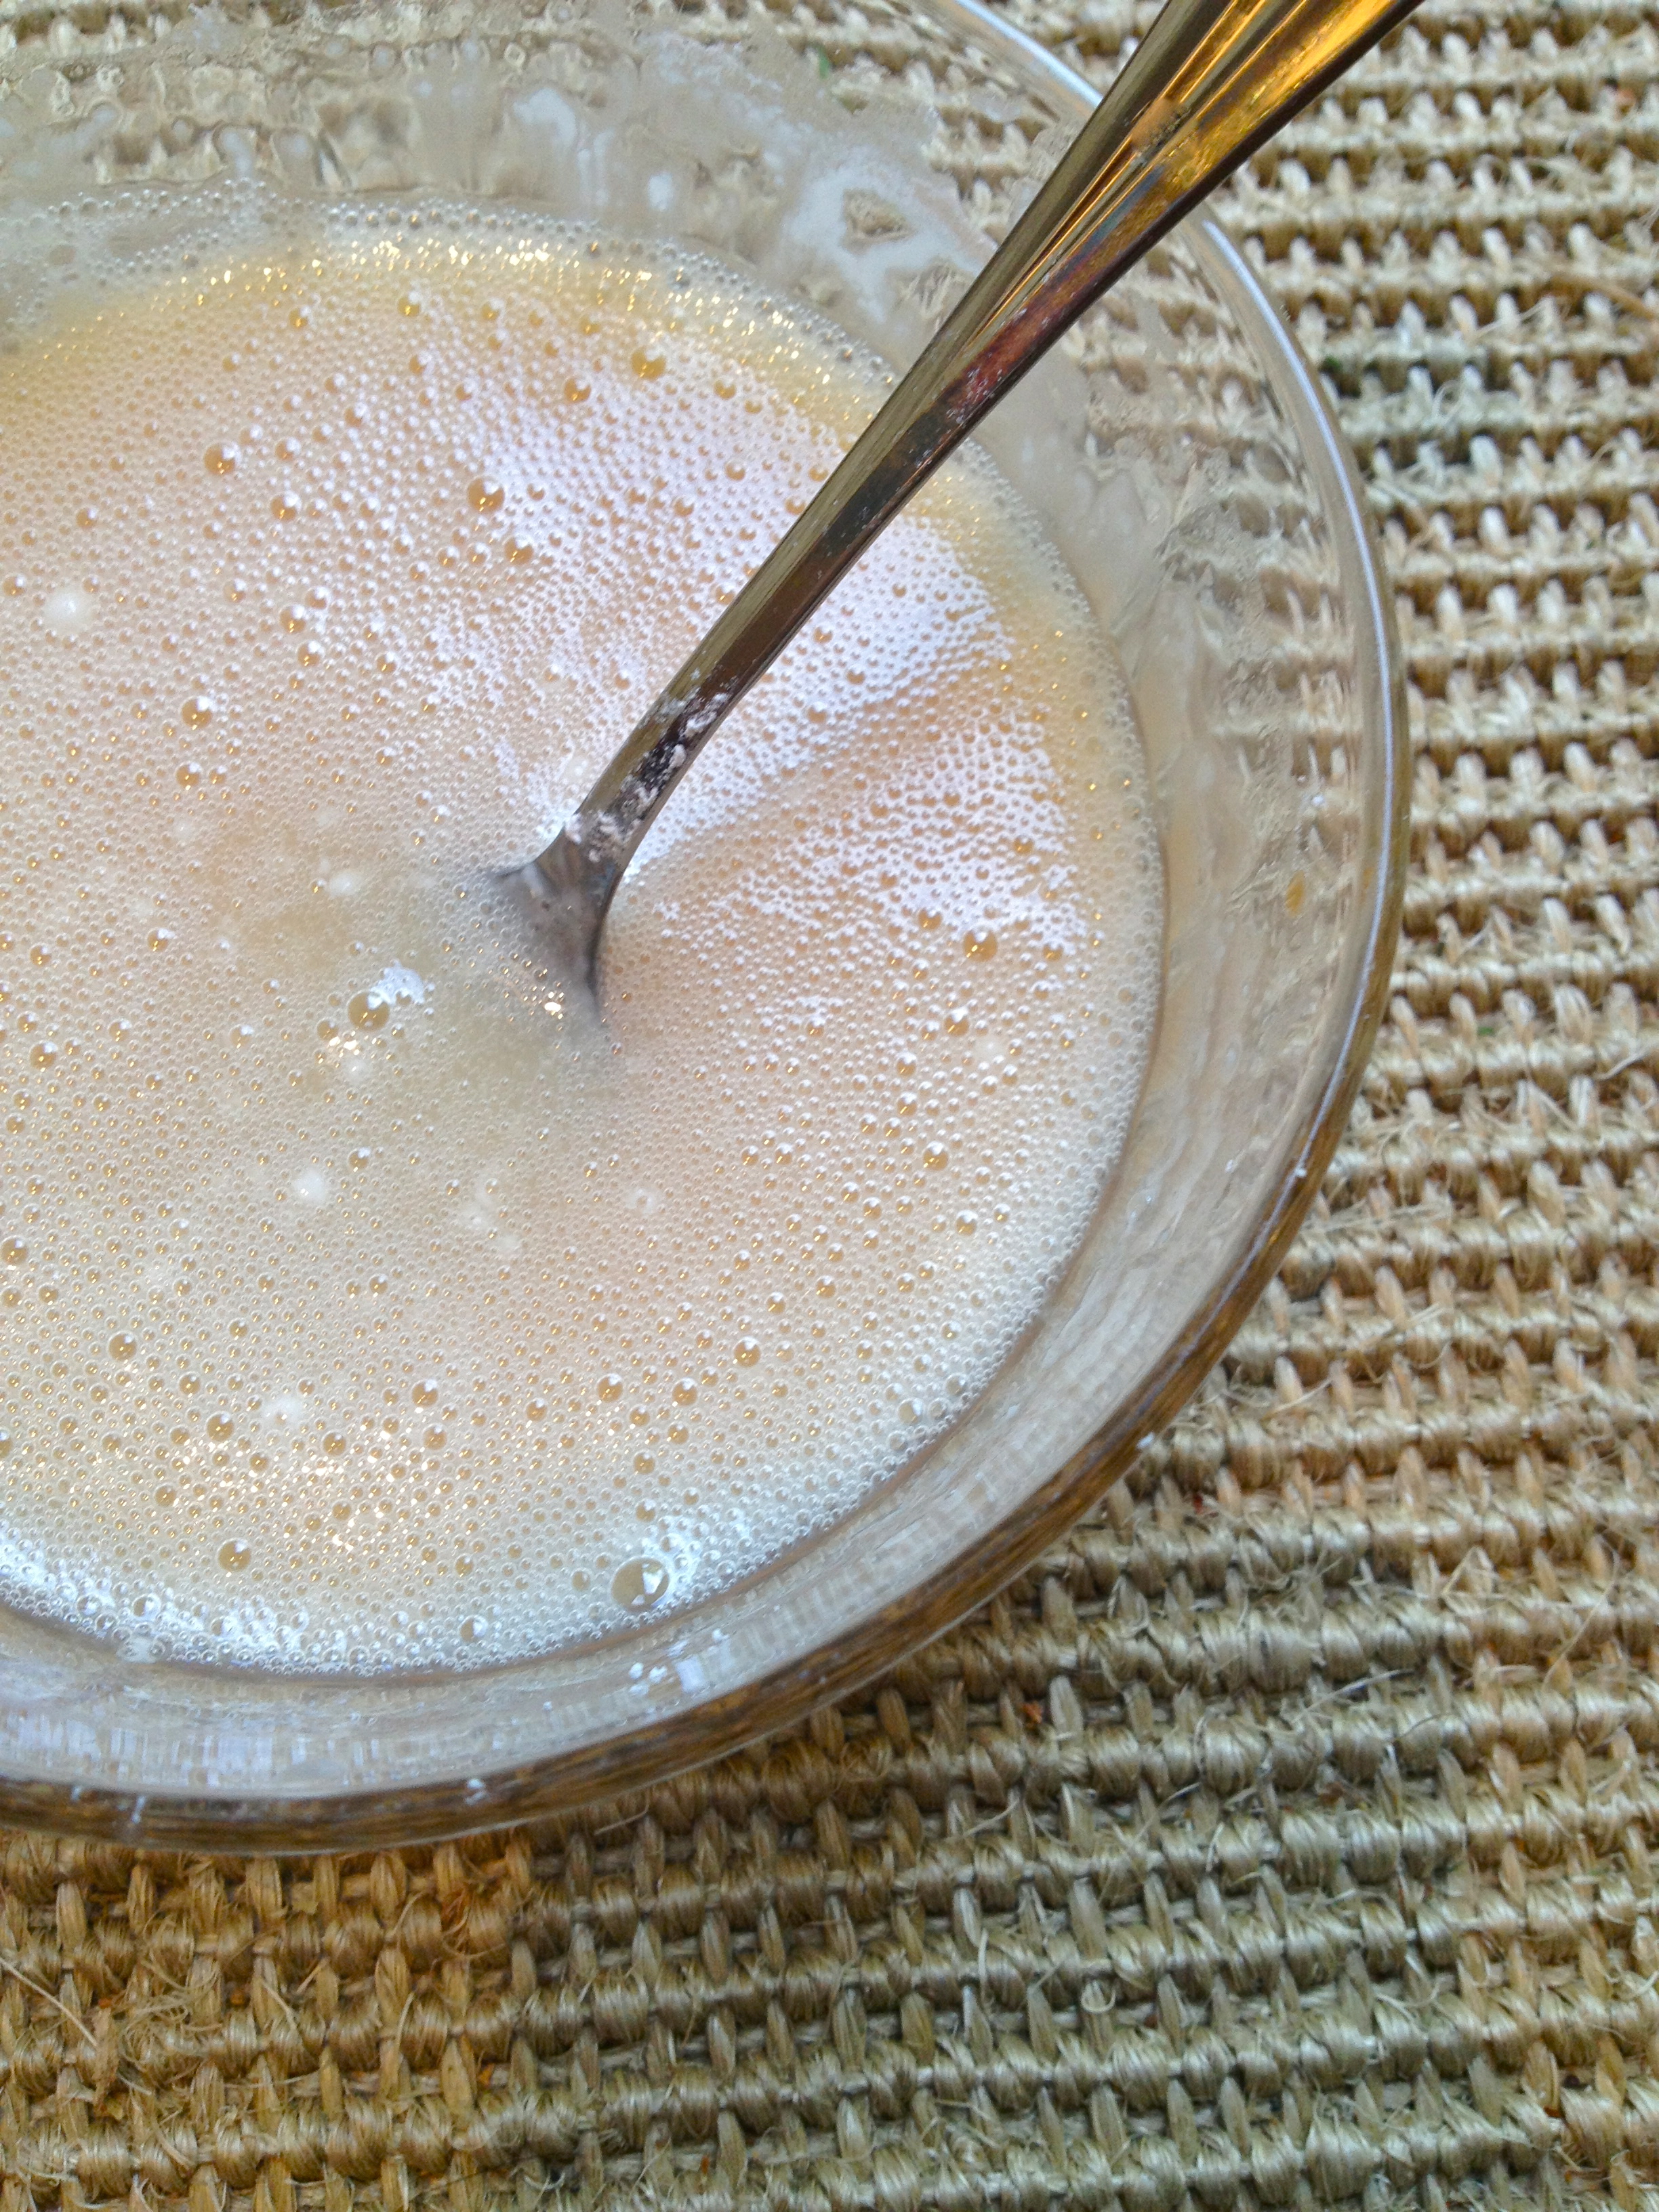
To make the glaze, pour the milk into a small bowl and add the vanilla. Then add 4 tbsp of powdered sugar and whisk or use a fork to combine. From there, add the rest of the powdered sugar as needed until you reach the right consistency – thin, but not watery.

IMG_8682

When the cookies have cooled, glaze them. The quick way is to spoon the glaze over the cookies, drizzling a bit on each one. If you want to put a bit more TLC into the glazing process, dip the top of each cookie into the glaze. Either way, set them back on the cooking rack to set before plating.

IMG_8688

That’s all! Enjoy.

IMG_8696

But be careful – my tasters found these pretty addicting.

IMG_8704

Harissa Grilled Pork Chops.

Often the best meals are the simplest, and these simple harissa pork chops are both easy to make and a little bit special, too. It’s the harissa. This spicy Tunisian mix of flavors has a real transformational power when it comes to seasoning meat, and I find myself using it more and more these days. You’ll see the rest of this recipe’s ingredient list is quite simple and basic – the harissa really stands on its own, with very little else needed by way of flavoring. And I just love recipes that are a breeze like this one: throw the marinade together with the meat in the morning, let the flavors develop and sink in all day in the fridge, and at the end of the day you’re just 15 minutes away from a tasty and speedy dinner. I’m having this for dinner again tonight!

IMG_8440

INGREDIENTS (serves 2)

for marinade:
4 small pork chops (I used 4 2oz chops)
2 tsp harissa (I get mine from The Spice House)
extra virgin olive oil
1 garlic clove, crushed with the side of a knife
salt and pepper, to taste

for yogurt sauce:
1/4 cup Greek yogurt
harissa, to taste
squeeze of lemon
salt and pepper to taste

Just the Recipe link: Harissa Grilled Pork Chops

DIRECTIONS

In a small bowl, stir together harissa, olive oil, garlic clove, and salt and pepper. Pour the marinade over the pork chops and use your hands to work it into the meat a bit. Cover and let the chops marinate in the fridge; I waited  about 45 minutes for the first batch I made, and 24 hours for the second. Both were great.

IMG_8421

When the chops have had their time with the marinade, remove them from the fridge and let them come to room temperature a bit while you preheat the grill or pan. Over medium high heat, cook the chops a few minutes on each side, depending on how think they are, until cooked through. Mine took about 3 minutes per side.

IMG_8431

The yogurt sauce couldn’t be simpler: just combine all the ingredients. Serve a big scoop of sauce over the chops and enjoy.

IMG_8434

Spinach and Green Garlic Soup.

Green garlic is everywhere right now. It’s just young garlic, with a softer, edible skin and a milder flavor. It’s delicious in scrambled eggs, soups, and sauces (especially pesto). Since I haven’t been feeling well lately, from a combination of allergies and a sore throat from screaming my head off when the Blackhawks beat the Red Wings in a Game 7 of the NHL playoffs, I figured a nice spring soup might perk me up a bit. It’s also a great way to get a good healthy helping of spinach! Adapted from Orangette, this light and easy green garlic and spinach soup is a breeze to make and delicious to boot. Dig in.

IMG_8350

INGREDIENTS

butter and olive oil
3 stalks green garlic, sliced (use the white and the light green parts)
pinch of salt
pinch of cayenne pepper
1 cup chicken stock
2 1/2 cups water
5 oz baby spinach
a spoonful of Greek yogurt
pepper

Just the Recipe link: Spinach and Green Garlic Soup

DIRECTIONS

In a Dutch oven or other large pot, heat a bit of butter and olive oil over medium low. The butter is for flavor, and the olive oil will keep the butter from burning. Once it’s hot, add the green garlic, salt, and cayenne.

IMG_8304

Cook gently, careful to avoid burning or browning, until the garlic is soft and smells sweet, and has lost its raw smell. Add the chicken stock and turn up the heat. Bring to a boil, and then turn down to simmer for 15 minutes.

Add the spinach and turn off the heat. Stir it in and let stand just 5 min, so it cooks but keeps its bright green color.

IMG_8313

Now puree the soup in batches, until it’s smooth. Add it back to the pot to reheat. I wanted to reduce my soup and get it to a little bit thicker consistency, so I simmered it a few minutes more.

IMG_8316

Once it’s where you want it, turn off the heat and stir in a scoop of greek yogurt. Serve immediately, with lots of pepper on top. Delish!

IMG_8345

Steamed Artichoke with Harissa Butter.

Let’s use our imaginations for a second. It’s something like 100,000 years ago and you’re a primitive human, walking around and looking for food. You spot a green, tough, pointy-leafed, stringy-stemmed, hairy-hearted and bitter-tasting vegetable. Naturally, you do not eat it. And none of your fellow humans eat it either. It’s clearly a bad food option. You move on and continue your search. Are the berries on that bush non-poisonous? Only one way to find out!

Are you enjoying the imagination game? I find myself thinking about this kind of thing a lot: how many thousands of years had to go by before someone figured out how to prepare an artichoke so that it’s a delicious treat instead of the “problem vegetable” that it is in its untouched state? The artichoke is one of the weirdest vegetables there is, and it’s pretty labor-intensive to prepare, and yet it is all so worth it to get to that delicious heart and eat the meat off the bases of the leaves. Mmmmm.

Despite its baggage, I am a huge fan of these guys, and today I share with you the best artichoke and dressing I have ever eaten. The dressing is a simple combo of melted butter and harissa, a red spiced paste that comes from Tunisia and is usually made from chilis and olive oil. It goes so well with artichokes, I can’t believe I didn’t think of this combo before now. Please please please make this simple recipe as soon as you can – it it magnificent.

IMG_8161

INGREDIENTS (this recipe easily doubles/triples/etc.)

1 artichoke
1 bay leaf
1 tbsp butter
1/4 tsp harissa paste (or more, to taste)

Just the Recipe link: Steamed Artichoke with Harissa Butter

DIRECTIONS

Fill a pot with 1 inch of water, toss in the bay leaf, and set it to boil. Meanwhile, prep the artichoke for steaming. Using a serrated knife, chop the stem most of the way, and cut through the middle of the artichoke so that you trim off the leaf points. Pull the small leaves off the base and discard.

IMG_8130

When the water is boiling, put the artichoke in the pot, wide cute side down and stem up. Cover, turn down to a low boil, and cook 20-30 minutes. It’s done when you can easily pull off smaller leaves at the base near the stem. Remove the artichoke from the water and set is aside to cool down a bit.

To assemble the harissa butter, melt the butter and stir in the harissa.

IMG_8140

When the artichoke has cooled enough to touch, take out the choke. Take your tongs and use them to find the middle section of the artichoke, where the purple-y leaves are. Use the tongs to pull this section out of the artichoke and expose the hairy choke in the center.

IMG_8145

Then trade the tongs for a fork. To remove the hairy center, use the fork to gently loosen the hair from the heart. Pull it away and throw it out. Continue to gently loosen the hair and remove it until the heart is clean and exposed.

IMG_8151

Put your artichoke on a plate and spoon about half of the butter over the center, over the heart. Use the rest for dipping the leaves; I like to dip each leaf and scrape the base for the “meat,” and then eat the heart last. These are so unbelievably good!!

IMG_8165

And thank you, oh culinary pioneer of the past, who discovered the glory of artichokes and made this meal possible.

Cabernet Beef Stew.

Because life is a cabernet.

Chicago has had a very chilly start to May, especially over the past few days, and this weekend I found myself with a crazy craving for beef stew. On Saturday, I built our beautiful new kitchen island, so I decided that Sunday would be the day I put it to good use and make a glorious pot of stew. Having just drooled over a DVR-ed episode of Barefoot Contessa where Ina Garten makes a food-porn-o-rific batch of Parker’s Beef Stew, I used her recipe as inspiration for this one. And of course, I added paprika to my recipe, because I can never make a beef stew without paying at least a little homage to goulash (the absolute king of stews, in my humble opinion). I give you, cabernet beef stew.

IMG_8039

INGREDIENTS

1 – 1/2 lbs stew beef, cubed (I like mine cut into small, bite-sized pieces)
1/2 cup potato starch flour (all-purpose flour is fine here, too, but you’ll need a bit more of it)
salt and pepper
olive oil
4 carrots, peeled and sliced
3 stalks celery, washed and sliced
1 small sweet potato, cubed
1 medium onion, chopped
3 bay leaves
2 cloves garlic, minced
1/2 bottle of cabernet sauvignon*
2 cups stock (I used homemade chicken stock)
1 tbsp Worcestershire sauce
3 canned whole tomatoes, chopped, plus a tbsp or two of canning liquid
2 sprigs fresh rosemary (or about 1 tsp dried rosemary)
1 tsp paprika
1 cup frozen peas
marjoram, for garnish
*Note: the flavor of the cabernet sauvignon is quite strong here. If that doesn’t sound good to you, I recommend cutting back to about a quarter bottle of wine.

Just the Recipe link: Cabernet Beef Stew

DIRECTIONS

In a mixing bowl, stir together potato starch flour, salt, and pepper. Drop a few pieces of meat in at a time and toss to coat. Shake off the excess and set aside, until all the meat is coated in flour.

Heat a Dutch oven or other large pot over medium high heat and add olive oil. Working in batches, brown the meat on all sides. Remove the browned meat from the pan and set aside.

IMG_8017

Preheat oven to 300 F.

Add carrot, celery, sweet potato, and onion to the Dutch oven, along with bay leaves. Cook about 8 minutes, stirring occasionally.

IMG_8014

Add garlic and cook two more minutes. Remove vegetables from the pan and set aside.

IMG_8019

Pour red wine into the pan, along with the rosemary and paprika, and stir to deglaze, making sure to loosen all the brown bits from the bottom.

IMG_8021

Add stock, Worcestershire sauce, and tomatoes. Then add the meat back to the pot, followed by the vegetables.

IMG_8024

Give it a stir, cover the pot, and bring to a low boil. Then place it in the oven and cook for 2-3 hours, until the meat is fall-apart tender or until you can’t wait any longer. I ended up turning the heat down to 275 F about 20 minutes in, to keep the stew at a low bubble instead of a more active simmer.

IMG_8028

Once the stew is done cooking, remove from the oven. Turn off the oven at this point – we’re done cooking.

IMG_8030

Stir in frozen peas and re-cover the pot. They’ll defrost and cook in the heat of the stew.

IMG_8034

Serve with warm, crusty bread, and if you like, sprinkle a bit of marjoram on top.

IMG_8043

Salmon Cakes and Baby Spinach Salad with Orange Vinaigrette.

On Friday night, I made baked salmon fillets for dinner. Intending to post the recipe afterward, I shot each step of the prep process – but when I sat down to eat, it was…just fine. Not great. And I tend not to blog about recipes that I don’t think are awesome or that I wouldn’t make again, so I decided not to write it up or post it here. Oh well, this happens fairly often, folks. I finished eating one of the fillets,  and I shredded up the second and put it in the fridge. I unenthusiastically figured I would make some kind of salad out of it. Meh. But then I thought, there is a lot I could do with this average-tasting salmon that would make it totally delicious! So I combed the internet a bit and found a recipe from Rachel Ray that really got me going. I adapted it a bit and the result is what you see here: a tasty dinner that sees an ugly duckling salmon fillet turned into a real swan of a meal (birds and fish – stop me if the metaphor-mixing gets to be too much). Long story short: “blah.” became “ta-da!”

IMG_8001

INGREDIENTS

for the salmon and salad:
1 egg
1 – 1 1/2 cups salmon, cooked and flaked (1 can of salmon will work here as well)
1 green onion, sliced thin
1/3 cup bread crumbs (I used Panko – use gluten-free bread crumbs if you like)
1 tsp of your favorite fish seasoning (I used Lake Shore Drive Seasoning from the Spice House – love this stuff!)
a squeeze or two of hot sauce (I use Sriracha)
a small handful of fresh parsley, chopped
a pinch of cayenne pepper
salt and pepper
a few tablespoons of vegetable oil (not olive oil or butter – we need it to have a pretty high smoke point)
1 1/2 cups fresh baby spinach, washed and dried
shredded carrots or any other salad fixins’ you like

for the orange vinaigrette dressing:
1 tbsp orange juice
1 tsp red wine vinegar
3-4 tbsp extra virgin olive oil
salt and pepper to taste

Just the Recipe link: Salmon Cakes and Baby Spinach Salad with Orange Vinaigrette

DIRECTIONS

Get the pan going over medium heat (not medium high). We’ll add the oil in a little bit; for now, just heat the pan.

Crack the egg into a mixing bowl and add the salmon. Use a fork to mash up the salmon a little bit and combine it with the egg. Add green onion, bread crumbs, seasoning, hot sauce, parsley, cayenne pepper, and salt and pepper, and stir together to combine everything evenly.

IMG_7991

At this point, add the oil to the pan – just enough to cover the bottom. Let it get hot while you form the salmon into cakes. Divide the mixture into two even portions, and use your hands to shape each portion into a patty about 3/4 inch thick. Add them to the pan and cook until browned and a little bit crispy on each side. Mmm.

IMG_7994

While the cakes cook, prep the salad. I tossed the baby spinach onto a pretty plate and topped it with shredded carrots. Then make the dressing, which is incredibly easy. Just stir together all the ingredients with a fork.

IMG_7997

Then it’s just a matter of dressing the salad and plating the salmon cakes. Perch them right on top of the greens, and if you have any dressing leftover, drizzle a bit on the cakes. The orange is delicious here. I could hardly believe this was the boring salmon I had made the night before. Enjoy!

IMG_7998