Egg in the Pepper.

Red Pepper Egg in the Hole? Egg in the Red Pepper Hole? Actually it’s more like Egg in and Around the Hole. I wasn’t sure what to call these. Basically it’s your standard egg in the hole, only instead of being in a hole, they’re in slices of red pepper. I love the shape of red pepper slices, and I was just struck with the idea to do this while I was making breakfast over the weekend. Eggs in the Pepper are really good for breakfast, and here’s why: They’re easy. They don’t have a lot of ingredients. They’re fast. And they feel fancy. Happy eating.

IMG_7204

INGREDIENTS

1 red pepper
olive oil
2 slices of ham (or use some baby spinach instead, if you like)
6 eggs
cheese, for sprinkling (I used cheddar and mozzarella)
salt and pepper to taste

Just the Recipe link: Egg in the Pepper

DIRECTIONS

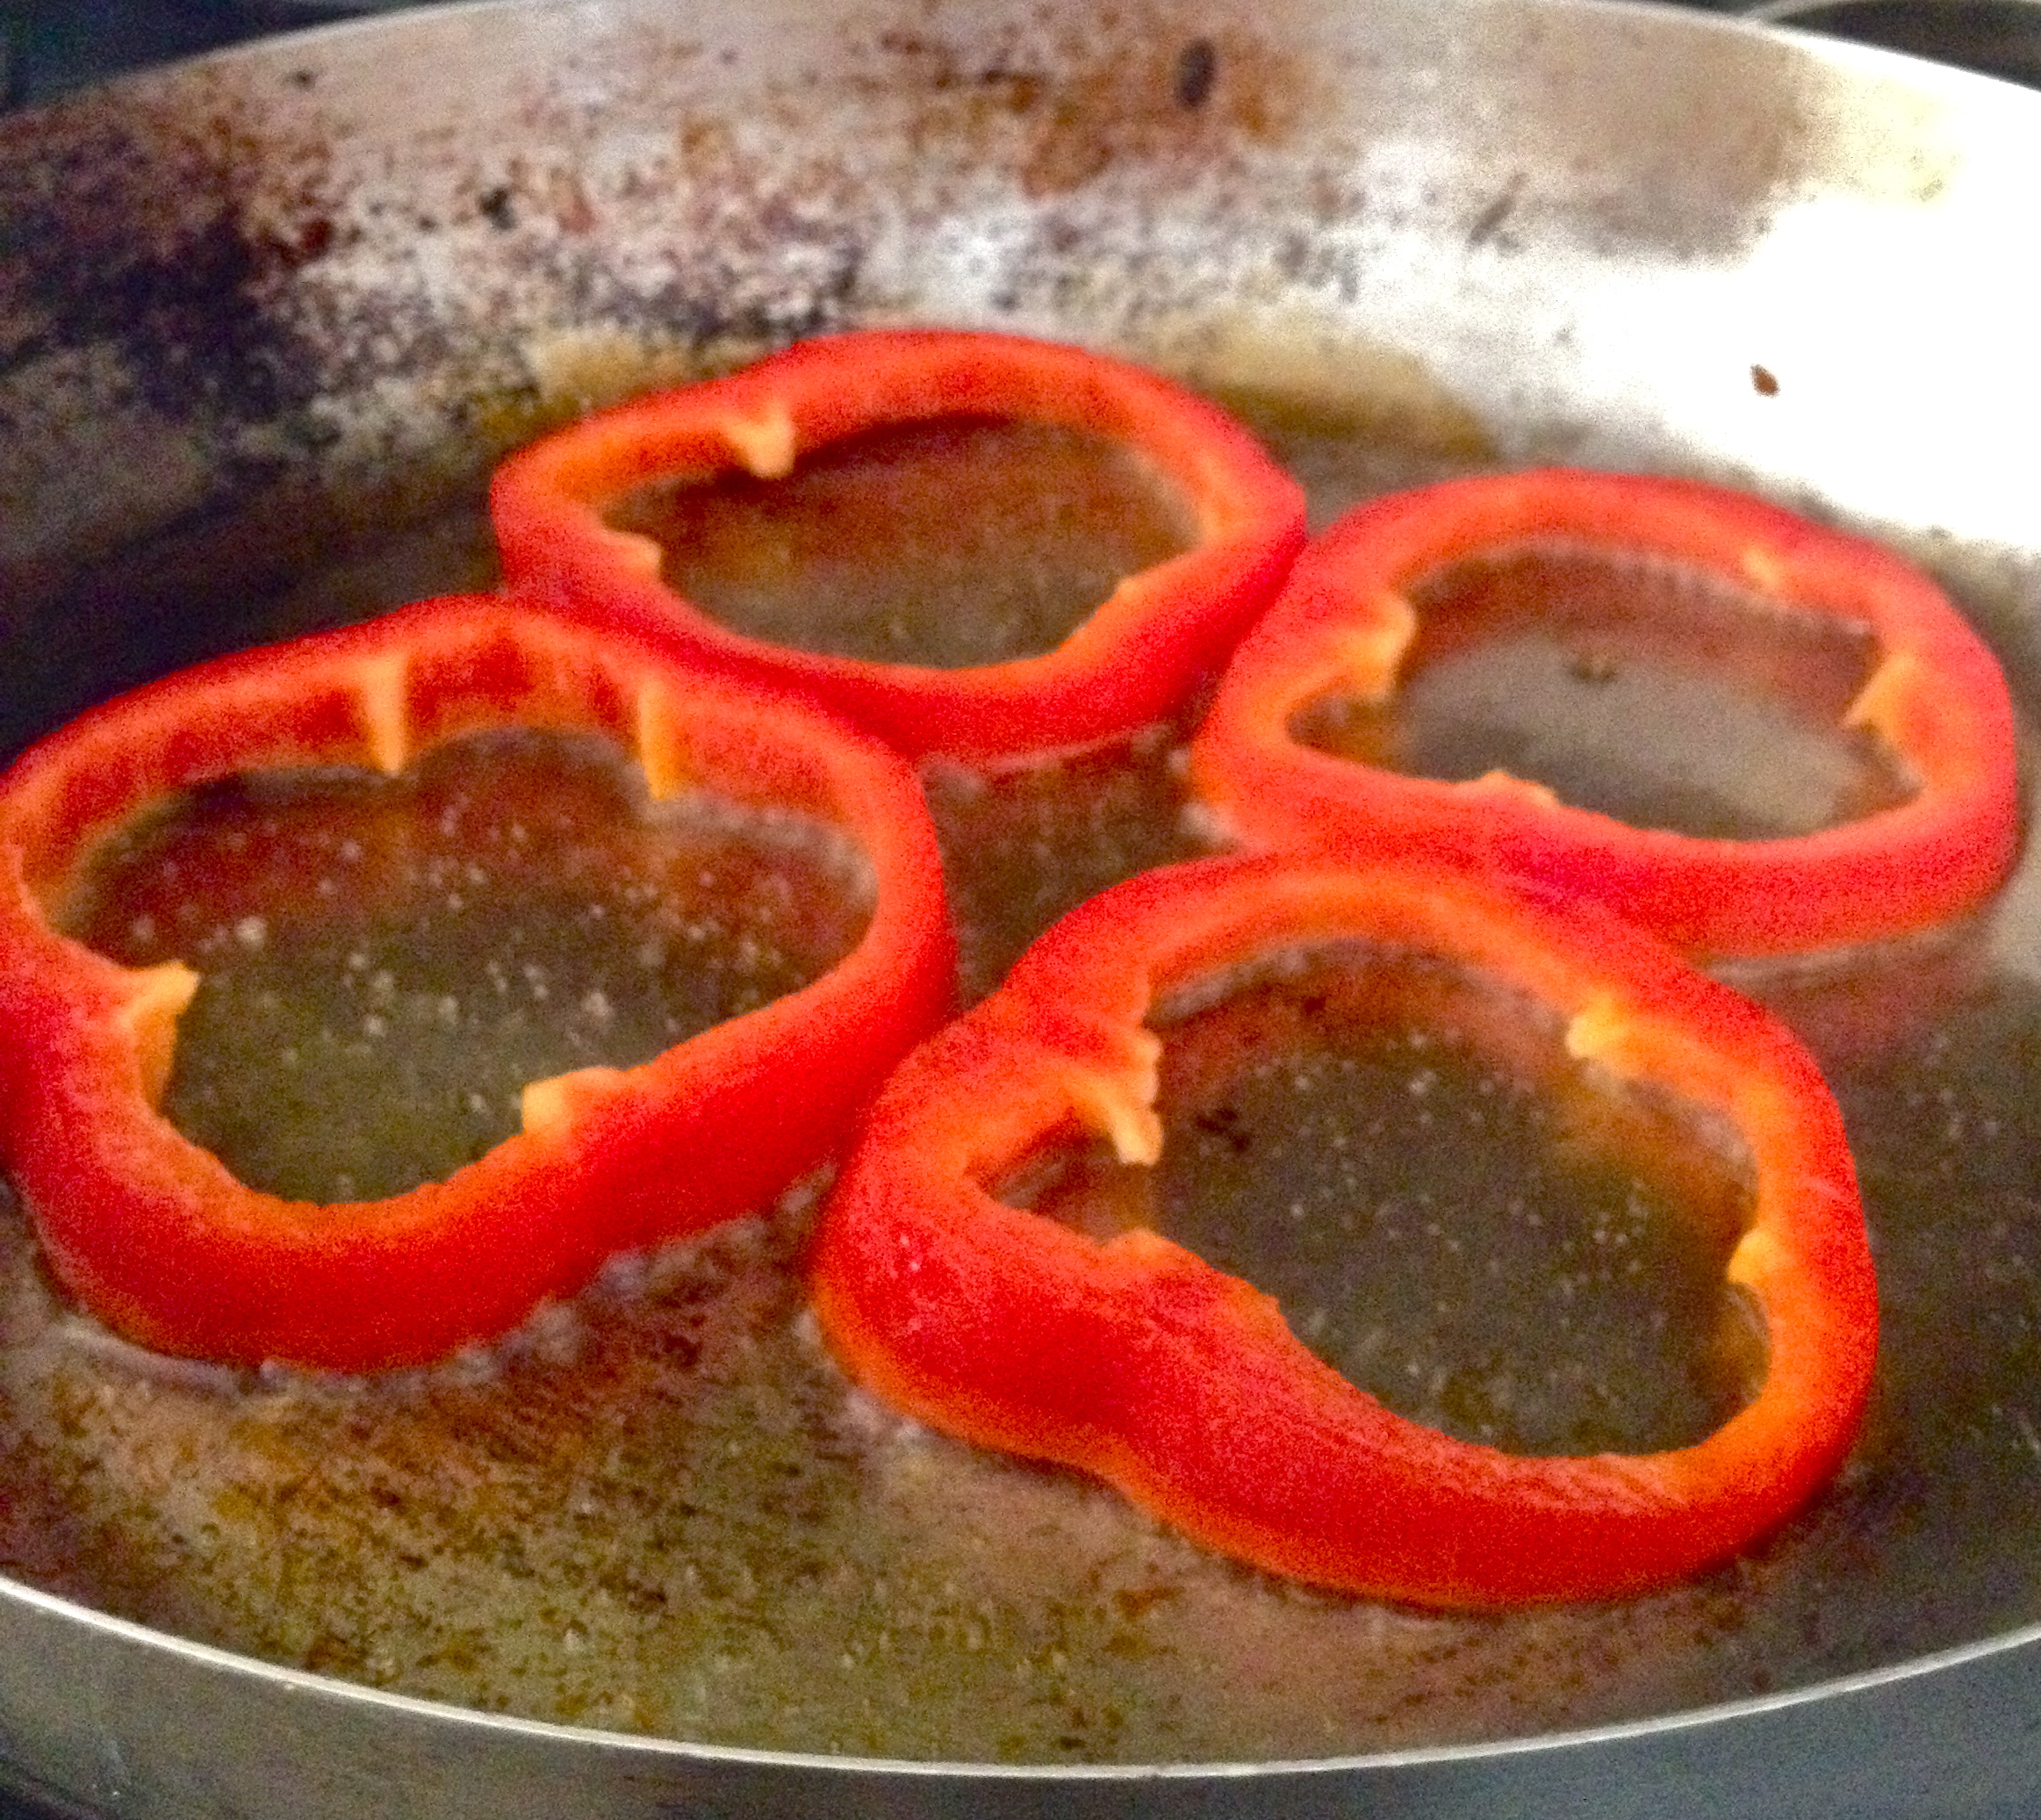
Lay the red pepper down horizontally and cut into 6 slices, cleaning out all the seeds and stuff inside.

IMG_7189

Heat oil in a pan and fry the peppers a few minutes on eat side, until tender and lightly browned. Work in two batches until they’re all cooked.

IMG_7190

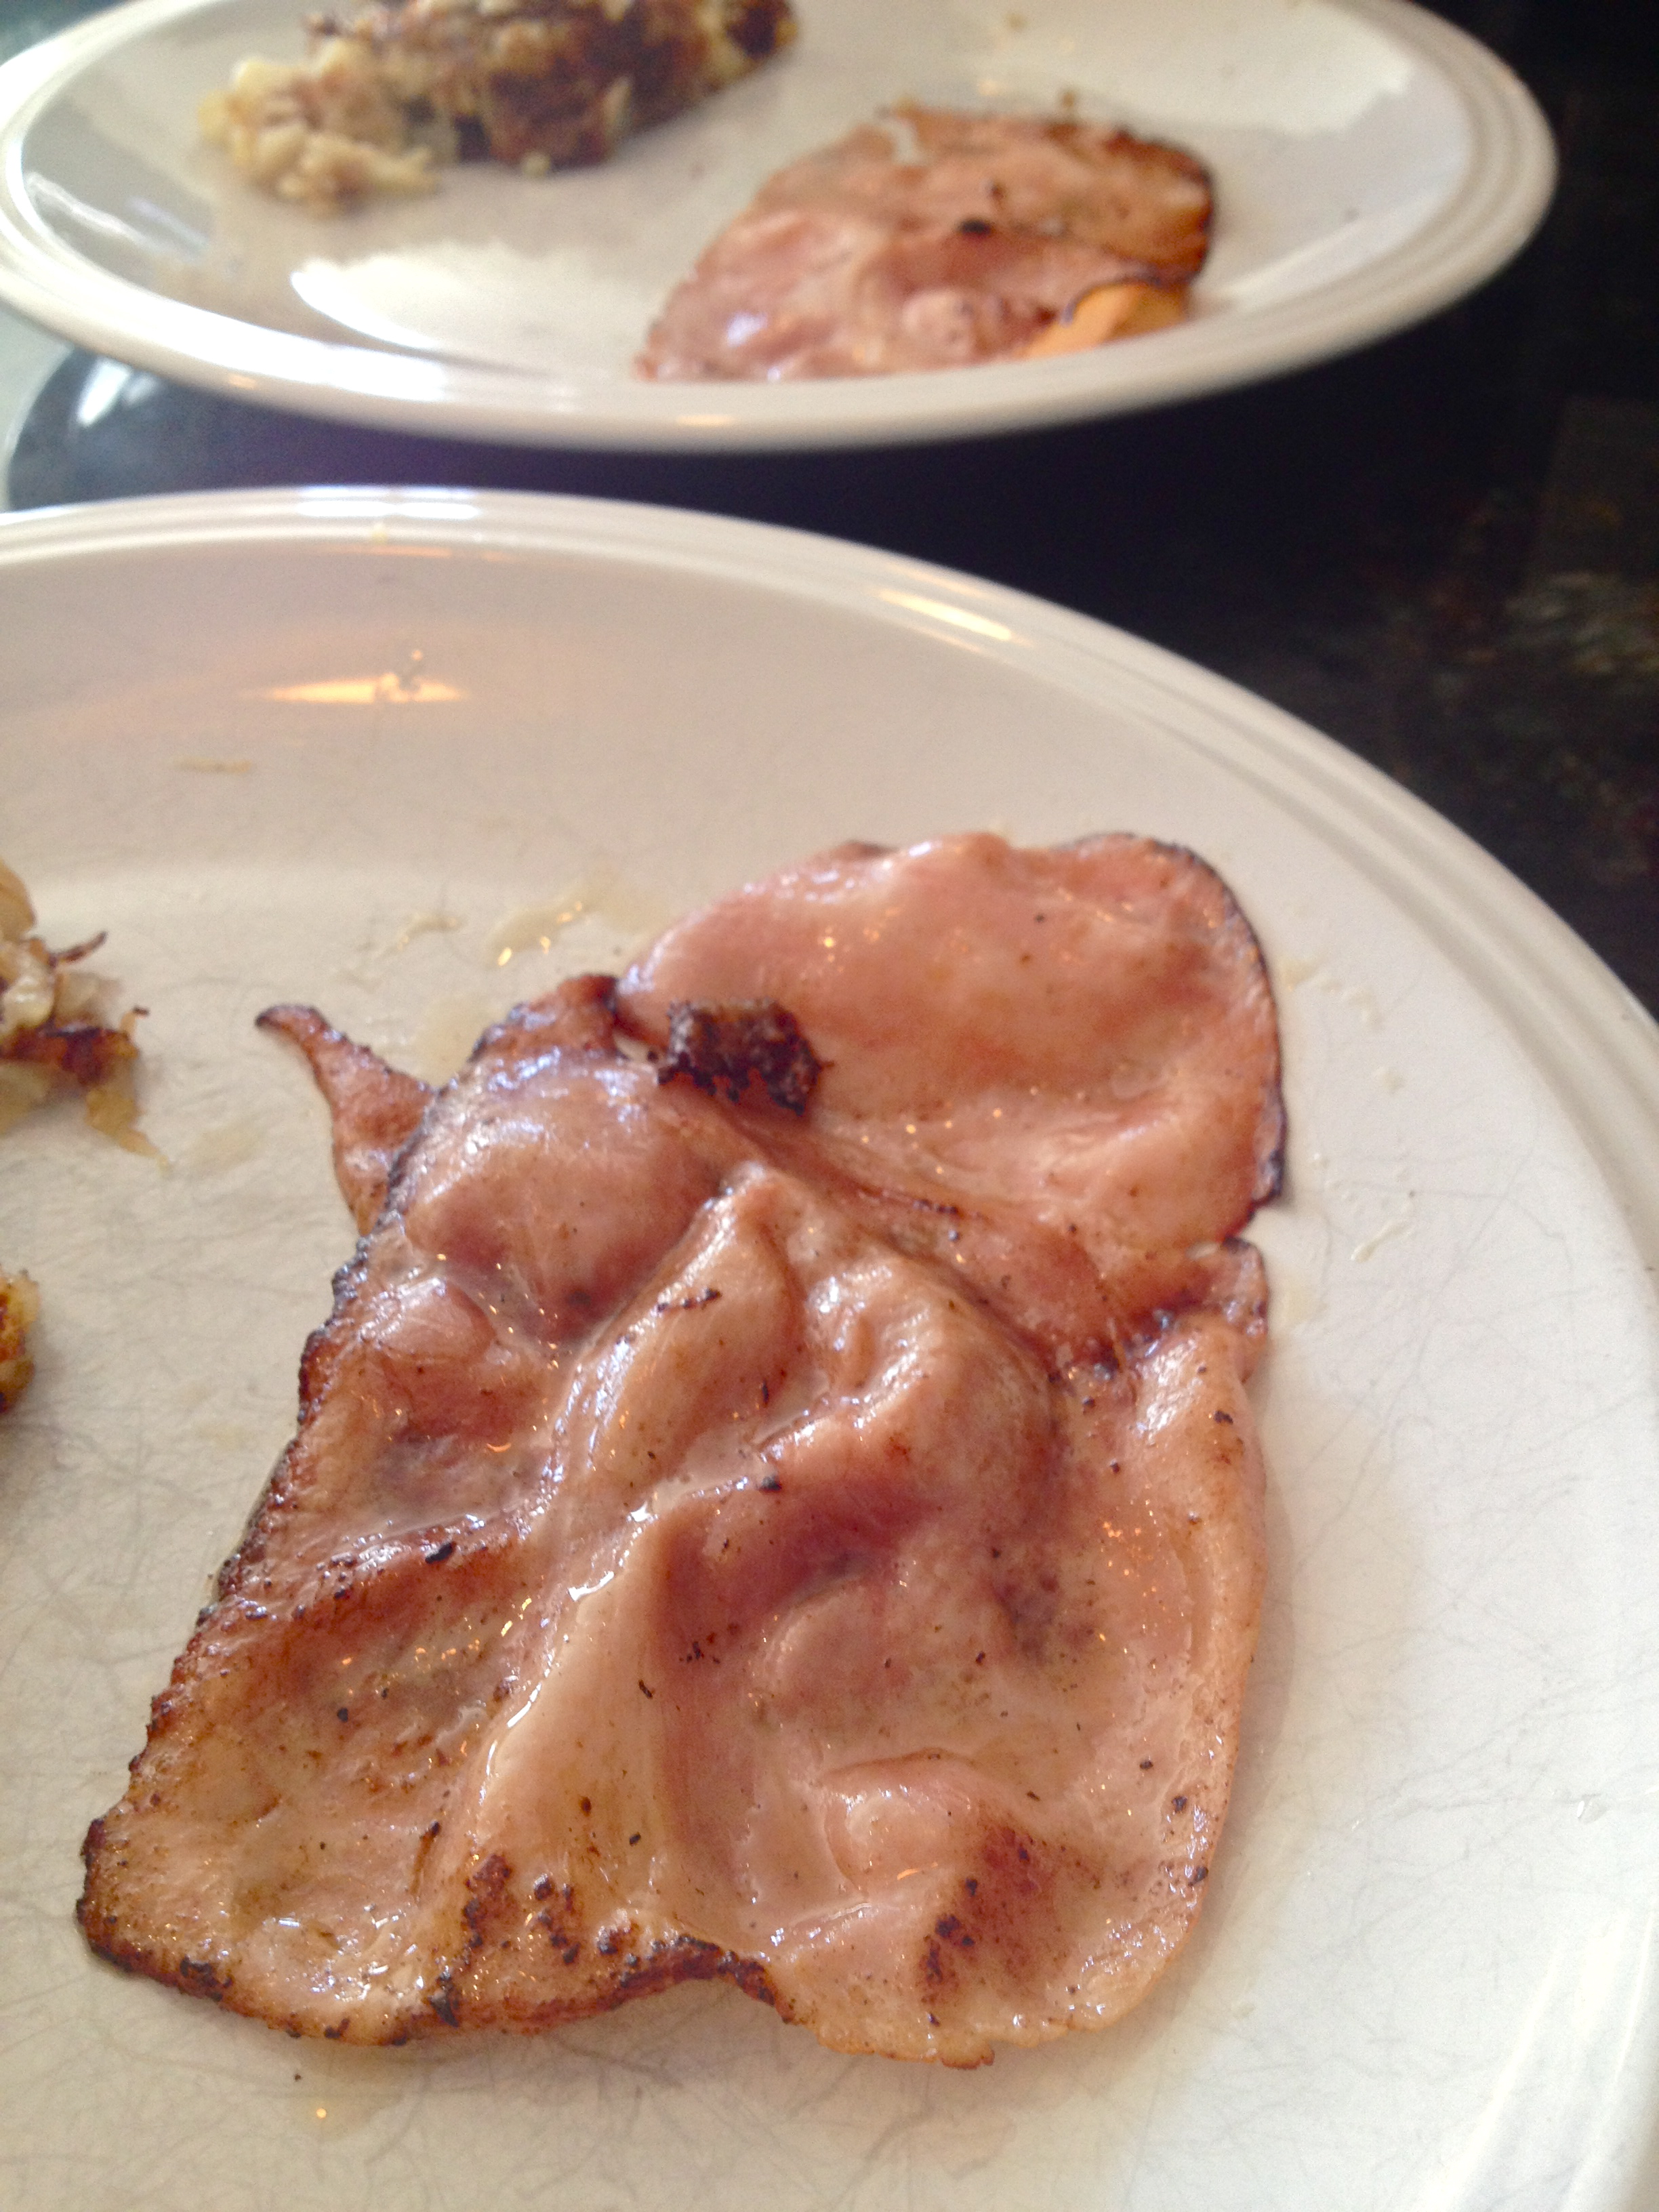
Then fry up the ham (or spinach instead, if you like). Just give it a minute or two on each side, and remove it to a plate. This will be the base for the peppers and eggs.

IMG_7198

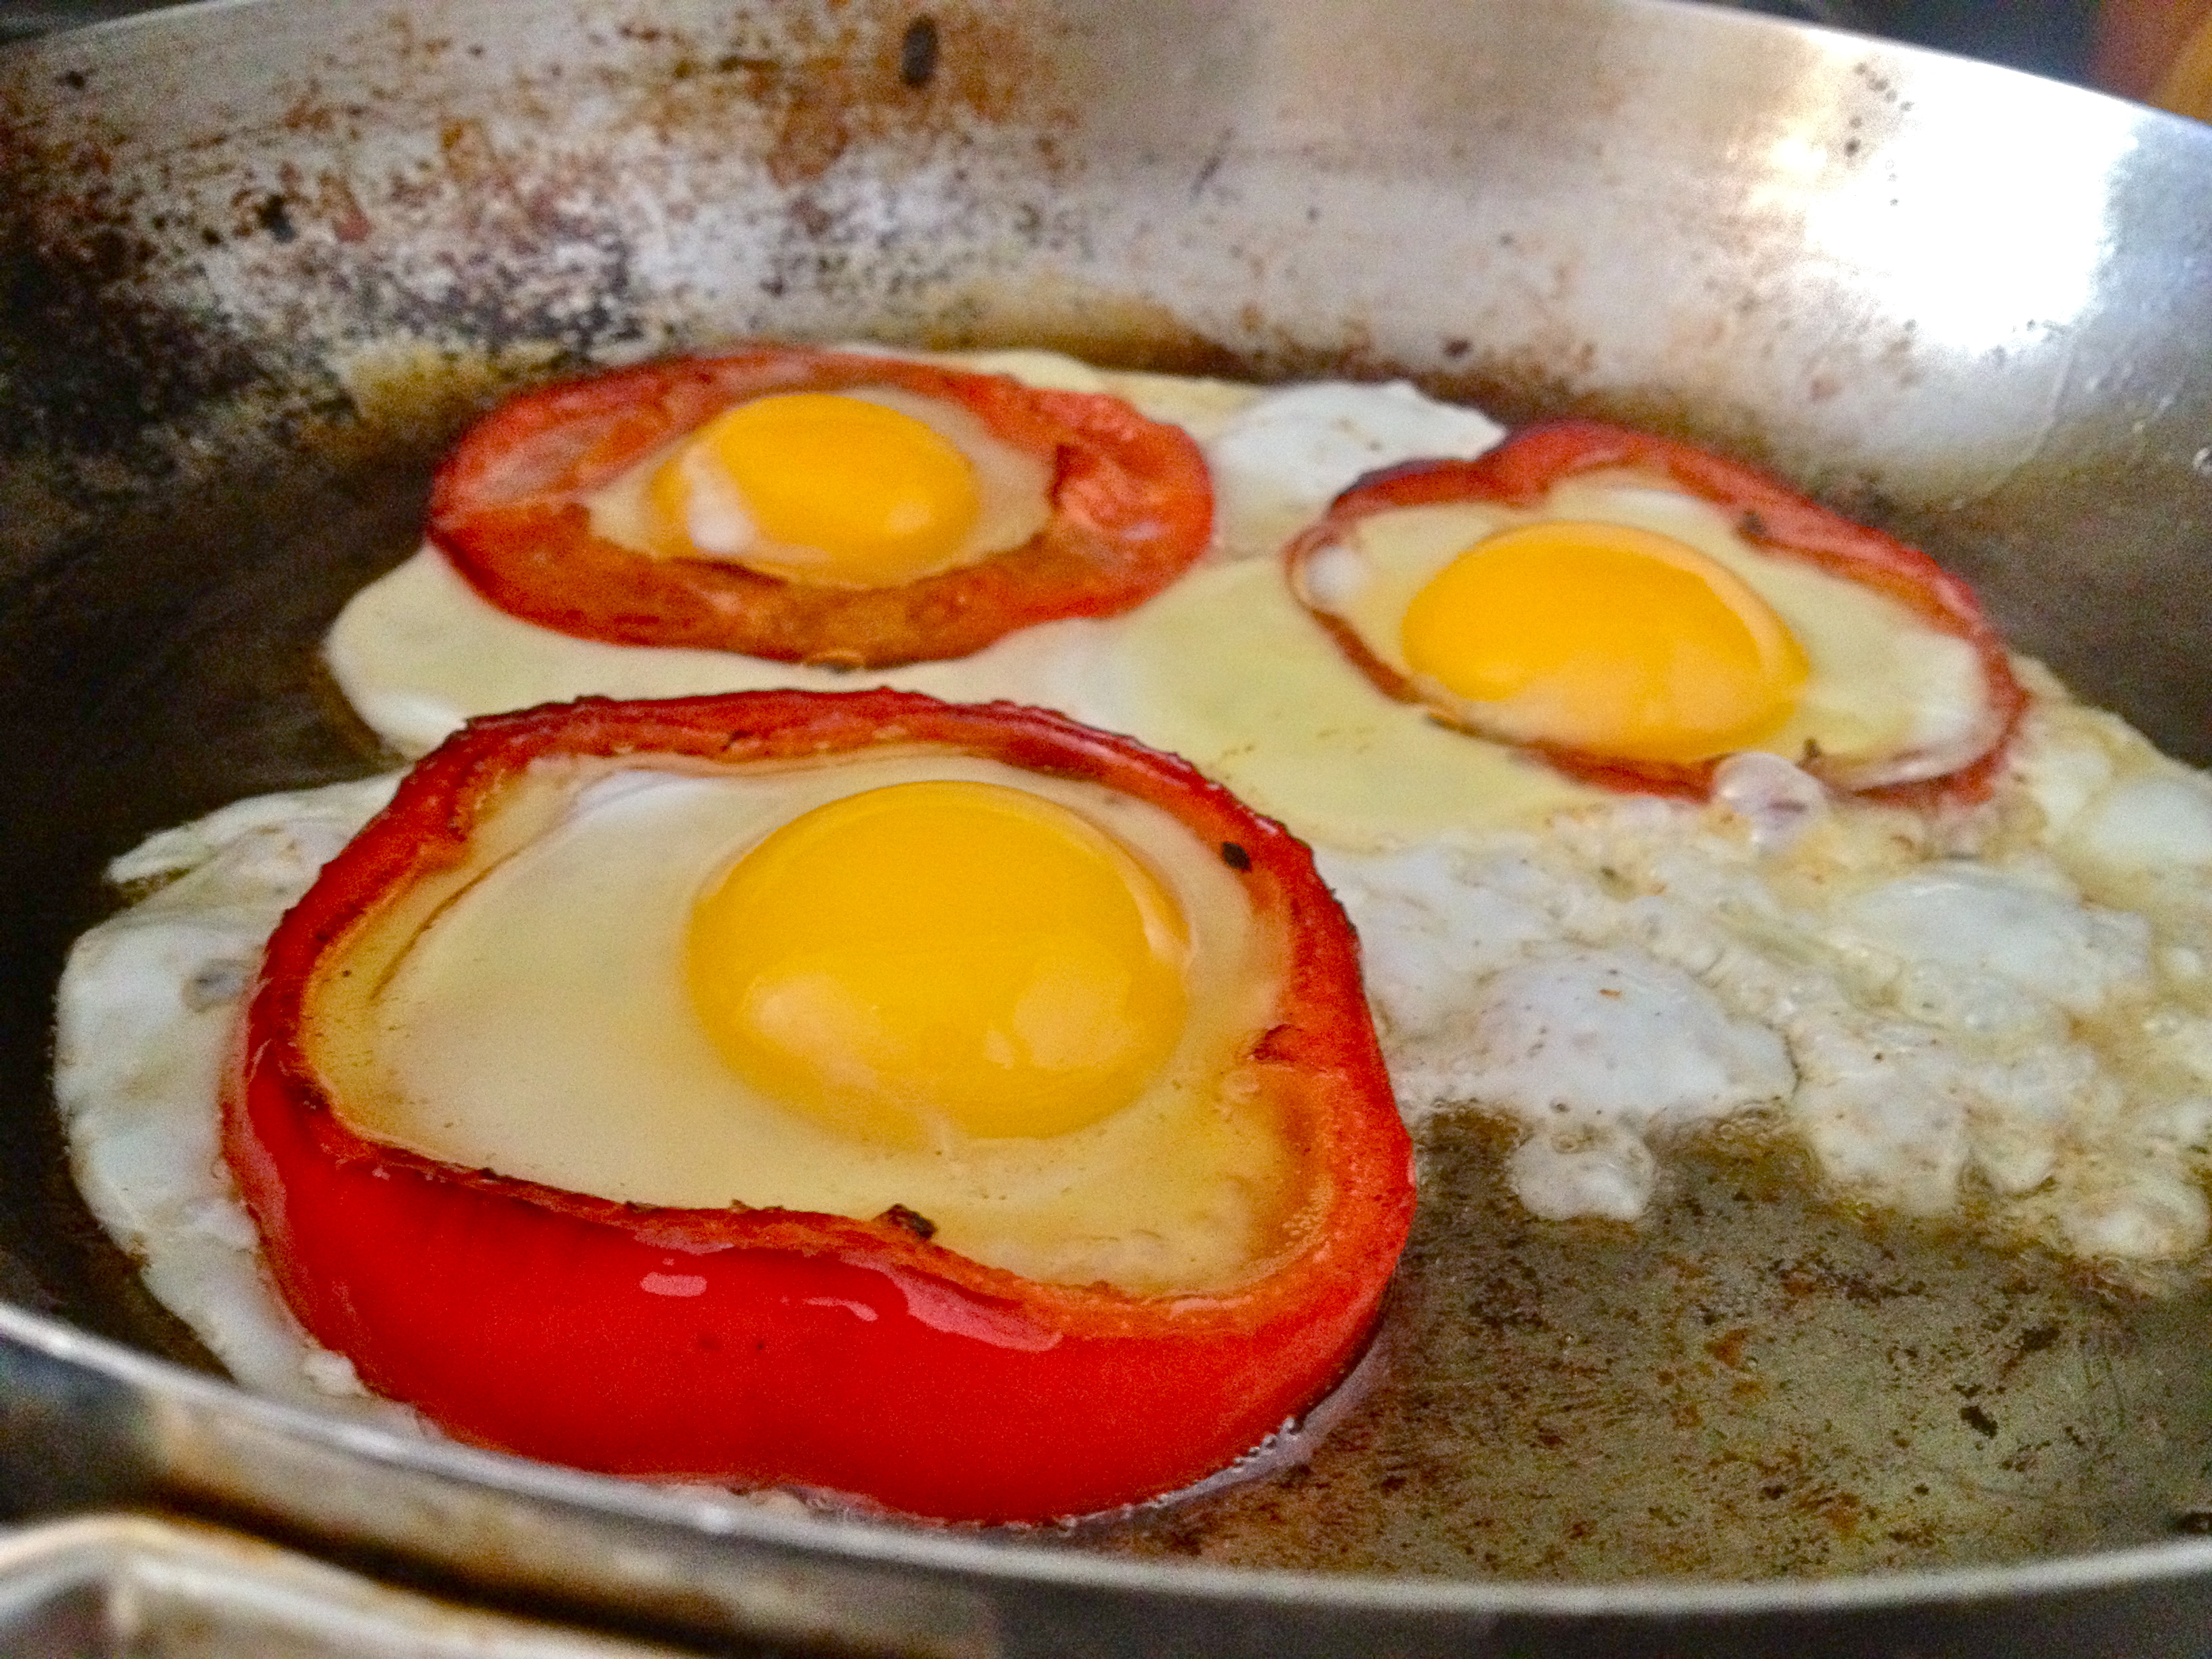
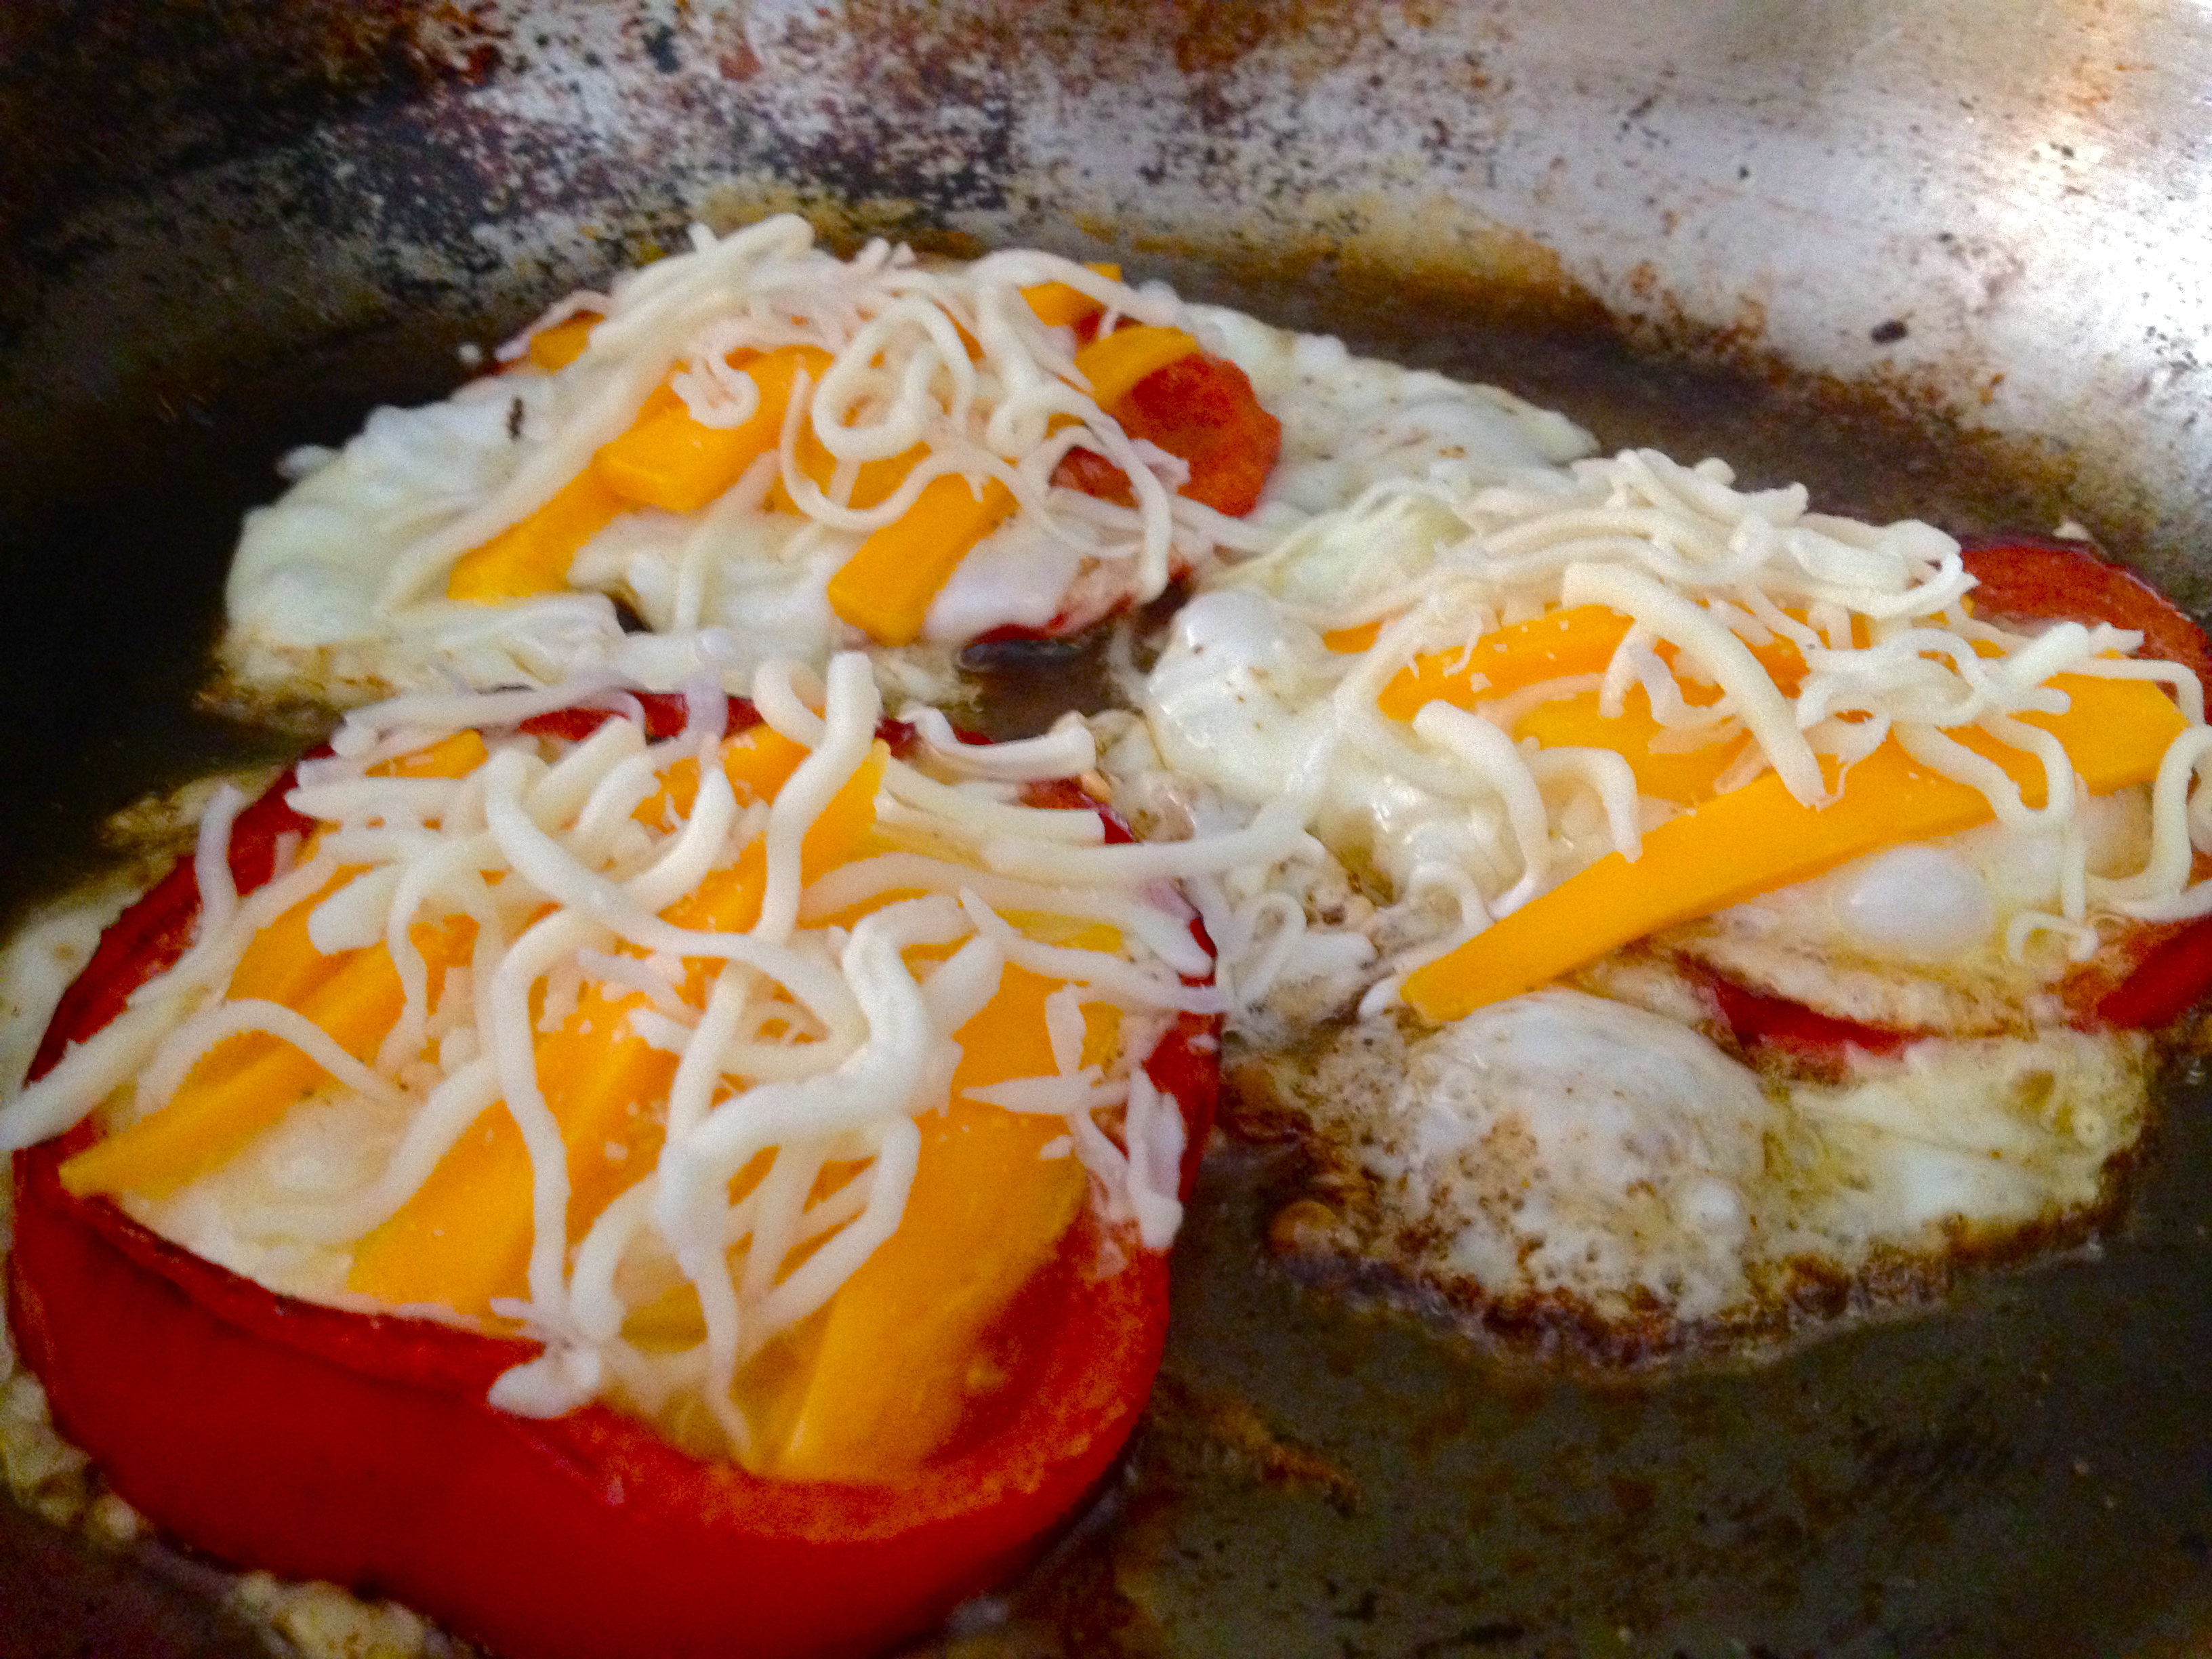
Now put 3 of the cooked pepper slices back into the pan with some more oil. Crack 3 of the eggs into the middle of the peppers – no worries if some of the egg spills out the sides; it probably won’t be perfect. Cover the pan with a lid.

IMG_7195

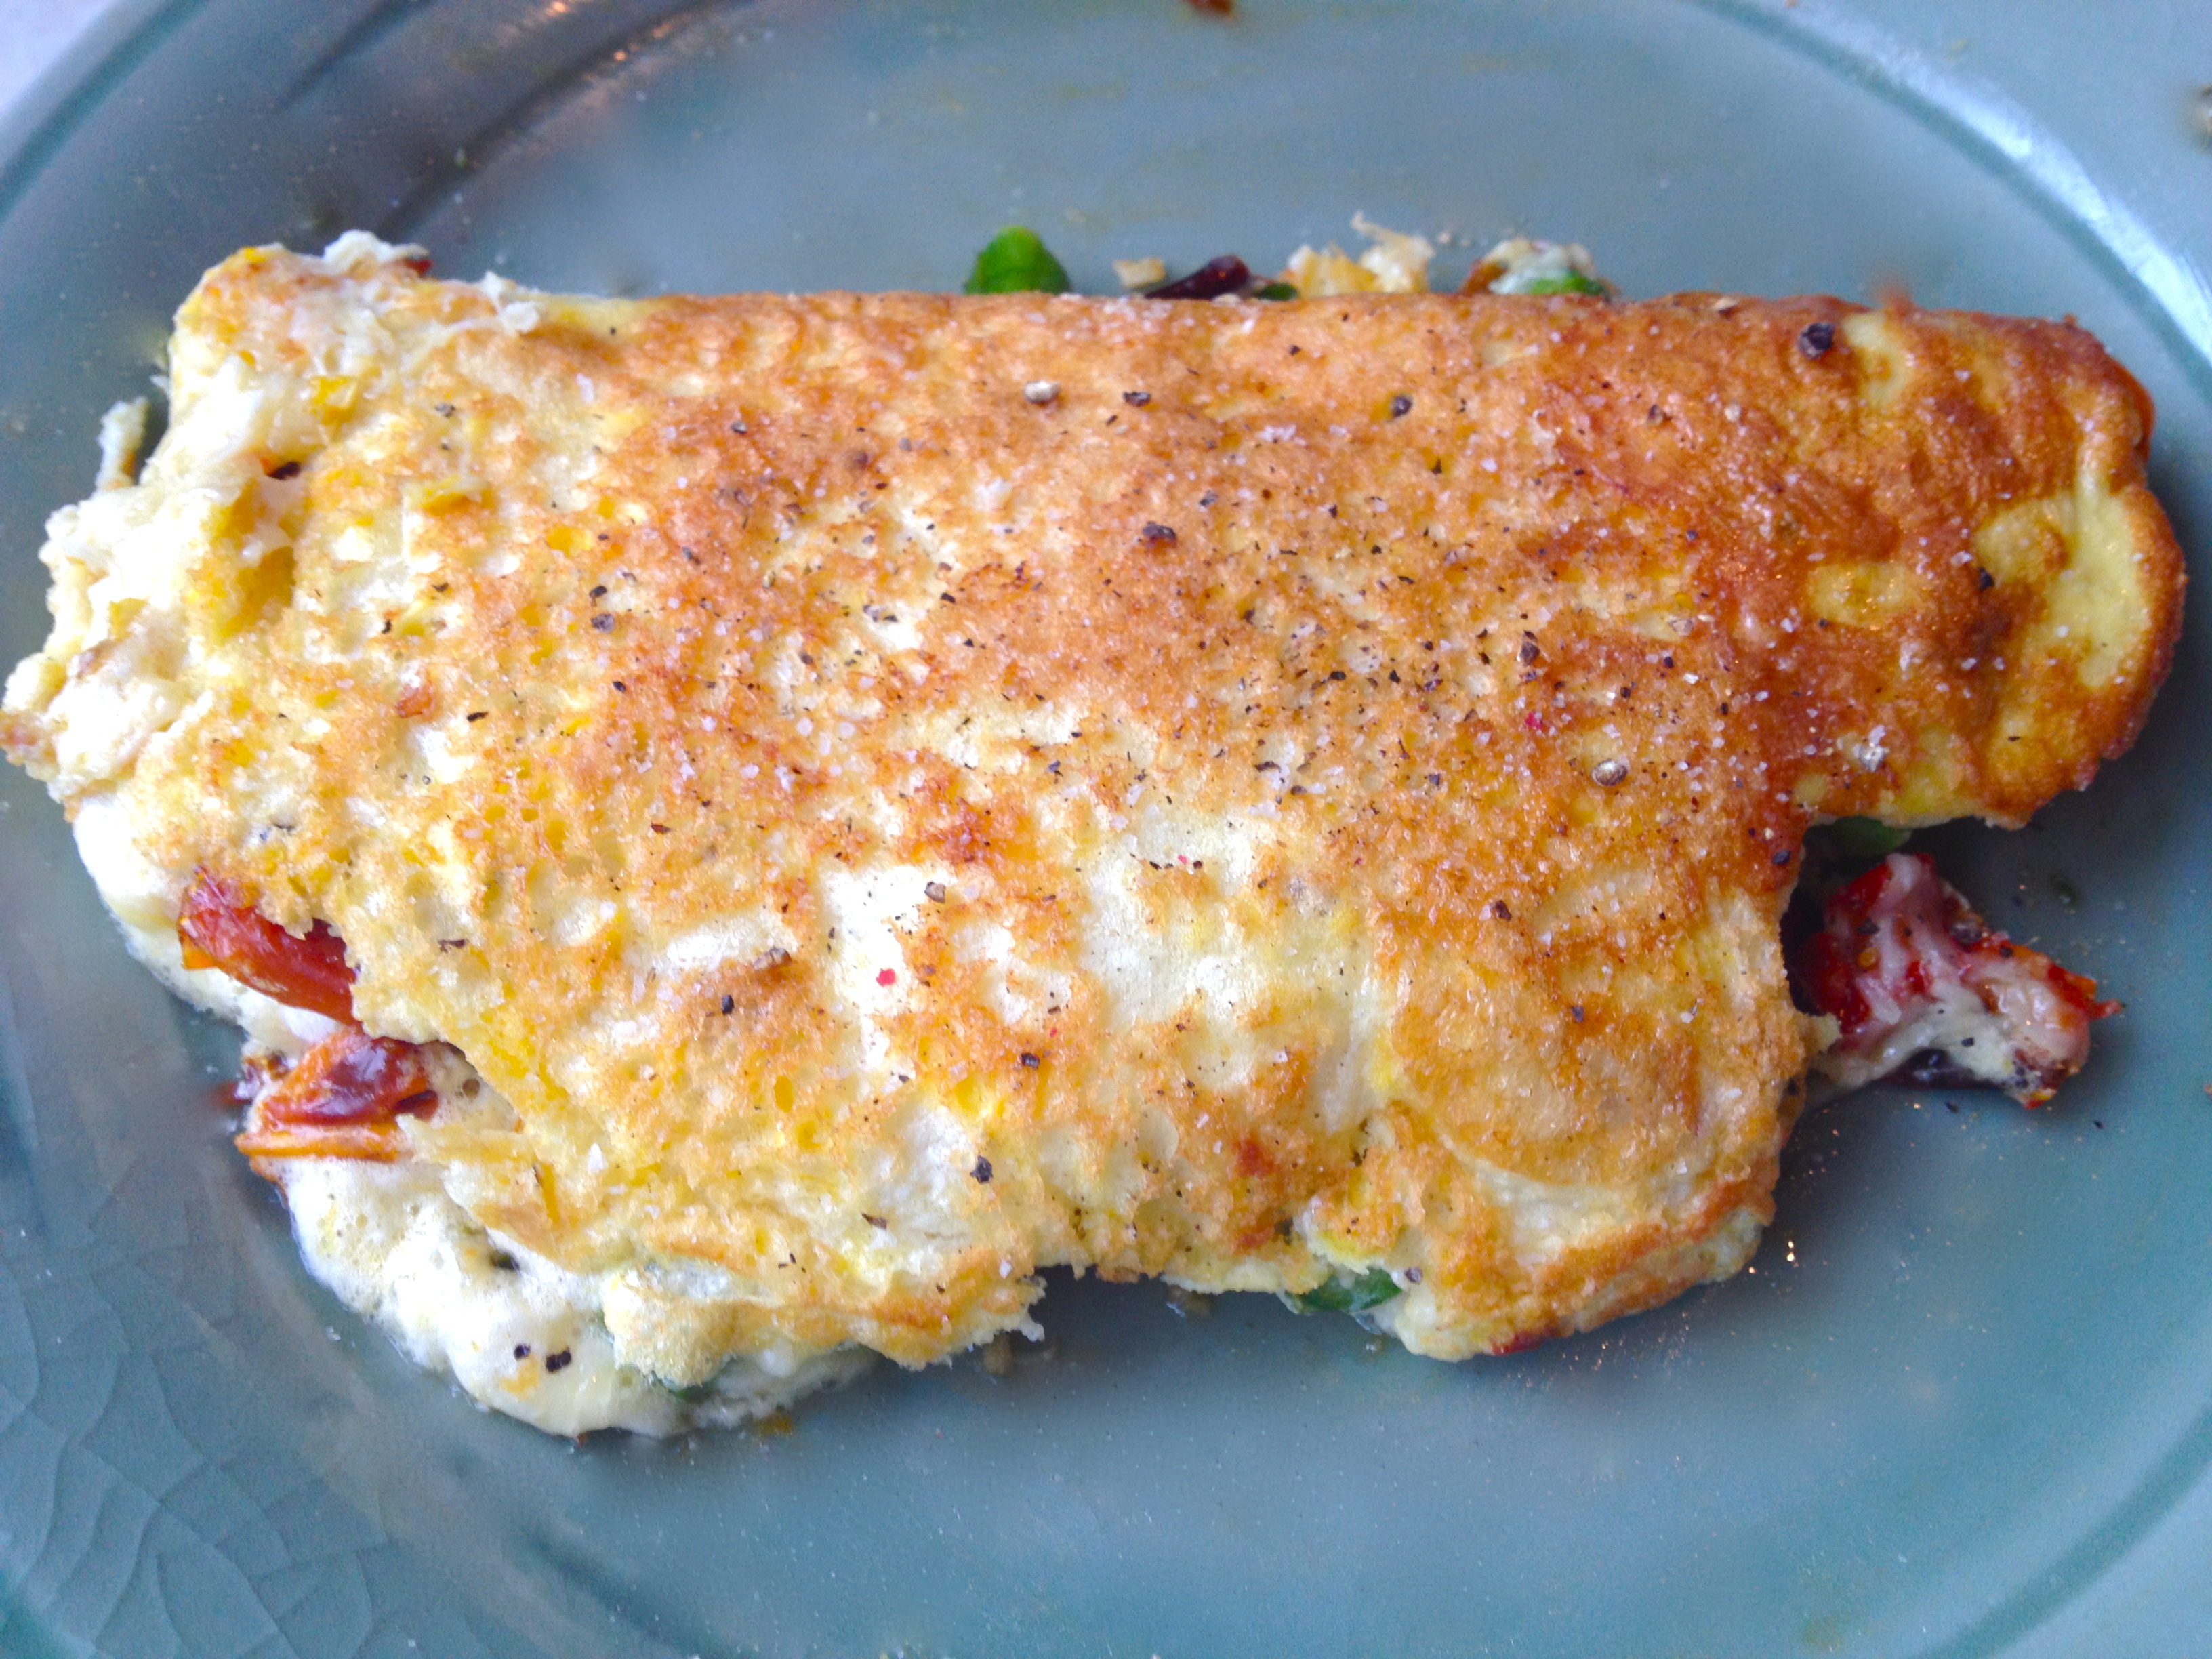
When the eggs are almost done, sprinkle some cheese on top and cover again to melt.

IMG_7196

Remove from heat and plate on top of ham or spinach. Repeat with the last 3 red pepper slices and eggs. We served these with hash browns – such a great breakfast!

IMG_7210

Cauliflower Crust Pizza.

This recipe is a tribute to a friend who so generously acted as beauty consultant / hair colorist for me yesterday. To thank her, I made these gluten-free pizzas, which are completely delicious whether g-free is your lifestyle (hers) or not (mine). Though gluten is fine by me, I’ve found that a lot of the things I love to cook (and eat) are already gluten-free. So when I find a recipe, like this one, that is totally dreamy and healthy AND fits in with the g-free life, I love to share it. This is one of those! I came upon essentially the same ingenious recipe on 3 of my favorite blogs, and this is my version of that awesomely tasty and healthy pizza. Yum! And thanks Jeni!

IMG_7186

INGREDIENTS

for crust:
2 cups cauliflower stems and florets, grated
1 cup mozzarella cheese, shredded
oregano and granulated garlic to taste
1 egg
salt and pepper
2-3 tbsp cottage cheese, to hold it together

topping ideas:
1/2 cubed chicken breast, sauteed with salt, pepper, and paprika
shredded mozzarella
grape tomatoes, quartered
green onions, chopped

Just the Recipe link: Cauliflower Crust Pizza

DIRECTIONS

Preheat oven to 450 F.

First, put the grated cauliflower into a bowl and microwave for 7 minutes, covered with a washcloth or paper towel. When it’s cooked, mix all the crust ingredients in a bowl. Use more or less cottage cheese, depending on how dry the mixture is and how it’s holding together.

IMG_7177

On a greased baking pan, shape the cauliflower mixture into two flat discs, as thick or thin as you like.

IMG_7178

Bake them for about 15 minutes, or until the edges are browned and the top is flecked with bits of golden melted cheese. The thickness of the crusts will affect baking time, so make sure to keep an eye on them.

IMG_7181

Once the crusts come out of the oven, I use a spatula to loosen them from the bottom of the pan and make sure they come off in one piece, because this will be a lot harder to do once they’re topped with cheese and other wonderful things.

Before you start with the toppings, turn up your oven to broil (or to very, very hot!). The pizzas only have a few minutes left to cook, and we want to do it at a high heat.

On to the beautiful toppings. They can truly be whatever you want – we went with chicken, green onion, tomato, and cheese, and they were fantastic!

IMG_7183

Stick back in the oven for 3-5 minutes, until the cheese is melted and has started to turn a little golden. Sprinkle with some more green onion or some oregano and dig in!

IMG_7185

Rosemary Lemon Roasted Brussels Sprouts.

Let’s keep this simple: I love Nigella Lawson.

I love her recipes. I love her witticisms. I love her energy.

My approach to cooking is strongly influenced by something she once said: “Don’t worry if bits of eggshell get into the bowl. It proves it’s homemade.”

So when I made her recipe for roasted brussels sprouts and discovered that a few lemon seeds had made their way into my final product, I wasn’t bothered in the least.

All is right with the world. Try these Rosemary Lemon Roasted Brussels Sprouts a la Nigellissima yourself, and just be sure to mind the pips!

Rosemary Lemon Roasted Brussels Sprouts | KellyintheKitchen | olive oil, lemon zest, 1 clove garlic, 1 sprig rosemary, 100 g brussels sprouts, 1 tbsp parmesan cheese, salt and pepper

INGREDIENTS

olive oil
1 lemon, zested to taste (I go lighter on lemon zest but Nigella’s recipe calls for the zest of a whole lemon)
1 clove garlic, grated or finely minced
1 sprig rosemary
a few handfuls of brussels sprouts, trimmed and halved (you want enough to form a single layer on the bottom of a standard sized cast iron skillet)
1-2 tbsp parmesan cheese (to taste)
salt and pepper
NOTE: this recipe doubles and triples easily if you’re cooking for a bigger group!

DIRECTIONS

Preheat oven to 425 F.

IMG_7081

Drizzle olive oil on the bottom of a pan (I used my cast-iron skillet). Grate the garlic and lemons zest into the pan and, tearing the rosemary leaves apart roughly, strew them about the pan. You can leave them large enough to remove at the end if you like. Add the brussels sprouts and toss to coat.

IMG_7083

Roast for about 15 minutes, until starting to become tender. Drizzle with lemon juice and sprinkle with parmesan and salt and pepper at pop back in the oven for another 5 minutes. They’re ready when they’re tender but still have a little bit of bite in them.

IMG_7087

Pull out the rosemary leaves and serve ’em up! These make a fantastic side dish to an herby roasted chicken, but we ate almost all of them straight out with our fingers. Yeah, they’re that good!

Roasted Spiced Chickpeas.

Lately at work, I’ve been hanging around a lot of talk about snack foods. Normally I’m not really much of a snacker; I never buy chips or pretzels or anything like that, because I generally don’t crave them. But for the past week, I’ve been taking a lot of notes about people’s snacking habits, and as a result, I found myself really craving salty snack foods. This led me to two thoughts: 1) I have a reaffirmed belief in the power of advertising to get people interested in products they never would have cared about before (i.e., me craving snack foods), and 2) I wanted to give these roasted chickpeas a go, after having seen them on a handful of blogs over the past month or so. Roasted chickpeas make a fantastic replacement for chips. They’re crunchy, salty, spicy, and come in any flavor you can make. So make some!

IMG_6710

INGREDIENTS

1 can chickpeas
olive oil
salt
extra virgin olive oil
seasonings of your choice (I used Ukrainian Village Seasoning from the Spice House)

Just the Recipe link: Roasted Spiced Chickpeas

DIRECTIONS

Preheat oven to 350 F.

The chickpeas require quite a bit of prep: Drain them. Rinse them off. Remove the skin from each little bean, pretending you’re a rabbi conducting a hundred brises. Lay them out on a towel and gently pat them dry. In a bowl, toss them with a drizzle of olive oil and a good sprinkling of salt.

IMG_6701

Lay the salted, oiled chickpeas out on a baking sheet.

IMG_6705

Bake about 50 minutes, until they’re crunchy and browned.

IMG_6708

Now, the seasoning part. There are so many flavor combos that I want to try! Paprika and cumin, parsley and granulated garlic, honey and cayenne pepper, and good old salt and pepper – all yummy pairings. For this batch, I used one of the Spice House‘s awesome Chicago neighborhoods spice blends – the Ukrainian Village seasoning – which has a great blend of onion and pepper flavors. I topped it off with a little sprinkle of truffle salt, just because I was feelin’ fancy.

IMG_6709

That’s it! I love these. They’re a great, substantial snack to munch on when you need a crunch but don’t want to go the chips or nuts route. Enjoy! And be sure to let them cool completely before you put them in any kind of container, or else the heat/condensation will make the chickpeas soggy.

Souffled Omelet with Sweet Peppers and Asparagus.

Introducing my new favorite breakfast item: the souffled omelet. So light it melts in your mouth, with a surprising textural contrast of the almost crispy bottom and the airy inner egginess. It’s a perfect example of how a simple change in technique can transform a dish. Rather than beating the eggs with a whisk (or even a fork) as you would for a standard omelet, this one is made by separating the yolks and the whites and fluffing them up pretty much as far as they can go—much like in a souffle. It’s a fun way to prep eggs and it makes them go so much further than they would in a regular omelet; just look at the photo, that big fluffy thing is a two egg omelet! And of course, you can stuff it with whatever fillings you like. I had some leftover grilled asparagus and mini sweet peppers, so I chopped them up and sprinkled them over along with the cheese. Thanks to Laura Calder for the recipe, who (as usual) inspired me to try something new, and (as usual) it turned out pretty groovy! Also pretty groovy: the truffle salt I used to finish the dish. Optional, but recommended.

IMG_6483

DIRECTIONS

2 eggs, whites and yolks separated
salt and pepper to taste
1/2 cup shredded cheese (I used Parmesan)
grilled veggies, like asparagus and sweet peppers, chopped
1 pat butter
truffle salt (optional)

Just the Recipe link: Souffled Omelet with Sweet Peppers and Asparagus

INGREDIENTS

Eggs first. Put the yolks in a glass or metal bowl (they’re going over a double boiler). Season them with salt and pepper.

IMG_6472

Bring a small pot of water to a low boil in the stove, and set the yolk bowl over it (but don’t let the bottom of the bowl touch the water, or they’ll cook too fast.) Using a whisk, beat the yolks over the double boiler until they’re ribbony, pale yellow, and just about tripled in size. Scrape into the center of the bowl and set yolks aside.

IMG_6475

Next, use your whisk to beat the whites until they’re fluffy and stiff.

IMG_6476

Pour the whites into the bowl with the yolks. Using a spatula, gently fold them together.

IMG_6477

Heat a pan over medium high and melt the butter. Pour the fluffy eggs into the pan and cover with a lid.

IMG_6478

When the bottom is starting to turn golden brown and the foaminess on top is starting to firm up a bit, spread your veggies and cheese over the whole surface of the omelet.

IMG_6482

When the bottom is browned to your liking, gently loosen the sides of the omelet from the bottom of the pan and carefully slide it out. As you do so, fold one half of the omelet over the other. Sprinkle with pepper and truffle salt, if you’ve got it, or else regular salt. Then just float away on this cloud of a breakfast (or lunch, or dinner….).

IMG_6486

Blackened Onion and Lentil Pilaf.

On Wednesday night, I got home late from a busy day at work, and I was starving! Thinking to make something easy and quick, I decided to put together a really simple lentil dish to accompany the chicken drumsticks I was roasting. I love lentils and consider them an almost-perfect food. They taste good, they’re really versatile, they’re easy to cook, they’re good for you, they last forever, and they’re incredibly cheap! What’s not to love? Last night, I riffed on a Lebanese rice dish called mdardara, which I had learned about a long time ago but hadn’t ever made. It’s a really simple lentil and rice pilaf topped with blackened onion strings, but in my version, I replace the rice with quinoa and the regular brown lentils with the slightly fancier French lentils. What makes this dish so great is that you can really use any kind of lentil, any kind of onion, and any kind of grain that you have around the house. It’s so flexible – just use what you’ve got and you’ll be good to go with a tasty side or main dish that’s totally simple and healthy.

IMG_6457

INGREDIENTS

1/2 cup French lentils
2 cups stock or water (I used homemade vegetable stock)
bay leaf
1/2 onion, sliced
olive oil
salt and pepper
1/3 cup red quinoa (really this will work with any grain)

Just the Recipe link: Blackened Onion and Lentil Pilaf

DIRECTIONS

Add lentils, 1 1/2 cups stock or water, and bay leaf to a pan and bring to a boil.

IMG_6447

Reduce to a simmer and cook until lentils are tender, about 30-40 minutes. Remove the bay leaf, drain any excess liquid, season with salt and pepper, and set aside.

Meanwhile, heat olive oil in a frying pan and add the onions. Cook over medium low, stirring occasionally. When they start to take on a slightly blackened color, add a shallow layer of stock or water to the pan, to help them soften and brown rather than dry up and turn black. If you want them on the more charred side, use less stock; if you like them totally browned and almost caramelized, as I do, use a bit more stock.

IMG_6450

Turn the fire down to low and cook the onions until they’re a deep brown-black and the liquid is almost totally reduced.

Finally, the quinoa. Cook according to package directions. I recommend cooking the quinoa in any remaining stock you have on hand, as this really perks up the flavor of quinoa and makes it way more flavorful than when it’s cooked with water.

When everything is cooked, assemble! Mix the lentils and quinoa and make sure to season with salt and pepper. Spoon them into your bowl or serving dish and top with the onion strings. Add another sprinkle of salt to the onions and that’s it! A simple and easy yet very yummy after work meal that functions as a side or a main dish. And I’m saving the leftovers for lunch.

IMG_6455