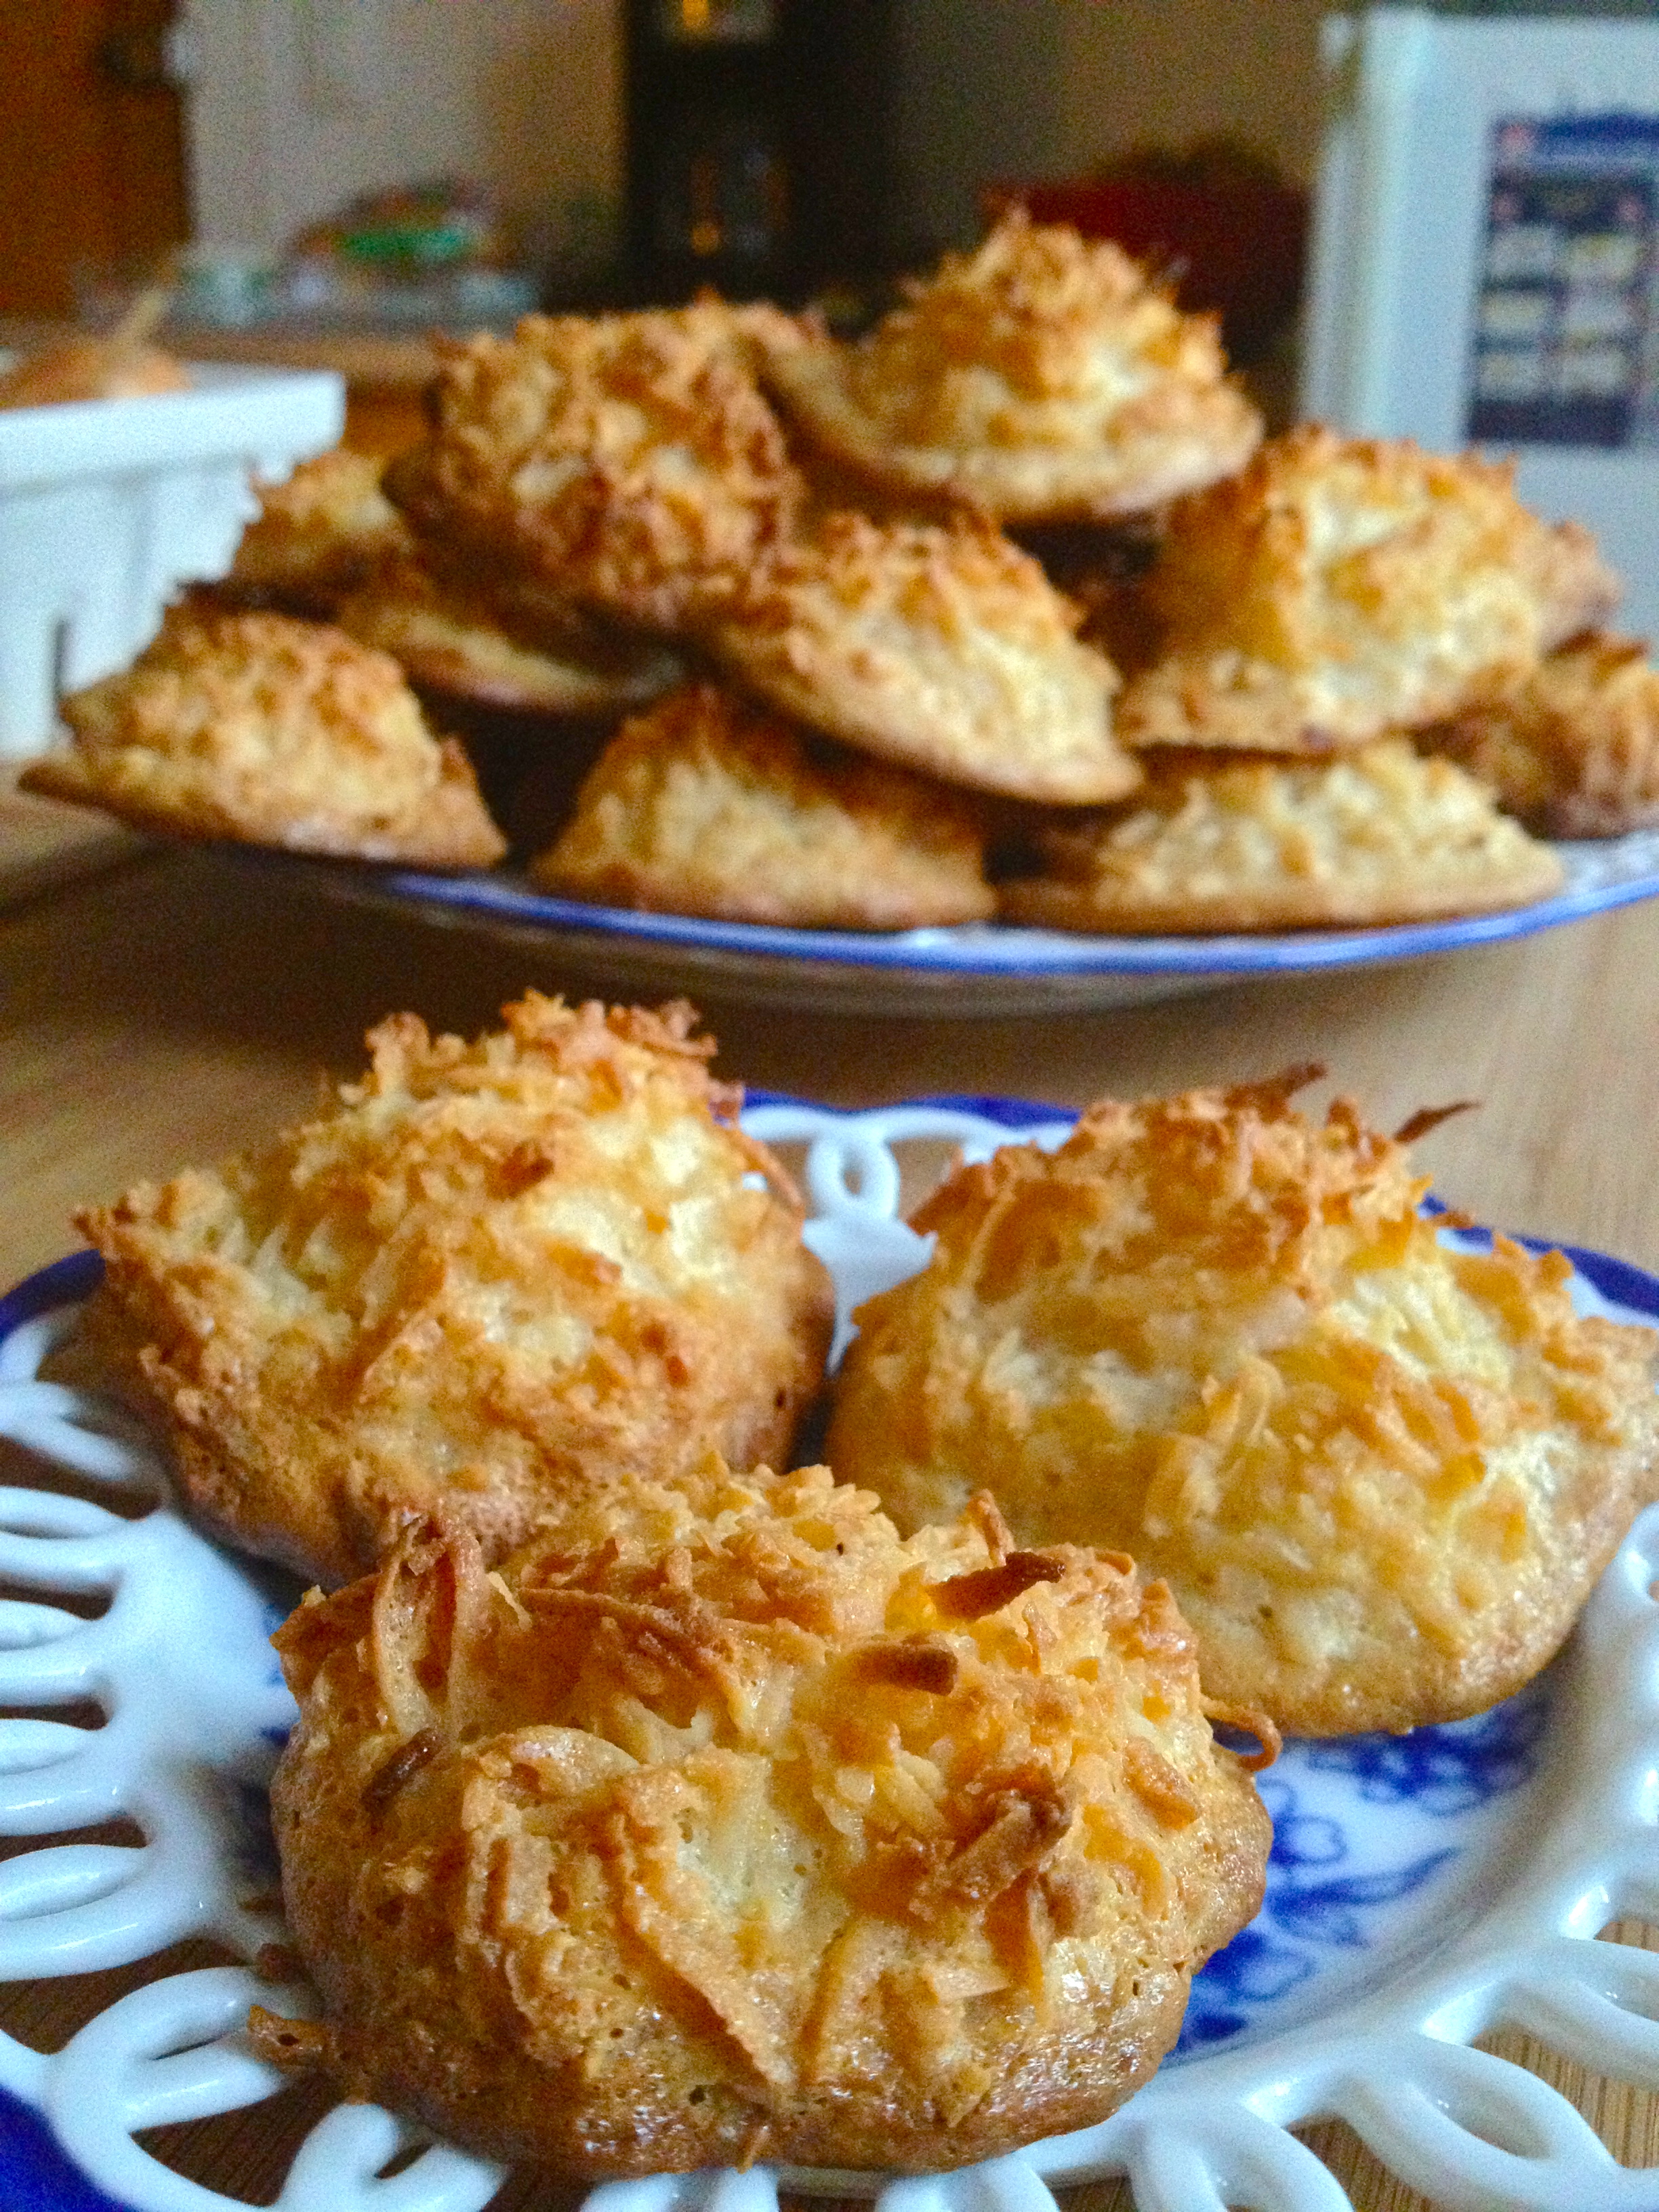
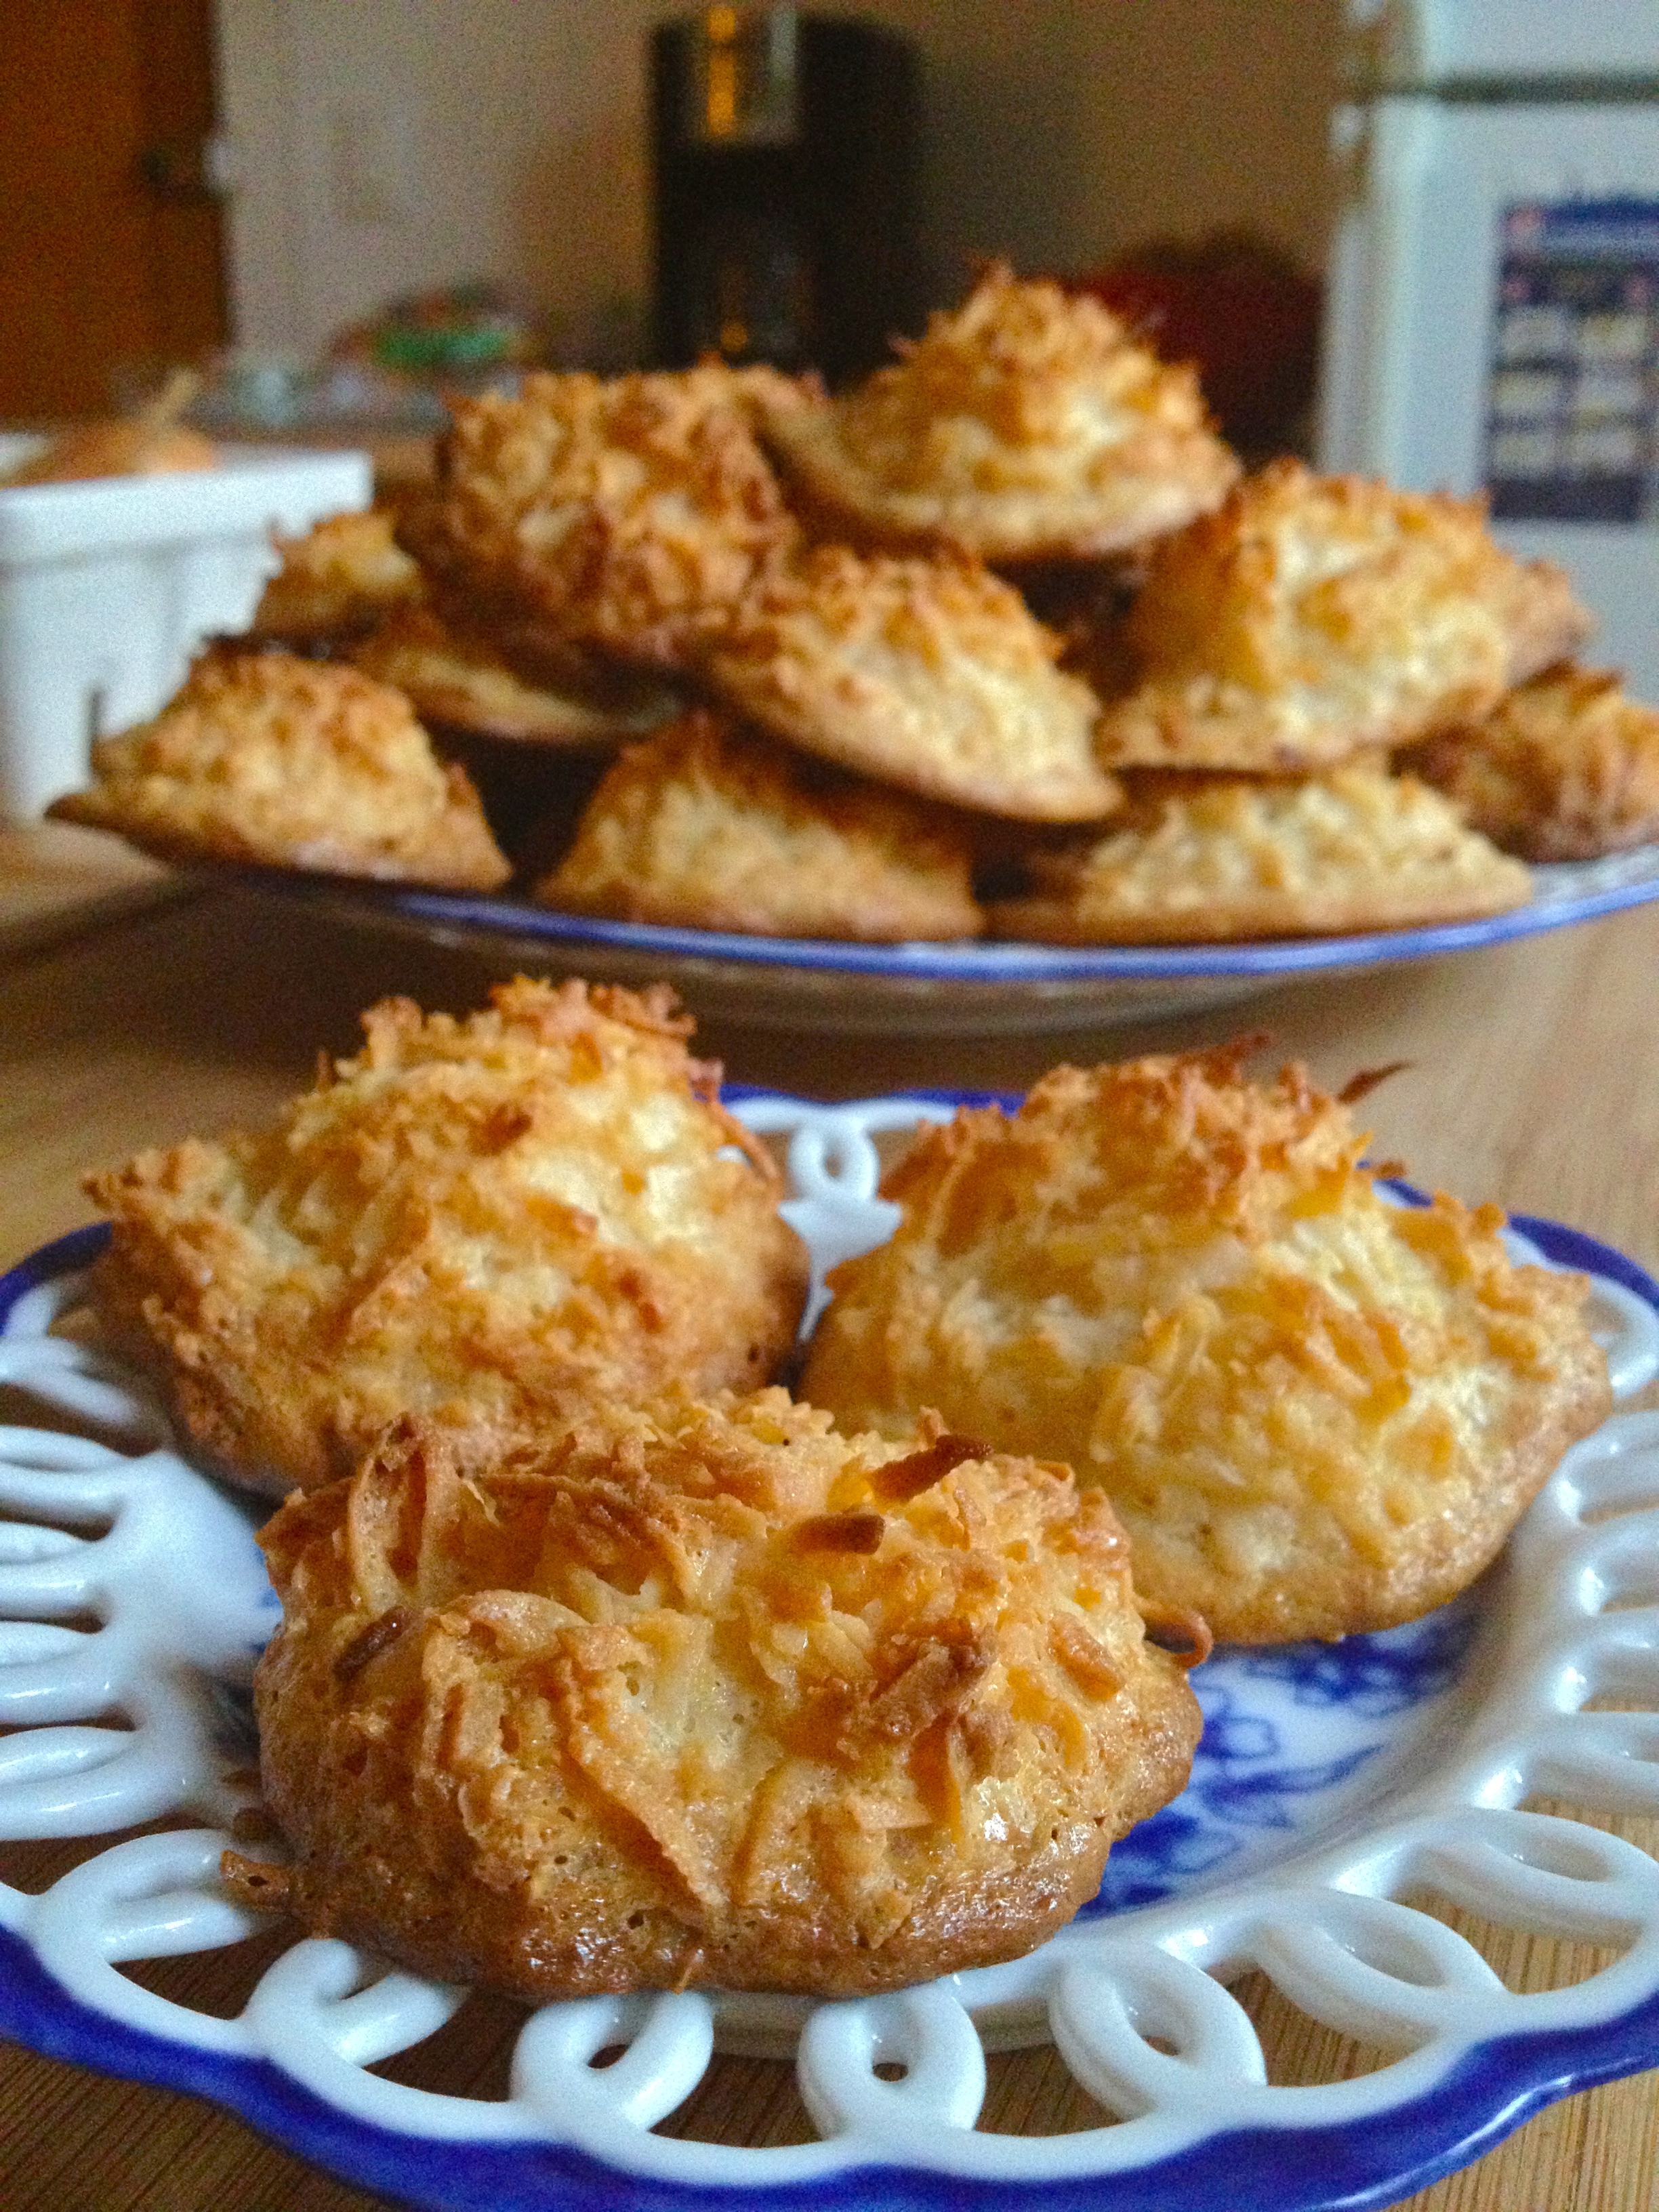
These are as as delectable as they are adorable. I saw Ina Garten make ’em recently on Barefoot Contessa and have had them in the back of my mind ever since. Oh man, are these coconut macaroons delicious. But my favorite part about them (okay, one of my many favorite parts) is how totally easy they are. Just look at the ingredient list – so simple! As I was whipping them up, I thought about adding a new section on my Recipe List page where I could collect my simplest, easiest recipes in one place. So if you check out the Recipe Listnow, you’ll see a new section called “Easiest, Simplest Recipes,” where I’ve called out all my recipes that are amazingly basic and basically amazing. And these chewy, gooey coconut macaroons are going right there.
INGREDIENTS
14 oz sweetened shredded coconut
14 oz sweetened condensed milk
1 tsp vanilla
2 egg whites, room temperature
1/4 tsp salt
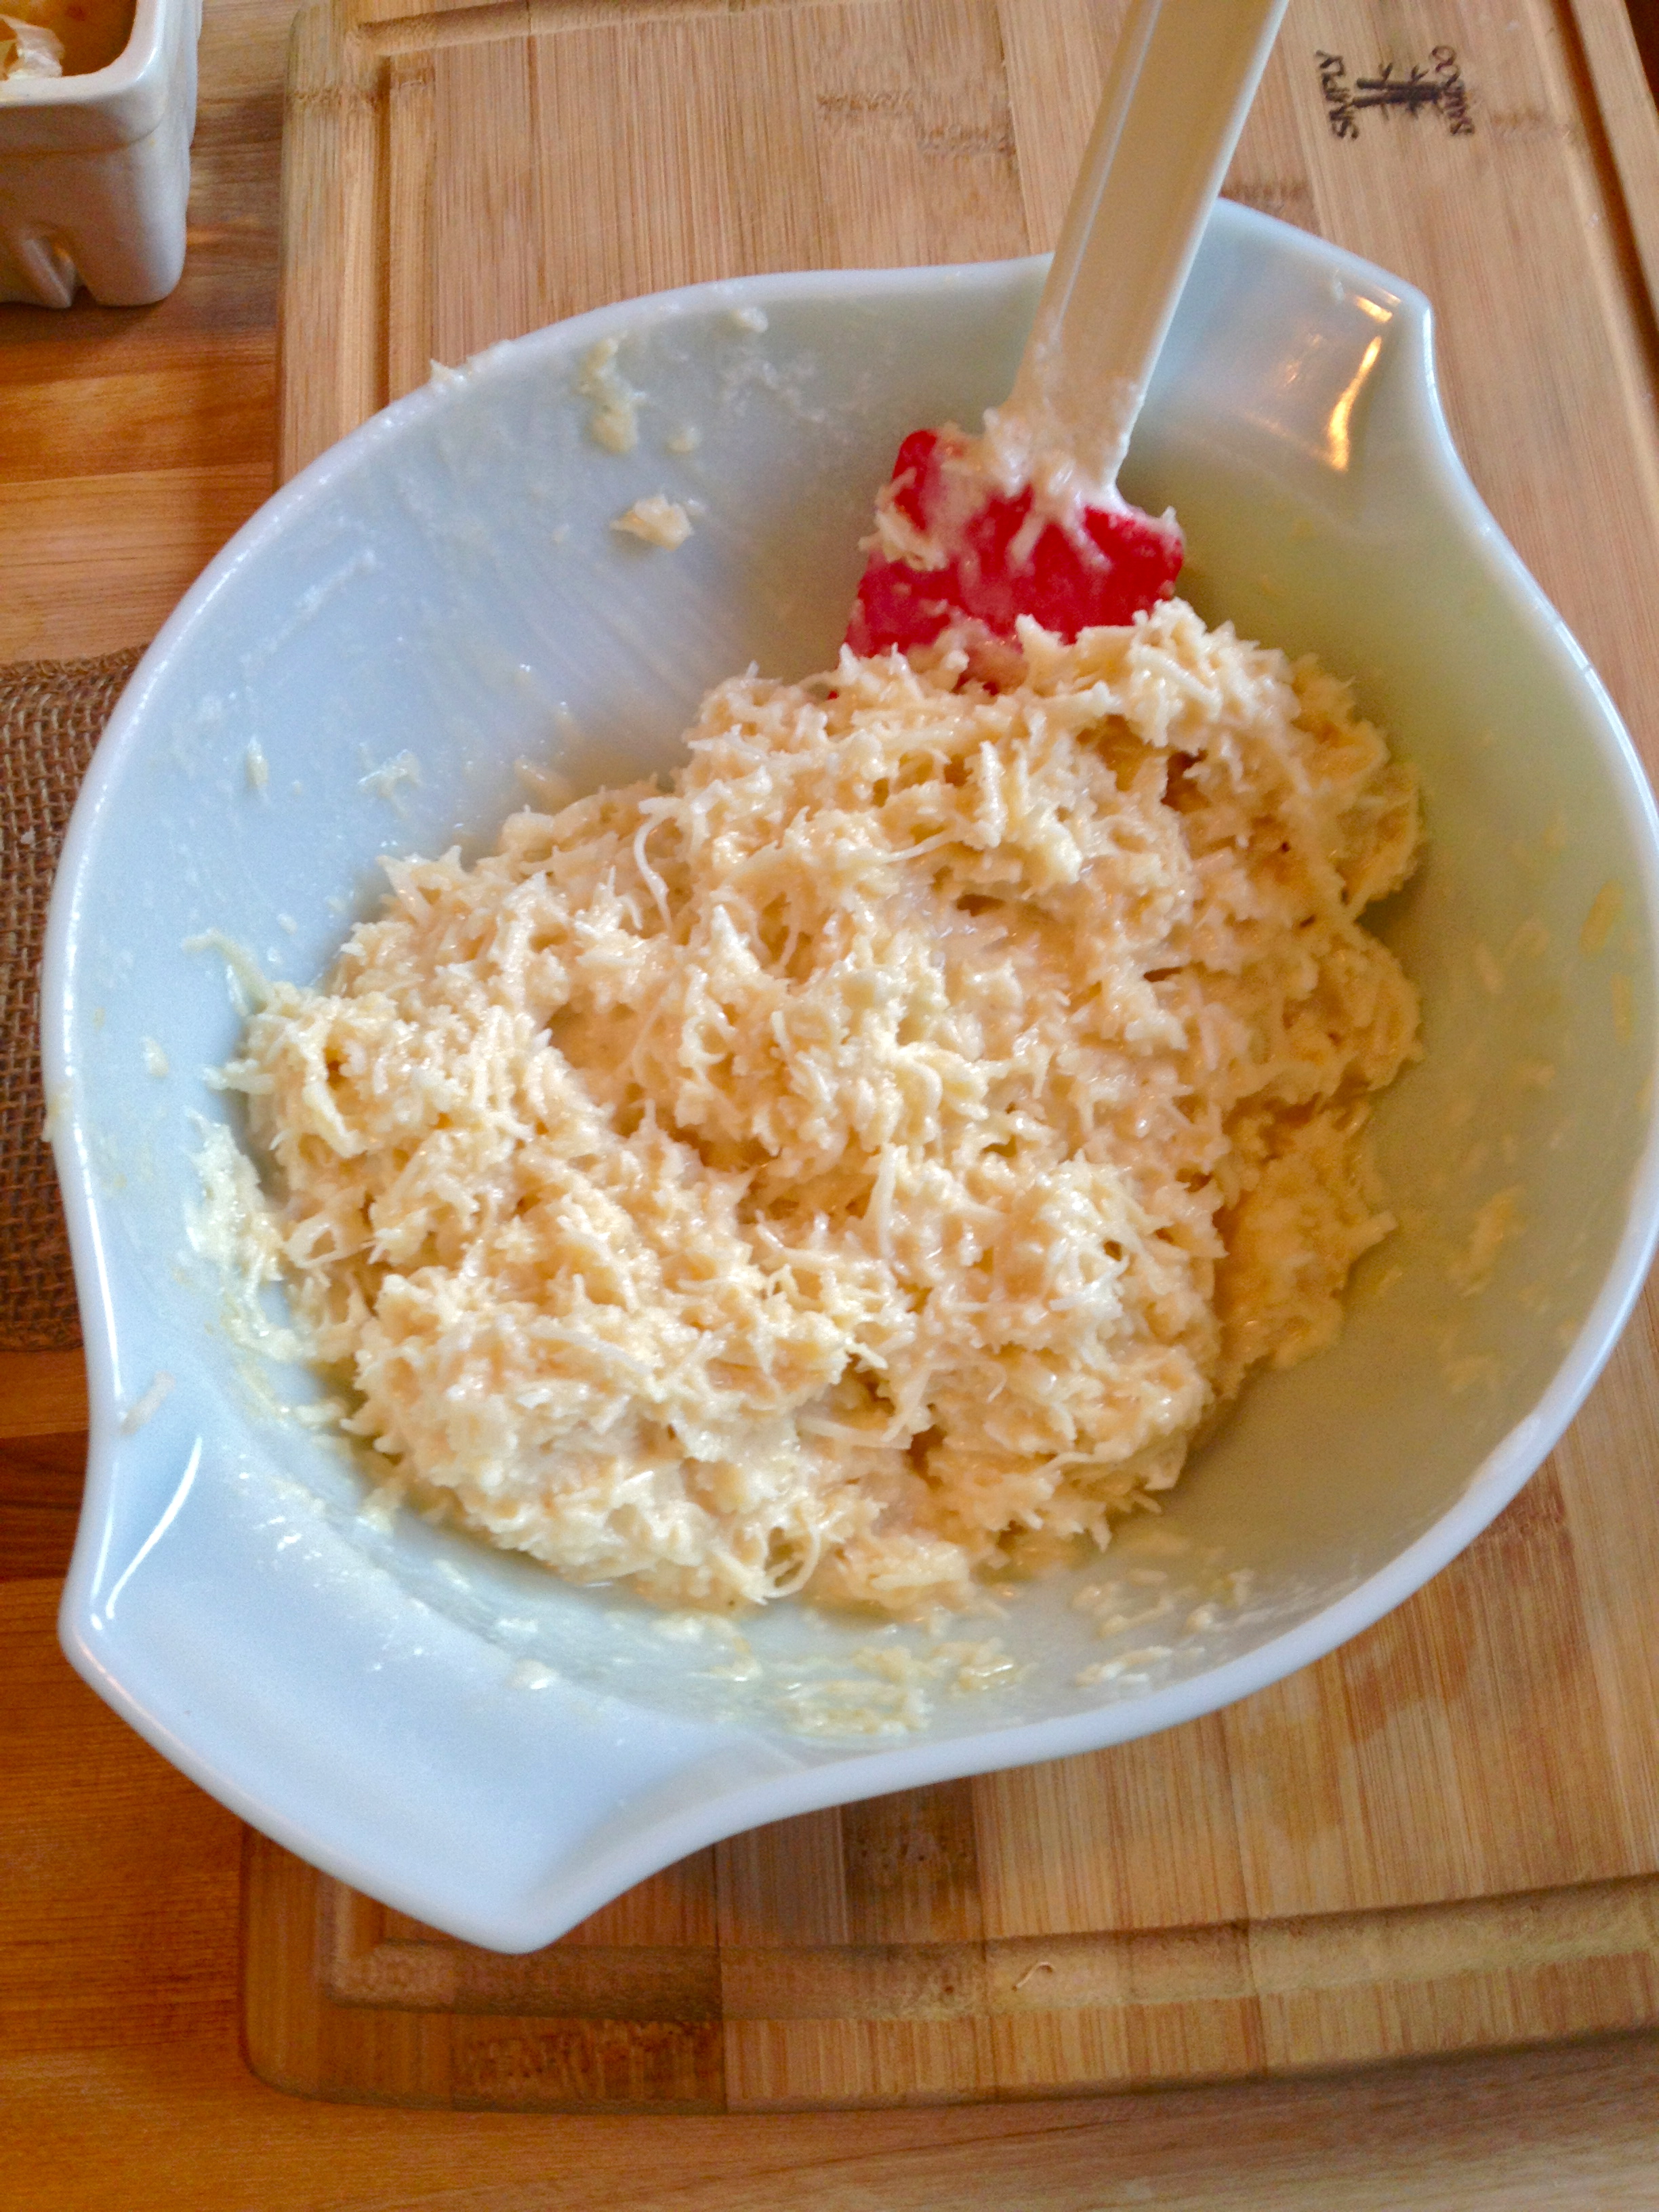
Stir together the coconut, sweetened condensed milk, and vanilla in a large bowl.
In a separate bowl, use a whisk to beat the egg whites and salt until they form medium-stiff peaks. Fold the whites gently into the coconut mixture.
Use an ice cream scoop (or your fingers) to drop little scoops of batter on a baking sheet lined with parchment paper or a baking mat. Don’t put the cookies too close, as they spread out a little bit.
Bake for about 25 minutes, until golden brown and set. Devour.
Green garlic is everywhere right now. It’s just young garlic, with a softer, edible skin and a milder flavor. It’s delicious in scrambled eggs, soups, and sauces (especially pesto). Since I haven’t been feeling well lately, from a combination of allergies and a sore throat from screaming my head off when the Blackhawks beat the Red Wings in a Game 7 of the NHL playoffs, I figured a nice spring soup might perk me up a bit. It’s also a great way to get a good healthy helping of spinach! Adapted from Orangette, this light and easy green garlic and spinach soup is a breeze to make and delicious to boot. Dig in.
INGREDIENTS
butter and olive oil
3 stalks green garlic, sliced (use the white and the light green parts)
pinch of salt
pinch of cayenne pepper
1 cup chicken stock
2 1/2 cups water
5 oz baby spinach
a spoonful of Greek yogurt
pepper
In a Dutch oven or other large pot, heat a bit of butter and olive oil over medium low. The butter is for flavor, and the olive oil will keep the butter from burning. Once it’s hot, add the green garlic, salt, and cayenne.
Cook gently, careful to avoid burning or browning, until the garlic is soft and smells sweet, and has lost its raw smell. Add the chicken stock and turn up the heat. Bring to a boil, and then turn down to simmer for 15 minutes.
Add the spinach and turn off the heat. Stir it in and let stand just 5 min, so it cooks but keeps its bright green color.
Now puree the soup in batches, until it’s smooth. Add it back to the pot to reheat. I wanted to reduce my soup and get it to a little bit thicker consistency, so I simmered it a few minutes more.
Once it’s where you want it, turn off the heat and stir in a scoop of greek yogurt. Serve immediately, with lots of pepper on top. Delish!
Let’s use our imaginations for a second. It’s something like 100,000 years ago and you’re a primitive human, walking around and looking for food. You spot a green, tough, pointy-leafed, stringy-stemmed, hairy-hearted and bitter-tasting vegetable. Naturally, you do not eat it. And none of your fellow humans eat it either. It’s clearly a bad food option. You move on and continue your search. Are the berries on that bush non-poisonous? Only one way to find out!
Are you enjoying the imagination game? I find myself thinking about this kind of thing a lot: how many thousands of years had to go by before someone figured out how to prepare an artichoke so that it’s a delicious treat instead of the “problem vegetable” that it is in its untouched state? The artichoke is one of the weirdest vegetables there is, and it’s pretty labor-intensive to prepare, and yet it is all so worth it to get to that delicious heart and eat the meat off the bases of the leaves. Mmmmm.
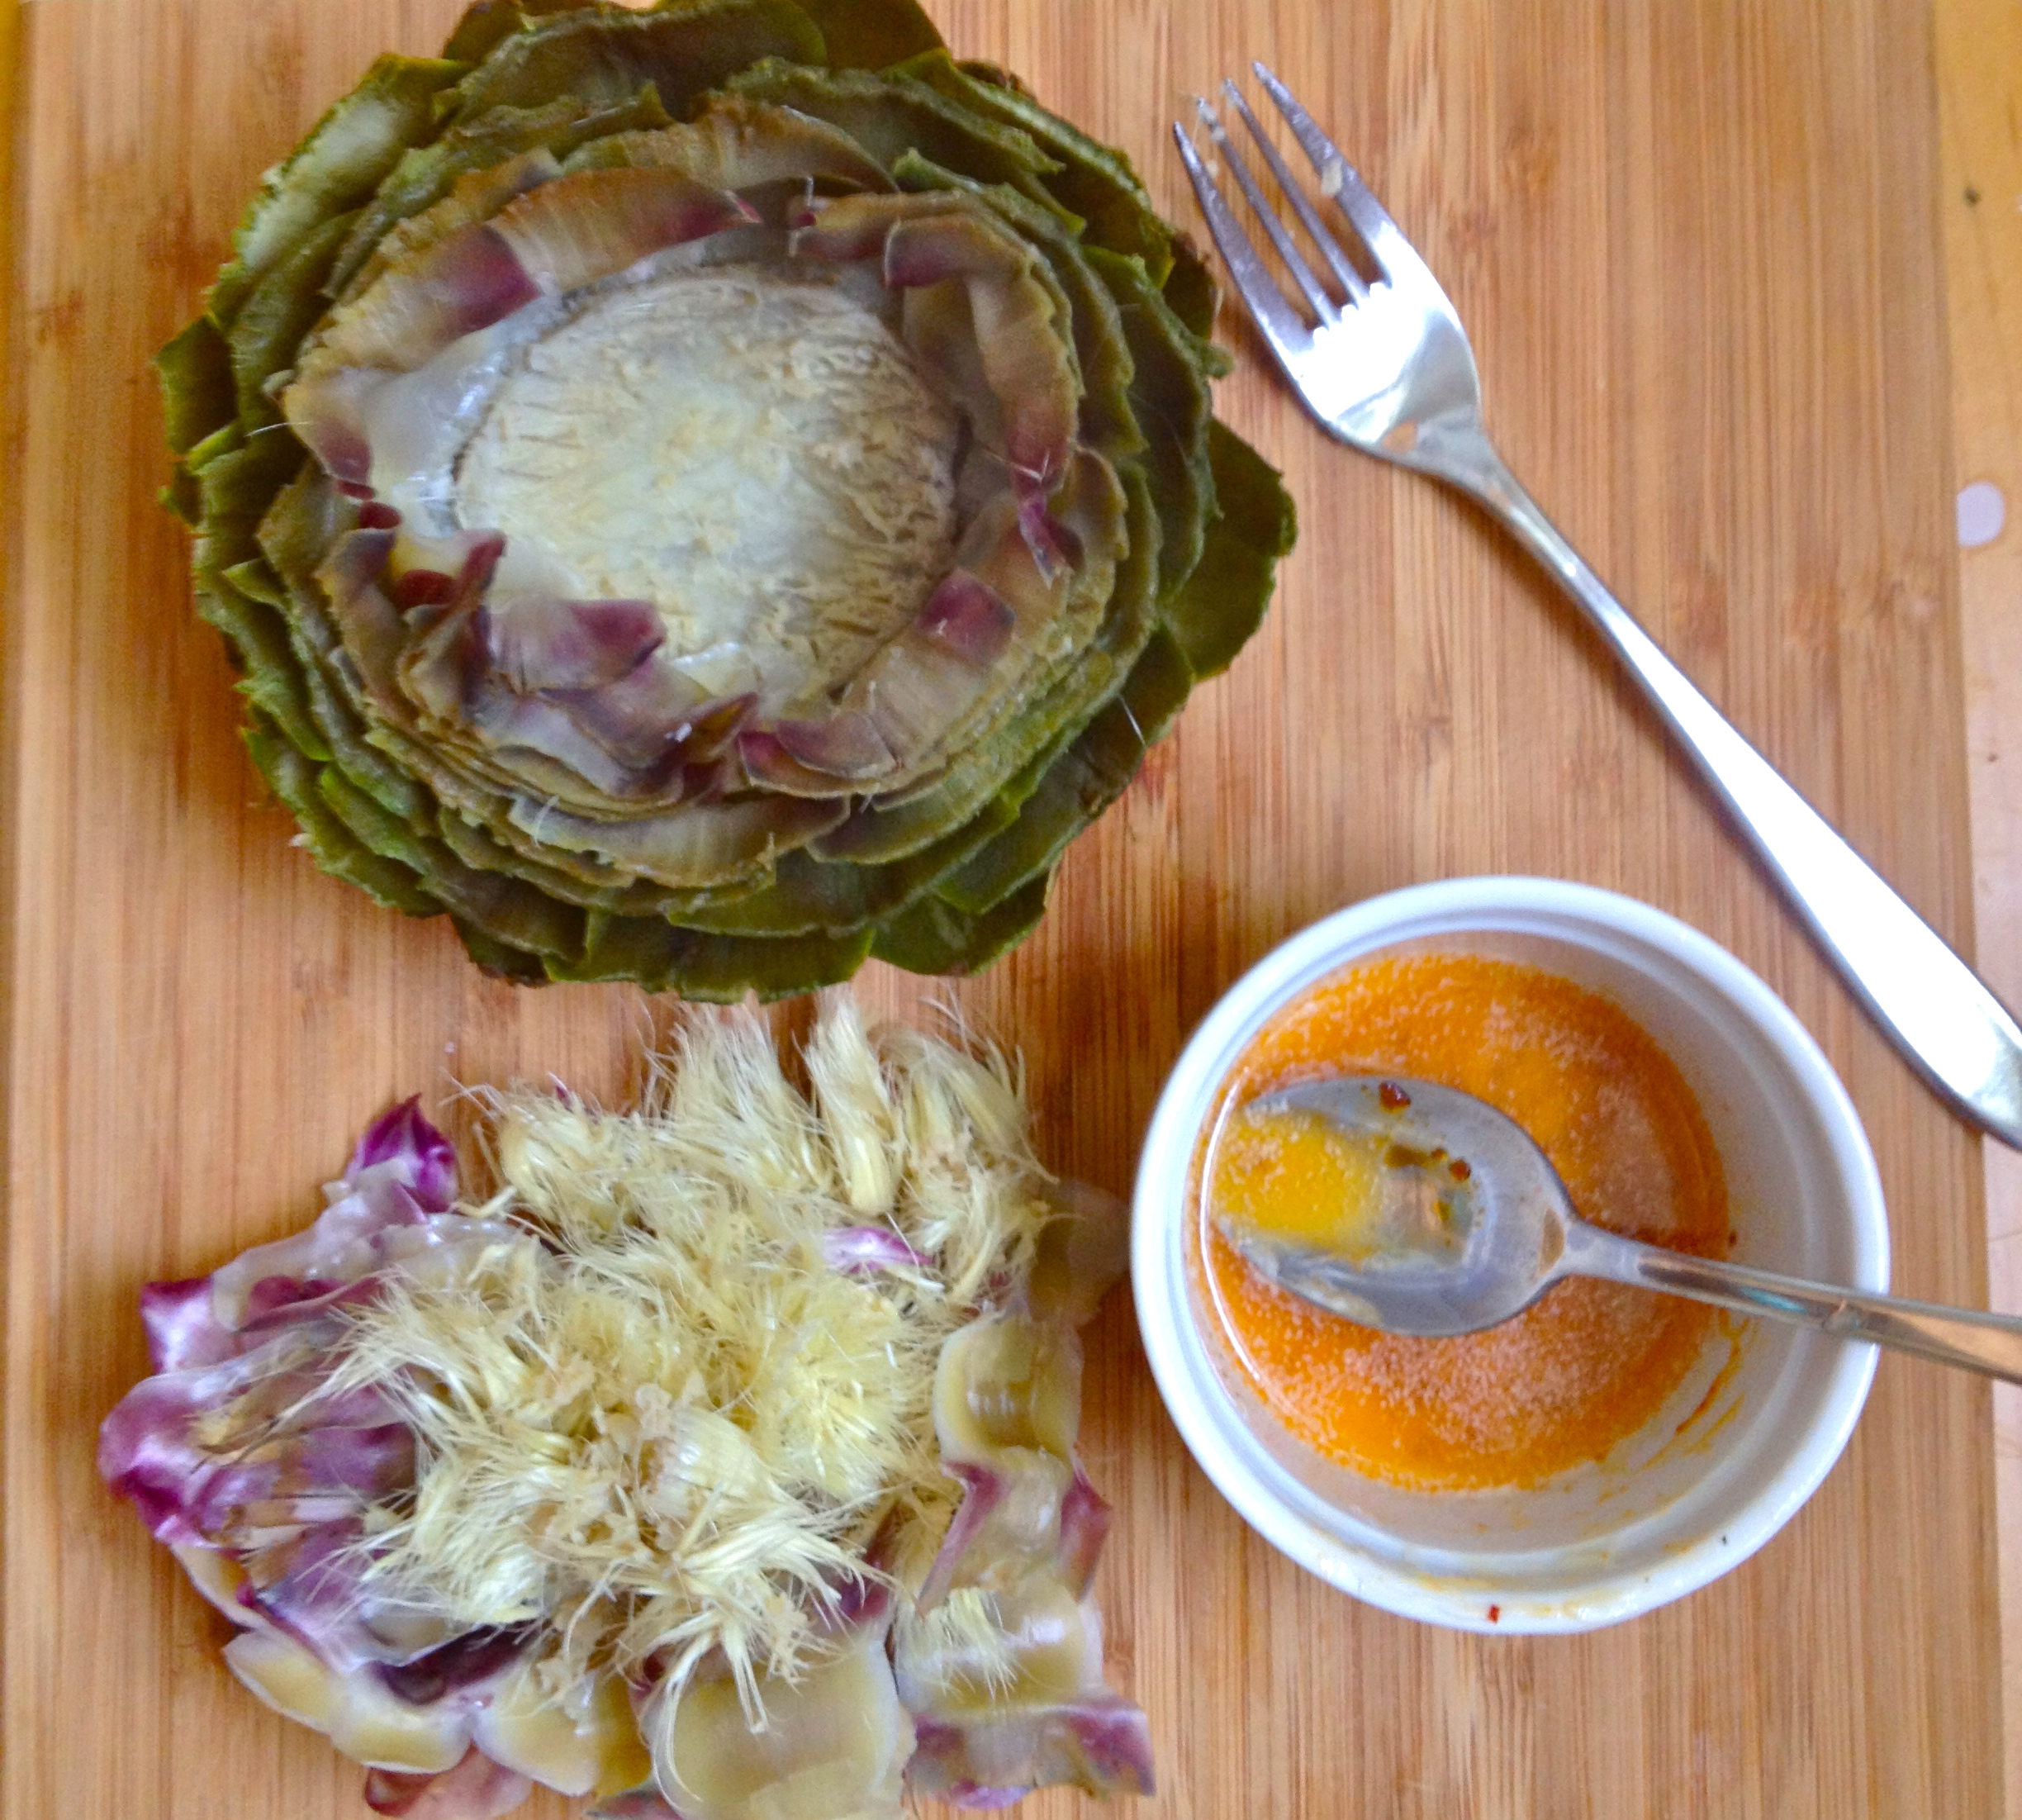
Despite its baggage, I am a huge fan of these guys, and today I share with you the best artichoke and dressing I have ever eaten. The dressing is a simple combo of melted butter and harissa, a red spiced paste that comes from Tunisia and is usually made from chilis and olive oil. It goes so well with artichokes, I can’t believe I didn’t think of this combo before now. Please please please make this simple recipe as soon as you can – it it magnificent.
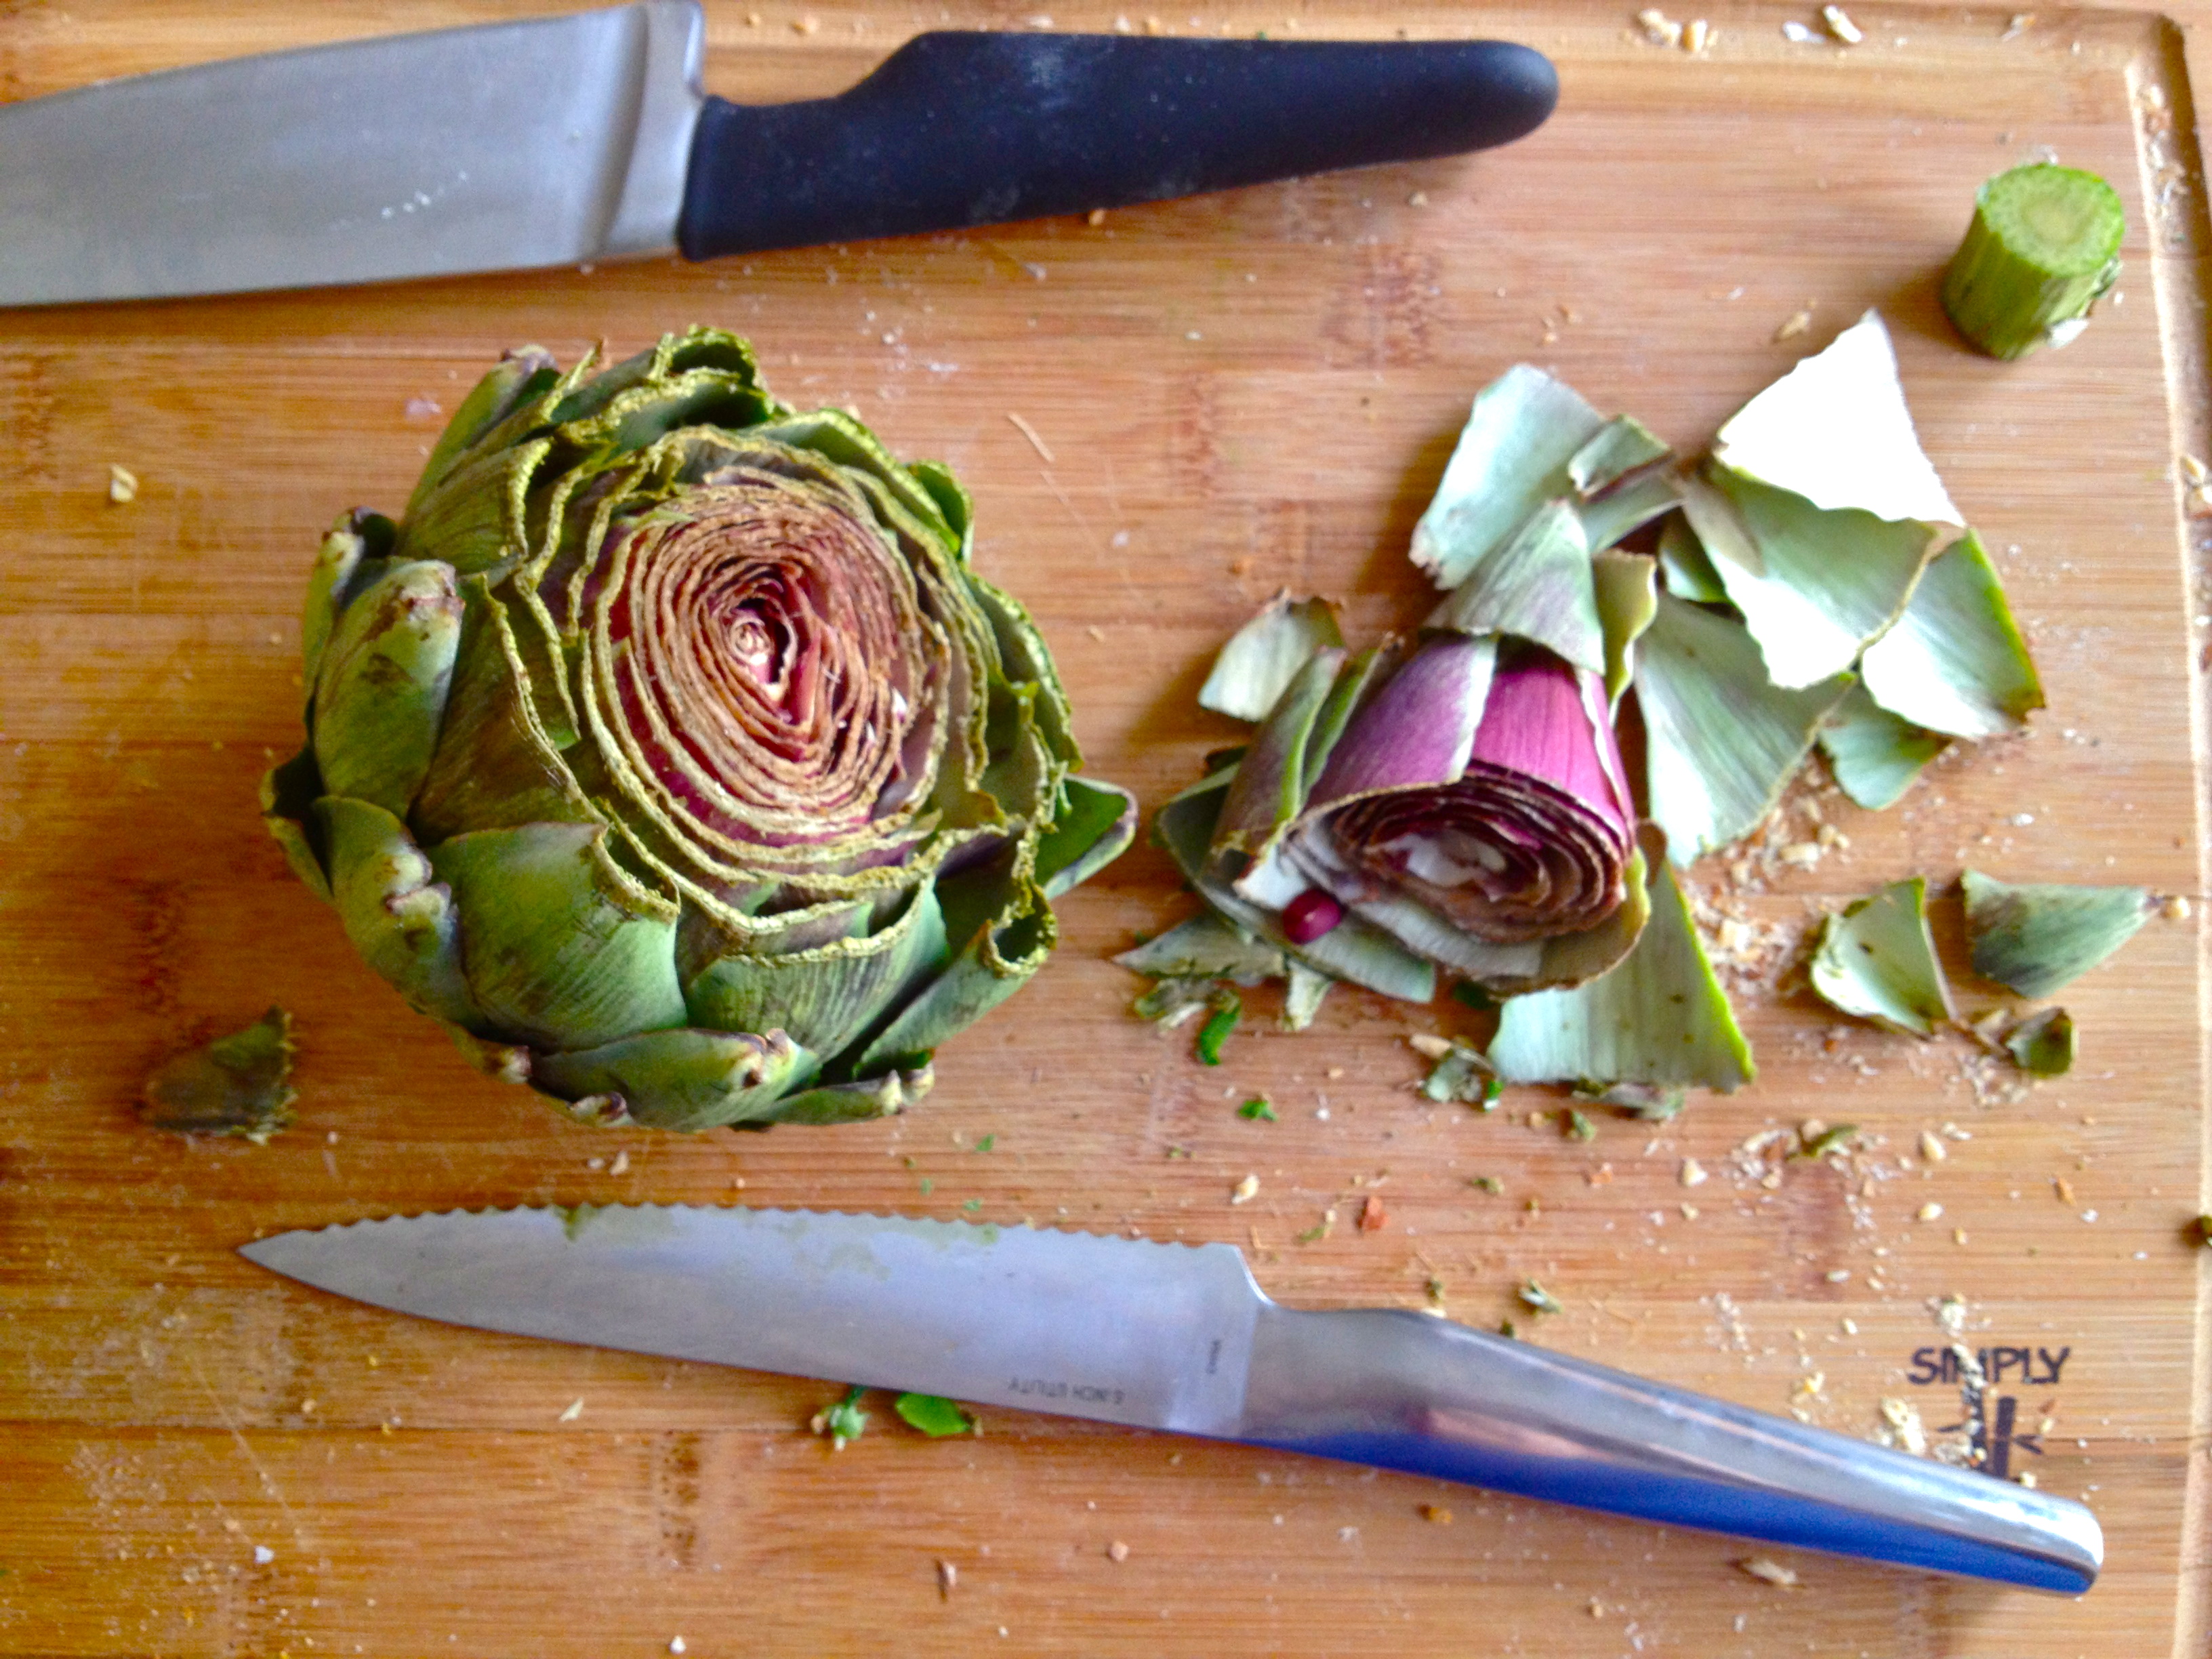
Fill a pot with 1 inch of water, toss in the bay leaf, and set it to boil. Meanwhile, prep the artichoke for steaming. Using a serrated knife, chop the stem most of the way, and cut through the middle of the artichoke so that you trim off the leaf points. Pull the small leaves off the base and discard.
When the water is boiling, put the artichoke in the pot, wide cute side down and stem up. Cover, turn down to a low boil, and cook 20-30 minutes. It’s done when you can easily pull off smaller leaves at the base near the stem. Remove the artichoke from the water and set is aside to cool down a bit.
To assemble the harissa butter, melt the butter and stir in the harissa.
When the artichoke has cooled enough to touch, take out the choke. Take your tongs and use them to find the middle section of the artichoke, where the purple-y leaves are. Use the tongs to pull this section out of the artichoke and expose the hairy choke in the center.
Then trade the tongs for a fork. To remove the hairy center, use the fork to gently loosen the hair from the heart. Pull it away and throw it out. Continue to gently loosen the hair and remove it until the heart is clean and exposed.
Put your artichoke on a plate and spoon about half of the butter over the center, over the heart. Use the rest for dipping the leaves; I like to dip each leaf and scrape the base for the “meat,” and then eat the heart last. These are so unbelievably good!!
And thank you, oh culinary pioneer of the past, who discovered the glory of artichokes and made this meal possible.
I went to college about 1000 miles away from home, and at times it was rough for a homebody like me! Home is comforting and safe and easy—and that’s part of the reason why I wanted to go far, far away. To stretch myself a bit, get uncomfortable, and try something a little bit scary.
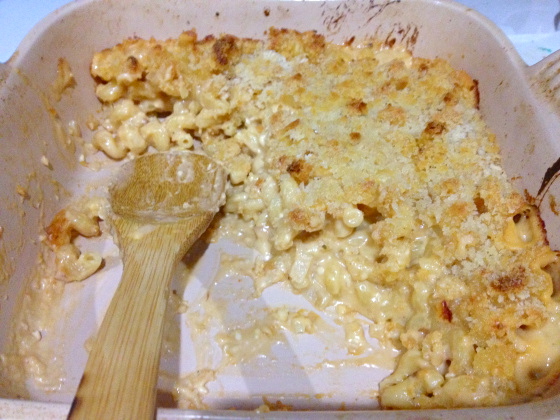
But not every experience needs to be new and unknown; sometimes safe and comfortable is just what the doctor ordered. And without any of my own family nearby, college-me found it especially thrilling to get to spend a weekend at the homes of some of my friends. It was so much fun to hang out with their families, pet their dogs, and see what it was like in the towns where they grew up. Visiting my beloved roommate Maura’s family was always a lot of fun for many reasons, not the least of which was the amazing FOOD! Maura’s mom and dad are awesome cooks and never failed to whip up something absolutely delicious whenever I came to visit; I have droolingly fond memories of her mom Gail’s key lime pie, and her mac ‘n’ cheese was always out of this world. I was overcome with a craving for it this past weekend, and they were nice enough to share the recipe with me. And, no surprise, it was the best mac ‘n’ cheese I’ve ever home-made myself. Check it out – this is the amazing Gail’s Baked Mac ‘n’ Cheese!
INGREDIENTS (this served 3 people 2 BIG helpings each, with leftovers)
1 lb (1 box) cavatappi or your favorite pasta
4 tbsp butter
olive oil
1 small onion, diced
3 tbsp flour
3 cups milk (approximately – you’re just going for the right sauce consistency, so eyeball it a bit)
1 cup Gruyere cheese, shredded
1 1/2 cups cheddar cheese, shredded
nutmeg, salt, and pepper to taste
1 tbsp or more Sriracha or other hot sauce
3/4 tsp Dijon mustard
panko bread crumbs
Cook the pasta in boiling salted water until slightly underdone. Reserve 1 cup of the pasta cooking water (it’s nice and starchy and is great to have on hand to add to the sauce later), and then drain the pasta and set it aside. It will finish cooking in the oven later.
Heat butter and a drizzle of olive oil over medium high, and add the onions. Cook until softened and translucent.
Add the flour and stir as it forms a paste. Let it cook for about 2 minutes, stirring the whole time.
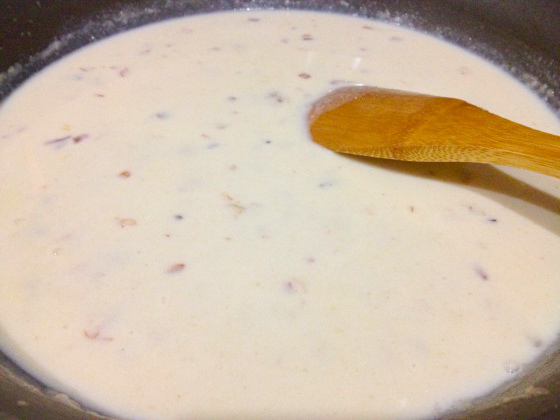
Then grab your whisk and slowly pour in 1 cup milk, whisking vigorously to avoid creating any lumps. Once this first addition of milk is incorporated, whisk in the rest of the milk. once all the milk is incorporated, you can trade in your whisk for a spoon if you like, and keep stirring as the sauce thickens.
Once the sauce has thickened and coats the spoon thickly, stir in the cheese.
Add the nutmeg, salt, pepper, Sriracha, and Dijon mustard at this point, tasting and adjusting to get the flavor you want. I ended up adding a lot more Sriracha than I initially planned. It’s just so good in here.
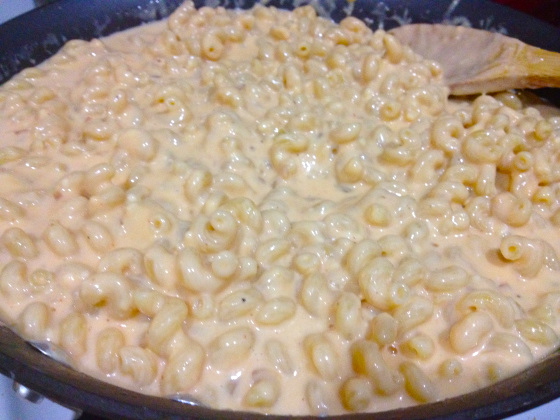
By this time, the sauce had thickened a little more than I wanted it to. To get it back to that gooey creamy sauciness, I added a bit of the pasta water that I had set aside earlier. When the sauce consistency is to your liking, stir in the pasta and coat it completely in beautiful cheesy goodness.
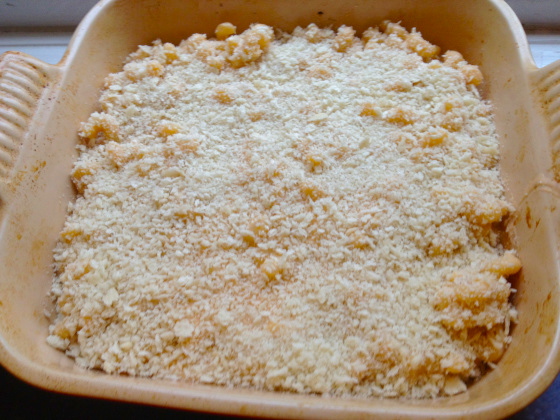
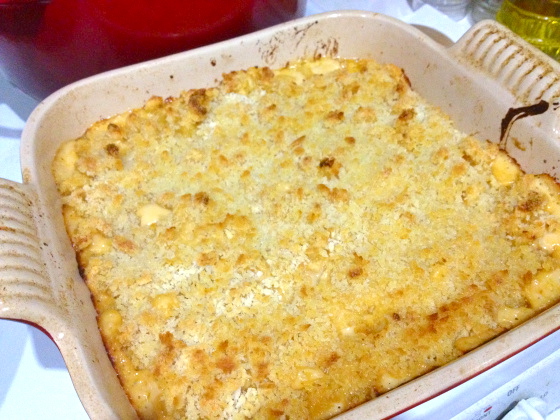
Pour the whole thing into a greased baking dish and spread it out evenly. Top with bread crumbs and drizzle with a bit of olive oil.
Bake for 20-30 minutes, or until the sides are bubbling and the topping is browned and crunchy.
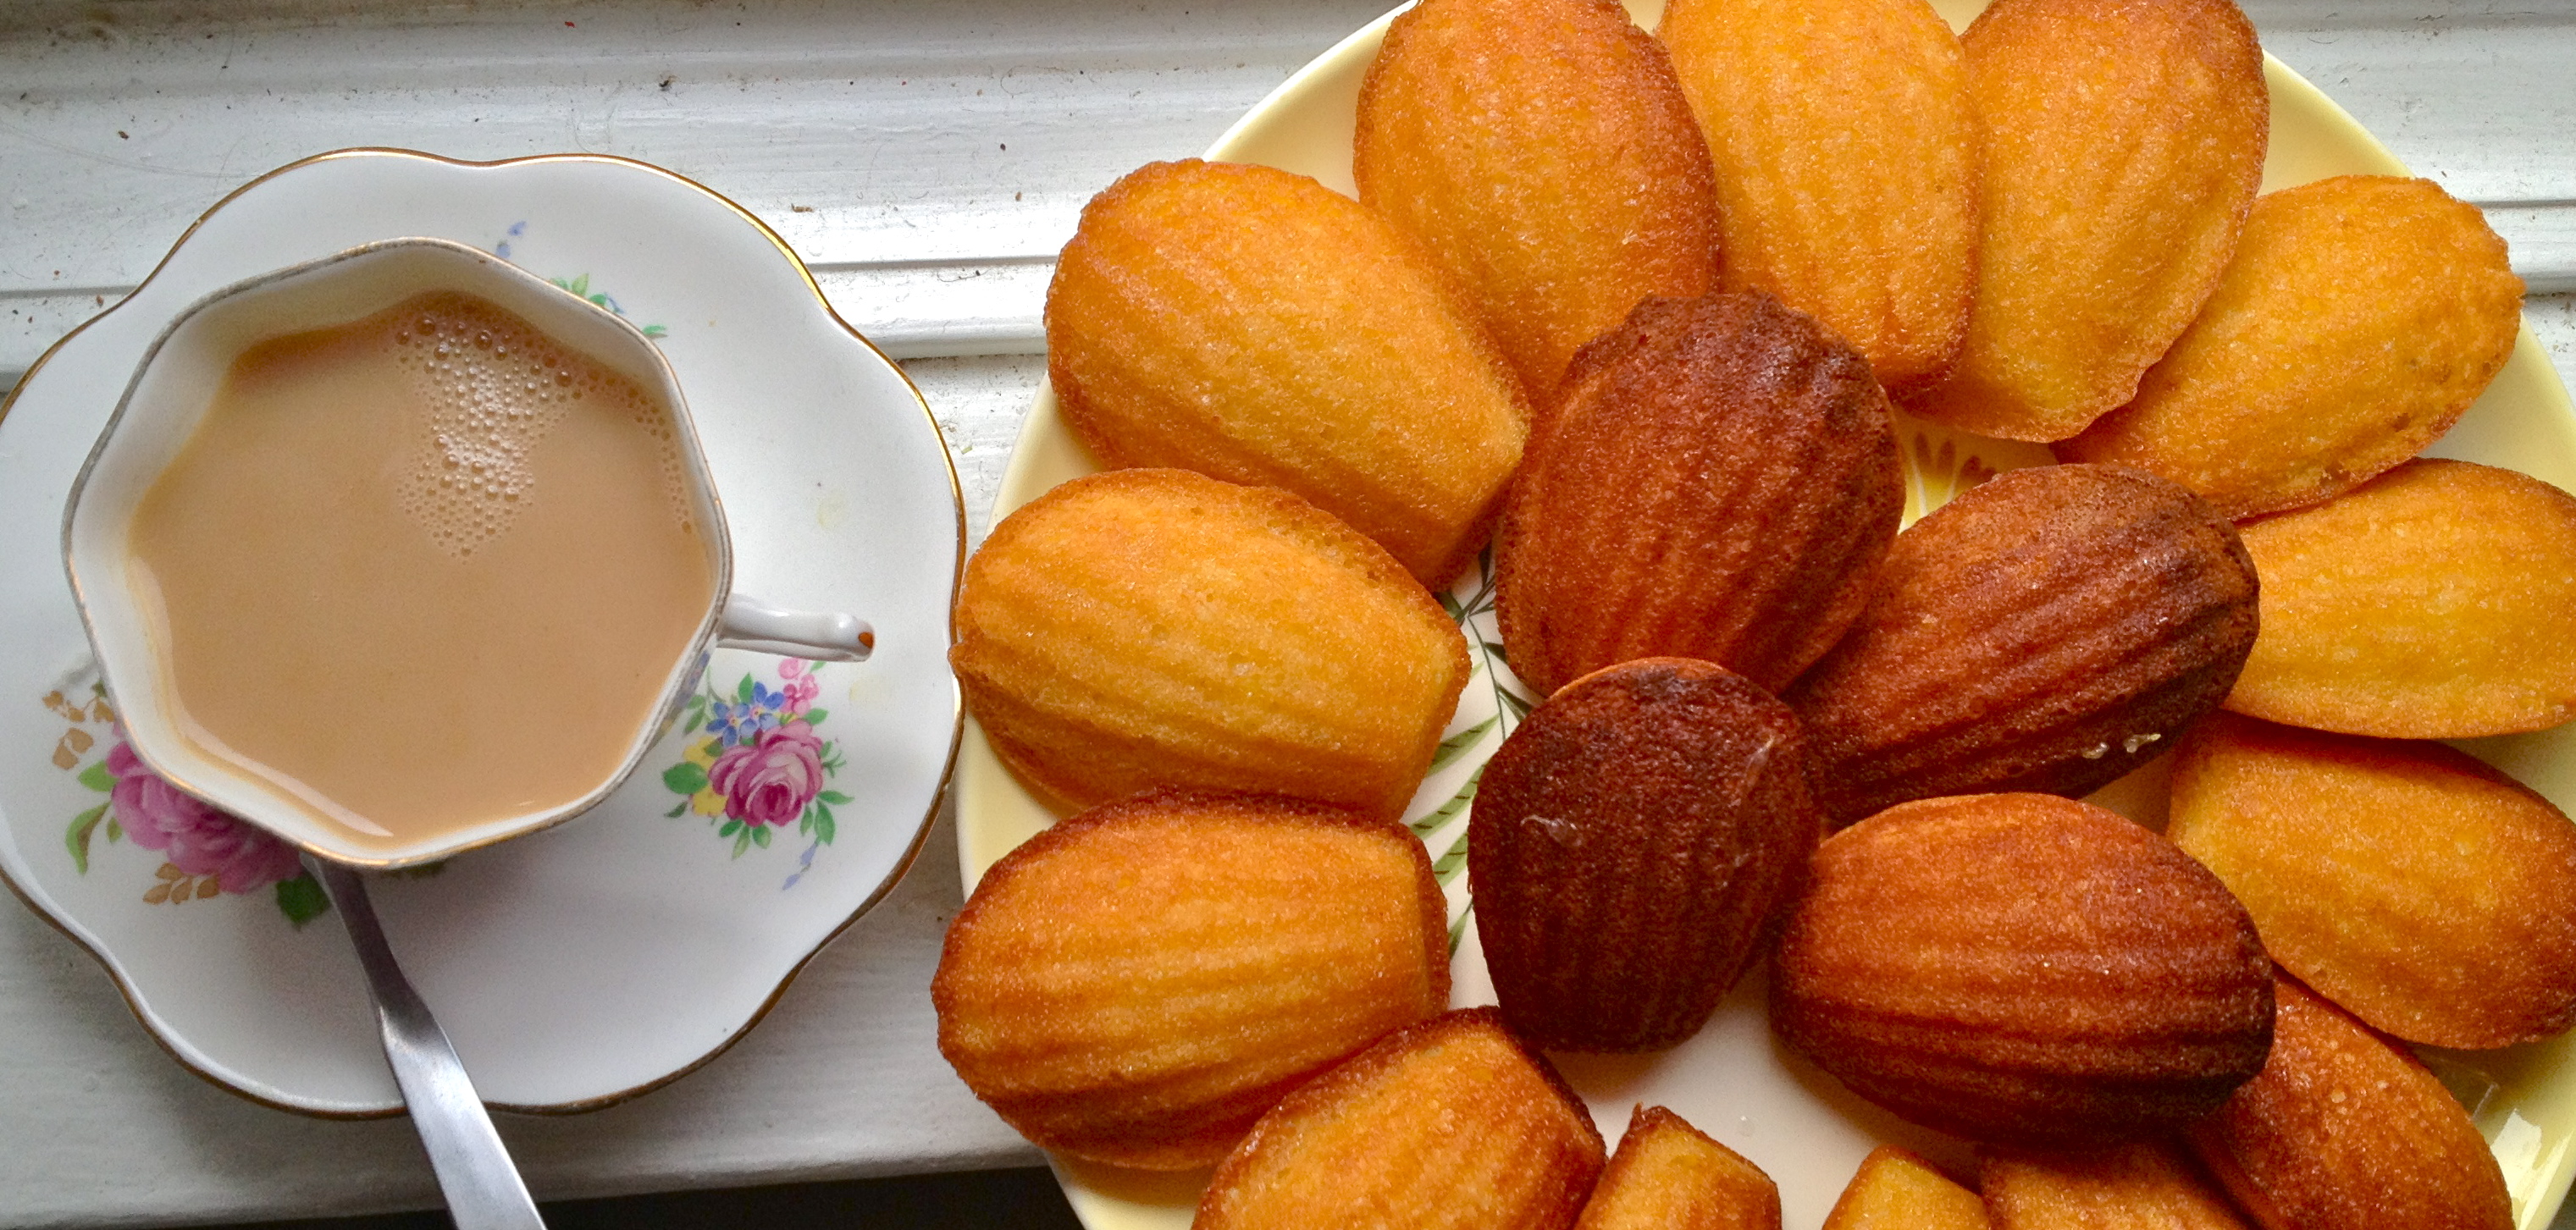
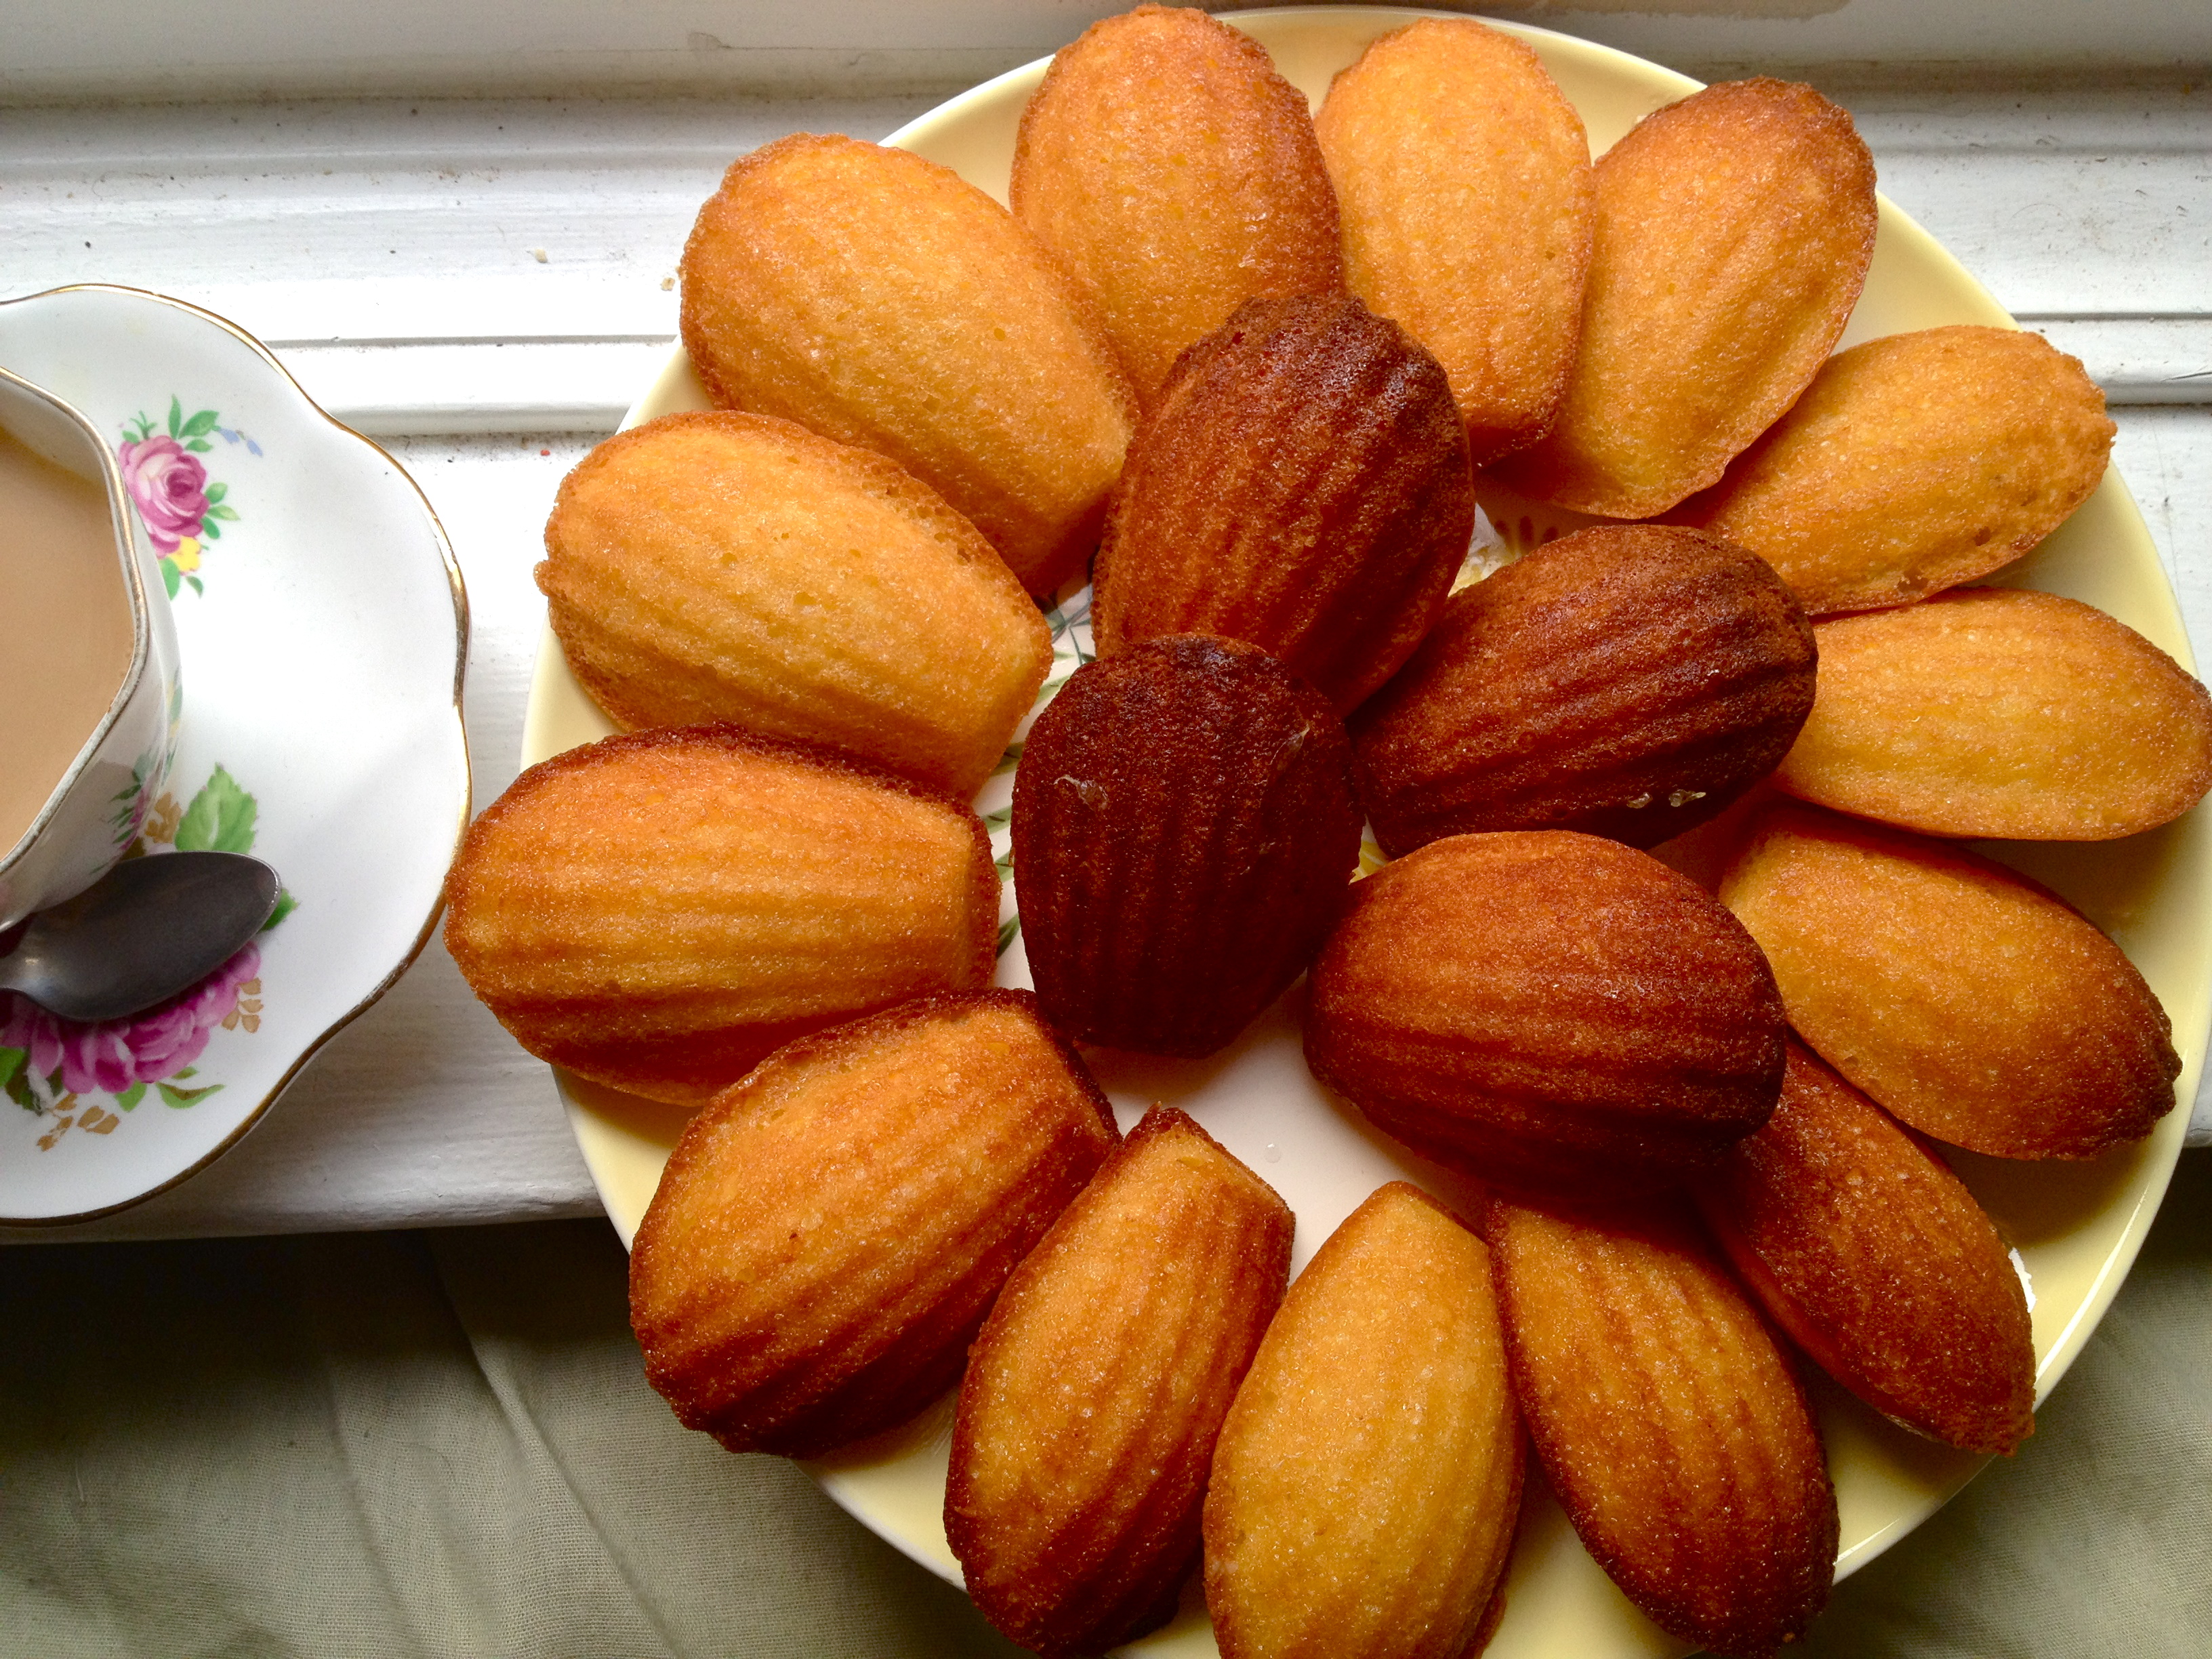
I’ve been looking for the perfect homemade madeleine. I think this is it. I would say that this recipe is “adapted from David Lebovitz,” but I realized that I really didn’t change much of anything! His recipe is perfect just the way it is (if you’ve never been to his website, please check it out – he usually inspires me either to cook something beautiful or to speed along my plan-making for another trip to Paris).
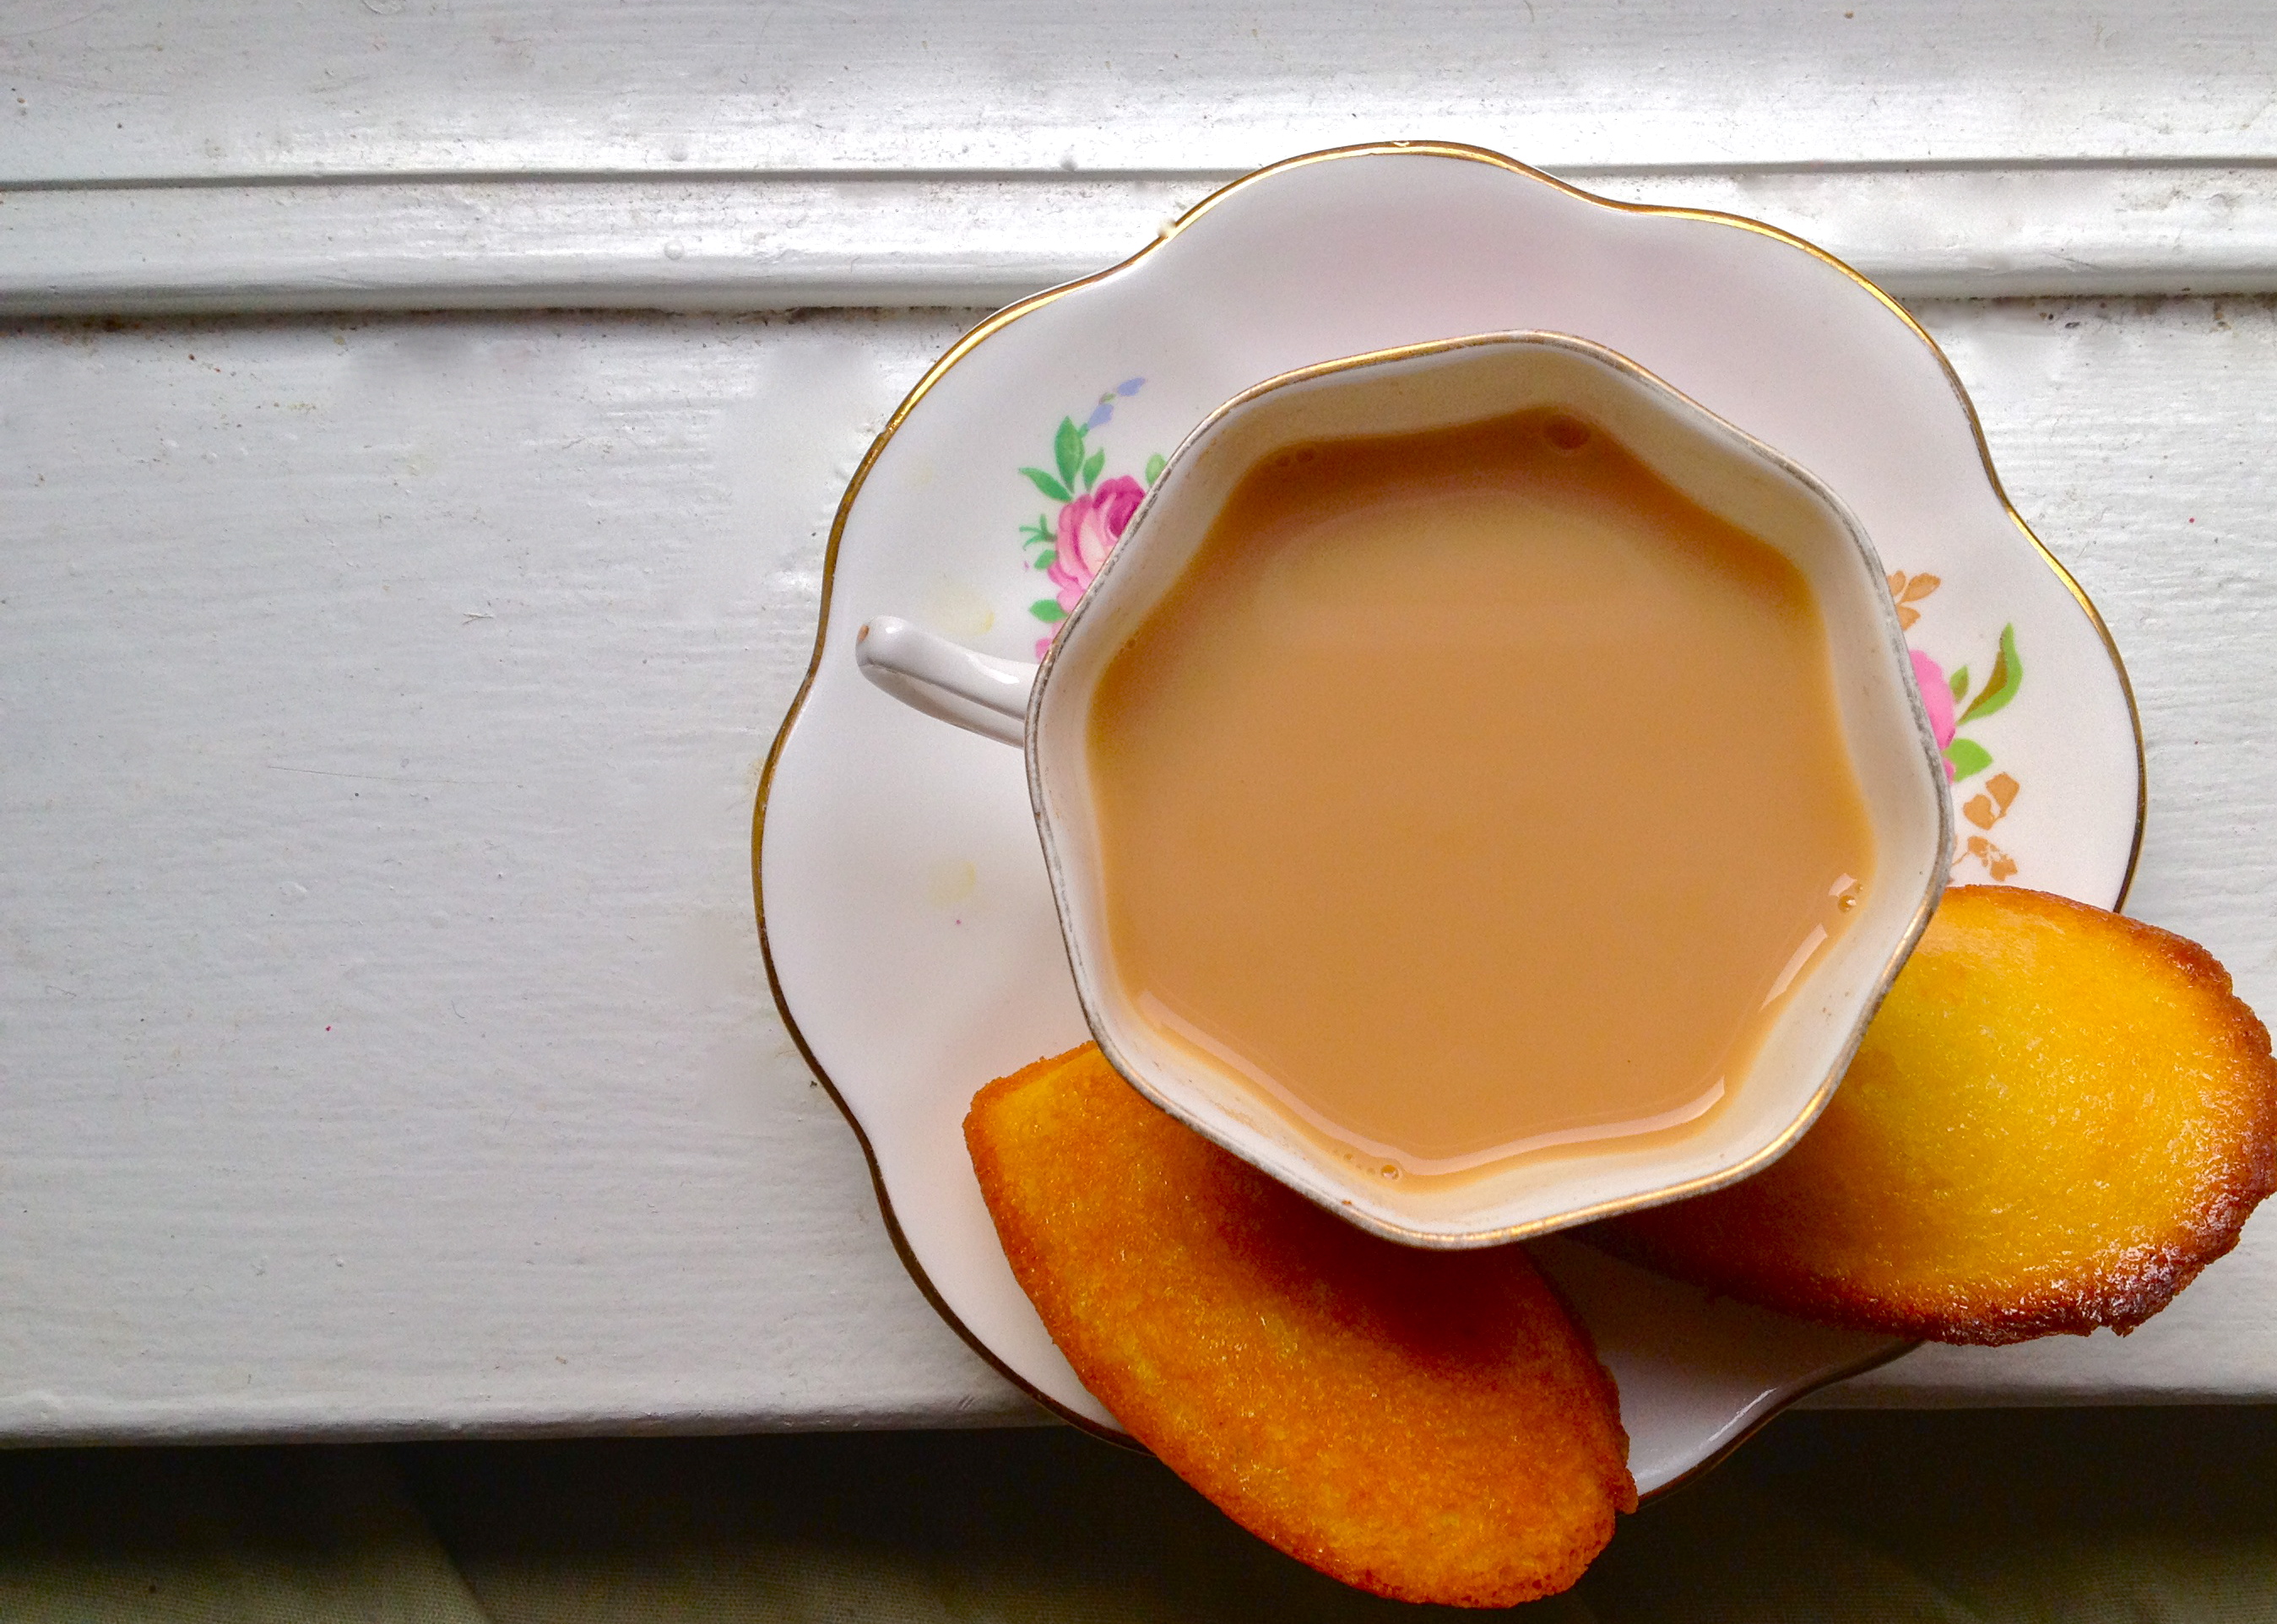
I love these lemon madeleines anytime. My roommate can attest that for some inexplicable reason I even made them during the Super Bowl this year–not BEFORE the Super Bowl, but actually DURING THE GAME. I have no excuse or explanation for that. And while they’re fine with football, they’re especially well-paired with tea. Lemon madeleines are actually one of the only things in this world for which I will actually delay drinking my daily pot of tea in order to whip up a quick batch.
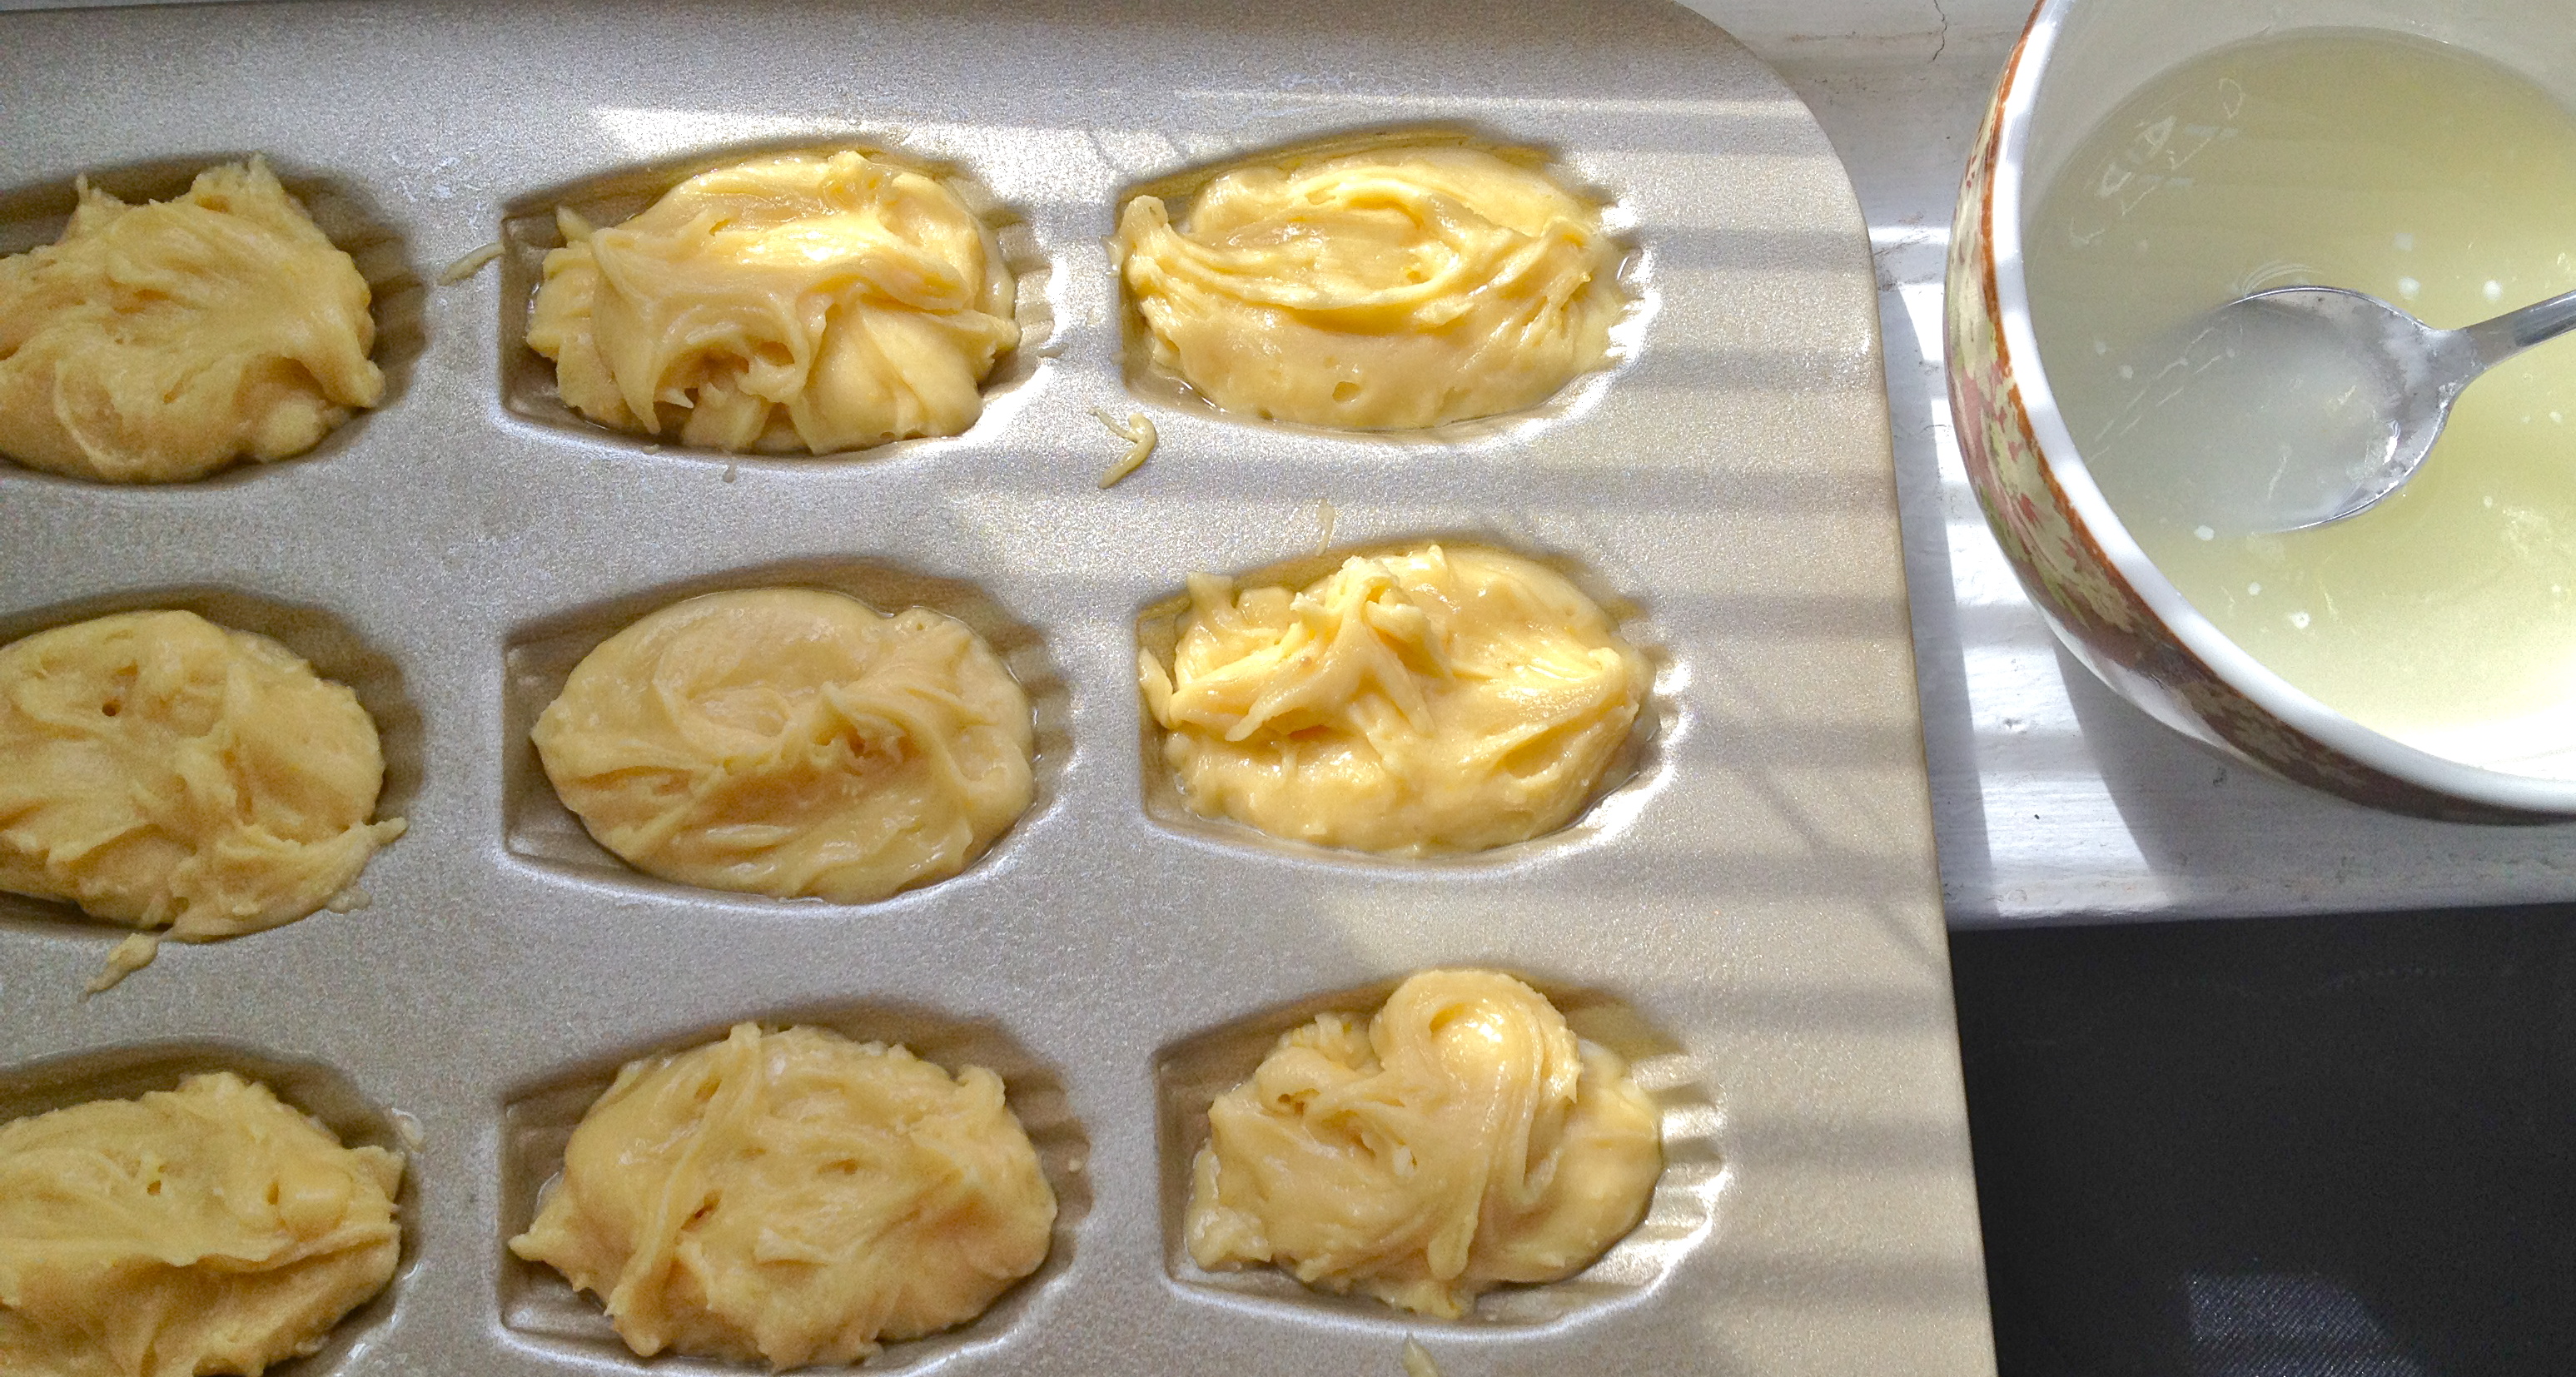
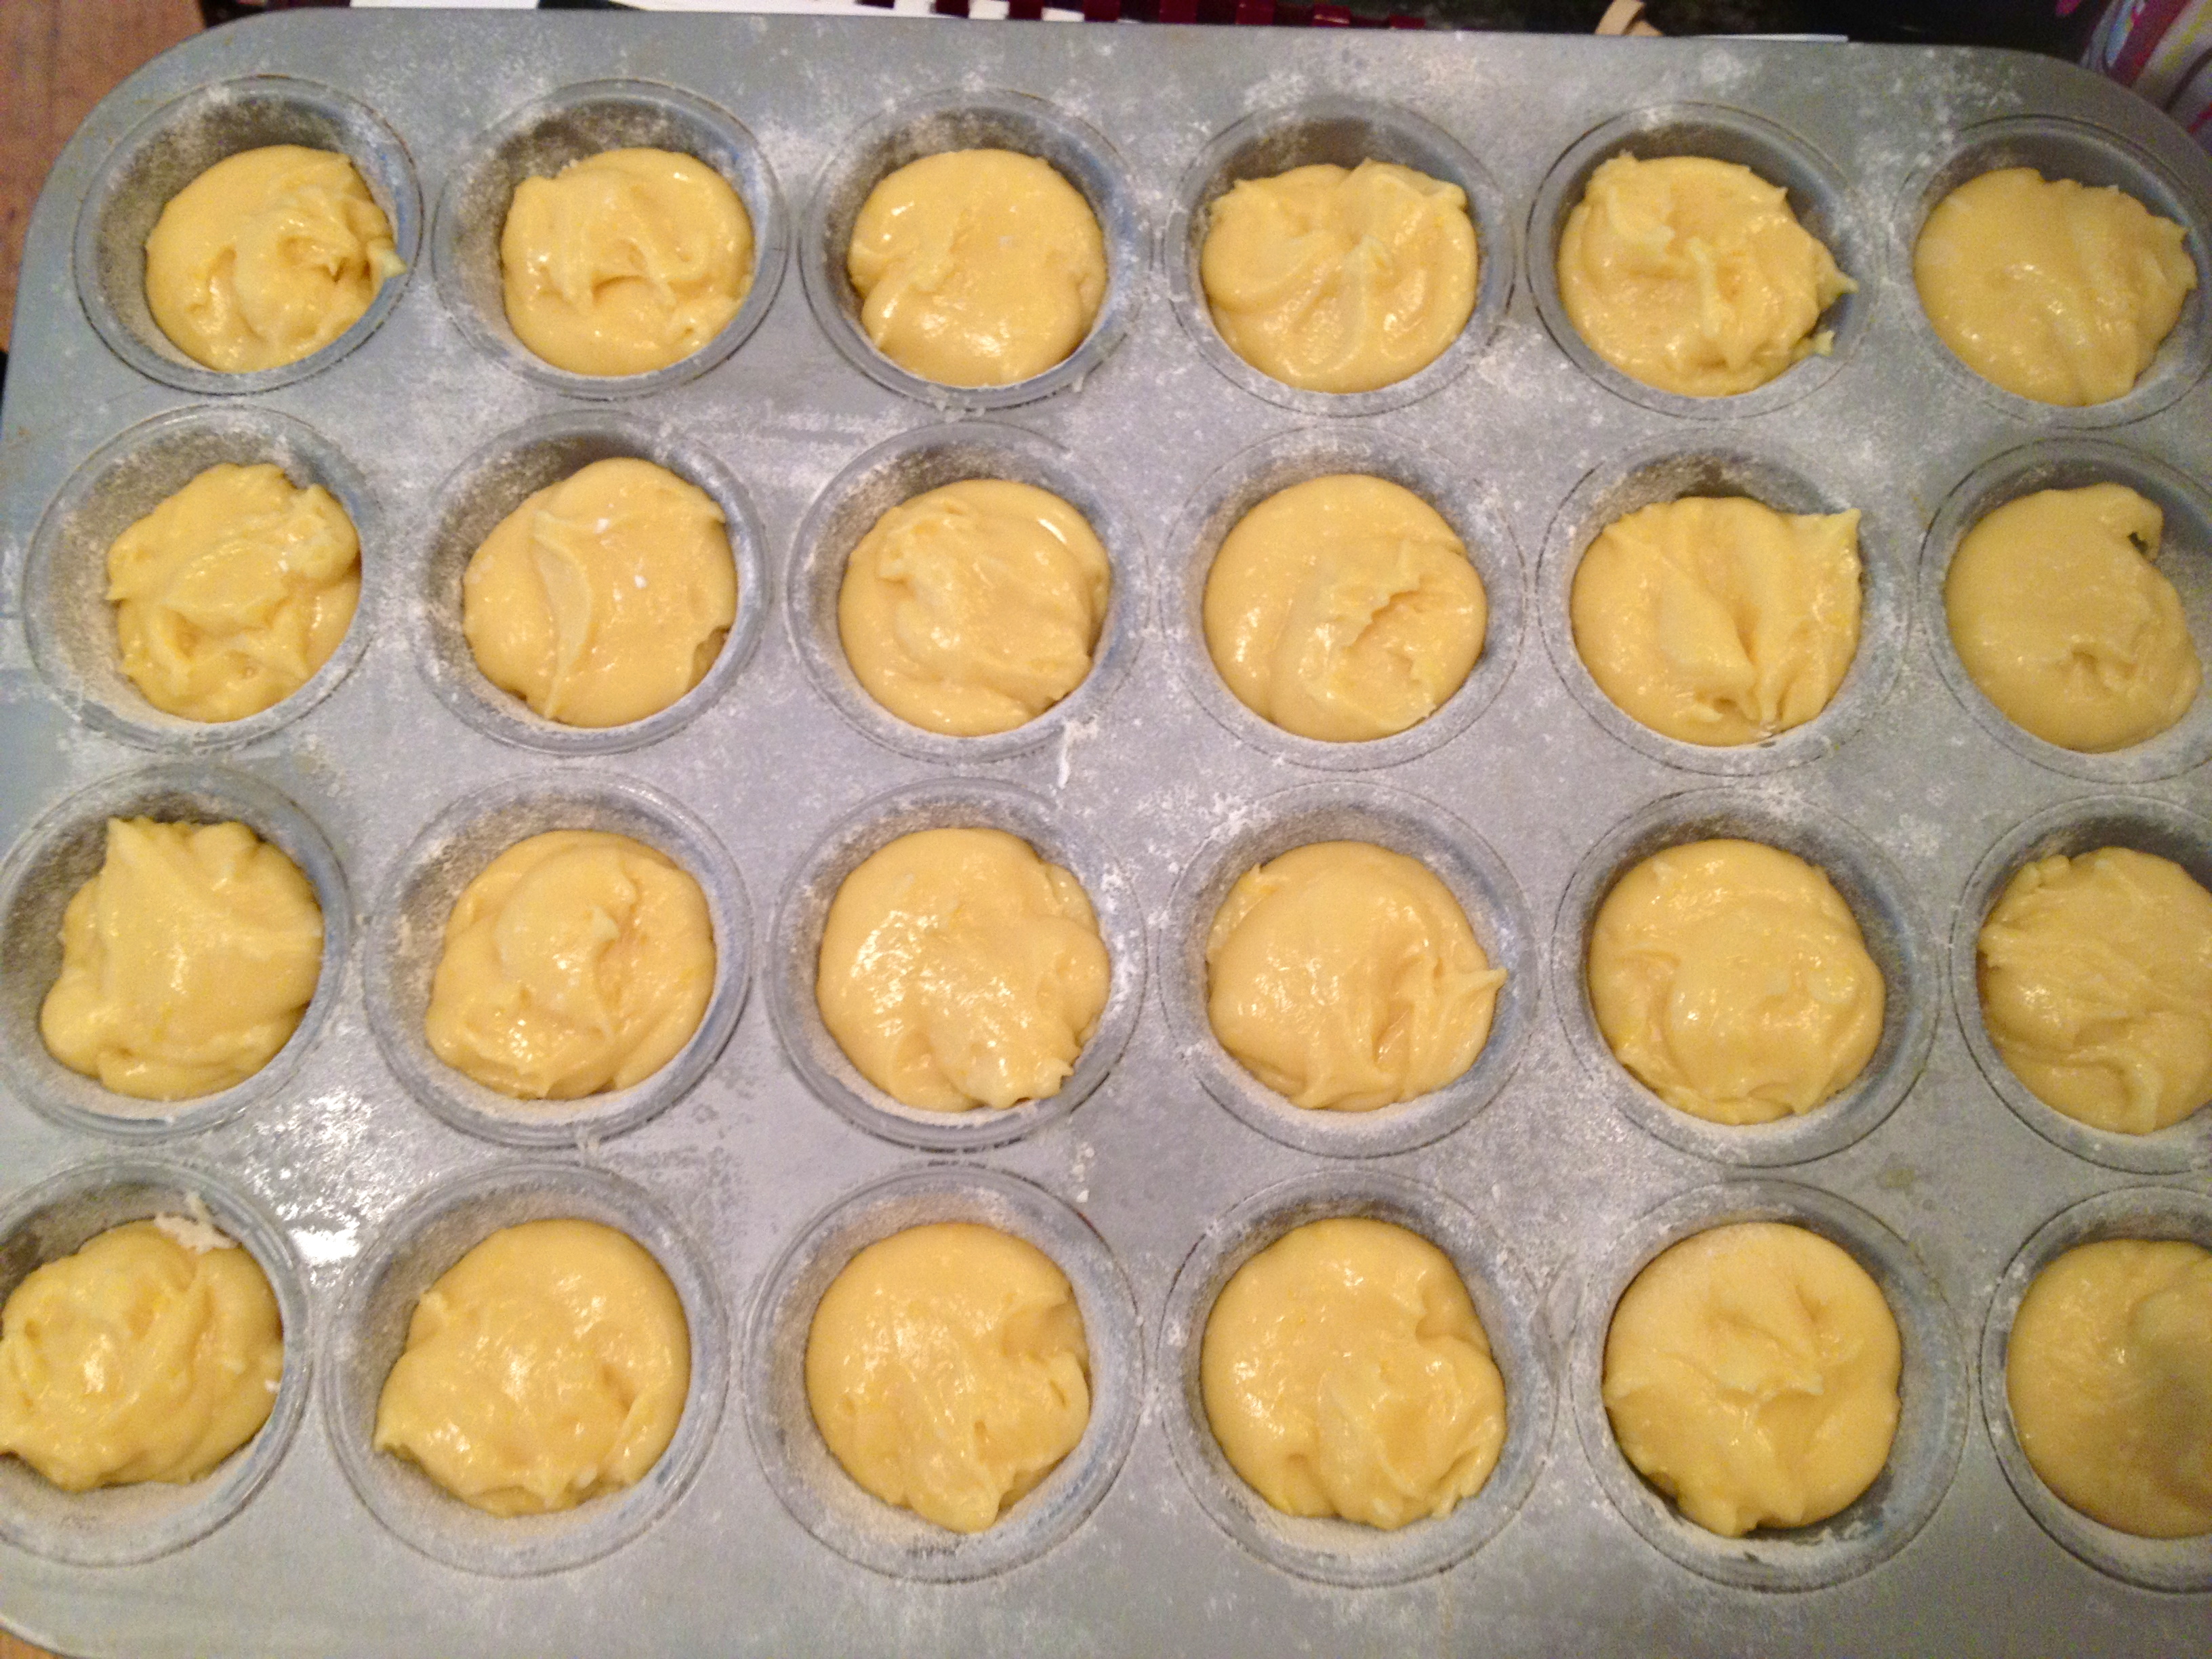
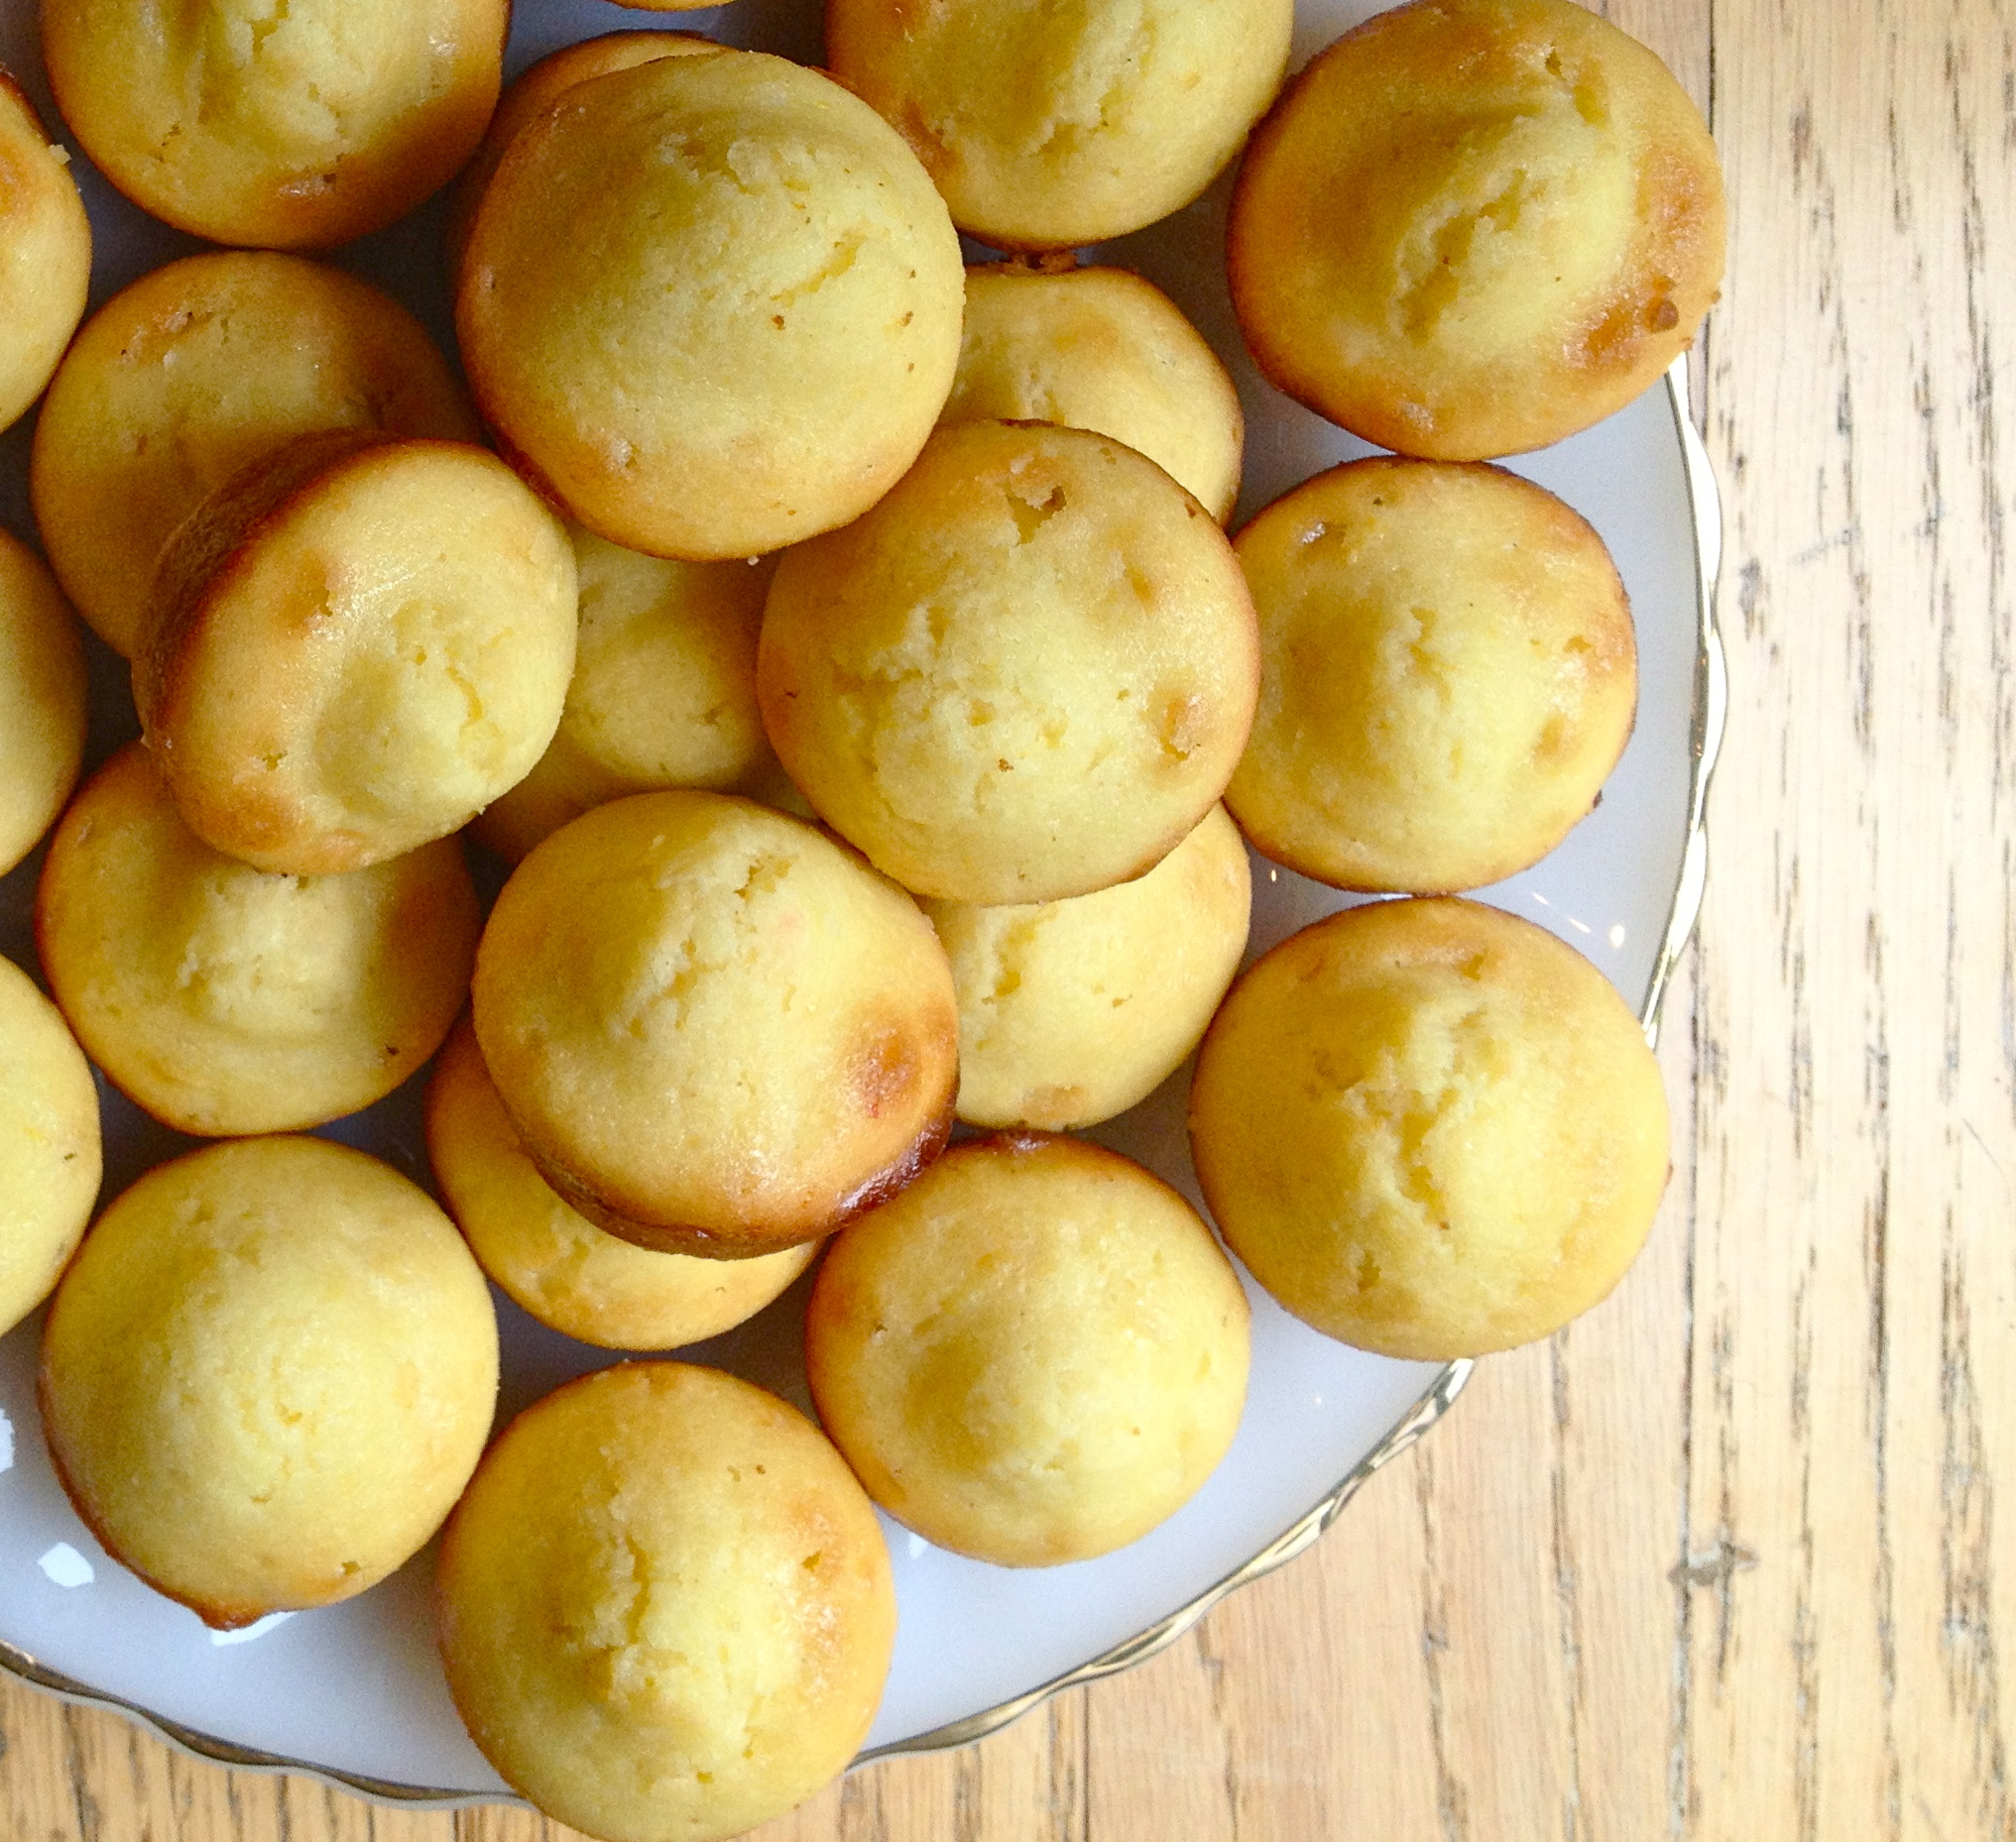
To give these adorable little cookie-cakes their distinctive shell shape, you need a special pan, called a madeleine pan (go figure). The pan gives them their scalloped bottom and humped and fluffy top. I’m quite happy with my madeleine pan, so if you ask me, it’s worth the investment for this little lemony French treat. However, if you want to try these but don’t have a madeleine pan of your own, just follow the directions exactly as written but use a mini muffin pan instead.
INGREDIENTS
3 eggs, room temperature
2/3 cup sugar
2 healthy pinches of salt
1 1/4 cups flour
1 tsp baking powder (optional – it helps them rise when baking, and I haven’t decided my opinion on it yet.)
zest of one medium lemon
9 tbsp butter, melted and cooled to room temperature
1 tbsp lemon juice
3/4 cup powdered sugar
up to 2 tbsp water
First, grease your madeleine pan and put it in the freezer. This will make sure the madeleines hump up when they’re in the oven.
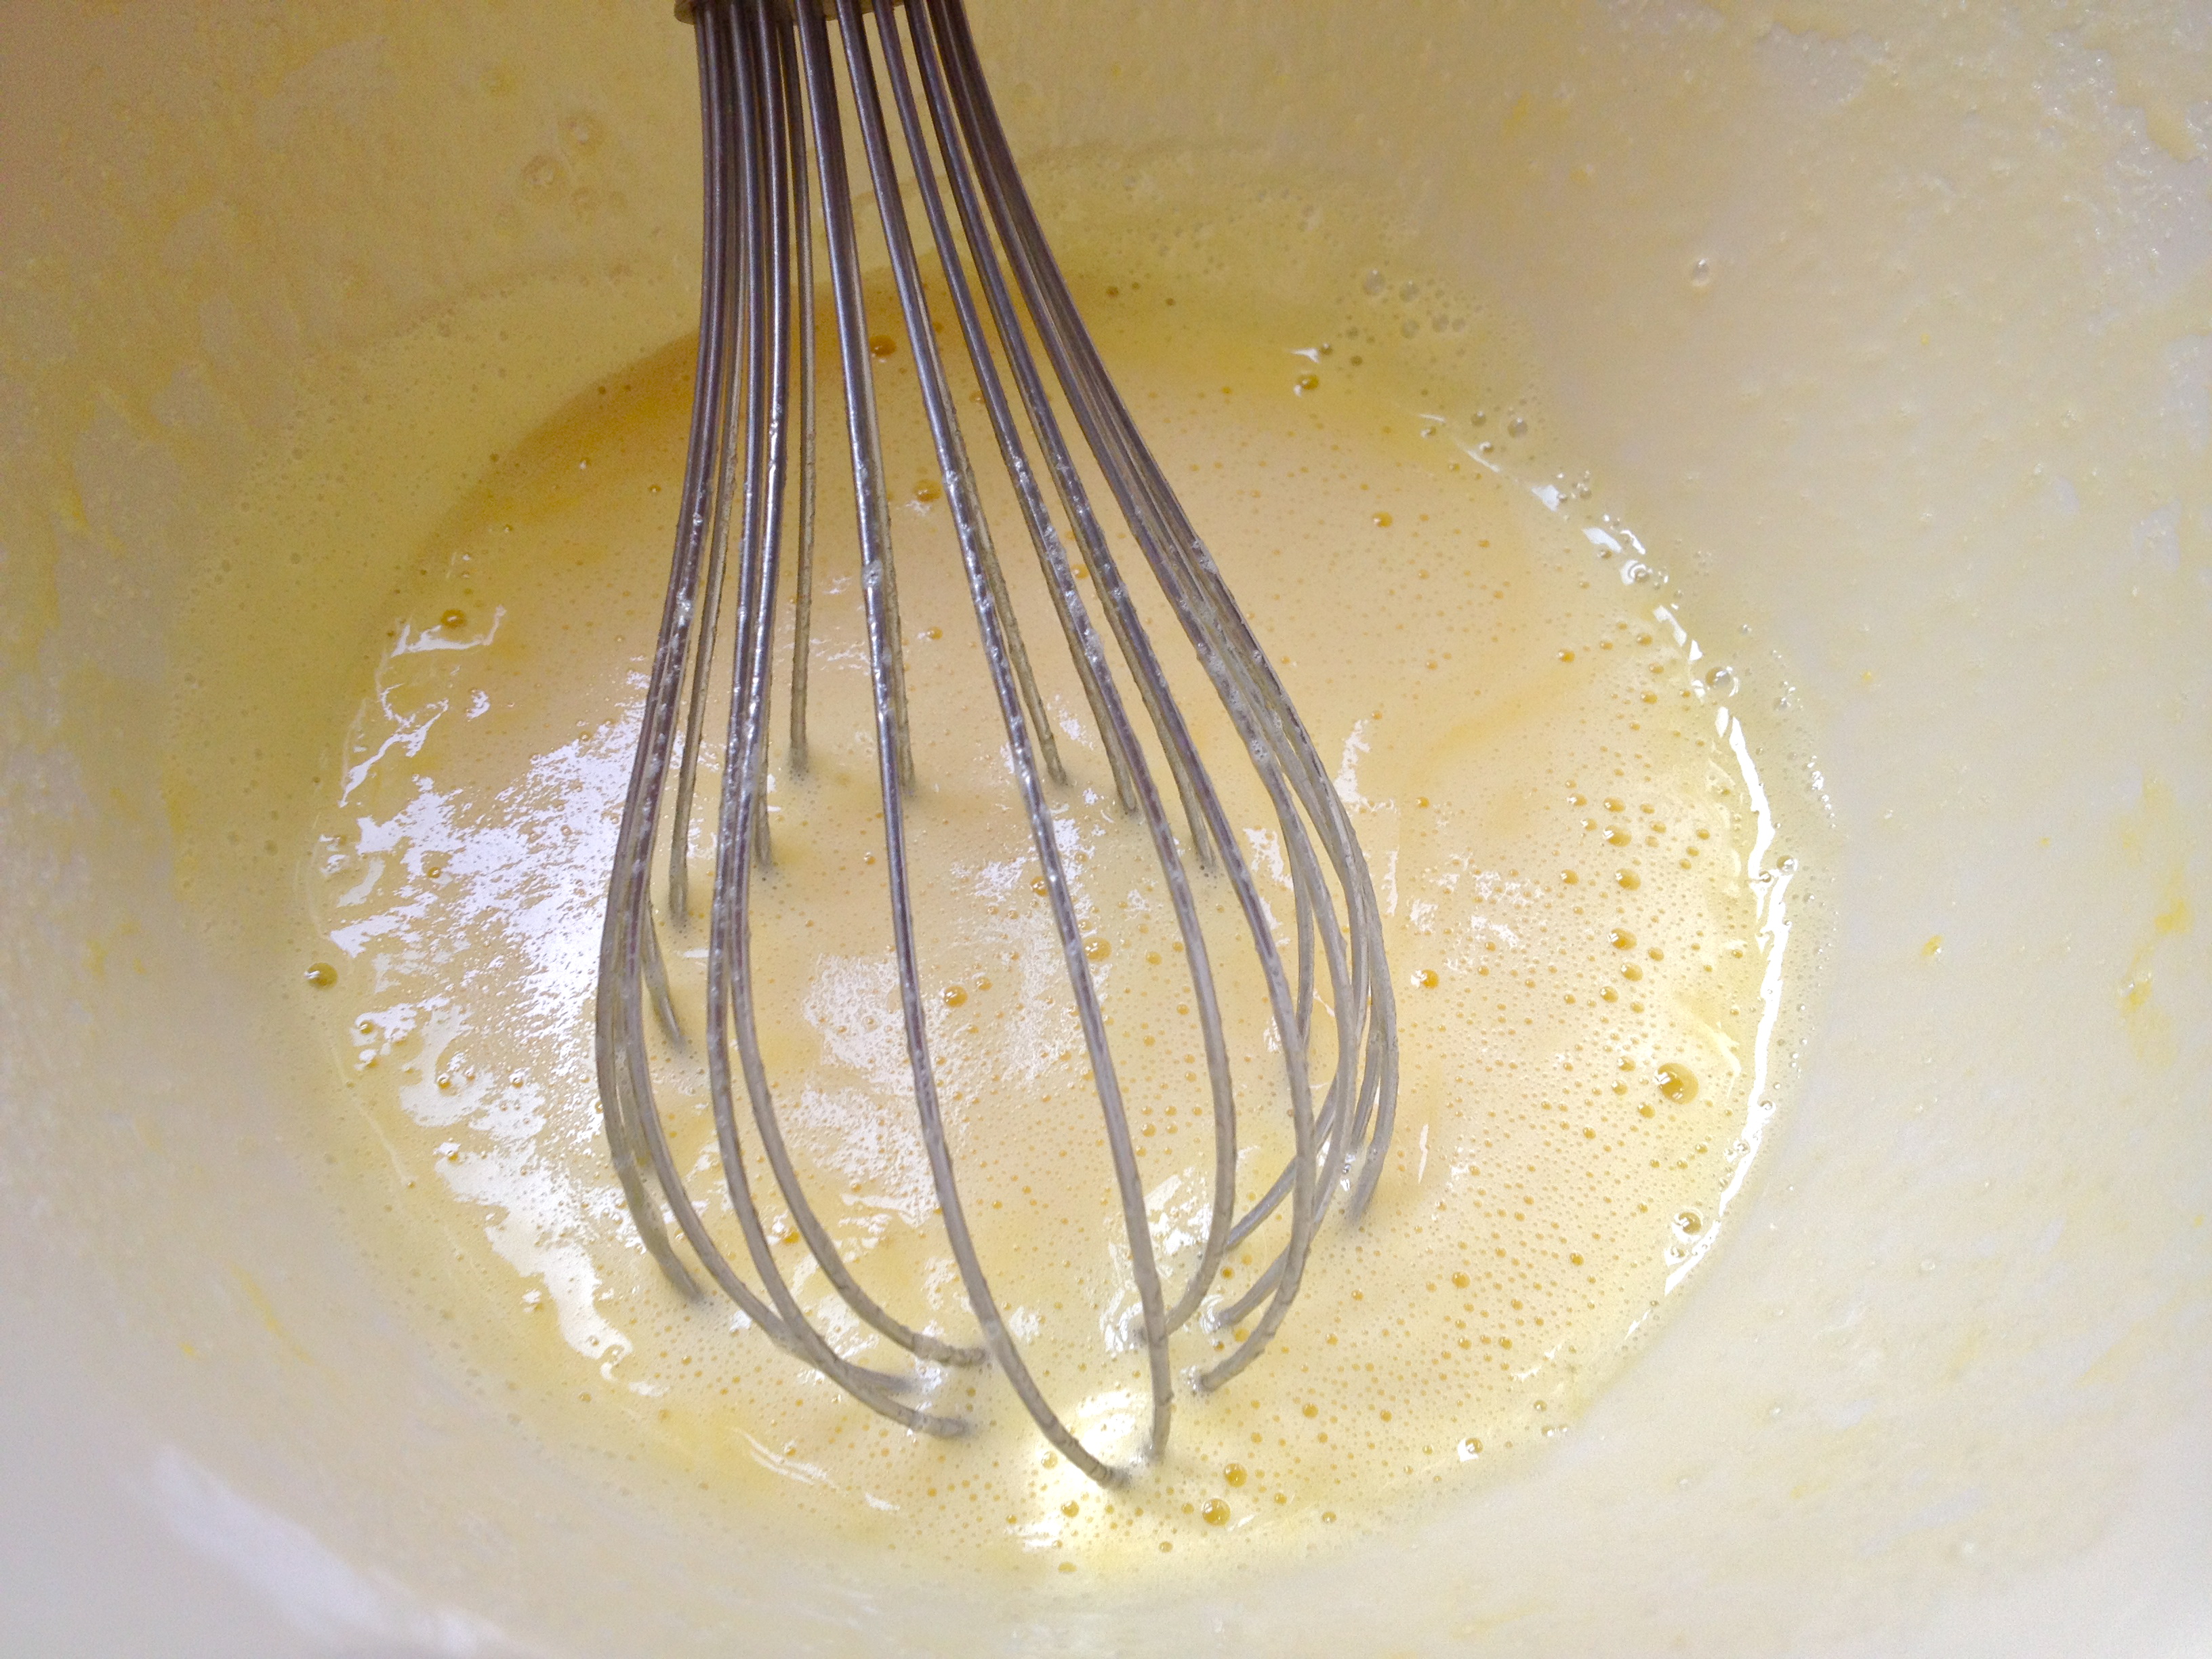
Add eggs, sugar, and salt to a bowl. Whisk like crazy until frothy and thickened.
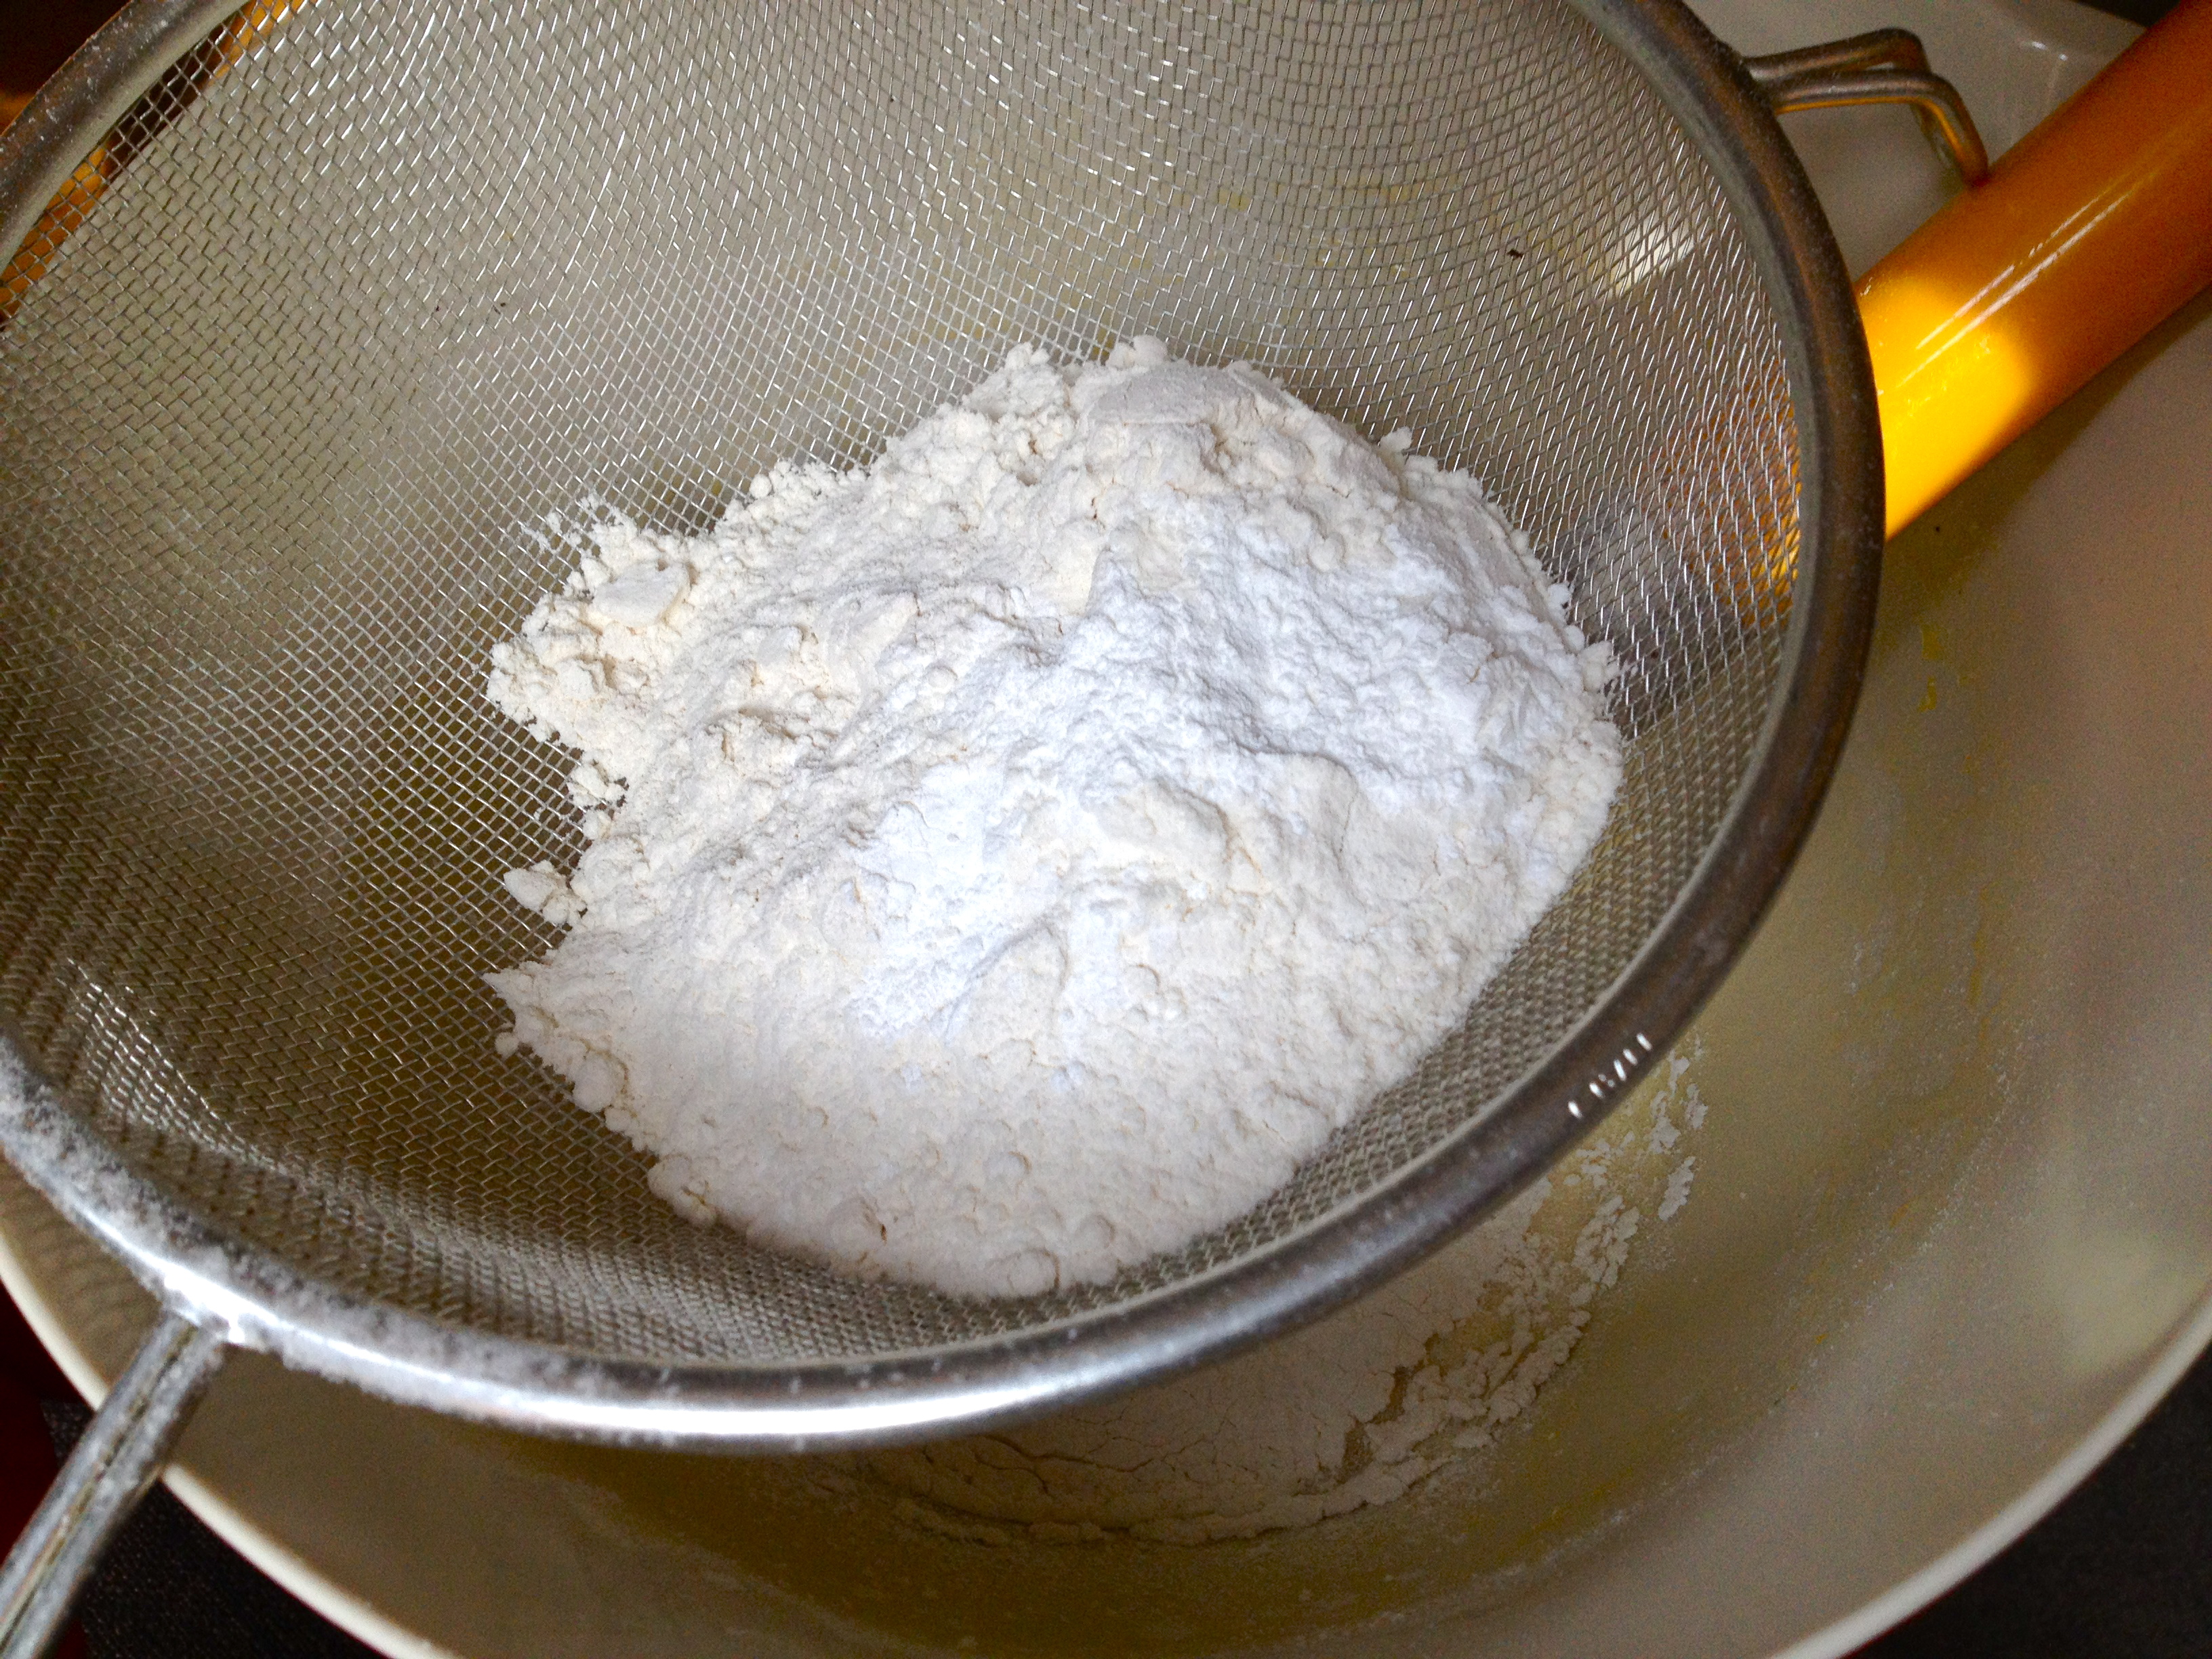
Sift in the flour and baking powder and fold into the egg mixture.
Gently stir the lemon zest into the butter and pour into the flour and egg batter, stirring until just combined. Pop the batter into the refrigerator for about 15 minutes.
As the batter chills, preheat the oven to 425 F.
Once the batter is slightly chilled, use a spoon to scoop into the cold madeleine pan. Don’t fill the scalloped cups up all the way to the rim, as the cakes will rise quite a bit.
The same goes if you’re using a mini muffin pan – give them a little room to grow.
Pop them in the oven for 8-9 minutes, until the tops are set and the bottoms are lightly browned. While they’re baking, mix the powdered sugar and lemon juice together for the lemon glaze, thinning with water until you reach the consistency you like – it should be pretty thin (think of a glazed doughnut).
Set the baked cakes to cool on a cooling rack. As soon as they’re cool enough to handle, dip each one in the glaze, both sides (!), and set back on the cooling rack, scalloped-side up, letting the glaze set as the cakes cool all the way.
Here they are as little mini muffins. Not as dainty as the madeleine-shaped madeleines, but just as tasty!
Serve immediately with a beautiful cup of tea or coffee. Make sure to use one of your prettiest cup-and-saucer pairs.
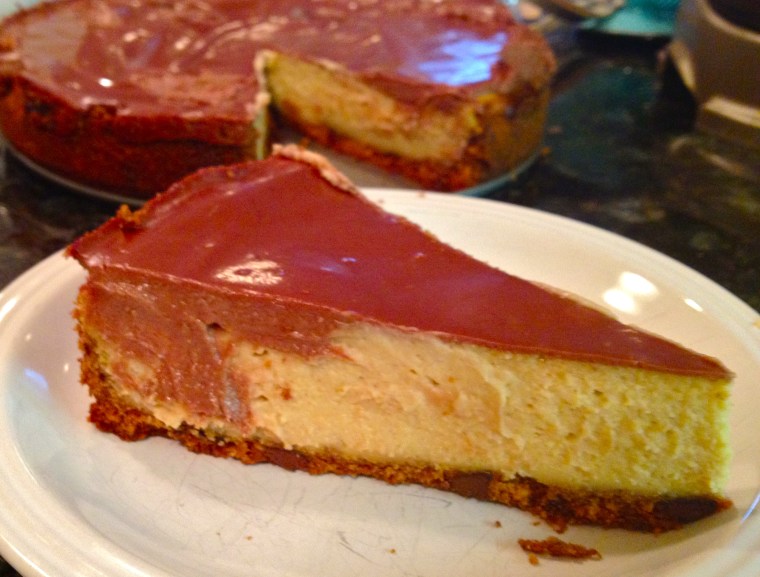
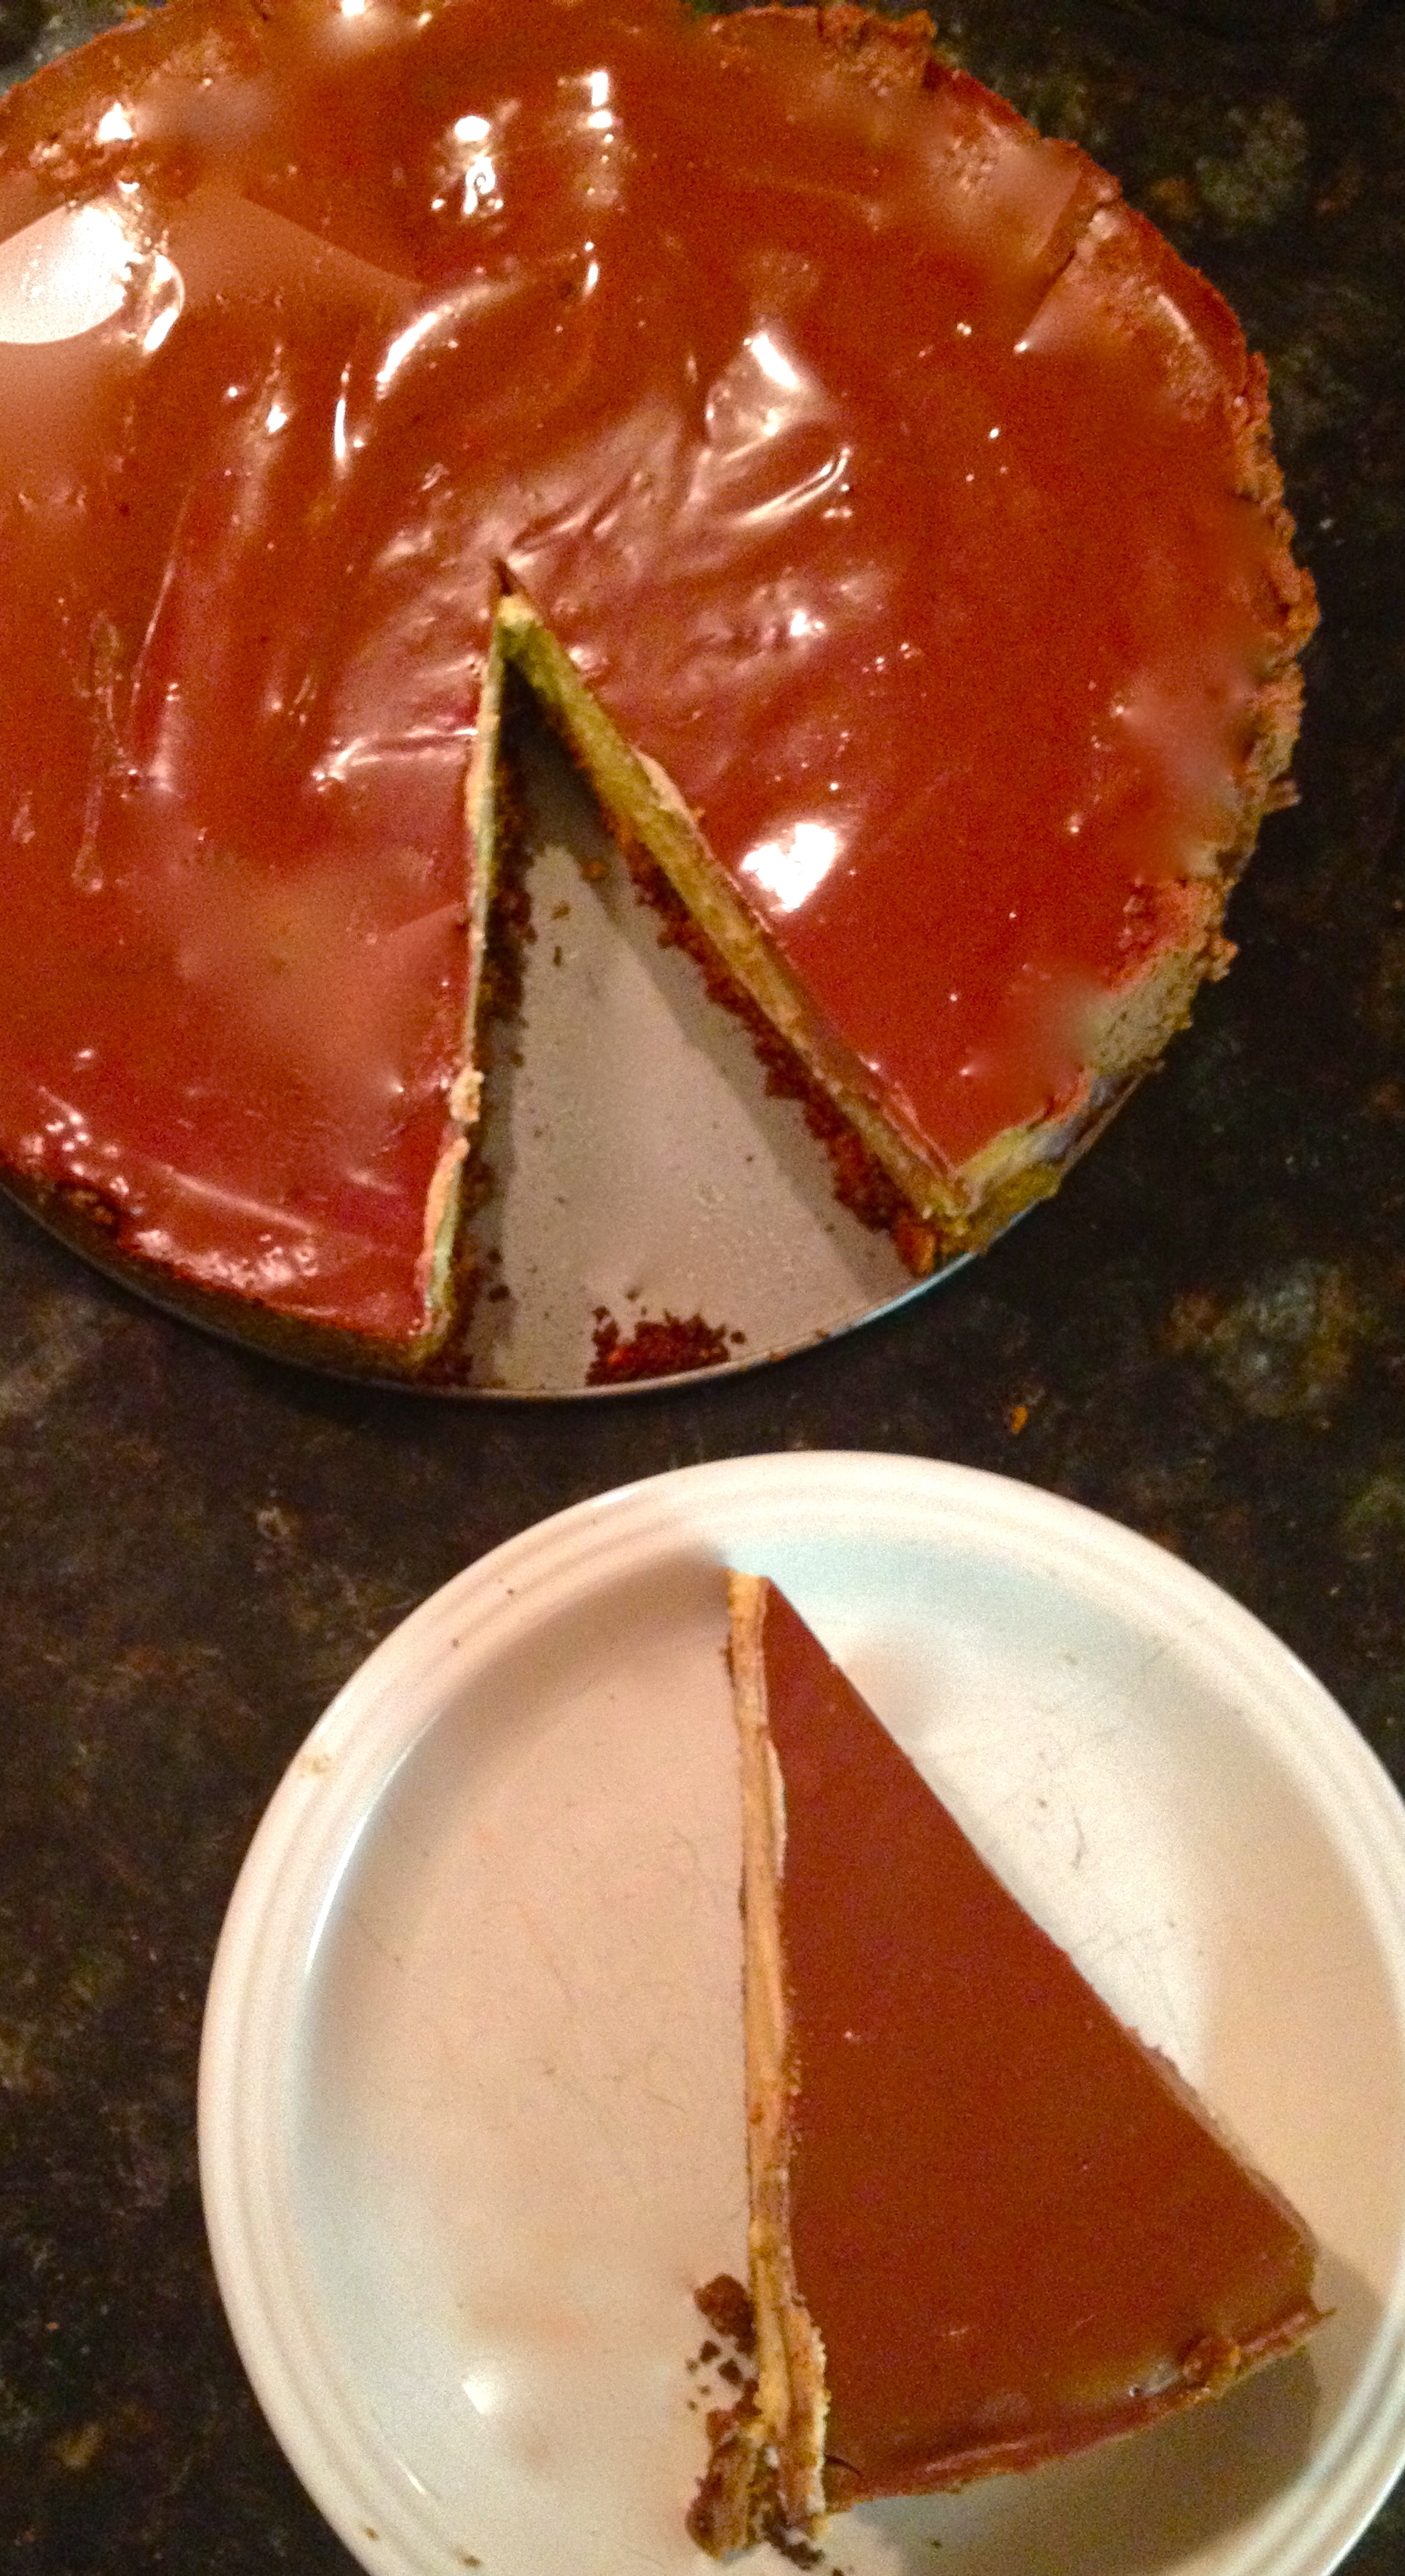
As ever, Nigella Lawson dishes out another perfect dessert recipe. There isn’t much need of an introduction for this beaut. I’ll just say that every step of the process is spoon-smackingly, bowl-lickingly good, and that the finished product is indulgent and fluffy and dreamy in every way. A graham cracker crust with bits of chocolate in it, filled with a smooth and creamy peanut butter cheesecake, and finished with a sweet, chocolate topping. Glamorous. Indulgent. Chocolate peanut butter cheese cake. Enjoy.
PS I looked for the video footage from Nigella’s show of the episode for which she makes this cheesecake, but I couldn’t find it. It looks so dang amazing when she makes it, I’ve had it on my list for at least a year.
INGREDIENTS
for crust:
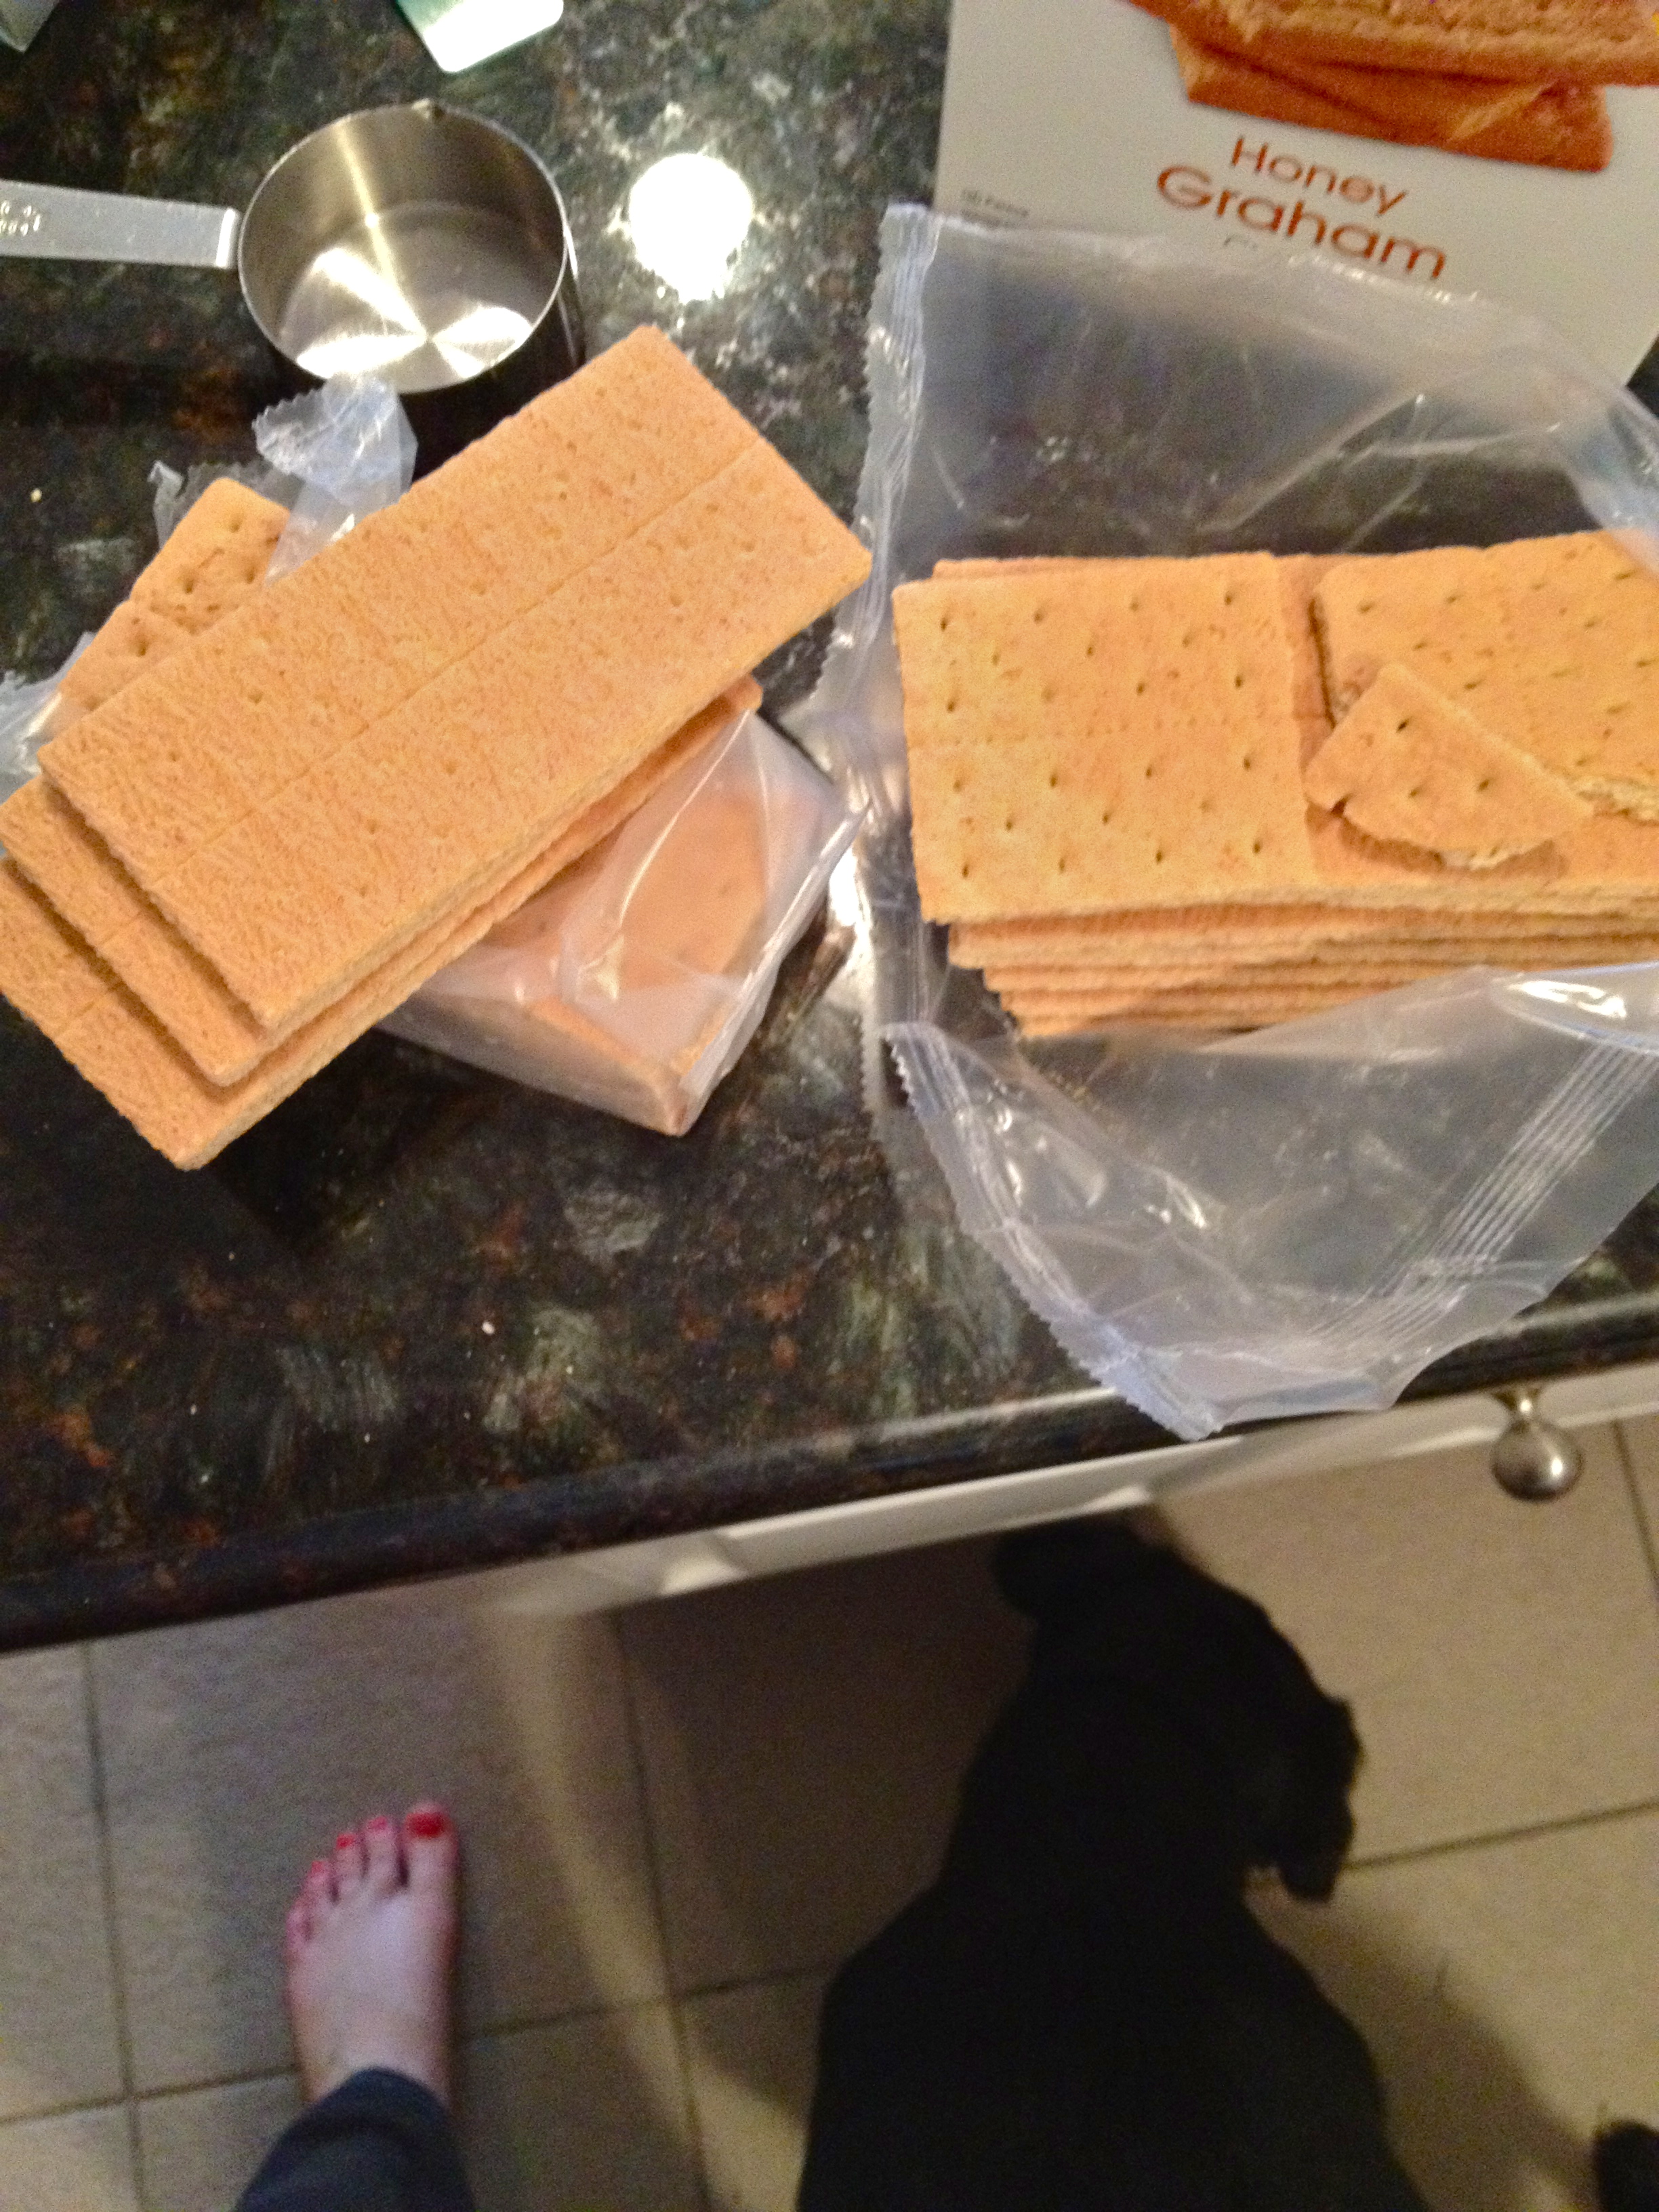
12 graham crackers (or 1 1/2 packets, from a box of three 8-cracker packets) (sub any gluten-free cookies if you like)
4 tbsp butter, softened
1/4 cup salted peanuts
1/2 cup semi-sweet chocolate chips
1-2 tsp vegetable oil
for filing (all these ingredients must be at room temperature):
16 oz cream cheese or neufchatel cheese (I used one packet of low fat and 1 packet of full-fat)
3 eggs
3 egg yolks
3/4 cup sugar
heaping 1/2 cup of sour cream or Greek yogurt (I used non-fat Greek yogurt)
1 cup smooth peanut butter
for topping:
1/2 cup milk chocolate chips
3 tbsp brown sugar
1 scant cup sour cream or Greek yogurt
Let your puppy eat the pieces of graham cracker that you’ll inevitably drop.
DIRECTIONS
Preheat oven to 338 F (okay, so you can go with 350 F if you like and you’ll be fine. I converted this recipe from metric, and the original 170 C is exactly 338 F. I do what I’m told).
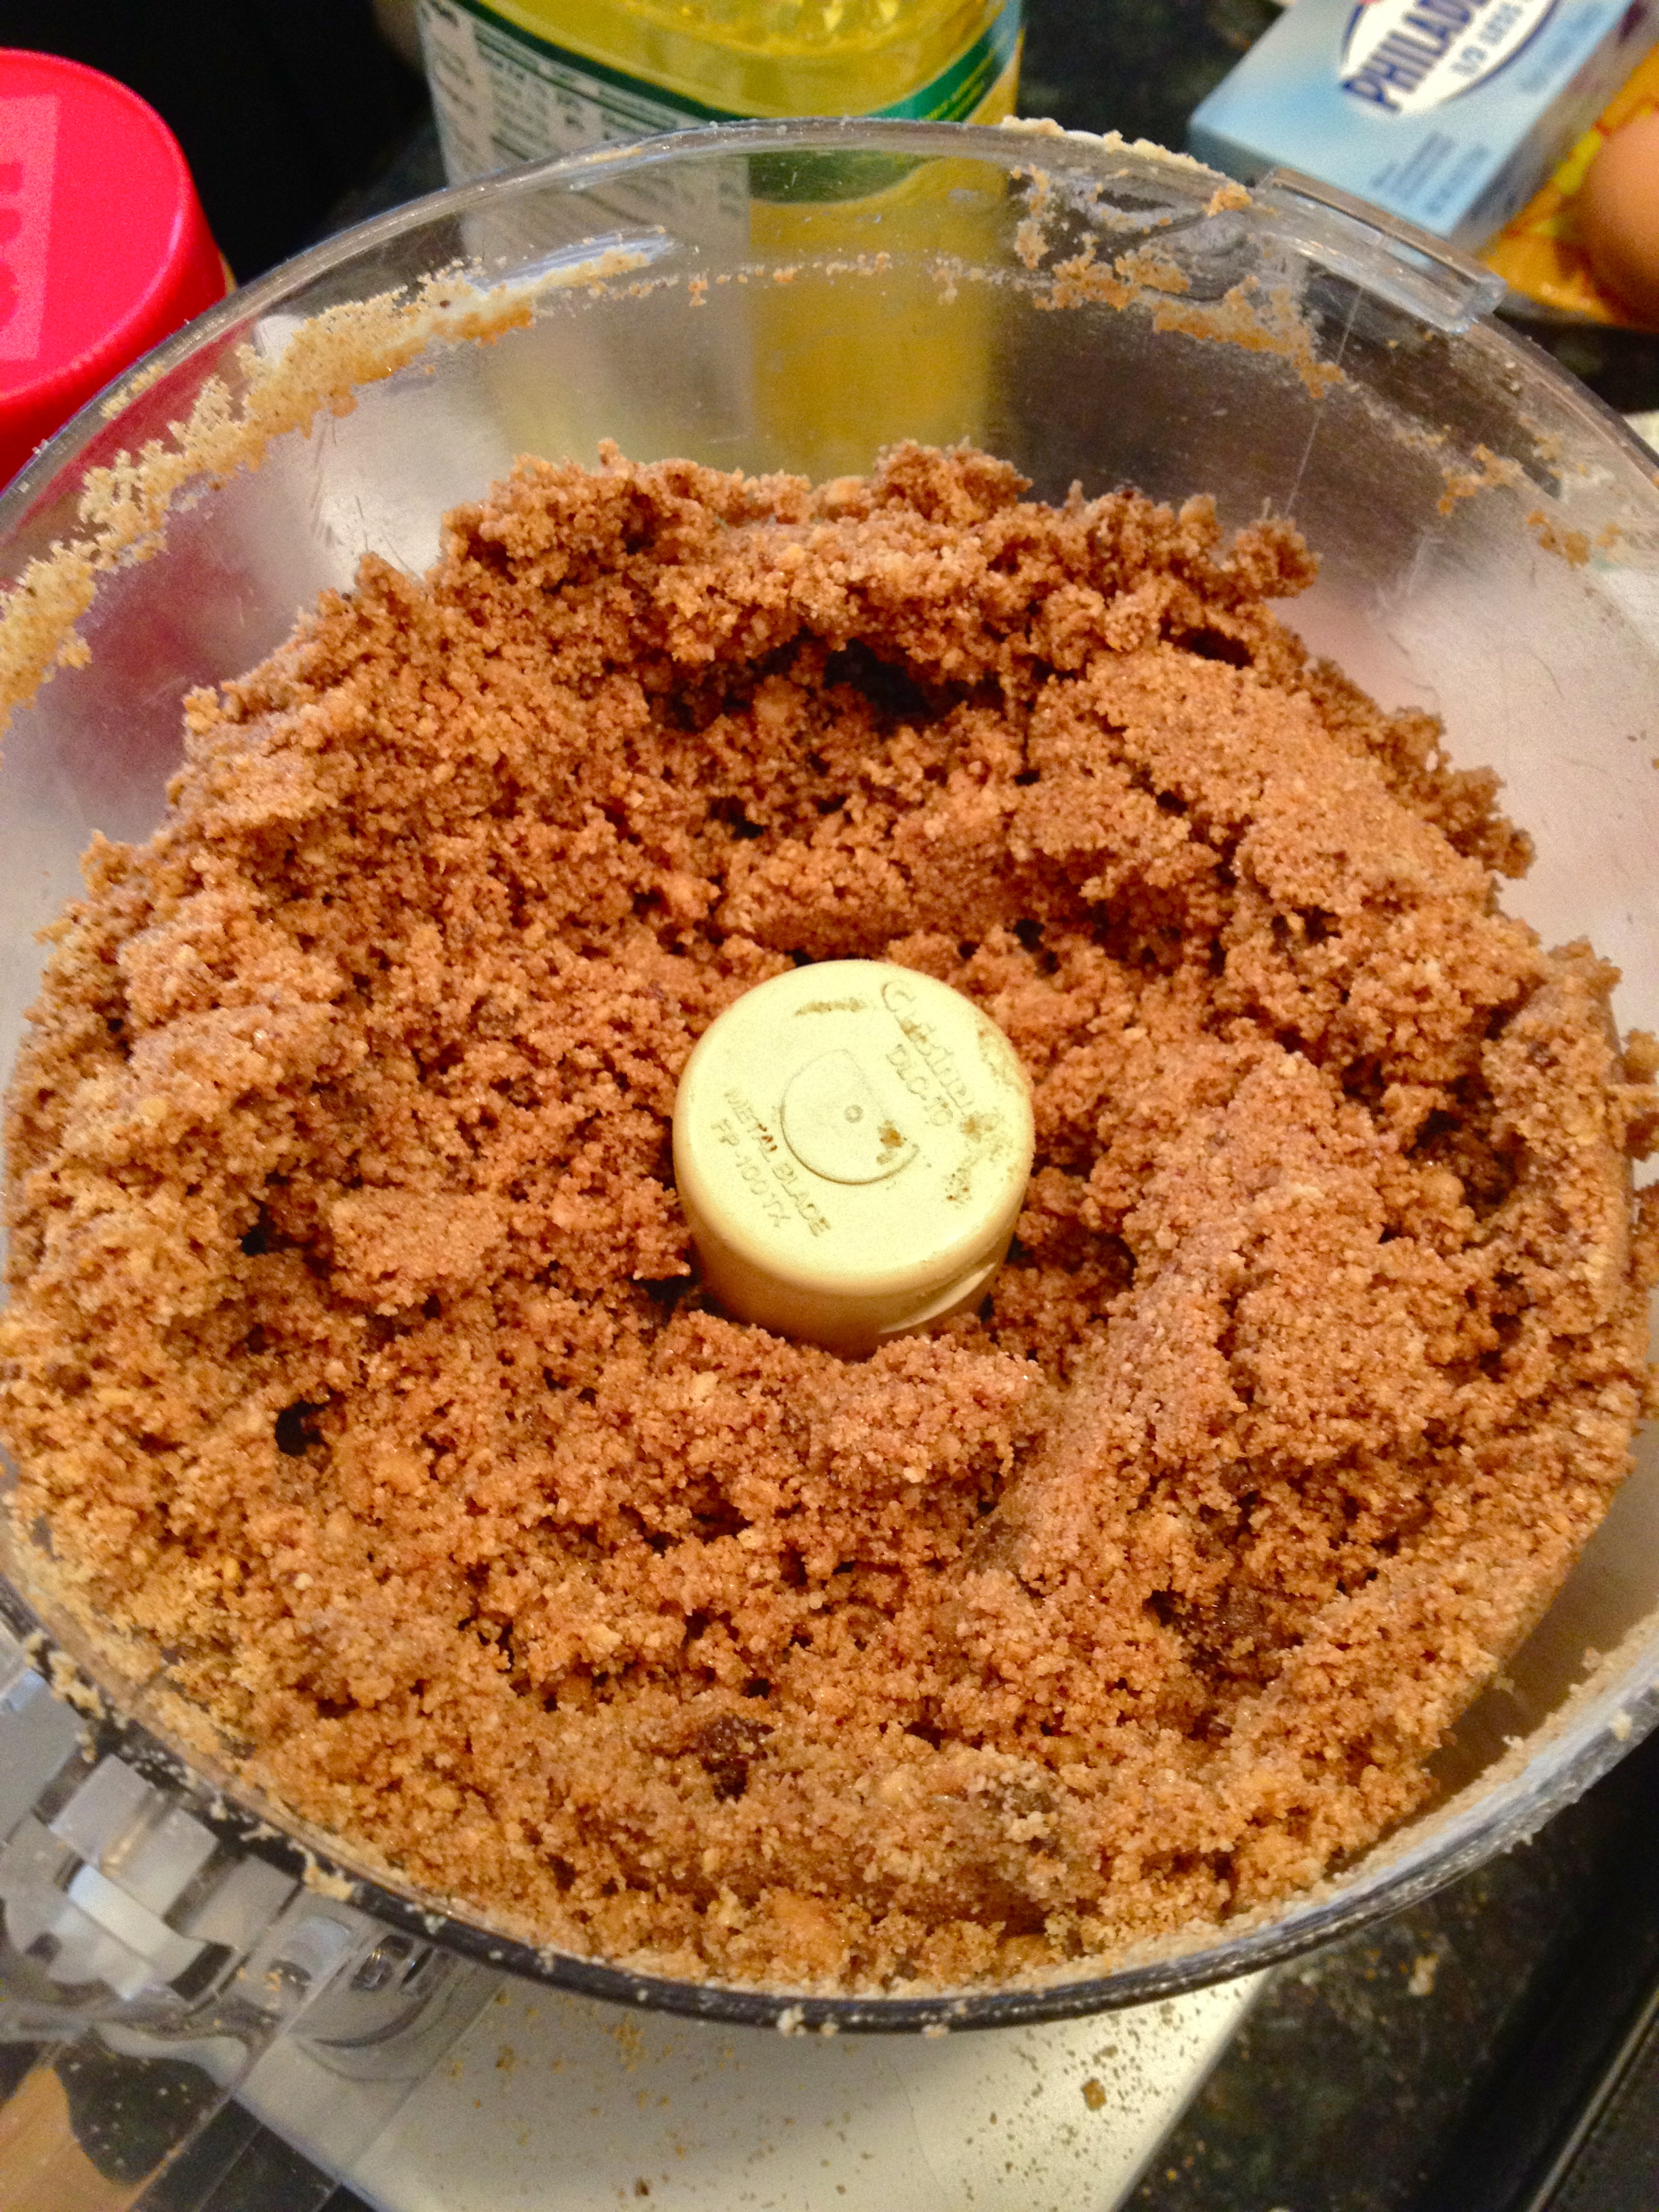
Next, the crust. In all honesty, crust is my favorite part of any cheesecake, and this one is awesome. One thing I didn’t do, but I think I will next time, is to start by pulverizing the chocolate chips in the food processor, so that they’ve broken up before the rest of the ingredients are added. This time, I added all the crust ingredients at once and pulsed until they came together, drizzling in just enough of the vegetable oil until the crust started to hold together. There were some chunks of chocolate left un-blitzed, so next time I’ll blitz the chocolate separately first.
Turn it out into a well-greased spring-form pan and use your fingers to press it into the bottom and up the sides. Put the crust in the fridge while you make the filling.
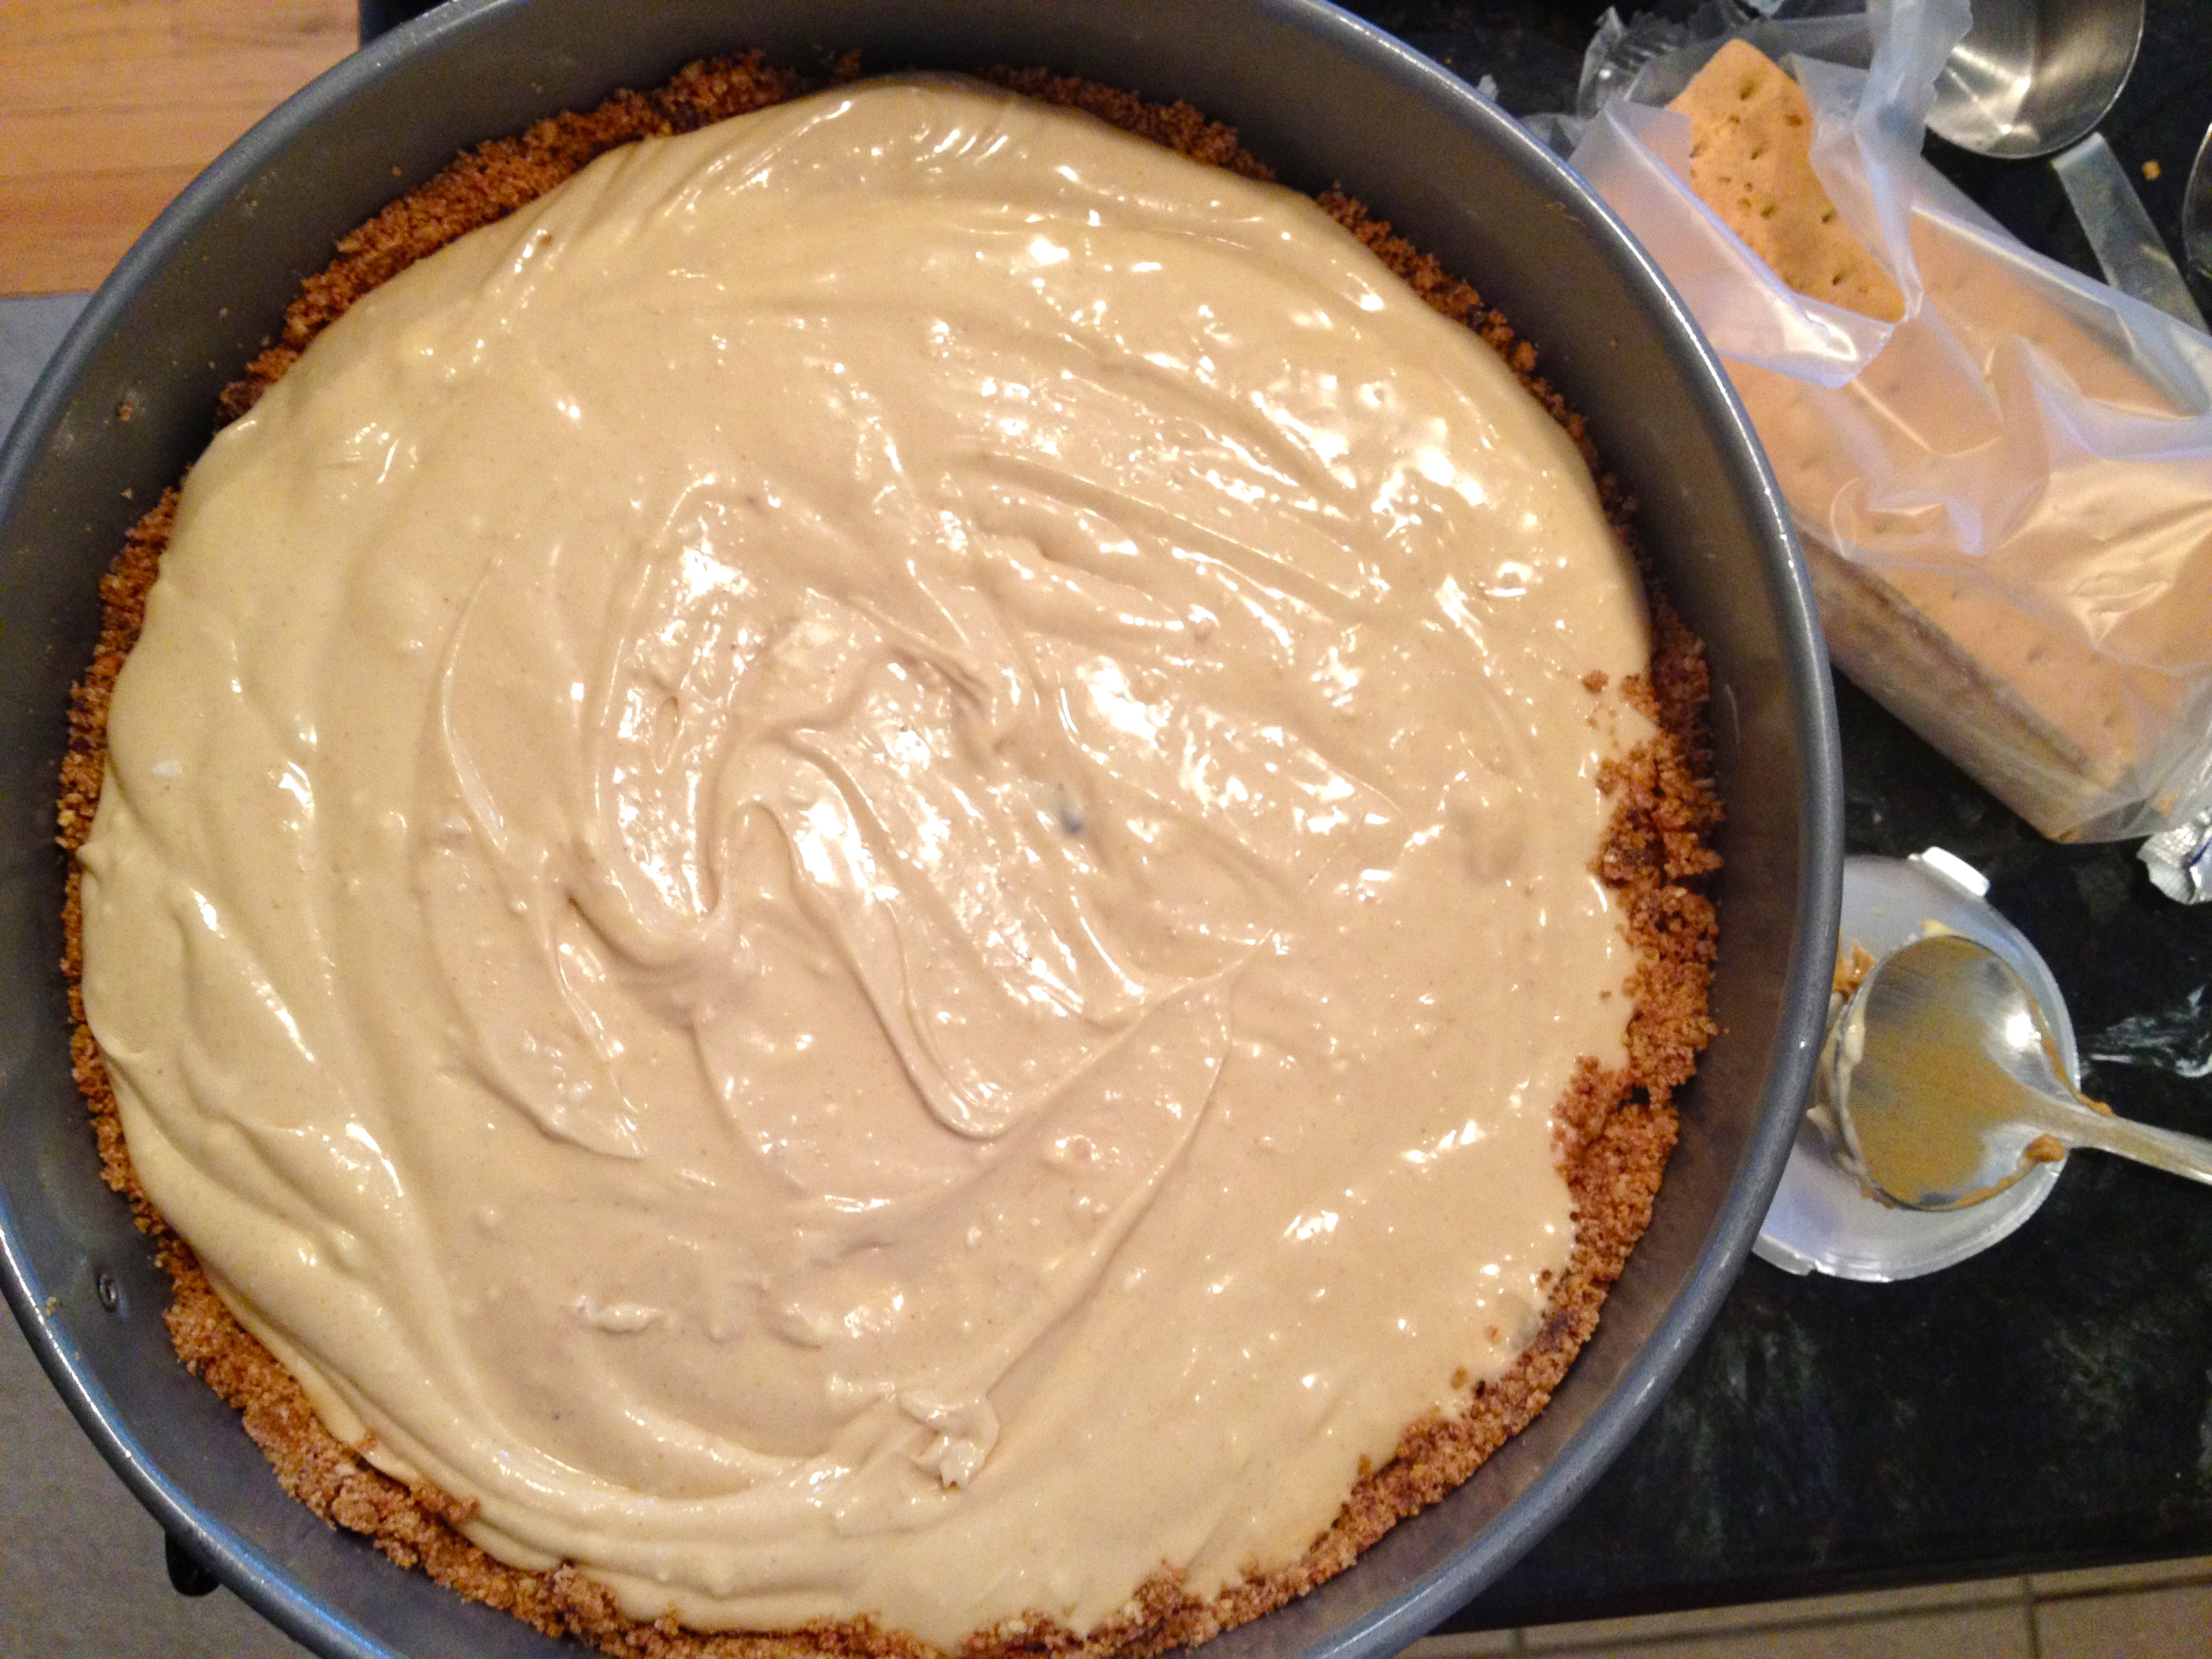
In a food processor, combine all the filling ingredients until totally smooth. Jeez, that’s beautiful.
Pour filling into the graham cracker shell. Spread it gently into all the “corners ” (can circles have corners?), careful not to mess with the tenuous architecture of the crust.
Bake for about an hour, but check it as it nears the end of the baking time. You want the top to be set and no longer wet or sticky, but for the inside to still be jiggly. In Nigella’s words, we’re looking for the center to have “just a hint of inner-thigh wibble.” Perfection. But I forgot to take a picture before I doused it in chocolate. See next step.
When the cheesecake is nearing the end of it’s bake time, melt all the topping ingredients in a pan over low until they come together. Pour over the cheesecake once it comes out of the oven, and then pop it right back into the oven for about 10 minutes, so that the topping can set.
Take it out of the oven and pop it right into the fridge to chill overnight, cake pan and all (careful when you take it out of the pan though, as the chocolate topping is prone to stick to the sides). To be honest, I made this cheesecake to give to friends, so all it got was a quick chill in the freezer for an hour and then another hour or so in the fridge until we ate it. So the overnight chilling time isn’t mandatory, but it is nice.